

Carbonio Community Edition (Carbonio CE) is an open source no-cost email and collaboration platform by Zextras. It provides privacy for organizations seeking digital sovereignty by using on-premises self-hosted servers. Using self-hosted servers offers a deeper level of control over infrastructure and data. However, it requires more attention to server configurations and infrastructure management to guarantee data sovereignty. Tasks done by system administrators play an important role in this matter. This makes administrative tasks a crucial part of achieving digital sovereignty, therefore, an administrative console dedicated to such tasks becomes extremely valuable to facilitate sysadmins' everyday jobs.
This is why Zextras launched the first release of its own admin panel for Carbonio CE on October 2022. For Carbonio CE system administrators, it is the first step toward the creation of an all-inclusive admin console.
In this article, I go into detail about the Carbonio CE Admin Panel and take a deeper look into what it can accomplish.

(Arman Khosravi, CC BY-SA 4.0)
What is the Carbonio CE Admin Panel?
The Carbonio CE Admin Panel is designed to assist the Carbonio CE system administrators with the most repetitive and frequent tasks such as user management and domain configuration. It is a browser-based application that runs on a particular port and is available for system administrators to use in production environments as soon as Carbonio CE is installed.
Why do you need the admin panel?
Everything done in Carbonio CE Admin Panel can be done through the command-line interface as well. This raises the question: why might system administrators prefer using the admin panel rather than the command-line interface?
Using the admin panel has its own obvious advantages such as:
-
Making repetitive activities much easier to perform
-
Saving system administrators' time monitoring servers
-
Providing a much easier learning process for junior system administrators
Even though using the admin panel makes administrative tasks easier to perform, there is more to using this native user interface for Carboino CE. In essence, the Carbonio CE Admin Panel gives you the ability to monitor and manage your organization server from a single centralized location. Even when you're far away, you may still access your admin panel to check the status of servers and carry out various administrative activities.
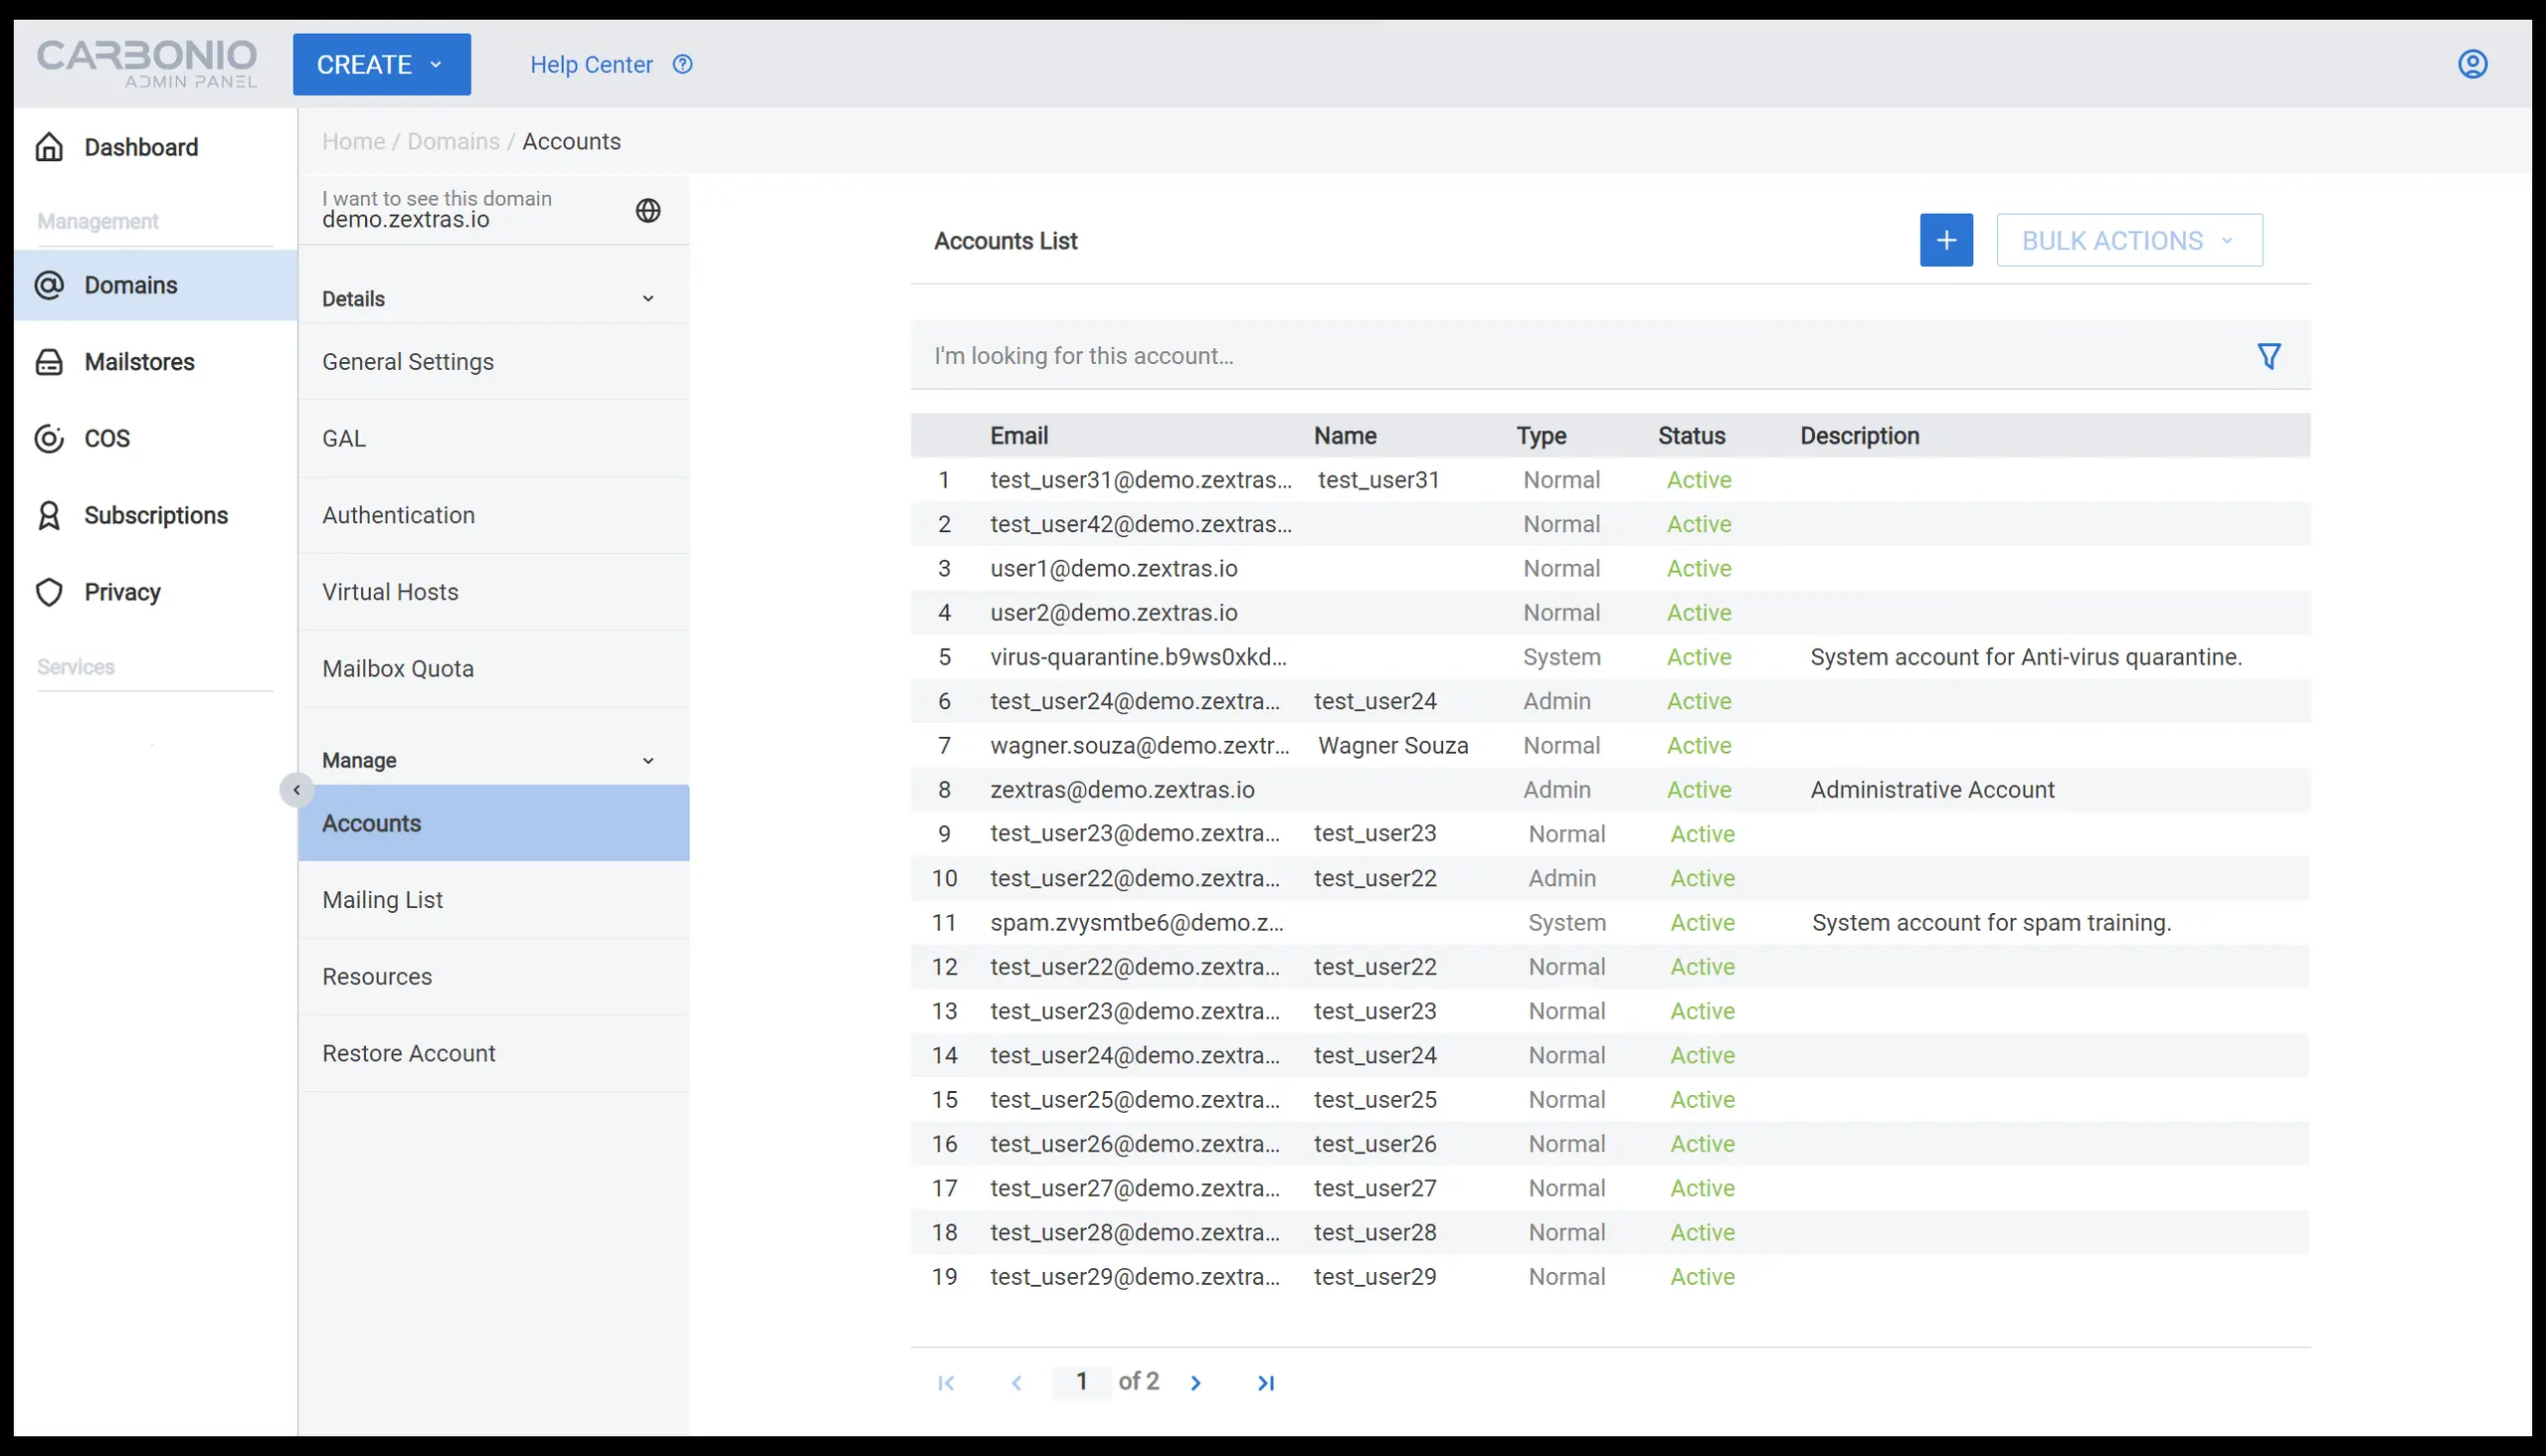
Creating and managing user accounts
Managing users has always been one of the most, if not the most, performed action by sysadmins. Therefore it should be an essential part of every administrative GUI available for system administrators. Suppose you, as the system administrator of the company have received some request by users to edit some information on their account. For instance, giving them access to some features, or your company has hired new employees, or some employees have left the company. All these scenarios require a sysadmin to manage user accounts frequently.
Using the Carbonio CE Admin Panel you can simply go to Domains > select a domain > Accounts and select any account to modify, or press the + button to add a new account.
(Arman Khosravi, CC BY-SA 4.0)
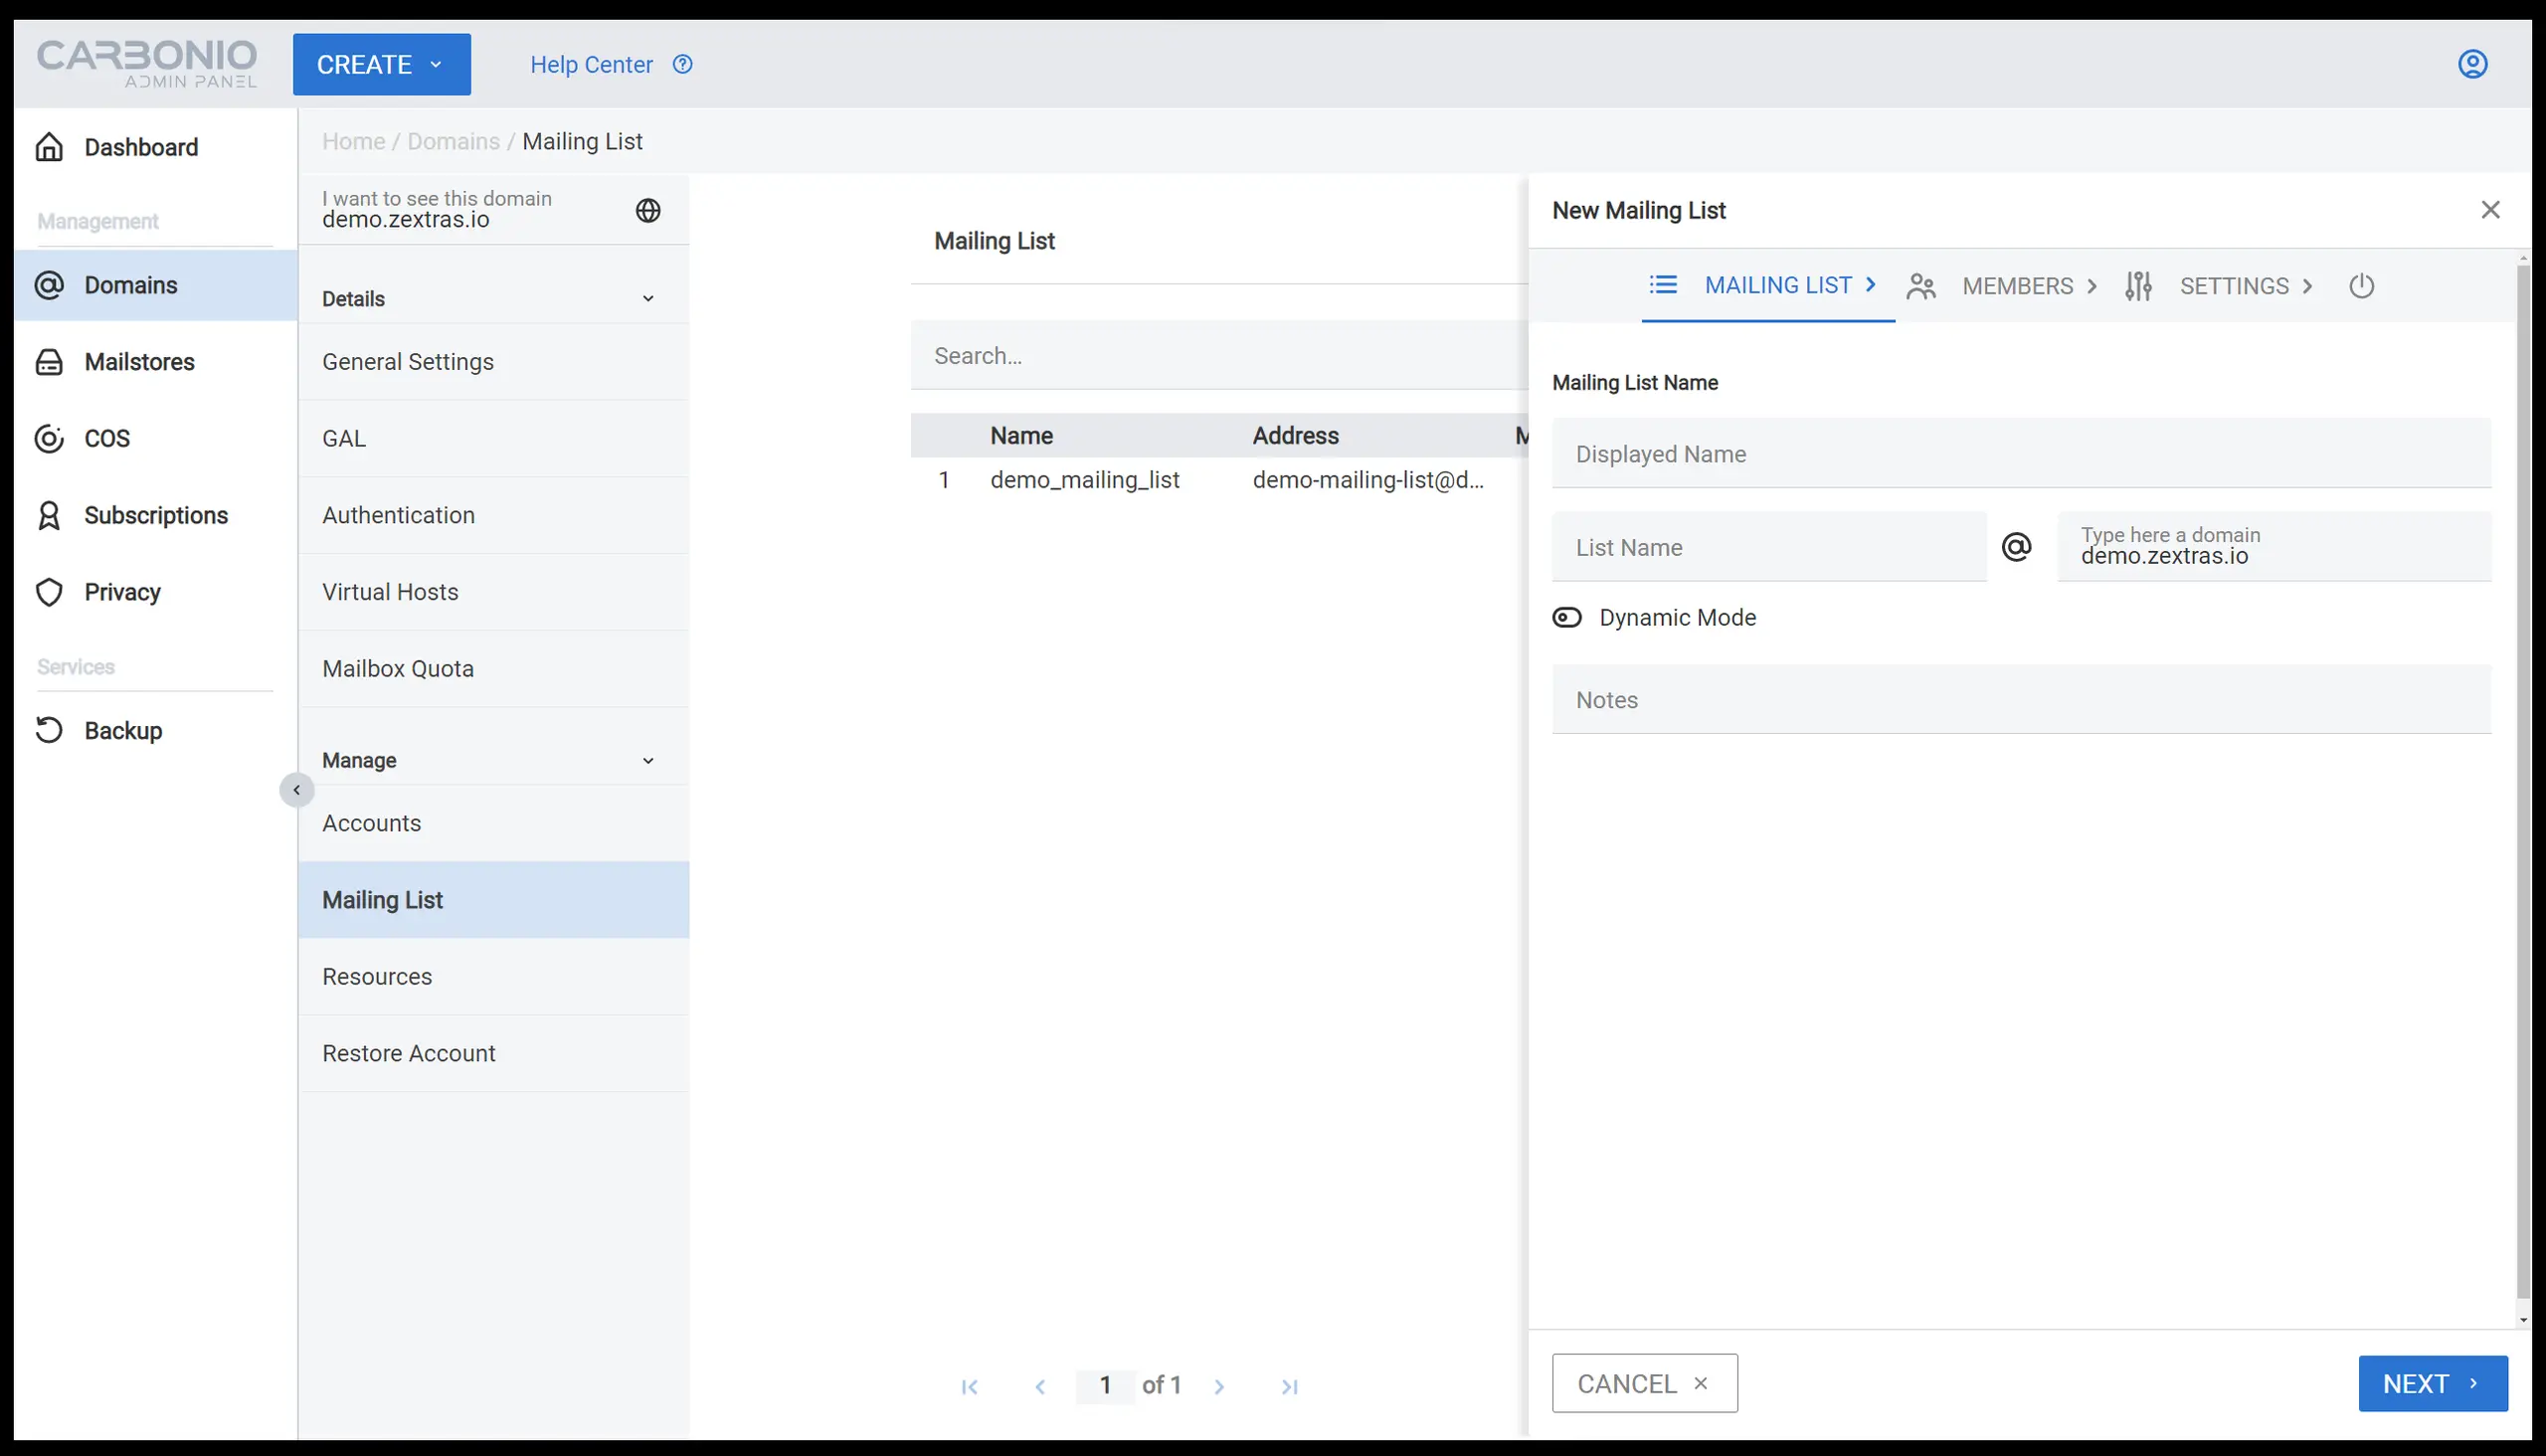
Creating and managing mailing lists
Besides creating user accounts, a system administrator is often required to create different mailing lists that reflect the organizational structure of the company. Using mailing lists, users can simply send emails to a group of users by inserting the list address instead of every user address one by one.
Creating mailing lists in Carbonio CE is extremely easy using the admin panel. You need to go to Domains > select a domain > Mailing List > press the + button. You can now use the wizard that opens up to create a mailing list.
(Arman Khosravi, CC BY-SA 4.0)
The essential steps to follow are:
-
Insert the name
-
Insert the mailing list address
-
Press NEXT
-
Insert the members
-
Press CREATE.
You can follow the same path to edit mail lists created before.
Creating and managing domains
Managing domains is another task frequently done by system administrators. Similar to accounts, creating a domain is very easy in the Carbonio Admin Panel. You only need to go to Domains > select a domain > under the details and find different entries to monitor the status of the domain. To create a new domain simply click on the CREATE button on the top bar and select Create New Domain and insert the necessary information such as:
-
Domain name
-
Maximum number of accounts and maximum email quota
-
Mail server where the domain is hosted

(Arman Khosravi, CC BY-SA 4.0)
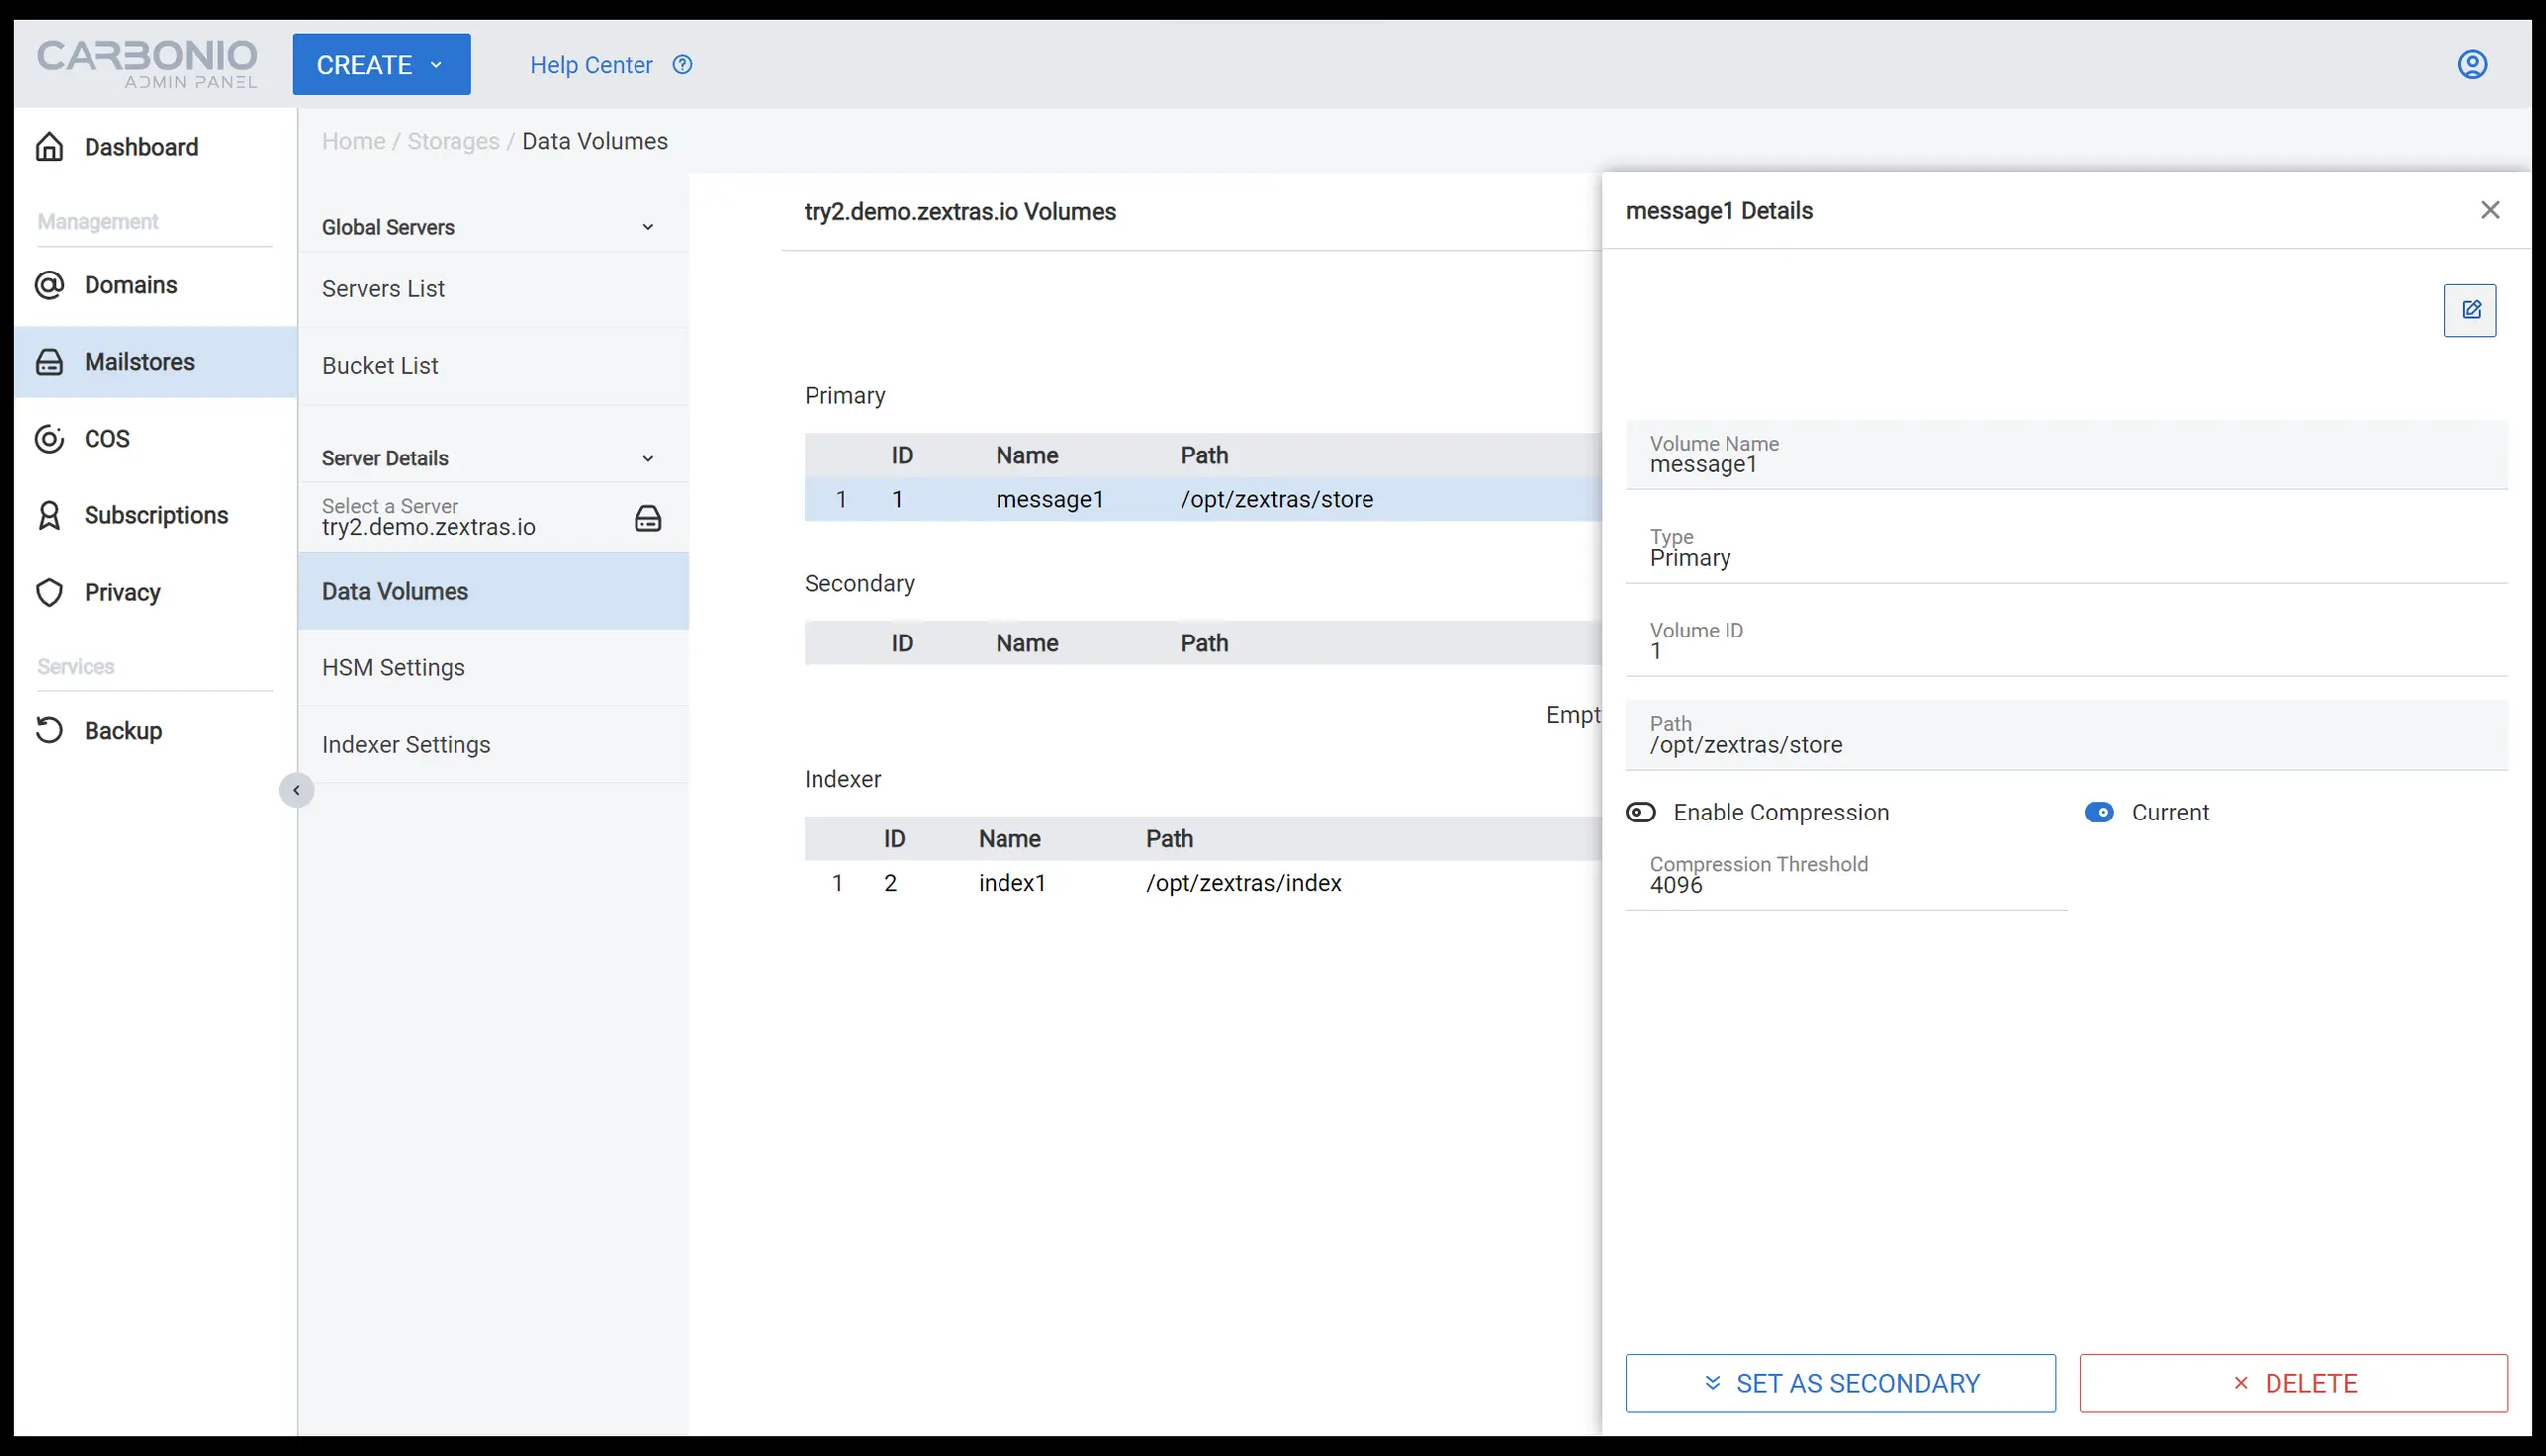
Creating and managing mailstore servers
The Carbonio CE Admin Panel allows system administrators to manage different servers present in the infrastructure and provide them with different tools to configure them. To monitor a new mailstore server you can go to Mailstores > Servers List and find all the available mailstore servers in your infrastructure in a list (when just one server is installed, only one server is shown in this area).
Under Server Details, you can select any of the available servers in the list and select Data Volumes to show more details of the storage volumes attached to it. While multiple volumes can be mounted simultaneously, only one primary volume, one secondary volume, and one index volume can be designated as active. You can add new volumes using the NEW VOLUME + button in the same section. You can also change the volume properties simply by clicking on them to open their detail window.
(Arman Khosravi, CC BY-SA 4.0)
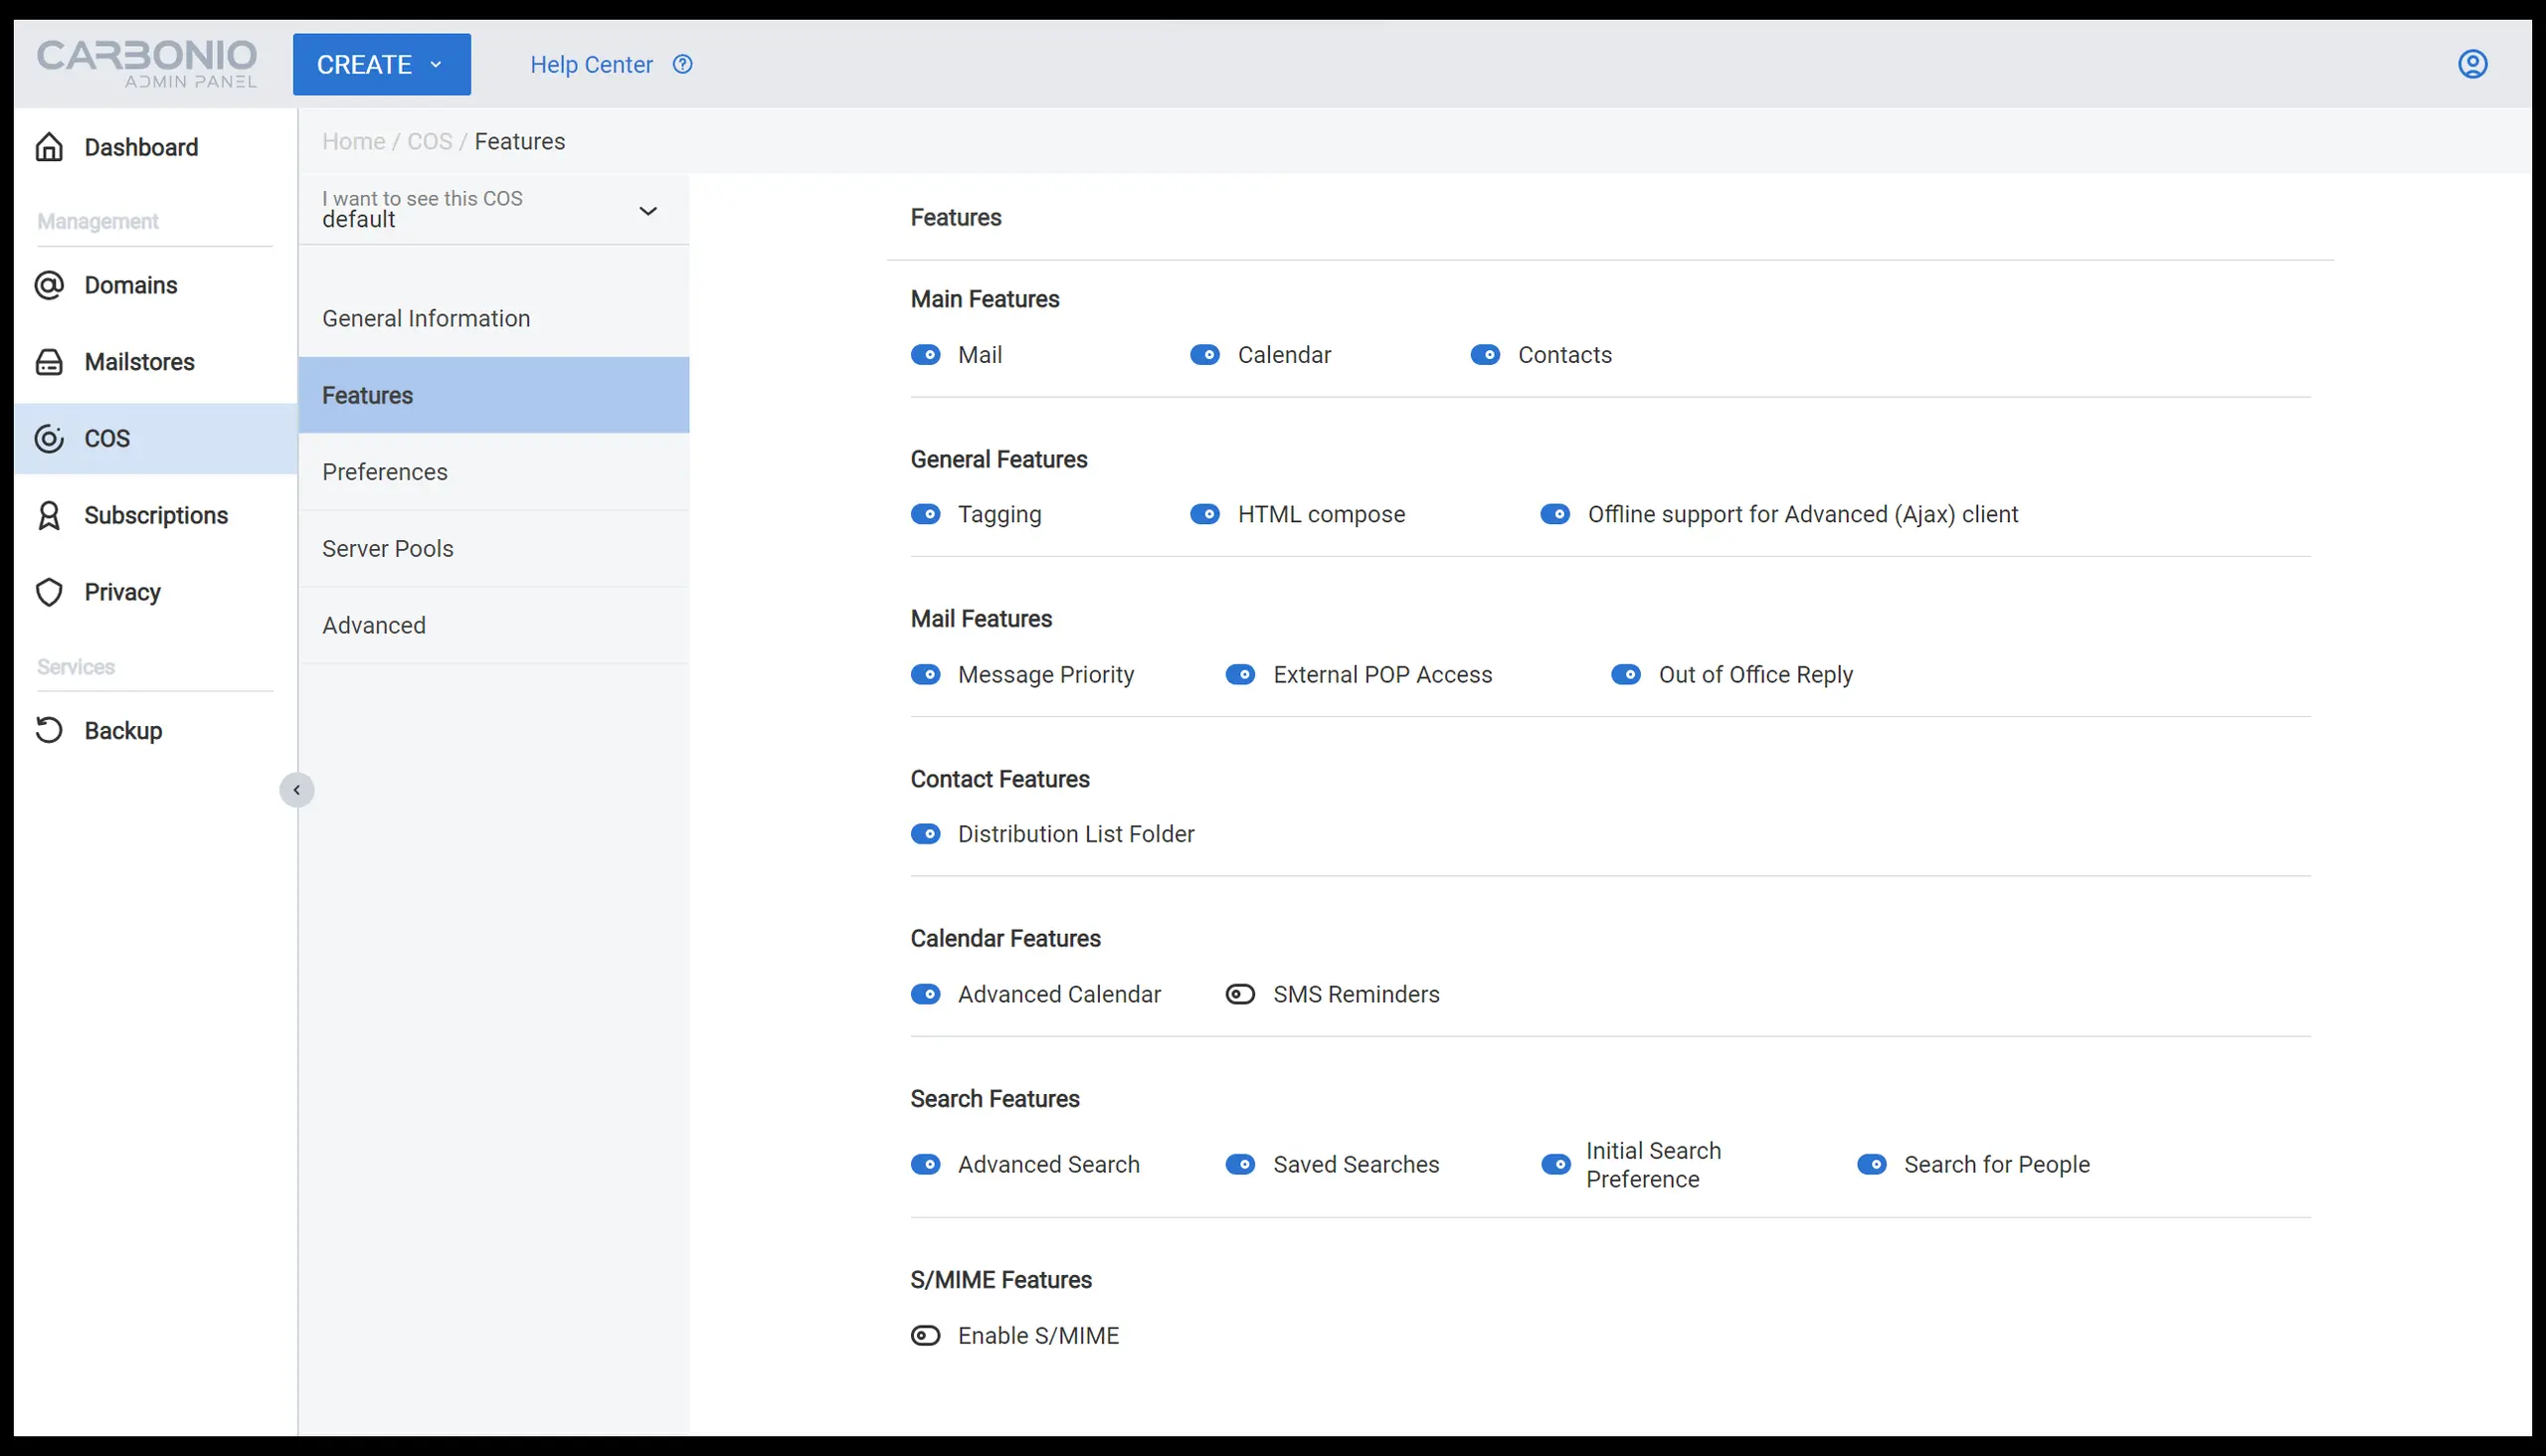
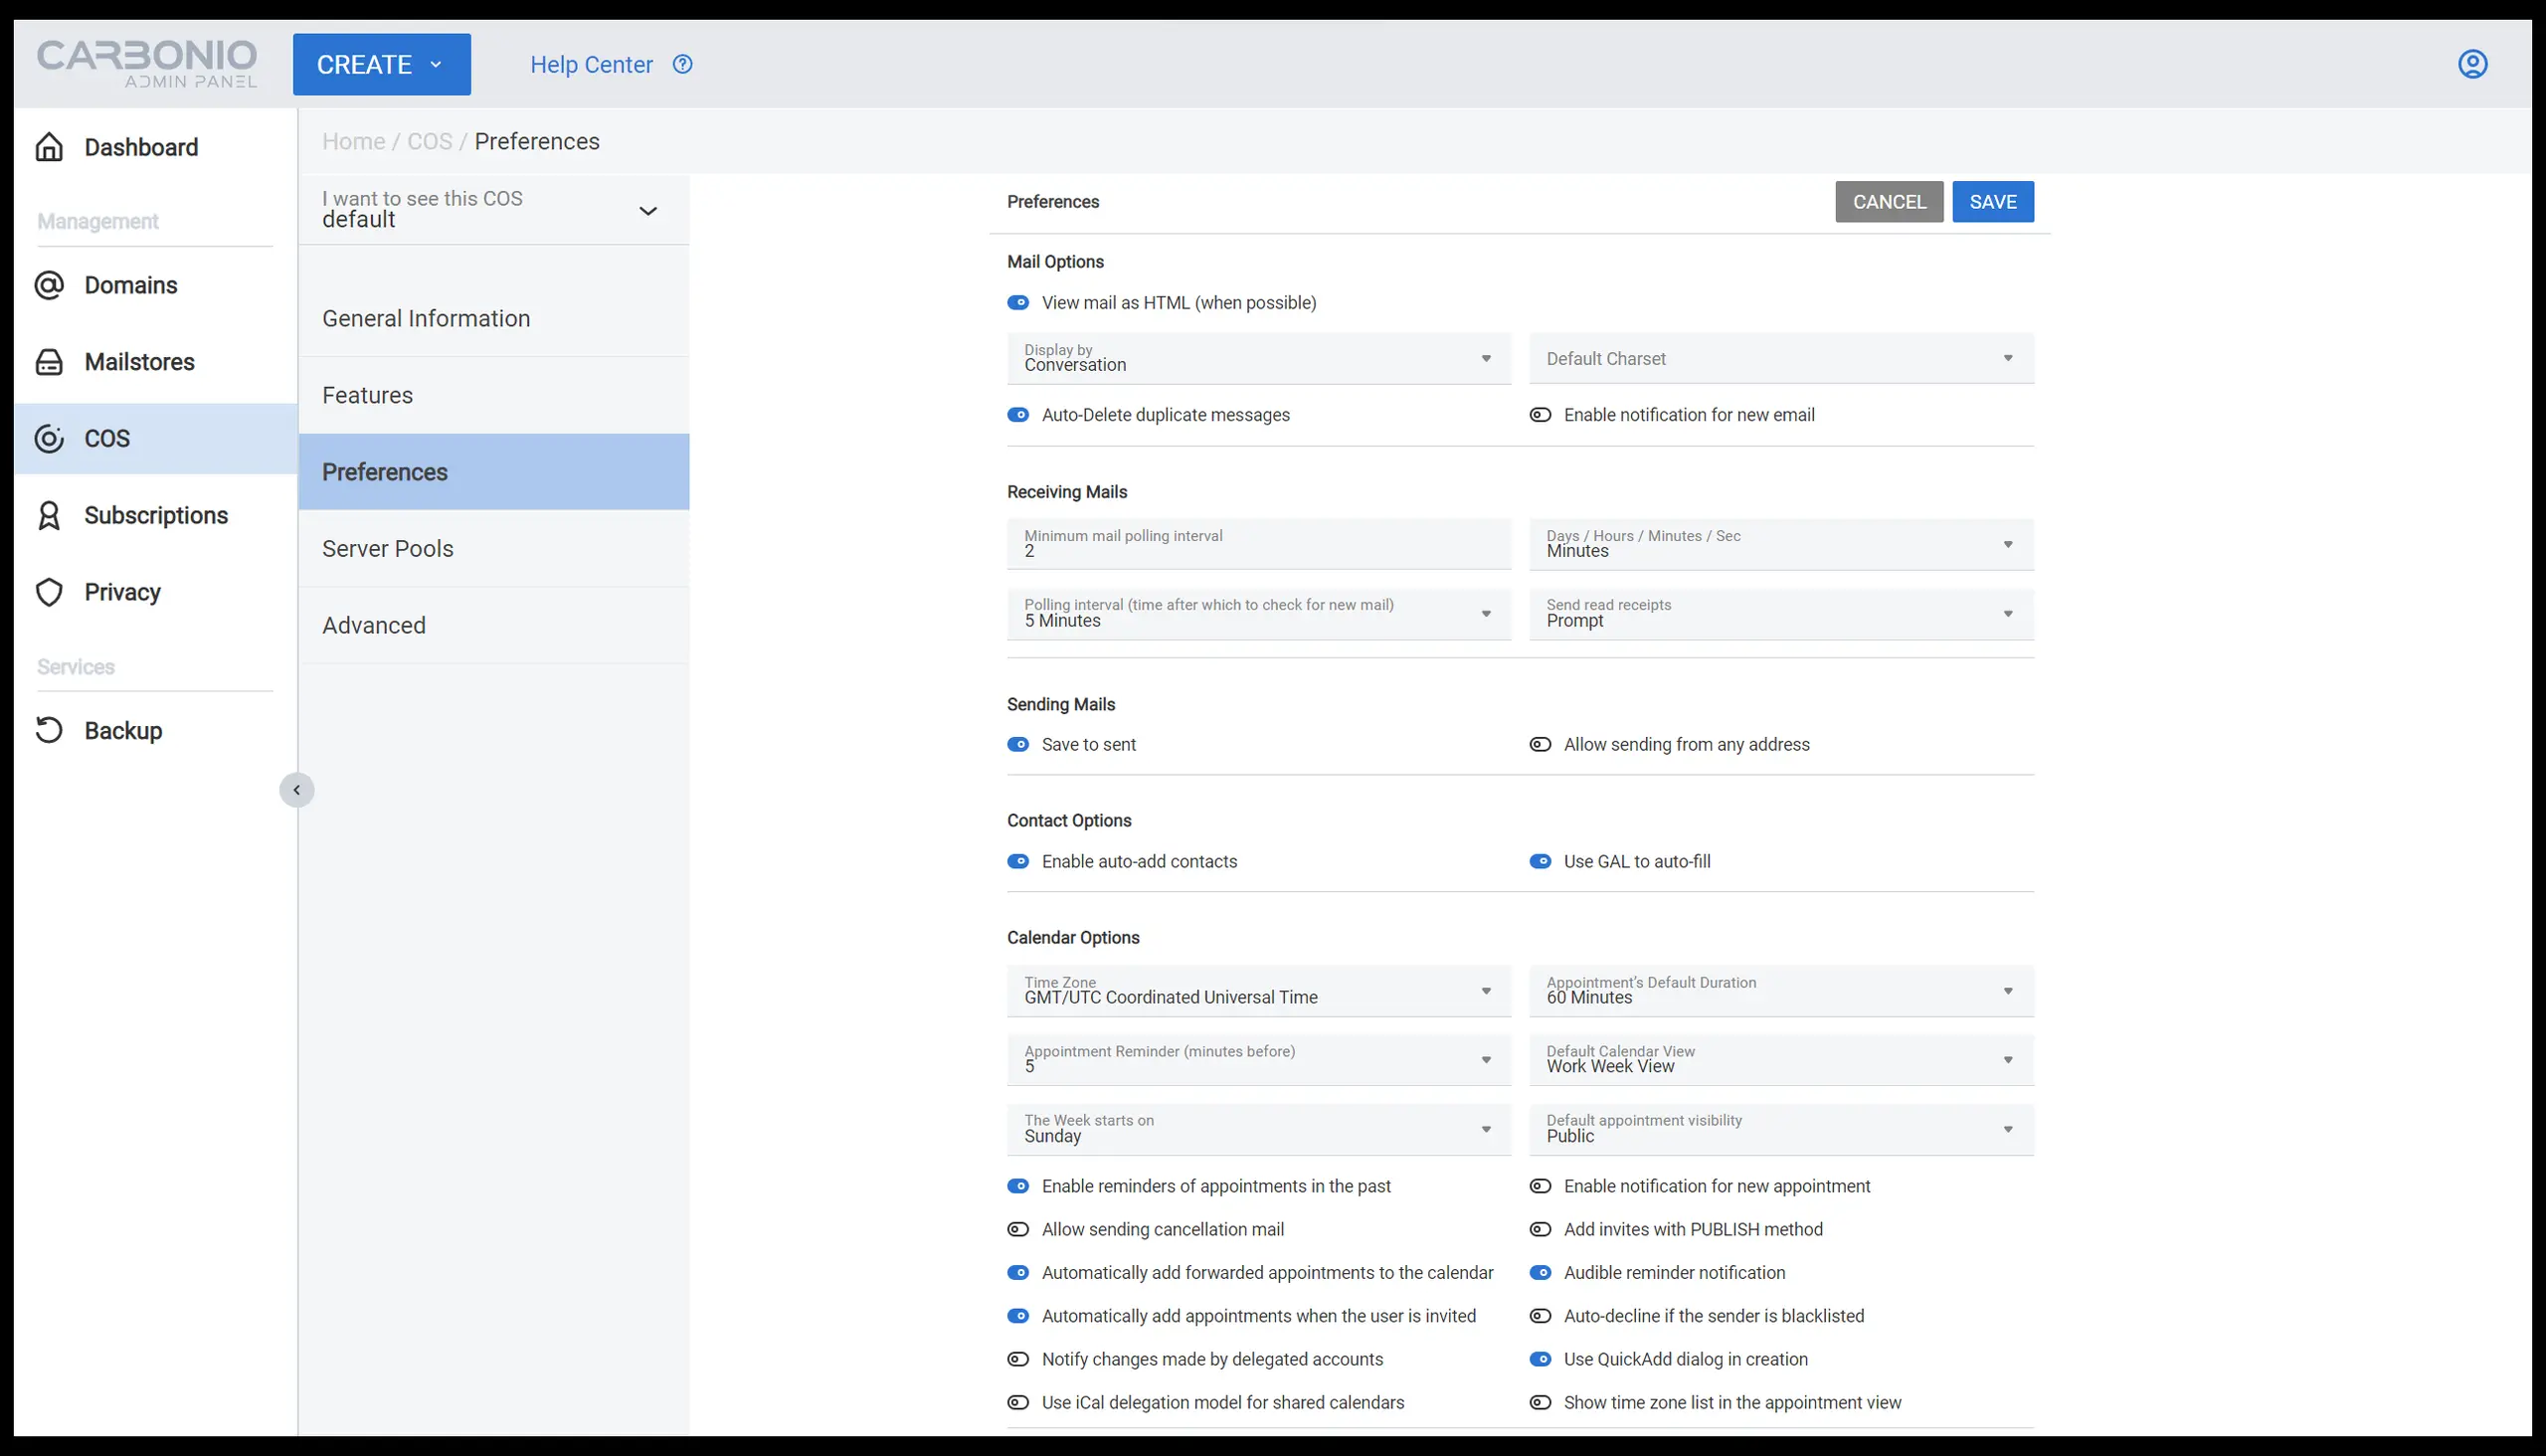
Creating and managing classes of service
Another scenario that can be facilitated with the help of the admin panel is creating classes of service (COS). After the installation, a system administrator might need to create different classes (groups) and assign different properties to them. This way, later in the process each user or a group of users can be easily nominated to a class of service in order to have access to the features and properties assigned to that specific COS.
(Arman Khosravi, CC BY-SA 4.0)
To create a COS simply click on the CREATE button and select Create New COS or alternatively go to COS on the left panel and click on CREATE NEW COS +. You can then insert the name of the COS and define the different services available to this specific class.
To edit a COS, go to COS on the left panel and select a COS from the dropdown menu at top of the list.
You can define settings like quotas, the mail servers that can host accounts from this COS, or enable features for this COS. You can also define features for general features like Mail, Calendar, and Contacts. Additional customizable options include Tagging, Out of Office Reply, Distribution List Folders, and so on.
(Arman Khosravi, CC BY-SA 4.0)
Conclusion
In this article, you saw a few scenarios in which the Carbonio CE Admin Panel saves you time and effort. The admin panel is an evolution of classical administrative tools in a new and centralized interface that gives the possibility of accessing different functionalities and monitoring tools from the same location.


Comments are closed.