How to Install Fathom Privacy-Focused Website Analytics on Debian 11
This tutorial exists for these OS versions
- Debian 12 (Bookworm)
- Debian 11 (Bullseye)
On this page
- Prerequisites
- Installing PostgreSQL Server
- Setting up PostgreSQL Database and User
- Downloading Fathom Binary
- Configuring Fathom Web Analytics
- Creating Fathom Admin user
- Installing and Configuring Nginx as a Reverse Proxy
- Securing Fathom with Firewall
- Securing Fathom Web Analytics with SSL/TLS Letsencrypt
- Logging In to Fathom Website Analytics
- Conclusion
Fathom is privacy-focused web analytics that delivers clean and concise data about your websites. It's a simple website analytics software that provides insightful reporting and metrics about your sites. Fathom is created as an alternative to Google Analytics, but it doesn't invade users' privacy and doesn’t compromise visitor data. It's GDPR compliant, with no cookie banners required.
Fathom is available in two versions, the open-source version that can be installed on your server, and the pro version that you can purchase from the official Fathom website. Notable Fathom website analytics users are IBM, Laravel, GitHub, Hoshicord, BOSCH, McLaren, VueJS, and many more.
This tutorial shows you how to install Fathom Privacy-Focused Website Analytics on a Debian 11 server. You'll perform Fathom installation with PostgreSQL as the database, Nginx web server as the reverse proxy, and also secure Fathom with SSL/TLS certificates via Certbot and Letsencrypt.
Along the way, you'll also learn how to set up authentication on PostgreSQL, create a database and user, and add systemd services to a Linux system.
Prerequisites
To complete this tutorial, you must have the following requirements:
- A Debian 11 server - This example uses a Debian server with the hostname 'fathome-server'.
- A non-root user with sudo/root administrator privileges.
- A domain name pointed to a server IP address - This example uses a sub-domain 'fathom.hwdomain.io'.
That's it. Let's start the Fathom installation.
Installing PostgreSQL Server
Fathom is a simple privacy-focused web analytics built with Golang Preact. On a default installation, Fathom uses SQLite as the database, but also possible to use RDBMS such as MySQL/MariaDB and PostgreSQL.
For this example, you'll be running Fathom with PostgreSQL. So, you'll now install and configure PostgreSQL on your Debian server.
To get started, run the below apt command to update and refresh your Debian package index.
sudo apt update
Now install PostgreSQL packages via the apt command below. This will install the default PostgreSQL server package from the Debian 11 repository, which is PostgreSQL 13.
sudo apt install postgresql
When prompted, input y to confirm and press ENTER to proceed.

After PostgreSQL is installed, you'll be required to set up authentication for the server. To achieve this, you need to modify PostgreSQL config files that are available in the '/etc/postgresql/13/main/' directory (default PostgreSQL on Debian).
Open the file '/etc/postgresql/13/main/postgresql.conf' using your preferred text/code editor. This example uses nano as the default editor.
sudo nano /etc/postgresql/13/main/postgresql.conf
Uncomment the 'password_encryption' parameter and change the default value to 'scram-sha-256'.
password_encryption = scram-sha-256
Save and close the '/etc/postgresql/13/main/postgresql.conf' file when finished. For nano users, press Ctrl+x, then y, and press ENTER.
Next, open the PostgreSQL authentication config file '/etc/postgresql/13/main/pg_hba.conf' using the following nao editor.
sudo nano /etc/postgresql/13/main/pg_hba.conf
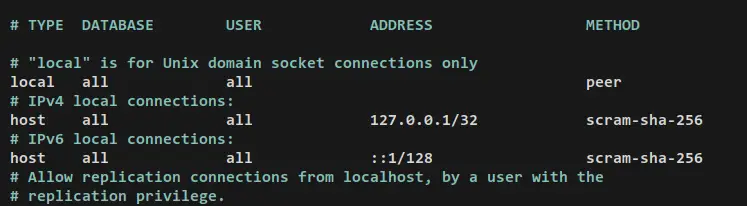
Change the default authentication method for the host '127.0.0.1/32' and '::1/128' to 'scram-sha-256'. This will specify the authentication method using 'scram-sha-256' for any connection from localhost to the PostgreSQL server.
When using parameter '-h 127.0.0.1', you'll be connected to PostgreSQL as the host and will be using the scram-sha-256 authentication. When you only use the 'psql' command without specifying the PostgreSQL host, you'll be connected as the local connection and using the 'peer' authentication method.
# TYPE  DATABASE        USER            ADDRESS                 METHOD
# "local" is for Unix domain socket connections only
local   all             all                                     peer
# IPv4 local connections:
host    all             all             127.0.0.1/32            scram-sha-256
# IPv6 local connections:
host    all             all             ::1/128                 scram-sha-256
Save and close the '/etc/postgresql/13/main/pg_hba.conf' file when you're done.
Next, run the below systemctl command utility to restart the PostgreSQL server and apply the changes.
sudo systemctl restart postgresql
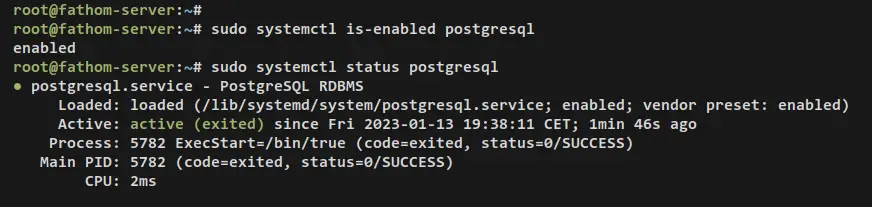
Then verify the PostgreSQL server to ensure that it's enabled and running.
sudo systemctl is-enabled postgresql
sudo systemctl status postgresql
If PostgreSQL is running and enabled, you'll see the output on your terminal.
With the PostgreSQL server running and enabled, you'll then start to create a new PostgreSQL database and user for Fathom web analytics.
Setting up PostgreSQL Database and User
In this step, you will set up the password for the default PostgreSQL user 'postgres' via the PostgreSQL shell. Then, you'll create a new database and user that will be used for the Fathom web analytics installation.
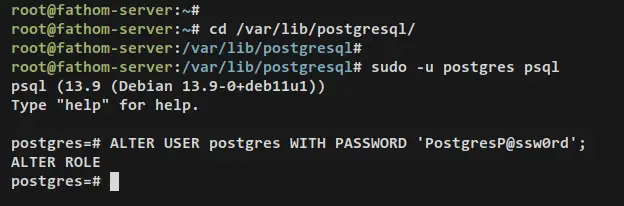
Log in to the PostgreSQL shell via the below command. With the 'sudo -u postgres 'psql' command, it means that you will execute the 'psql' command as the user 'postgres'.
cd /var/lib/postgresql
sudo -u postgres psql
After logging in, you should be connected to the default 'postgres' database and your PostgreSQL prompt should become 'postgres=#'.
Now run the below query to create a new password for the default PostgreSQL user 'postgres'. Be sure to change the password in the following query.
ALTER USER postgres WITH PASSWORD 'PostgresP@ssw0rd';
Next, run the following PostgreSQL queries to create a new PostgreSQL user and database. In this example, you'll create a new PostgreSQL user 'fathom' with the database 'fathomdb'.
CREATE USER fathom WITH CREATEDB CREATEROLE PASSWORD 'p4ssw0rdFathom';
CREATE DATABASE fathomdb OWNER fathom;

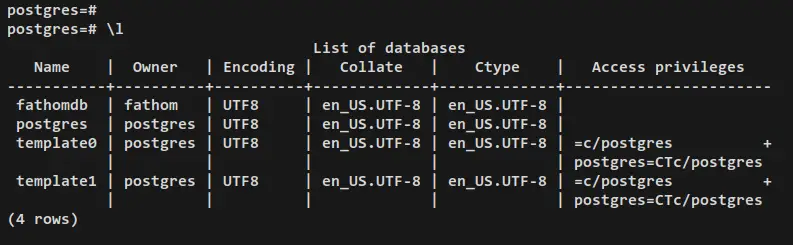
Lastly, run the below query to verify the list of databases and users on your PostgreSQL server.
\l
\du
Listing databases on PostgreSQL server via '\l' query -And you can see the new database 'fathomdb' is created.
Listing users on PostgreSQL via '\du' query - You can see the new PostgreSQL user 'fathom' added to the PostgreSQL.

At this point, you've now installed and configured the PostgreSQL server. In the next step, you'll start Fathom installation.
Downloading Fathom Binary
Fathom is a small and simple application written in Go and it comes as a single binary file that you can execute anywhen on your Linux system.
Now you'll download Fathom to your Debian server.
Visit the Fathom release page on GitHub and select the preferred version for your installation. This example will be using the latest Fathom version v1.3.0, which is the latest version during this writing.
Download Fathom binary file using the wget command below.
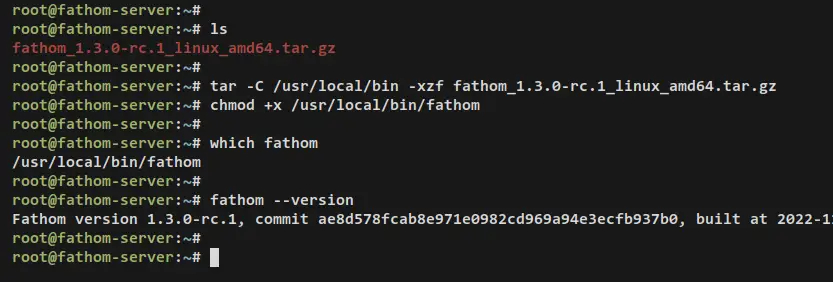
wget https://github.com/usefathom/fathom/releases/download/v1.3.0-rc.1/fathom_1.3.0-rc.1_linux_amd64.tar.gz
Once downloaded, run the tar command below to extract Fathom to the '/usr/local/bin' directory. Then, make the 'fathom' binary file executable via the chmod command.
tar -C /usr/local/bin -xzf fathom_1.3.0-rc.1_linux_amd64.tar.gz
chmod +x /usr/local/bin/fathom
Lastly, the below command to ensure that you can execute the 'fathom' binary file. Then, verify the 'fathom' version.
which fathom
fathom --version
When the command is successful, you should see the full path of the 'fathom' binary file '/usr/local/bin/fathom'. Also, you will see the Fathom version on your terminal.
With the Fathom downloaded, you'll next configure the installation of Fathom web analytics.
Configuring Fathom Web Analytics
In this step, you will set up the installation of Fathom web analytics. You will set up the data directory, set up the PostgreSQL database with Fathom, and lastly, you will run Fathom as a systemd service.
By running Fathom as a systemd service, you can easily manage to Fathom via the systemctl command utility. You can start, enable, and verify the status of Fathom via systemctl.
First, run the below command to create a new user 'fathom' on your Debian system. Also, be sure to set up the password for your new user.
sudo useradd -m -s /bin/bash fathom
sudo passwd fathom
Now run the below command to log in to the new user 'fathom' and start configuring the Fathom installation.
su - fathom

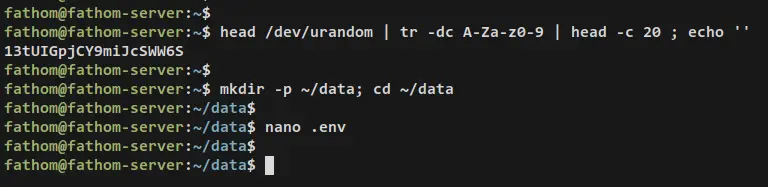
First, run the below command to generate a random string that will be used as the 'FATHOM_SECRET'. Be sure to copy the generated output.
head /dev/urandom | tr -dc A-Za-z0-9 | head -c 20 ; echo ''
Now create a new '~/data' directory and move the working directory into it. Then, create a new file '.env' via the below nano editor command.
mkdir -p ~/data; cd ~/data
nano .env
Add the following lines to the file. Be sure to change the details of the PostgreSQL database and user, and also replace the 'FATHOM_SECRET" with your generated string on top.
Also, if you're running Fathomn on production, ensure to change the 'FATHOM_DEBUG' to 'false'. You can also set 'FATHOM_DATABASE_SSLMODE' if you're using databases with secure SSL/TLS connections. This example is using the same server as Fathom, so the 'FATHOM_DATABASE_SSLMODE' is set to 'disable'.
FATHOM_GZIP=true
FATHOM_DEBUG=true
FATHOM_DATABASE_DRIVER="postgres"
FATHOM_DATABASE_NAME="fathomdb"
FATHOM_DATABASE_USER="fathom"
FATHOM_DATABASE_PASSWORD="p4ssw0rdFathom"
FATHOM_DATABASE_HOST="127.0.0.1"
FATHOM_DATABASE_SSLMODE="disable"
FATHOM_SECRET="13tUIGpjCY9miJcSWW6S"
Save and close the '.env' file when finished.
Now type exit to log out from the 'fathom' user and get back to the root session.
Next, create a new systemd service file '/etc/systemd/system/fathom.service' using the nano editor command below.
sudo nano /etc/systemd/system/fathom.service
Add the following lines to the file. With this, you will run Fathom web analytics in localhost with the default port '8080', and the data directory for Fathom is configured to '/home/fathom/data'.
[Unit]
Description=Starts the fathom server
Requires=network.target
After=network.target

[Service]
Type=simple
User=fathom
Restart=always
RestartSec=3
WorkingDirectory=/home/fathom/data
ExecStart=/usr/local/bin/fathom server

[Install]
WantedBy=multi-user.target
Save and exit the file when finished.
Now run the below command to reload the systemd manager and apply the new service file 'fathom.service'.
sudo systemctl daemon-reload
After that, start and enable the 'fathom' service using the following systemctl command.
sudo systemctl start fathom
sudo systemctl enable fathom

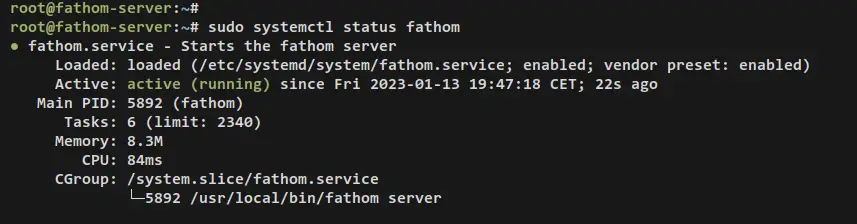
Verify the 'fathom' service to ensure that the service is running.
sudo systemctl status fathom
You should receive an output like this - The status of the fathom service is running and it's now enabled, which means the service will be run automatically upon the bootup.
Creating Fathom Admin user
With the Fathom is running as a systemd service, you'll now ready to create a new admin user for your Fathom installation.
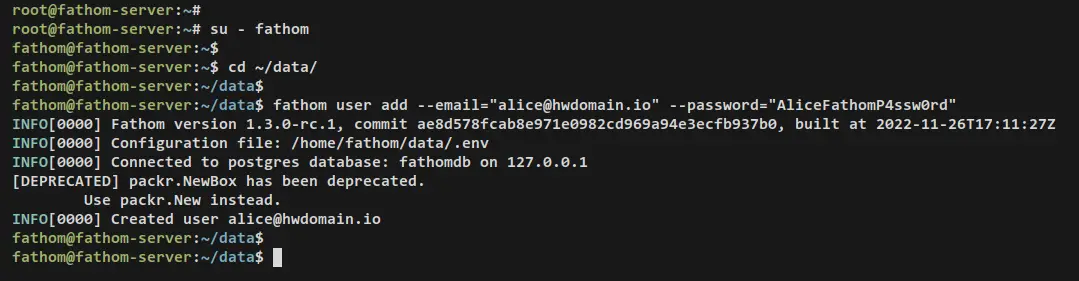
To create a Fathom admin user, you must be in the Fathom data directory. So, run the below command to log in as a 'fathom' user. Then, move the working directory to '~/data'.
su - fathom
cd ~/data
Run the below fathom command to add a new administrator user for Fathom web analytics. Be sure to change the email address and password in the following command line.
fathom user add --email="[email protected]" --password="AliceFathomP4ssw0rd"
If successful, you will receive an output similar to this. You can see the message that shows you the status connection to the PostgreSQL 'fathomdb' database and the new admin user '[email protected]' is created.
At this point, you've now finished the Fathom installation with the PostgreSQL database server. You've also created an administrator user for Fathom.
In the next step, you'll install and set up Nginx as a reverse proxy for Fathom web analytics that runs on localhost with default port 8080.
Installing and Configuring Nginx as a Reverse Proxy
In this step, you'll install the Nginx web server and set up the Nginx server block that will be used as a reverse proxy for Fathom web analytics.
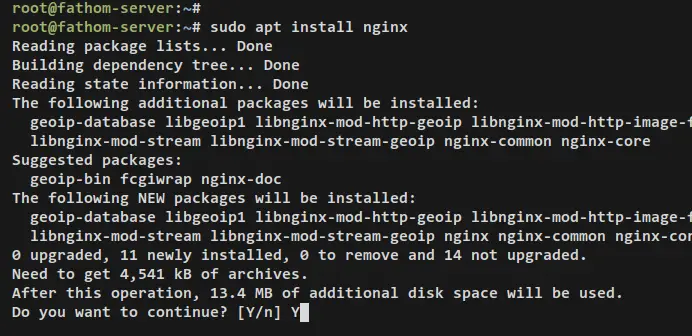
Run the below apt command to install the Nginx package to your Debian server. When prompted, input y to confirm and press ENTER to proceed.
sudo apt install nginx
After Nginx is installed, create a new server bloc config file '/etc/nginx/sites-available/fathom' using the below nano editor command.
sudo nano /etc/nginx/sites-available/fathom
Add the following lines to the and be sure to change the domain name with your domain.
server {
    listen 80;
    server_name fathom.hwdomain.io;

    location / {
        proxy_set_header X-Real-IP $remote_addr;
        proxy_set_header X-Forwarded-For $remote_addr;
        proxy_set_header Host $host;
        proxy_pass http://127.0.0.1:8080;
    }
}
Save the file and exit the editor when finished.
Next, run the below command to activate the Nginx server block '/etc/nginx/sites-available/fathom'. Then, verify the Nginx configuration to ensure that you have proper Nginx configurations.
sudo ln -s /etc/nginx/sites-available/fathom /etc/nginx/sites-enabled/
sudo nginx -t
If successful, you'll see an output such as 'test is successful - syntax ok' in your terminal.
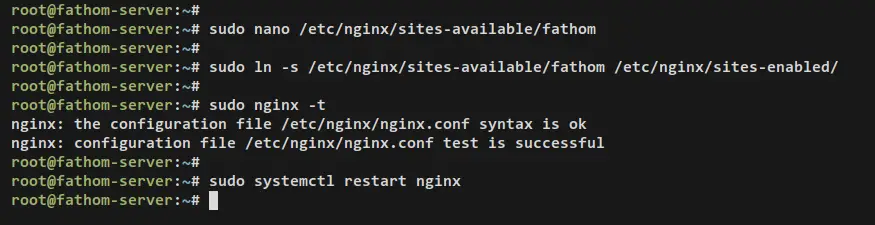
Now run the below systemctl command utility to restart the Nginx service and apply the changes.
sudo systemctl restart nginx
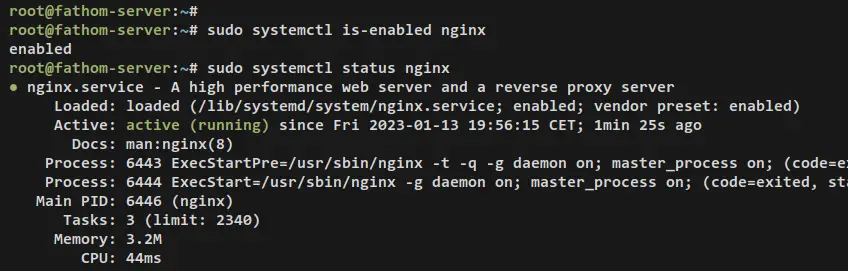
After that, verify the Nginx service to ensure that the service is running via the below systemctl command utility.
sudo systemctl is-enabled nginx
sudo systemctl status nginx
You should receive an output such as Nginx service is running and it's enabled, which means the service will start automatically upon the bootup.
Now that the Nginx web server is running as a reverse proxy for Fathom web analytics, you'll next set up the UFW firewall and open HTTP and HTTPS ports.
Securing Fathom with Firewall
In this step, you will install UFW on your Debian server. Then, open the SSH, HTTP, and HTTPS services to allow access to the server.
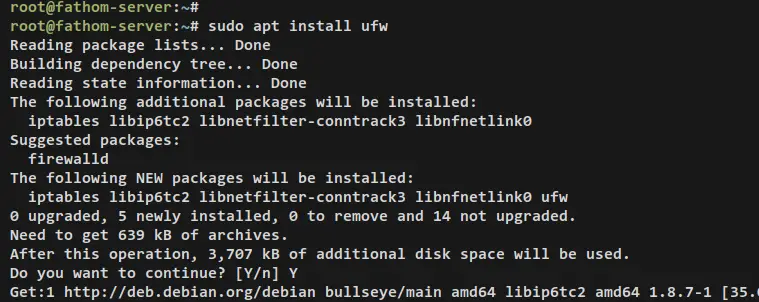
Install the ufw package via the apt command below. Input y when prompted and press ENTER to proceed.
sudo apt install ufw
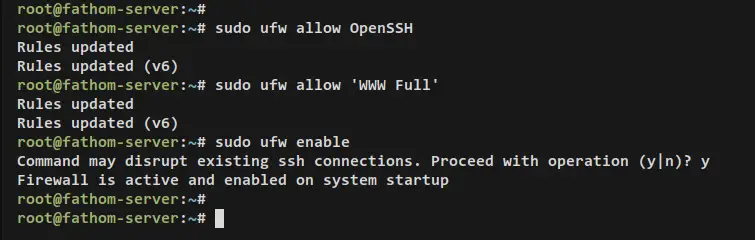
Once UFW installed, run the below command to add OpenSSH and 'WWW Full' applications. The OpenSSH application will open the default SSH port 22 and the 'WWW Full' application will open both HTTP and HTTPS services.
sudo ufw allow OpenSSH
sudo ufw allow 'WWW Full'
When added, you should get an output such as 'Rules updated'.
Now run the below ufw command to start and enable the UFW firewall. When prompted, input y to confirm and press ENTER to proceed.
sudo ufw enable
You should receive an output such as 'Firewall is active and enabled on system startup', which means the UFW firewall is started and enabled. This also enables UFW to run automatically upon the bootup.
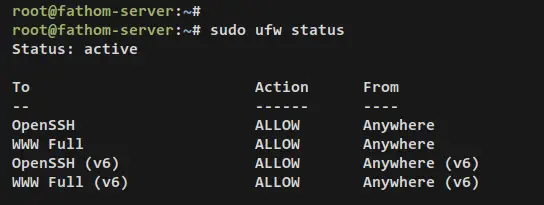
Lastly, run the below ufw command to verify the list of open ports and services in UFW.
sudo ufw status
You'll receive the OpenSSH and 'WWW Full' applications added to the UFW firewall.
Securing Fathom Web Analytics with SSL/TLS Letsencrypt
In this step, you'll secure the Fathom web analytics with SSL/TLS certificates from Letsencrypt. You must install Certbot and an additional Certbot Nginx plugin to your Debian server to achieve this.
Before generating SSL/TLS certificates, ensure that your domain is pointed to the server IP address. Also, ensure that you have an email address that will be used to register to Letsencrypt.
Now run the below apt command to install the Certbot and the Certbot Nginx plugin. Input y when prompted and press ENTER to proceed.
sudo apt install certbot python3-certbot-nginx
After Certbot is installed, run the below command to generate SSL/TLS certificates for your domain name. Also, be sure to change the domain name and the email address in the following command.
sudo certbot --nginx --agree-tos --redirect --hsts --staple-ocsp --email [email protected] -d fathom.hwdomain.io
With this command, the new SSL/TLS certificates will be generated for your domain name. Also, this will automatically set up HTTPS on your Nginx server block and set up auto-redirect from HTTP to HTTPS for your Fathom server block. Certbot SSL/TLS certificates is generated to the directory '/etc/elstencrypt/live/fathom.hwdomain.io/'.
Logging In to Fathom Website Analytics
Open your web browser and visit the domain name of your Fathom web analytics installation (i.e: https://fathom.hwdomain.io). You should be prompted with the Fathom login page.
Input your email address and password, then click Sign In.
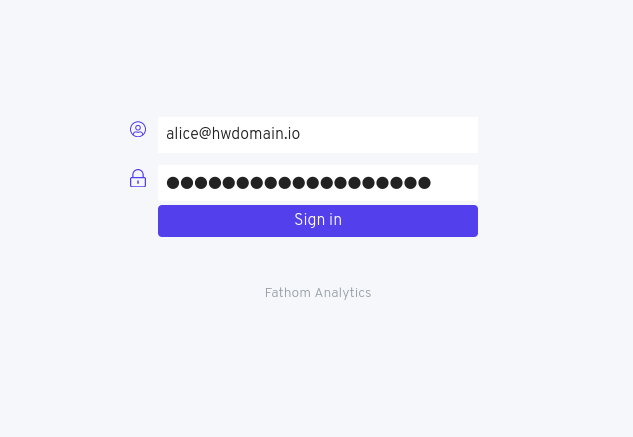
When the email address and password are correct, you should get the Fathom administration dashboard.
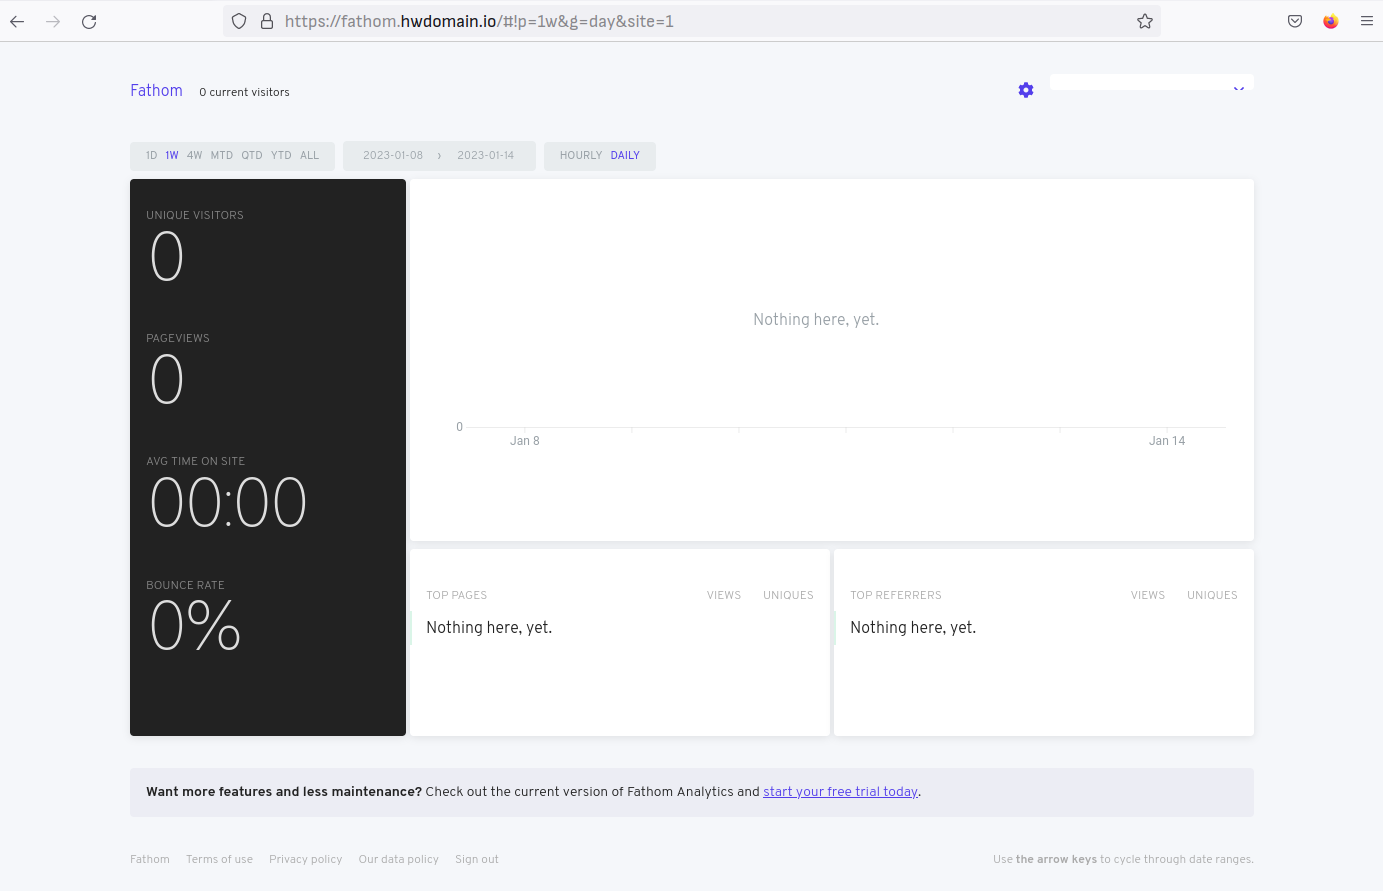
With this, you have successfully installed Fathom web analytics with PostgreSQL and Nginx.
Conclusion
In this tutorial, you've installed an open-source and privacy-focused web analytics Fathom on a Debian 11 server. You've also installed and configured PostgreSQL as the backend database server for Fathom web analytics. And at the front end for client access, you've configured Nginx as a reverse proxy. You've also secured Fathom website analytics with SSL/TLS certificates via Certbot and Letsencrypt.
With this in mind, you can now add new tracks and monitor your website and visitors. You can also integrate Fathom with multiple CMS (Content Management Systems) such as WordPress and Drupal. Also, you can integrate with forums such as Discourse.

