How to Set Up Multi-Master PostgreSQL Replication on Ubuntu 22.04
PostgreSQL is an open-source database management system focusing on extensibility and SQL compliance. PostgreSQL is an advanced and enterprise-class RDBMS (Relational Database Management System) that supports both SQL (relational) and JSON (non-relational) querying.
It's a highly stable and enterprise-grade database management system that provides different solutions, enabling you to set up high availability and failover. PostgreSQL is used as a primary database for web, mobile, and analytic applications. It has a strong reputation for its reliability, flexibility, feature robustness, and performance.
This tutorial will install the PostgreSQL database server on Ubuntu 22.04 servers and set up Multi-Master replication with multiple servers via Bucardo - an asynchronous PostgreSQL replication system -. You will install PostgreSQL via the official PostgreSQL repository, compile and install bucardo, and then set up the multi-master replication between PostgreSQL servers.
Bucardo is a Perl application that enables the asynchronous PostgreSQL replication system and allows you to set up multi-master and multi-source operations. Bucardo is free and open source, licensed under BSD License.
Prerequisites
You will need two or more Ubuntu 22.04 servers to complete this tutorial. You will also need a non-root user with sudo/root administrator privileges on your systems.
This example will be using two Ubuntu 22.04 servers with the following details:
Hostname      IP Address
---------------------------
postgres01    192.168.5.121
postgres02    192.168.5.122
When all requirements are ready, you can start installing the PostgreSQL server.
Setup /etc/hosts and UFW
In this first section, you will set up the '/etc/hosts' and the UFW firewall to open the default PostgreSQL port 5432 and allow a specific network subnet to access it. You must set up the /etc/hosts file and UFW on both of your servers.
Open the /etc/hosts file using the following nano editor command.
sudo nano /etc/hosts
Add the following lines to the file and be sure to change the details IP address and hostname with your current working environment.
192.168.5.121    postgres01
192.168.5.122    postgres02
Save and close the file once you're finished.
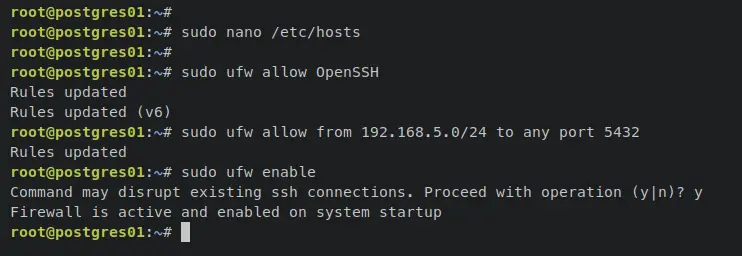
Next, enter the following 'ufw' command to open the OpenSSH port and the PostgreSQL server port 5432. With this, you will open the default OpenSSH port 22, then you will also open the PostgreSQL server port 5432 and specify access only from trusted networks '192.168.5.0/24'.
sudo ufw allow OpenSSH
sudo ufw allow from 192.168.5.0/24 to any port 5432
Now enter the following command to start and enable UFW. When prompted, input y to confirm and press ENTER to proceed.
sudo ufw enable
An output 'Firewall is active and enabled on system startup' confirms that the UFW is now running and will start automatically upon the system startup.
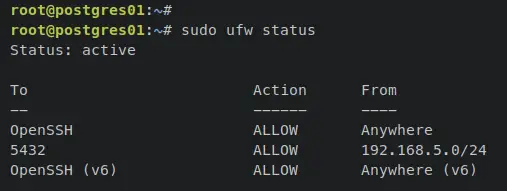
Lastly, verify the status of the UFW firewall using the below command.
sudo ufw status
You should receive an output like this - The OpenSSH service added and is available on the UFW rule list. Also, the PostgreSQL server port 5432 is only accessible from '192.168.5.0/24'.
Installing PostgreSQL Server
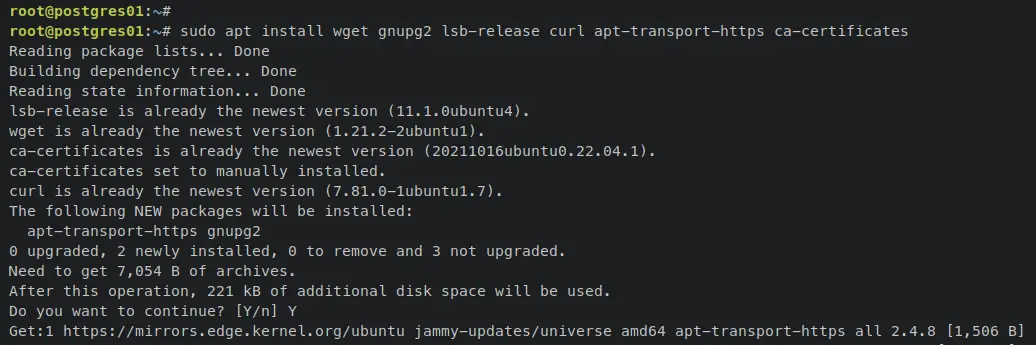
First, enter the 'apt install' command to install some basic dependencies. Input y when prompted and press ENTER to proceed.
sudo apt install wget gnupg2 lsb-release curl apt-transport-https ca-certificates
Next, enter the 'curl' command below to download the PostgreSQL repository GPG key, convert the .asc file to .gpg via the 'gpg --dearmor' command, then add the PostgreSQL repository.
curl https://www.postgresql.org/media/keys/ACCC4CF8.asc | gpg --dearmor | sudo tee /usr/share/keyrings/pgdg.gpg > /dev/null 2>&1
sudo sh -c 'echo "deb [signed-by=/usr/share/keyrings/pgdg.gpg] http://apt.postgresql.org/pub/repos/apt $(lsb_release -cs)-pgdg main" > /etc/apt/sources.list.d/pgdg.list'

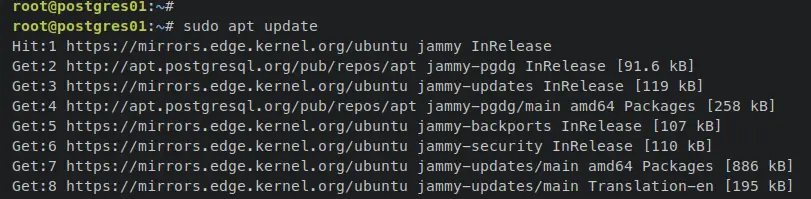
Now update and refresh your Ubuntu package to apply the new PostgreSQL repository that you've added.
sudo apt update
You can now install the PostgreSQL server via the 'apt install' command below. With this, you will install the latest version of the PostgreSQL server, which is PostgreSQL 15.
sudo apt install postgresql
When prompted, input y to confirm and press ENTER to proceed.

Once the PostgreSQL server is installed, please enter the following systemctl command utility to verify the PostgreSQL service and ensure that it's running and enabled.
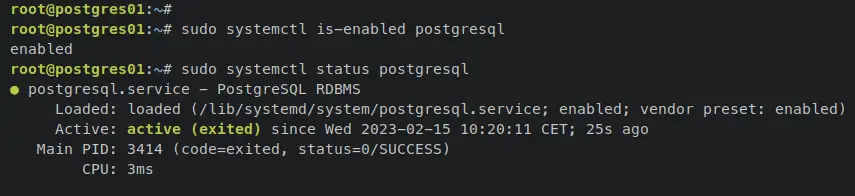
sudo systemctl is-enabled postgresql
sudo systemctl status postgresql
An output 'active (running)' confirms that the PostgreSQL server is running. And the output 'enabled' confirms that the PostgreSQL will be run automatically upon the system startup.
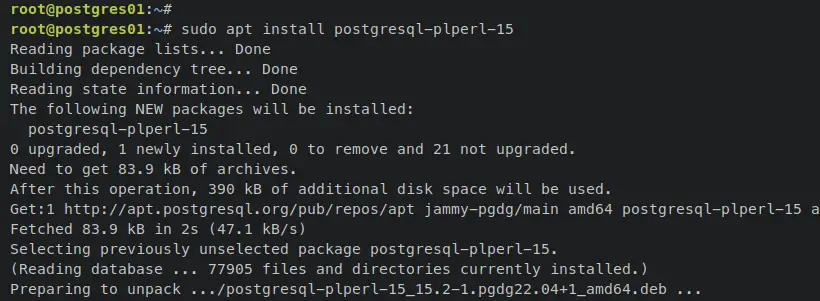
Lastly, you will also need to install the PostgreSQL extension 'plperl', which will be needed by the Bucardo software. Enter the following 'apt install' command to install the 'plperl' extension.
sudo apt install postgresql-plperl-15
The installation should automatically begin.
With this, you have now installed PostgreSQL 15 on both Ubuntu 22.04 servers, and also installed the PostgreSQL extension 'plperl' that will be used by Bucardo. In the next step, you will set up the PostgreSQL user and database that will be used by Bucardo, and also set up the database test that will be used for replication testing.
Setup Database and User
In this section, you will create a new database and user that will be used for the Bucardo installation. You will also create a new database with the schema for testing the PostgreSQL replication. Be sure to run the following command and queries on bot PostgreSQL servers.
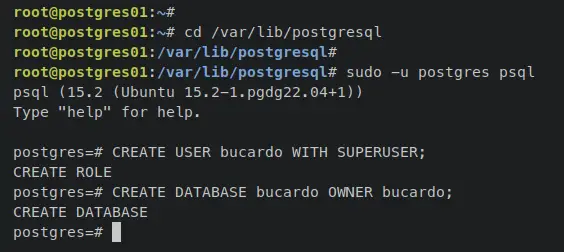
Before you start, move the working directory to '/var/lib/postgresql'.
cd /var/lib/postgresql
Now log in to the PostgreSQL shell via the following command.
sudo -u postgres psql
Once logged in to the PostgreSQL shell, enter the following queries to create a new user and database called 'bucardo'. This database will be used for storing Bucardo data, and the 'bucardo' user should have the SUPERUSER privilege.
CREATE USER bucardo WITH SUPERUSER;
CREATE DATABASE bucardo OWNER bucardo;
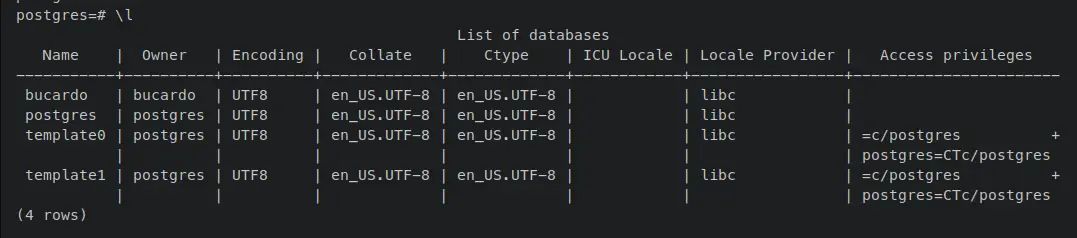
Now enter the following queries to verify the list of databases and users on PostgreSQL. If successful, you should see the database and user 'bucardo' listen in the output.
\l
\du
List of databases on PostgreSQL server.
List of users on the PostgreSQL server.

After creating the database and user for Bucardo, you will next create a new database for testing the replication on your PostgreSQL server.
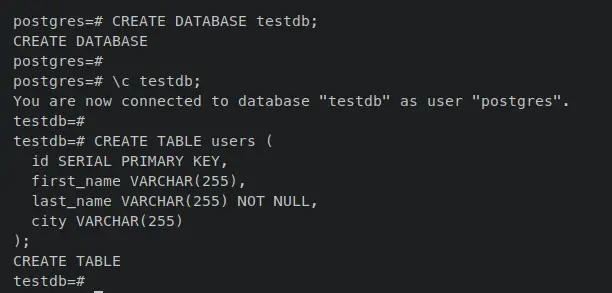
Enter the following query to create a new database 'testdb'. Then, connect to the database 'testdb' via the '\c' query.
CREATE DATABASE testdb;
\c testdb;
Now enter the following query to create a new table 'users'.
CREATE TABLE users (
  id SERIAL PRIMARY KEY,
  first_name VARCHAR(255),
  last_name VARCHAR(255) NOT NULL,
  city VARCHAR(255)
);
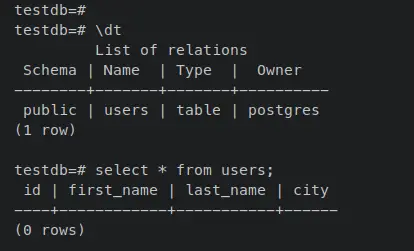
Once the table is created, enter the following queries to verify the schema of the table 'users', then verify the list of available data on the table.
\dt
select * from users;
Setup PostgreSQL Server
In this section, you will set up both PostgreSQL servers to run on an internal IP address. Also, you will set up the PostgreSQL authentication to allow connections between servers as trusted to PostgreSQL.
Open the default PostgreSQL configuration '/etc/postgresql/15/main/postgresql.conf' using the following nano editor command.
sudo nano /etc/postgresql/15/main/postgresql.conf
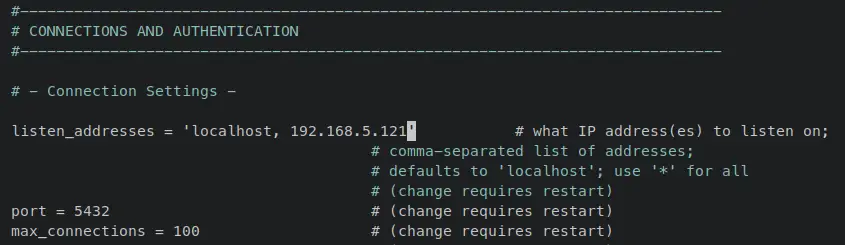
Uncomment the 'listen_addresses' parameter and add the internal IP address of your PostgreSQL server. With this, you will set up PostgreSQL to be running on an internal IP address on each server.
Below is the configuration for the postgres01 server.
listen_addresses = 'localhost, 192.168.5.121'
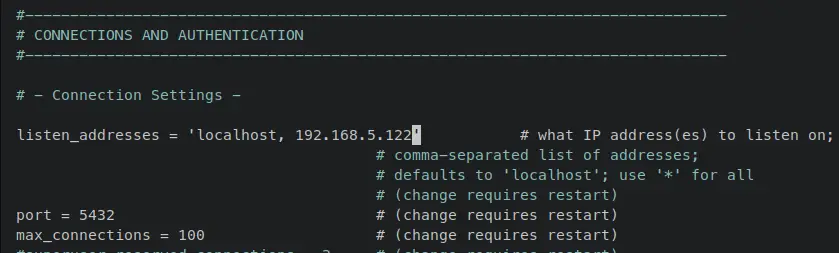
And below is the configuration for the postgres02 server.
listen_addresses = 'localhost, 192.168.5.122'
Save and close the file when finished.
Next, open the default PostgreSQL authentication config file '/etc/postgresql/15/main/pg_hba.conf' using the following nano editor command.
sudo nano /etc/postgresql/15/main/pg_hba.conf
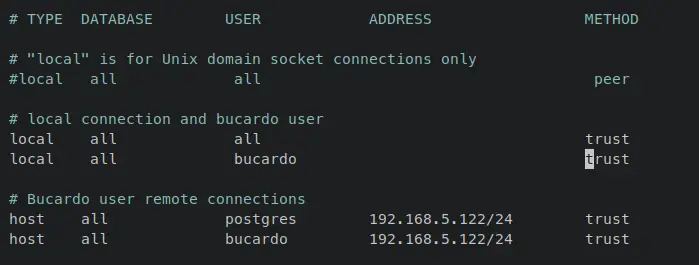
On the postgres01 server, add the following configurations and be sure to change the IP address with the postgres02 server IP address. With this, any local connections and connections from user bucardo will be trusted. Also, connections of users postgres and bucardo that comes from the postgres02 are trusted.
# local connection and bucardo user
local    all             all                                    trust
local    all             bucardo                                trust

# Bucardo user remote connections
host    all             postgres         192.168.5.122/24       trust
host    all             bucardo          192.168.5.122/24       trust
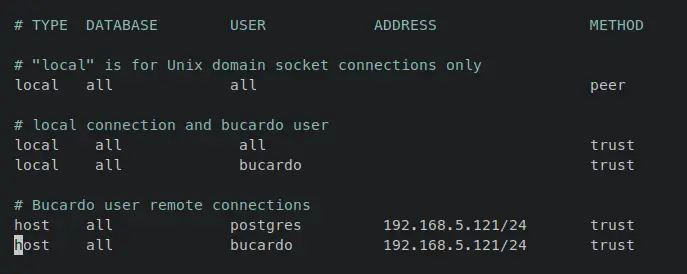
Below is the configuration for the postgres02 server. Be sure to change the IP address with the IP address of the postgres01 server.
# local connection and bucardo user
local    all             all                                    trust
local    all             bucardo                                trust

# Bucardo user remote connections
host    all             postgres         192.168.5.121/24       trust
host    all             bucardo          192.168.5.121/24       trust
Save and close the file when finished.
Now enter the following systemctl command utility to restart the PostgreSQL service and apply the changes.
sudo systemctl restart postgresql
With this, the PostgreSQL server should be running on localhost and the internal IP address via the 'listen_addresses' parameter. Enter the following command to verify the list of open ports on each server. You should see that PostgreSQL is running on an internal IP address of the postgres01 and postgres02 servers.
ss -tulpn | grep postgres

Lastly, to verify the authentication, you can enter the following command to connect to the PostgreSQL shell.
On the postgres01 server, enter the following command. When successful, you should be logged in to the PostgreSQL shell of the postgres02 server without any authentication, because you're on the trusted host and user.
sudo -u postgres psql
sudo -u postgres psql -U bucardo -h 192.168.5.122
For the postgres02 server, you can enter the following command to connect to the PostgreSQL shell that running on the postgres01 server. You will have a similar result that you will be logged in to the postgres01 server without password authentication because both user and connected are trusted.
sudo -u postgres psql
sudo -u postgres psql -U bucardo -h 192.168.5.121
With this, you have now finished the installation of the PostgreSQL 15 server, configured the database and user for Bucardo, and also configured PostgreSQL listen_addresses and authentication.
In the next step, you will compile and install Bucardo as an application that allows you to create Multi-Master PostgreSQL replication.
Installing Bucardo
Bucardo is a free and open-source application for creating PostgreSQL multi-source and multi-master replication systems. In this section, you will install Bucardo manually from the source, also you do not need to install Bucardo on all nodes.
You will install Bucardo only on the 'postgres01' server. So be sure to run all these following commands on the postgres01 server.
First, enter the following apt command to install package dependencies for Bucardo. Input y when prompted and press ENTER to proceed.
sudo apt install make libdbix-safe-perl libboolean-perl libdbd-mock-perl libdbd-pg-perl libanyevent-dbd-pg-perl libpg-hstore-perl libpgobject-perl libpod-parser-perl libencode-locale-perl

Now download the Bucardo source code via the wget command below.
wget -q https://bucardo.org/downloads/Bucardo-5.6.0.tar.gz
Once downloaded, extract the Bucardo source code, the move it to the Bucardo working directory.
tar xf Bucardo-5.6.0.tar.gz
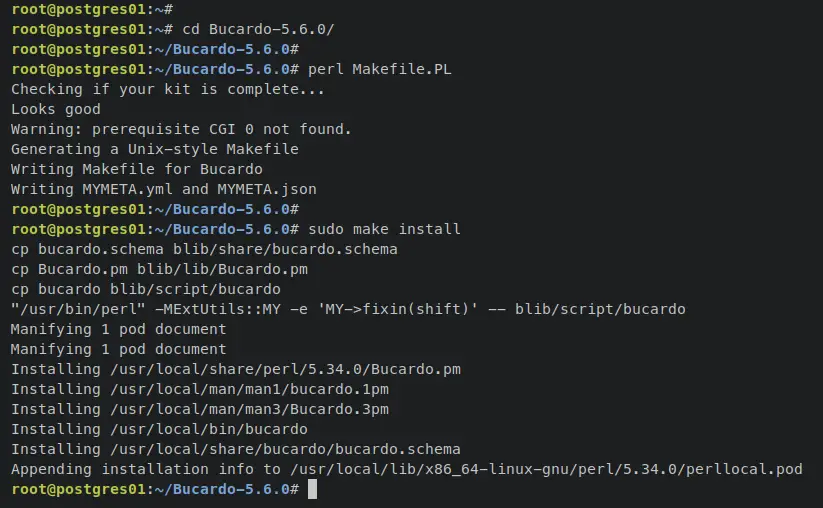
cd Bucardo-*/

Now enter the following command to compile and install Bucardo to the postgres01 server.
perl Makefile.PL
sudo make install
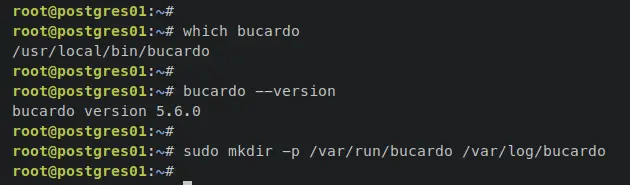
Verify the binary path of the 'bucardo' application and verify the version of Bucardo via the following command.
which bucardo
bucardo --version
The 'bucardo' binary file is located at '/usr/local/bin/bucardo', and the currently installed version is v5.6.0.
With the Bucaro installed, you will next set up the PostgreSQL Multi-Master replication using two PostgreSQL servers postgres01 and postgres02.
Setup Multi-Master Replication with Bucardo
The following commands must be executed on the postgres01 server.
Before you start, enter the following command to create a new data and log directory for Bucardo.
sudo mkdir -p /var/run/bucardo /var/log/bucardo
touch /var/log/bucardo/log.bucardo
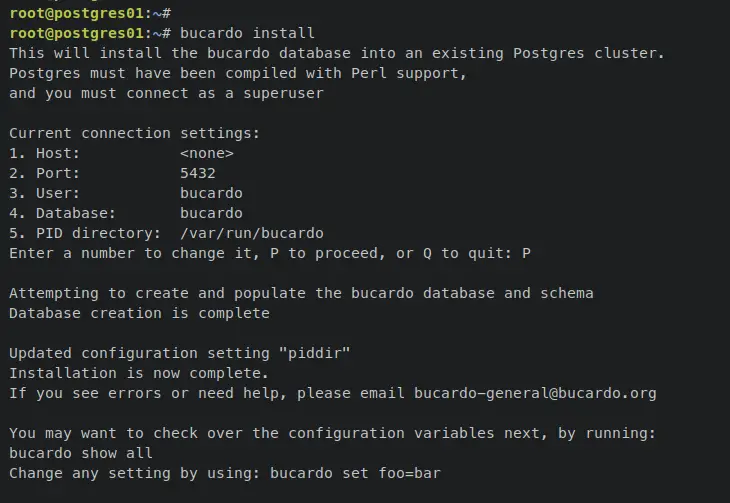
Execute the following 'bucardo' command to start the installation. Review the connection settings to PostgreSQL, then input P to proceed.
bucardo install
When the Bucardo installation is successful, you should get an output message such as 'Installation is now complete'.
Enter the following command to define the database server and database name that will be replication. That information will be stored as the 'server1' for the PostgreSQL server ppstgres01 and 'server2' for the PostgreSQL server postgres02.
bucardo add database server1 dbname=testdb
bucardo add database server2 dbname=testdb host=192.168.5.122

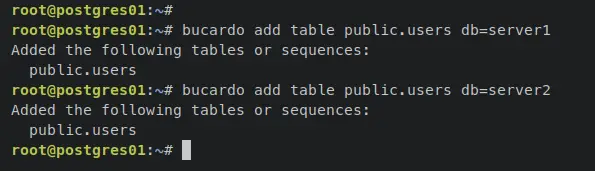
Add the table schema that you want to replicate. in this example, the table called 'users' will be replicated and synchronized across PostgreSQL servers.
bucardo add table public.users db=server1
bucardo add table public.users db=server2
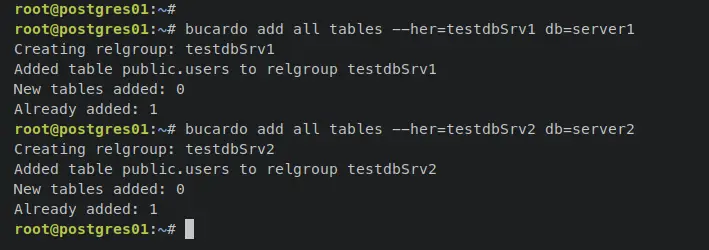
You can also add all tables on the database via the 'bucardo add all tables' command. With this, you will also create a relgroup if it does not already exist.
bucardo add all tables --her=testdbSrv1 db=server1
bucardo add all tables --her=testdbSrv2 db=server2
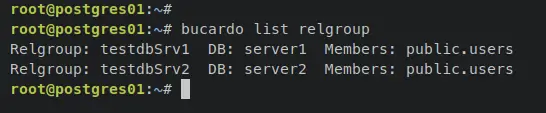
Enter the following command to verify the list of relgroup available.
bucardo list relgroup
Then verify the list of relgroup, you should see the details output like the following. On each relgroup, you will see the relgroup name followed by the PostgreSQL server and available table that is added to the relgroup.
With the relgroup and table added, you will now start the synchronization process for both PostgreSQL servers. Enter the following command to create a new sync 'testdbSrv1' that will sync the 'server1' and 'server2'. And the sync is called 'testdbSrv2' which will sync between 'server2' and 'server1'.
bucardo add sync testdbSrv1 relgroup=testdbSrv1 db=server1,server2
bucardo add sync testdbSrv2 relgroup=testdbSrv2 db=server2,server1

Now verify the list of sync on Bucardo by entering the following command.
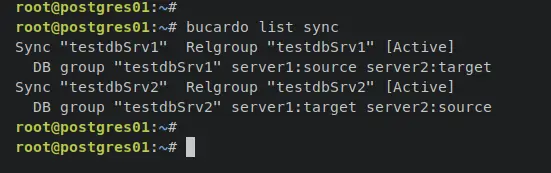
bucardo list sync
You will see the sync 'testdbSrv1' with the status 'Active' and the synchronization is from the 'server1' as the source and 'server2' as the target node. As for the 'testdbSrv2' sync, the status is also 'Active', but the synchronization is from the 'server2' as the source to the target 'server1'.
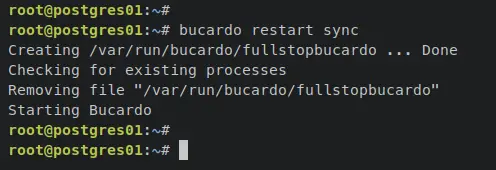
Next, enter the following command to restart the synchronization process. And you should see an output 'Starting Bucardo' when successful.
bucardo restart sync
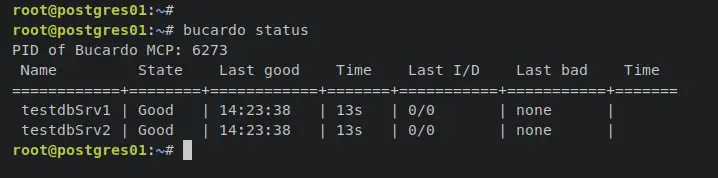
Lastly, verify the synchronization status using the following 'bucardo' command.
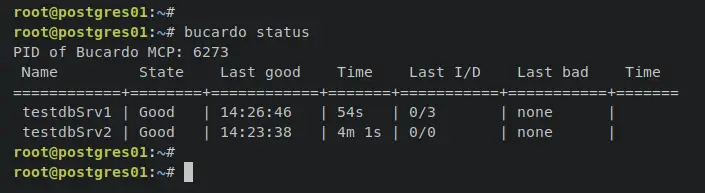
bucardo status
You should receive an output similar to this - Both sync 'testdbSrv1' and 'testdbSrv2' on the state 'Good' which confirms that the synchronization is working and your configuration is successful.
At this point, you have now configured the Multi-Master replication on PostgreSQL via Bucardo. You will next verify the Multi-Master replication by adding new data from both servers and verify the replication between PostgreSQL servers.
Verify Multi-Master Replication PostgreSQL Server
With the PostgreSQL Multi-Master configured, this means that both PostgreSQL will are synchronized with each other and bot servers accept READ and WRITE operations. In this example, you will verify the PostgreSQL multi-master deployment by inserting new data into the database 'test'.
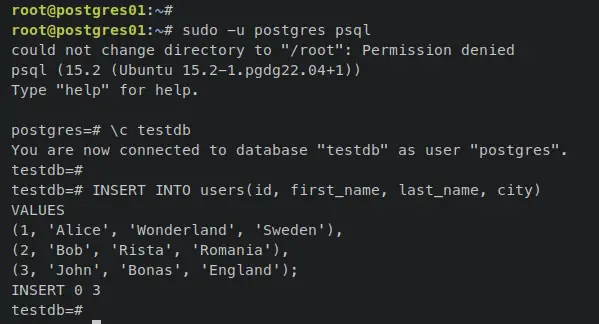
First, on the postgres01 server, log in to the PostgreSQL shell and connect to the database 'testdb.
sudo -u postgres psql
\c testdb
Enter the following queries to insert new data to the table 'users'.
INSERT INTO users(id, first_name, last_name, city)
VALUES
(1, 'Alice', 'Wonderland', 'Sweden'),
(2, 'Bob', 'Rista', 'Romania'),
(3, 'John', 'Bonas', 'England');
Verify and retrieve your data via the select query below. You should see that your data is available.
select count(*) from users;
select * from users;

Type 'quit' to exit from the PostgreSQL shell.
Then, verify the Bucardo synchronization status using the 'bucardo' command below.
bucardo status
On the 'Last I/D' section, you will see the last data synchronization between the PostgreSQL servers.
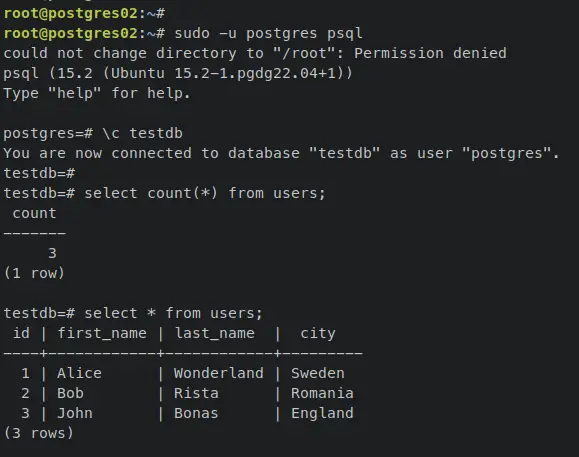
Now move to the postgres02 server, access the PostgreSQL shell, then connect to the database 'testdb'.
sudo -u postgres psql
\c testdb
Retrieve the data that is available on the table 'users' using the following query. You should see your data are available and replicated from the postgres01 server.
select count(*) from users;
select * from users;
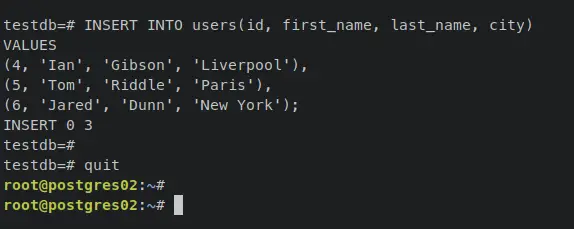
Next, enter the following queries to add another data and type 'quit' to exit from the PostgreSQL shell.
INSERT INTO users(id, first_name, last_name, city)
VALUES
(4, 'Ian', 'Gibson', 'Liverpool'),
(5, 'Tom', 'Riddle', 'Paris'),
(6, 'Jared', 'Dunn', 'New York');
quit
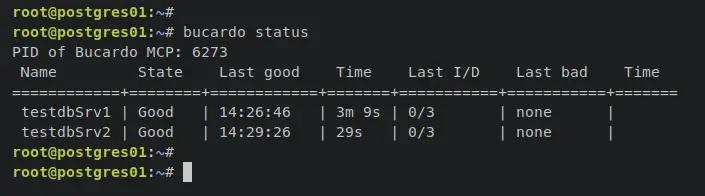
Now move back to the postgres01 server and run the following bucardo command to verify the synchronization status.
bucardo status
You should see that on 'testdbSrv2' the last synchronization is 3. YOu can see this in the 'Last I/D' section.
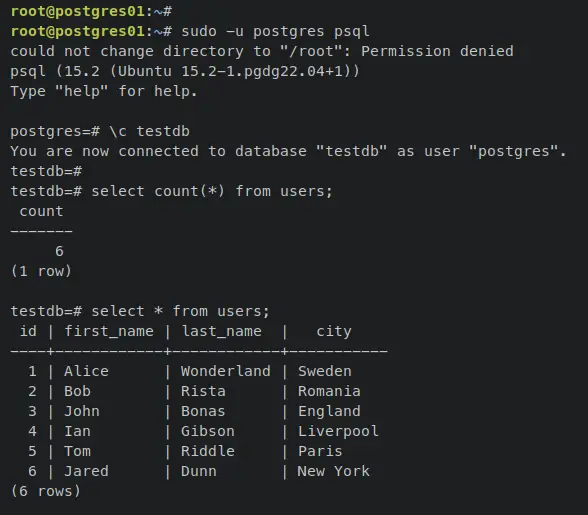
Now log in again to the PostgreSQL shell and connect to the database 'testdb'.
sudo -u postgres psql
\c testdb
Then verify the list of available data on the table 'users'. You should see additional data that you've added from the postgres02 server.
select count(*) from users;
select * from users;
With this, you have now configured multi-master PostgreSQL replications via Bucardo on Ubuntu 22.04 servers.
Conclusion
In this tutorial, you have installed the PostgreSQL server on Ubuntu 22.04 servers and configured multi-master replication via Bucardo using two PostgreSQL servers. You have learned how to set up PostgreSQL to run on a local IP address, configured authentication for PostgreSQL users, compile and install Bucardo, and then how to set up multi-master replication with Bucardo.
In addition, you have verified the multi-master replication on PostgreSQL by inserting new data from PostgreSQL servers to ensure databases and tables are replicated and synchronized.
With this, you can now add more PostgreSQL servers to your current environment, then you can also set up load balancing and failover via a third-party application such as HAPROXY or by using pgPool for managing client connections. To get details information about PostgreSQL, visit the official PostgreSQL documentation. For Bucardo, visit the official Bucardo documentation.

