
Ubuntu is a widespread Linux distribution widely used among developers. On the other hand, Java is a programming language allowing them to create complex applications that can run on different platforms. Therefore, installing Java on Ubuntu 22.04 LTS is crucial for anyone looking to develop or run Java applications on their Ubuntu machine.
In this guide, we will provide step-by-step instructions on installing Java on Ubuntu 22.04 LTS, including the commands and configuration changes needed to get started.
Before that, however, we want to give you some clarity about the different editions and versions of Java, both to be as helpful and informative as possible and to give you as clear an understanding as possible of each of the steps in this guide.
Differences Between OpenJDK and OpenJRE
OpenJDK and OpenJRE are related but, at the same time, distinct software components used in the Java development and execution environment. Here are the key differences between the two:
- OpenJDK is an open-source Java SE (Standard Edition) platform implementation. It includes a Java Development Kit (JDK), which provides tools for developing and compiling Java applications, and a Java Runtime Environment (JRE), which is necessary for running Java applications on a user’s computer.
- OpenJRE is a runtime environment for Java applications. It includes the Java Virtual Machine (JVM), the engine that runs Java code, and the Java class libraries, which provide the core functionality of the Java platform. OpenJRE does not include the development tools and compilers that are part of the JDK.
In summary, OpenJDK is a complete Java development and runtime environment, while OpenJRE is a runtime environment only. Therefore, the JDK component of OpenJDK includes the JRE component but not vice versa.
In other words, if you are developing Java applications, you will need the OpenJDK, while if you want to run Java applications, the OpenJRE is sufficient.
Oracle’s JDK or OpenJDK: Which to Choose?
You can use one of the following two approaches to install Java on your Ubuntu system. The first and recommended one, which we will use in this guide, is to install Java from the official Ubuntu repositories, giving you a system with OpenJDK installed.
However, in addition to this approach, you can get Java support on your Ubuntu system by installing Oracle’s official Java implementation. There, however, you have some limitations, such as that due to Oracle’s licensing agreement for Java doesn’t allow automatic installation through package managers. This requires manual interventions, such as downloading and installing the DEB package, which complicates the entire process.
If you’re wondering if Oracle’s Java implementation has any advantages over OpenJDK, the short answer is no, it doesn’t. After all, OpenJDK has the same code as Oracle’s JDK. The most significant difference between them is the licensing model. In other words, OpenJDK is an entirely open-source Java implementation licensed under the GNU General Public License. Contrary, Oracle’s JDK follows other licensing policies, such as the “Oracle No-Fee Terms and Conditions” (NFTC) license.
Which Java Version Should You Install on Your Ubuntu 22.04 System?
In its repositories, Ubuntu 22.04 includes different versions of OpenJDK. So, if you search for available Java implementations, you will find a long list of choices for 8, 11, 17, 18, and 19. For new users, this may be confusing. So, let us help you with the right choice.
Like some Linux distributions, the Linux kernel, and other software, Java provides LTS (Long Term Support) versions. These are the ones with a 5-year support period. In comparison, the non-LTS versions get only six months of support. Therefore, the best choice for installing the Java version on our Ubuntu system would be one of the LTS releases.
Ubuntu offers three Java LTS releases: 8, 11, and 17. According to the table below, Java 8 reached the end of active support in March 2022, while Java 11 will reach the same point in September 2023. More information about all releases is here.
| Java Release | Active Support | Security Support |
|---|---|---|
| 8 (LTS) | March 31, 2022 | December 21, 2030 |
| 11 (LTS) | September 30, 2023 | September 30, 2026 |
| 17 (LTS) | September 30, 2026 | September 30, 2029 |
| 18 | September 20, 2022 | September 20, 2022 |
| 19 | March 21, 2023 | March 21, 2023 |
Although Java 11 LTS is now the most widely used version, followed closely by Java 8 LTS, looking ahead and following Oracle’s guidance, we recommend installing Java 17 LTS on your Ubunutu 22.04 system. This is the way we shall take in the next section.
Install Java on Ubuntu 22.04 LTS
1. Check If Java Is Already Installed
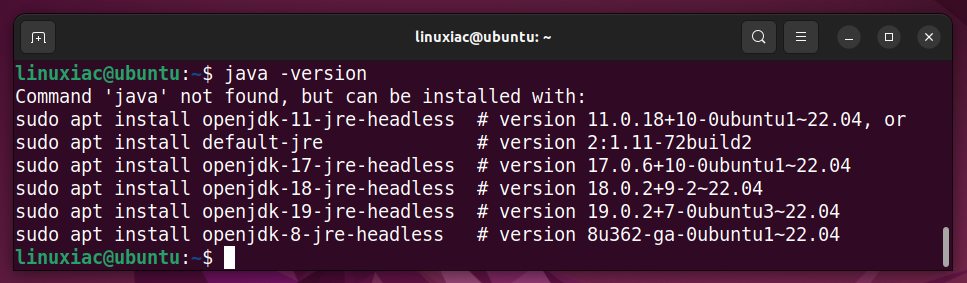
First, ensure Java is not already installed on your Ubuntu system. Type the following:
java -versionIf it is not, you need to get a result similar to the one shown below.
2. Install OpenJDK on Ubuntu 22.04 LTS
For clarity, we shall state right away that Ubuntu provides the “default-jdk” package, a regularly updated one to ship the latest version of the current OpenJDK LTS release, for the convenience of its users. As a result, using the APT command below will result in a system with the OpenJDK 11 LTS version installed.
sudo apt install default-jdkCode language: JavaScript (javascript)However, we will not use this approach since we want to install the latest Java LTS version, 17. So, instead, we will install the specific OpenJDK 17 version, which we are targeting.
sudo apt install openjdk-17-jdk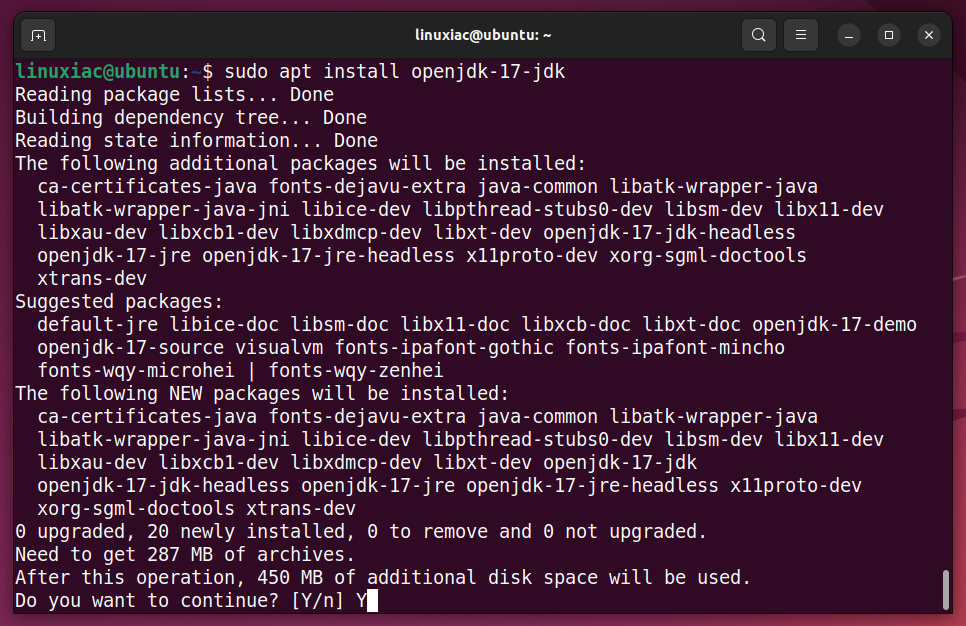
3. Verify the Installation
With the command provided below, verify that the installation was successful. It should output similar to the following:
java -version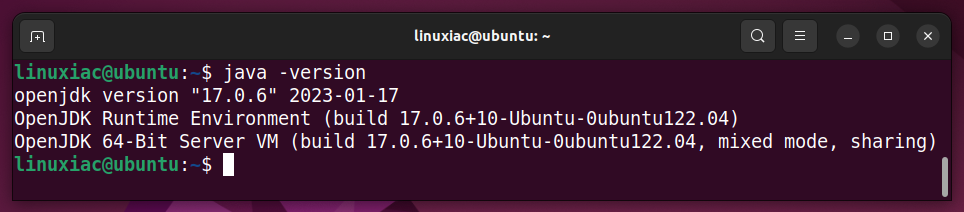
As you can see, we now have OpenJDK 17 successfully installed on our Ubuntu 22.04 system.
Set Default Java Version
Java allows you to have several different versions of your Linux system simultaneously. Run the following command to find out what versions are currently installed:
sudo dpkg -l | grep 'jdk\|jre'Code language: JavaScript (javascript)
As we can see, OpenJDK 11 and OpenJDK 17 coexist here. Checking in a now-familiar way, we see that the default is OpenJDK 17.
java -versionHowever, what if we change the default version from OpenJDK 17 to OpenJDK 17? The command shown below makes this simple and quick.
sudo update-alternatives --config java
The output will provide a list of available installed Java versions, each associated with a number in the “Selection” column. To switch to a different version than the one currently in use, select the appropriate number corresponding to the specific Java version, type it in, and confirm with “Enter.”
If you rerun the java -version command, you will see that the default version has already been changed.
Set JAVA_HOME Environment Variable
The JAVA_HOME variable is used by various applications, such as development environments and build tools, to locate the JDK installation directory. Therefore, setting this environment variable is necessary for running Java-based applications and tools on a computer system.
When JAVA_HOME is set, the system knows where to look for the JDK and can use it to execute Java applications or compile Java code. So, run the now familiar command to see the path you need:
sudo update-alternatives --config java
As we can see, the path we need to set for JAVA_HOME is “/usr/lib/jvm/java-17-openjdk-amd64/bin/java“. So, first, open the “/etc/environment” file with the terminal text editor you are using:
sudo nano /etc/environmentThen, add in it the line:
JAVA_HOME="/usr/lib/jvm/java-17-openjdk-amd64/bin/java"Code language: JavaScript (javascript)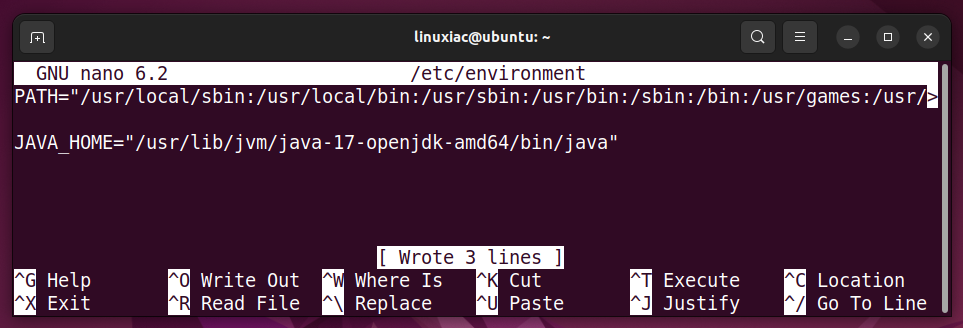
Of course, do not forget to change the content between the quotes with the path valid for your system – the one shown in the output of the “sudo update-alternatives –config java” command. Finally, save the file and exit.
Apply the changes and verify everything is correct by running the two commands below.
source /etc/environment
echo $JAVA_HOMECode language: PHP (php)
As we can see from the echo command output, the JAVA_HOME environment variable is set correctly.
Uninstall Java on Ubuntu 22.04 LTS
If you want to remove Java from your Ubuntu 22.04 system for any reason, first use the command below to find out all locally installed Java packages.
sudo dpkg -l | grep 'jdk\|jre'Code language: JavaScript (javascript)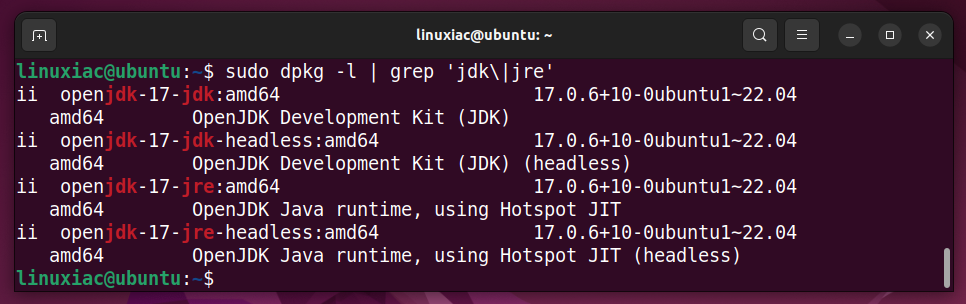
Then pass them as names after the “sudo apt purge” command but don’t forget to add “default-jre-headless” at the end even though you don’t have it installed locally. Otherwise, when attempting to remove all existing Java packages, Ubuntu will automatically install the “default-jre-headless” package in its place.
In our case, it would look like this:
sudo apt purge openjdk-17-jdk openjdk-17-jdk-headless openjdk-17-jre openjdk-17-jre-headless default-jre-headlessCode language: JavaScript (javascript)
Finally, clean your Ubuntu system of any remaining dependencies.
sudo apt autoremove --purgeDon’t forget to remove the JAVA_HOME variable from the “/etc/environment” file by simply opening it and deleting the line that contains it.
Conclusion
Installing Java on Ubuntu 22.04 LTS is a simple process that can be completed in minutes. With Java installed on your system, you can run Java applications, develop Java programs, and enjoy the many benefits of this powerful programming language.
Thanks for your time! I hope you find this guide helpful. Your feedback and comments are most welcome.


