How to Install Percona XtraDB Cluster on Rocky Linux 9
On this page
- Prerequisistes
- Setting up /etc/hosts and Firewalld
- Installing Percona XtraDB Cluster
- Copy SSL/TLS Certificates
- Initialize Percona XtraDB Cluster on pxc-rock01
- Adding Server pxc-rock02 to Percona XtraDB Cluster
- Adding Server pxc-rock03 Server to Percona XtraDB Cluster
- Testing Database Replication
- Conclusion
Percona XtraDB Cluster is a fully open-source database clustering solution for MySQL. It allows you to create high-availability MySQL server deployment with robust and high performance. The latest version of Percona XtraDB Cluster is 8.0, which is fully compatible with MySQL Server Comunity Edition 8.0.
Percona XtraDB Cluster provides features such as synchronous replication, multi-source replication, automatic node provisioning, automatic SSL encryption configuration, and optimized performance.
Percona XtraDB Cluster ensures the high availability of your database server, provides linear scalability, and prevents downtime and data loss.
This guide will show you how to set up MySQL cluster via Percona XtraDB Cluster (PXC) on Rocky Linux 9 servers. You will install Percona XtraDB Cluster to multiple Rocky Linux systems, and set up Percona XtraDB Cluster to enable database replication between servers, then you will also verify by inserting data to one server and checking data from another server.
Prerequisistes
To complete this guide, you must have two or more servers running Rocky Linux 9. You must also have a non-root user with sudo/root administrator privileges on all servers. And also the SELinux will be running in permissive mode.
For this example, there are three Rocky Linux 9 servers that will be used. Below are the details of the servers:
Hostname       IP Address
--------------------------
pxc-rock01       192.168.5.80
pxc-rock02       192.168.5.81
pxc-rock03       192.168.5.82
If all requirements are ready, you can start the Percona XtraDB Cluster installation.
Setting up /etc/hosts and Firewalld
In this first step, you will set up the /etc/hosts file and firewalld on all of Rocky Linux servers. You will modify the /etc/hosts file and add details of IP addresses and hostname for each server, then you will add some ports that will be used by Percona XtraDB Cluster.
Below are the details of Percona XtraDB Cluster ports that you must open on your firewall.
Ports   Used for
---------------------------
3306    MySQL client connection and SST (State Snapshot Transfer)
4444    SST via Percona XtraBackup
4567    write-set replication traffic (over TCP) and multicast replication (over TCP and UDP)
4568    IST (Incremental State Transfer)
To begin, open the '/etc/hosts' file using the following nano editor command.
sudo nano /etc/hosts
Add details hostname and IP address that will be used for the cluster. Be sure to change the details with your server environment.
192.168.5.80  pxc-rock01
192.168.5.81  pxc-rock02
192.168.5.82  pxc-rock03
Save and close the file when finished.
Next, enter the following 'firewall-cmd' command to add your internal network subnet as the trusted source. With this, only trusted networks will be allowed to access all servers.
sudo firewall-cmd --permanent --add-source=192.168.5.0/24
Now open some ports for Percona XtraDB Cluster and reload the firewalld to apply the changes. An output 'success' confirms that the new rule was added to firewalld.
sudo firewall-cmd --add-port={3306/tcp,4444/tcp,4567/tcp,4567/udp,4568/tcp} --permanent
sudo firewall-cmd --reload
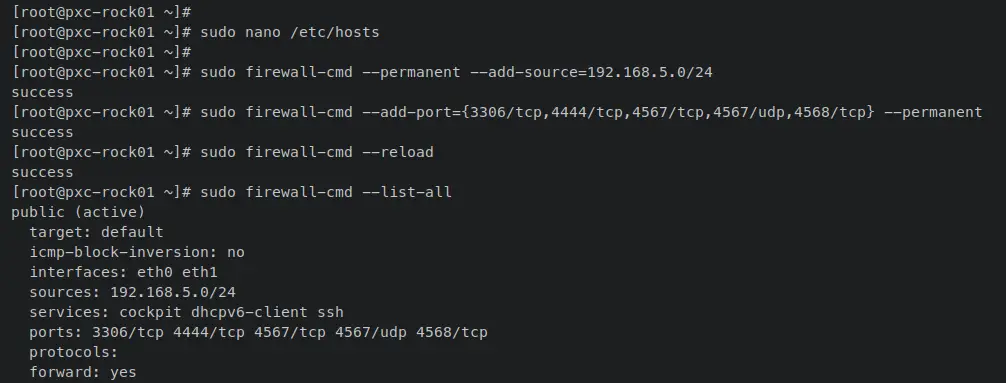
Lastly, enter the following 'firewall-cmd' command to verify the list of enabled rules on firewalld.
sudo firewall-cmd --list-all
The following output will be printout on your terminal shell. Be sure all of the ports that will be used by the Percona XtraDB Cluster are listed.
With the /etc/hosts file and firewalld configured, you will next install Percona XtraDB Cluster packages.
Installing Percona XtraDB Cluster
In his section, you will install Percona XtraDB Cluster on all of your Rocky Linux servers. You'll set up the Percona XtraDB repository, then install the Percona XtraDB Cluster package. Also at the end, you will change the default MySQL root password on all of your servers.
First, you must add and enable the EPEL repository. Enter the following 'dnf install' command to add the EPEL repository.
sudo dnf install epel-release
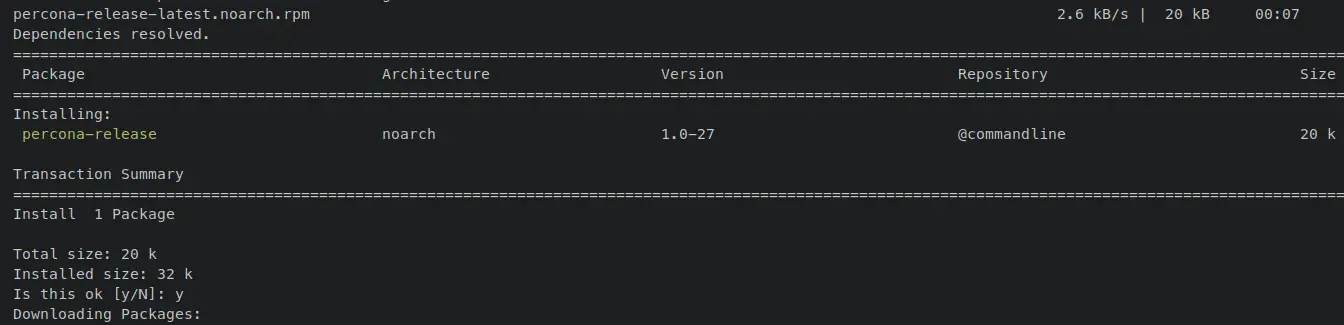
Now enter the following command to install the Percona release application. Input y when prompted and press ENTER to proceed. This package provides a command-line tool 'percona-release' that can be used for managing Percona repositories.
sudo dnf install https://repo.percona.com/yum/percona-release-latest.noarch.rpm -y
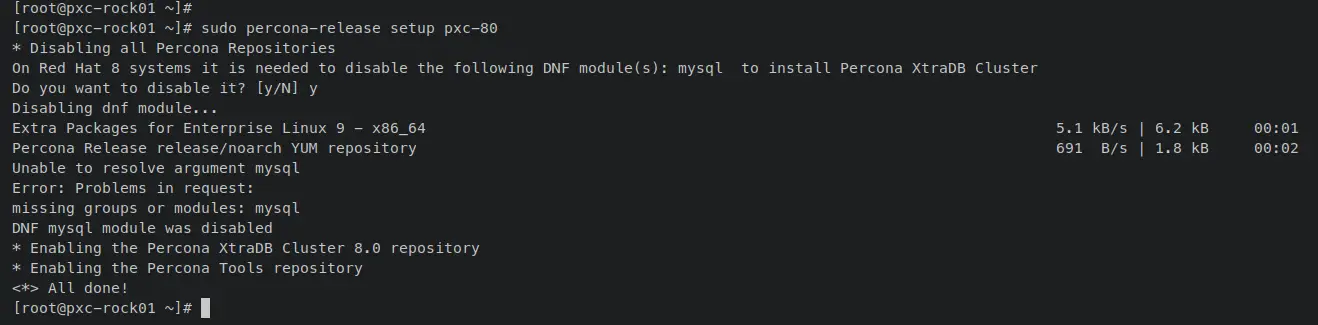
Next, run the following 'percona-release' command to enable the Percona XtraDB Cluster repository v8.0. During the process, you will be prompted to disable the default MySQL repository, input y to confirm, and press ENTER to proceed.
sudo percona-release setup pxc-80
An output message 'All done!' confirms that the operation is successful.
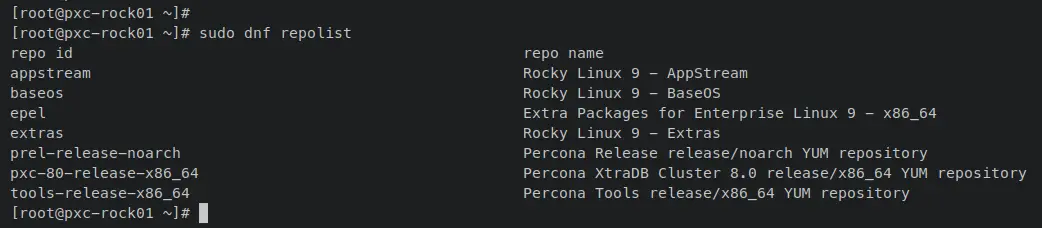
Verify the list of the enabled repository by entering the 'dnf repolist' command below. You should see the repository 'pxc-80-release' enabled and listed on the output with some additional repositories such as 'prel-release' and 'tools-release'.
sudo dnf repolist
Now enter the following 'dnf install' command to install the Percona XtraDB Cluster package. Input y when prompted for confirmation and press ENTER to proceed.
sudo dnf install percona-xtradb-cluster
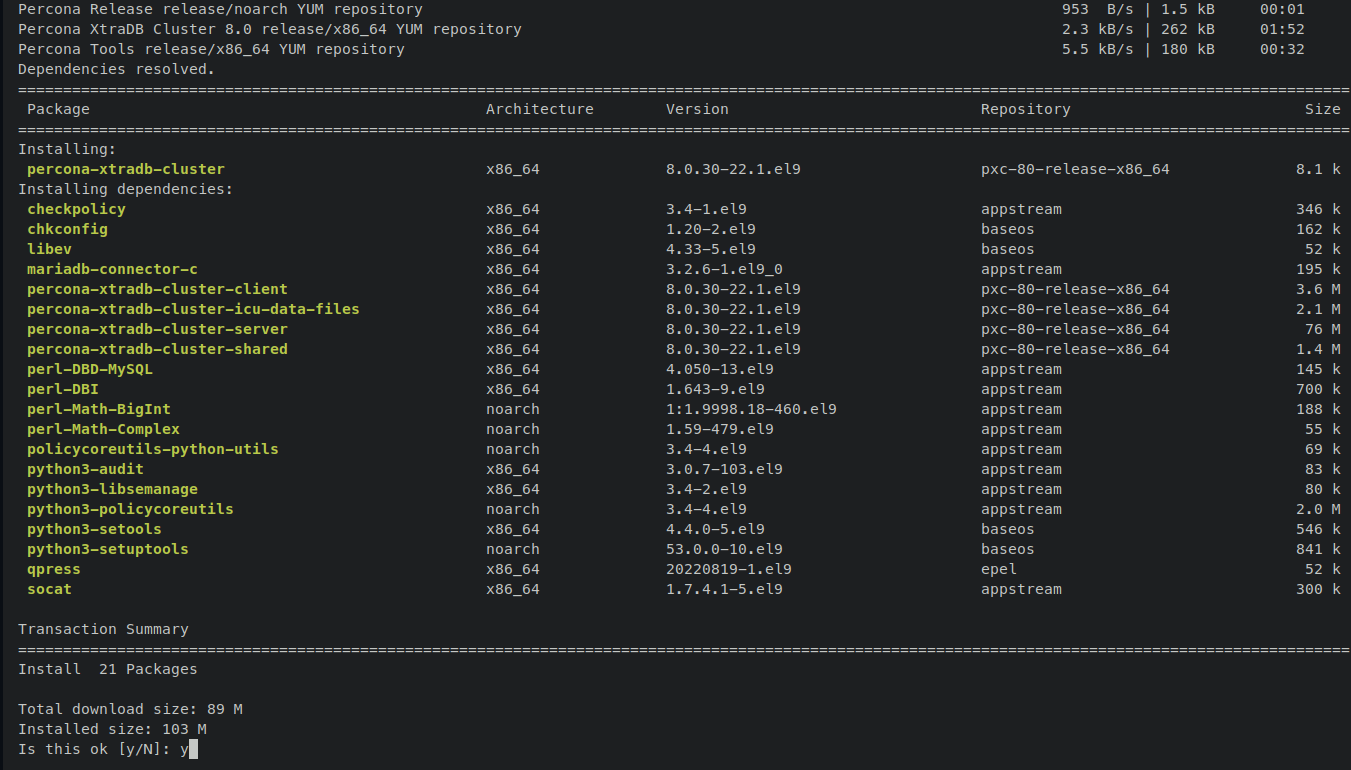
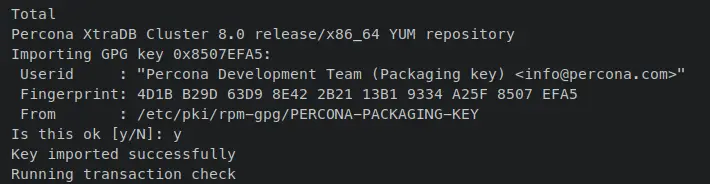
When prompted to accept the Percona GPG key, input y and press ENTER to confirm.
Once Percona XtraDB Cluster is installed, enter the following systemctl command utility to start and enable the MySQL service.
sudo systemctl start mysql
sudo systemctl enable mysql
Now verify the MySQL service status using the below command. An output 'active (running)' confirms that MySQL is running. And the output '..; enabled..' confirms that MySQL will start automatically upon the system startup.
sudo systemctl status mysql

With the Percona XtraDB Cluster running, you will now change the default root password for all of your MySQL servers.
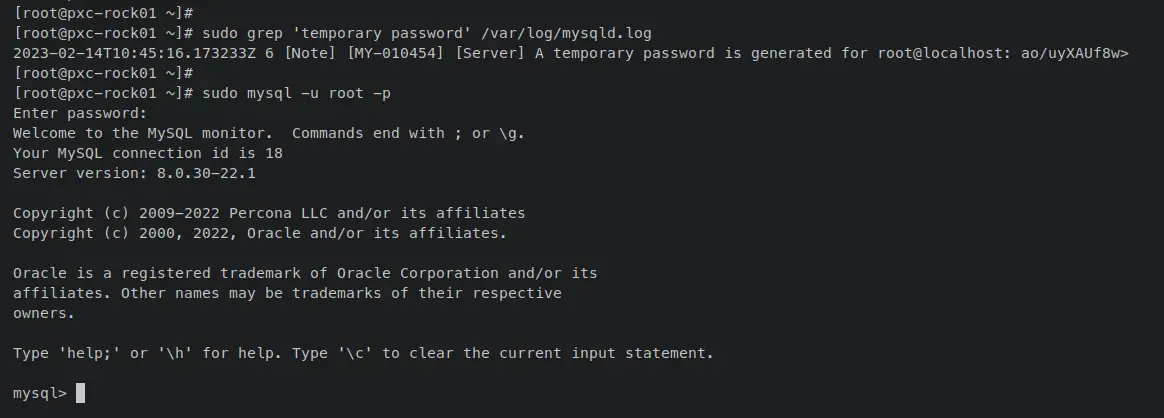
Enter the following command to check the default generated password for your MySQL root user. Copy the default MySQL root password.
sudo grep 'temporary password' /var/log/mysqld.log
Next, log in to the MySQL shell via the 'mysql' command below. When prompted for the password, paste the default MySQL password that you've copied.
sudo mysql -u root -p
Once logged in, you should see the MySQL shell with a prompt like this 'mysql>'.
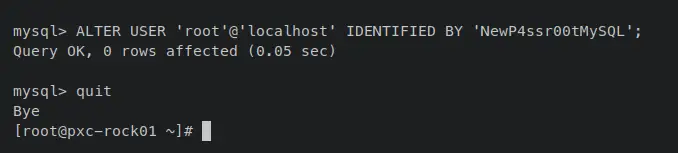
Enter the following MySQL query to change the default password for MySQL root user, the quit and exit.
ALTER USER 'root'@'localhost' IDENTIFIED BY 'NewP4ssr00tMySQL';
quit
Lastly, before configuring the Percona XtraDB Cluster, you must stop the MySQL service. Enter the following 'systemctl' command utility to stop the MySQL service on all servers.
sudo systemctl stop mysql
With the Percona XtraDB Cluster installed, the MySQL root configuration, and the MySQL service stopped, you will now be ready to configure and set up the cluster.
Copy SSL/TLS Certificates
Since the Percona XtraDB Cluster 8.0, the default connection between servers on the cluster must be encrypted. To set up encrypted between the servers, you must have the same SSL/TLS certificates on all servers.
In this section, you will copy the default generated SSl/TLS certificates from the 'pxc-rock01' server to the 'pxc-rock02' and 'pxc-rock03' servers.
On the 'pxc-rock01' server, enter the following command to verify available certificates. With this, you should copy certificate files 'server-cert.pem', 'server-key.pem', and 'ca.pem' to both the pxc-rock02 and pxc-rock03 servers.
ls /var/lib/mysql/*.pem

Move your working directory to '/var/lib/mysql'.
cd /var/lib/mysql
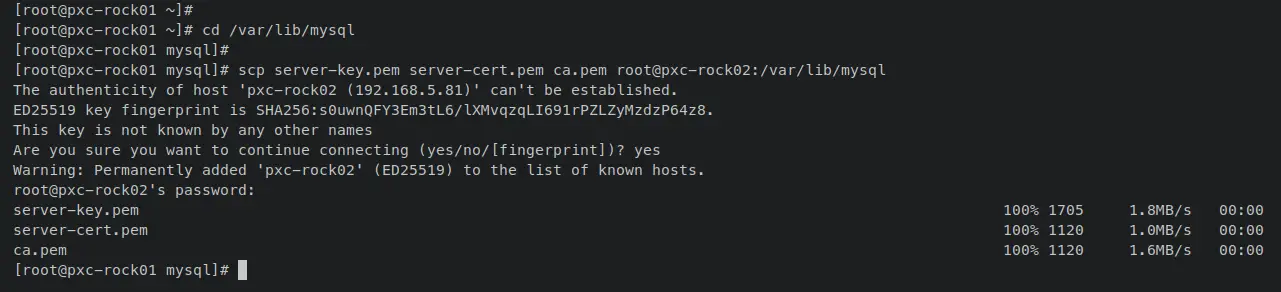
Now enter the following scp command to copy SSL/TLS certificate files to both the pxc-rock02 and pxc-rock03 servers.
scp server-key.pem server-cert.pem ca.pem root@pxc-rock02:/var/lib/mysql
scp server-key.pem server-cert.pem ca.pem root@pxc-rock03:/var/lib/mysql
Below is the output during the copy process of SSL/TLS certificates from the pxc-rock01 to the pxc-rock02 server.
And below is the output during the copy process of SSL/TLS certificates from the pxc-rock01 to the pxc-rock03 server.

Initialize Percona XtraDB Cluster on pxc-rock01
First, you will initialize the Percona XtraDB Cluster from the pxc-rock01 server. To achieve this, you will need to modify the MySQL server config file '/etc/my.cnf', then start the 'mysql@bootstrap' service.
Open the MySQL config file '/etc/my.cnf' using the following nano editor command.
sudo nano /etc/my.cnf
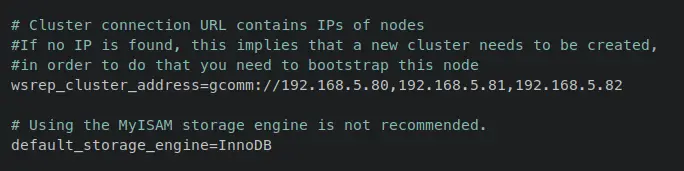
Add the list of your Percona XtraDB Cluster server IP addresses to the 'wsrep_cluster_address' parameter and add the parameter 'default_storage_engine=InnoDB'.
# Cluster connection URL contains the IPs of pxc-rock01, pxc-rock02, and pxc-rock03
wsrep_cluster_address=gcomm://192.168.5.80,192.168.5.81,192.168.5.82

# Using the MyISAM storage engine is not recommended.
default_storage_engine=InnoDB
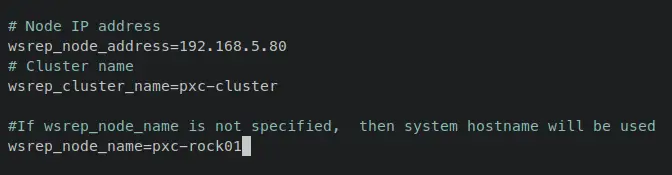
Change the 'wsrep_node_address' with the current server IP address, the 'wsrep_node_name' with the system hostname, and the 'wsrep_cluster_name' with the name of your cluster will be.
# Node 1 address
wsrep_node_address=192.168.5.80
# Node Name
wsrep_node_name=pxc-rock01

# Cluster name
wsrep_cluster_name=pxc-cluster
Lastly, at the bottom of the line, add the following config to enable a secure SSL/TLS connection between Percona XtraDB Cluster servers and the sst connection.
# enable ssl/tls connection
wsrep_provider_options="socket.ssl_key=server-key.pem;socket.ssl_cert=server-cert.pem;socket.ssl_ca=ca.pem"

[sst]
encrypt=4
ssl-key=server-key.pem
ssl-ca=ca.pem
ssl-cert=server-cert.pem

Save and close the file when finished.
Next, enter the following systemctl command utility to start the 'mysql@bootstrap' service and initialize the first Percona XtraDB Cluster server.
systemctl start [email protected]
To verify and ensure that Percona XtraDB Cluster initialization success, you should log in to MySQL shell and check the 'wsrep%' status.
Enter the following 'mysql' command to log in to the MySQL server as the 'root' user. Input your new MySQL root password when prompted.
sudo mysql -u root -p
After logging in, enter the following query to check the detail 'wsrep%' status.
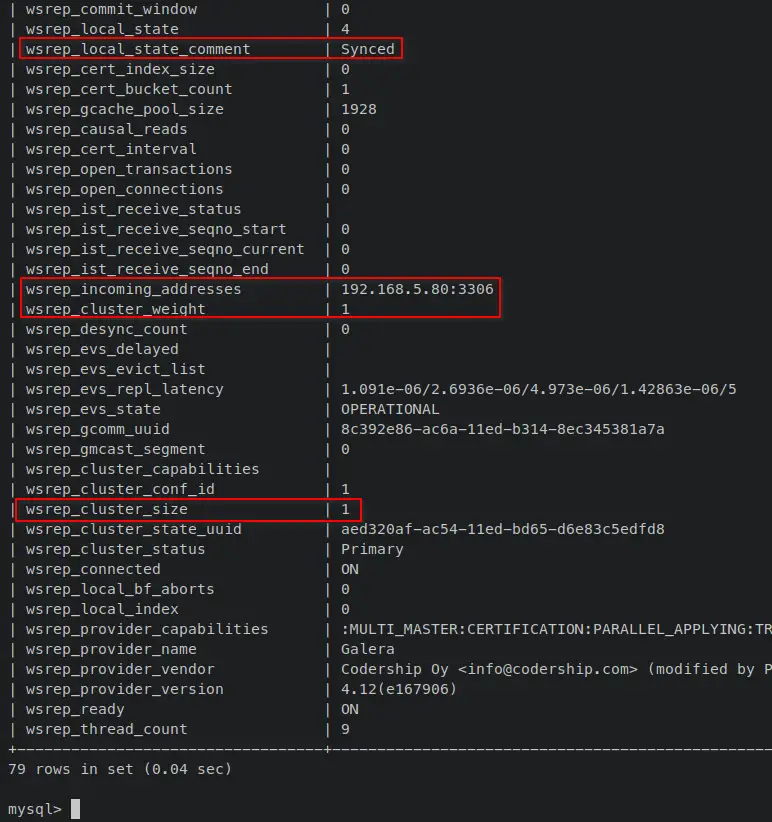
SHOW STATUS LIKE 'wsrep%';
You should receive an output like this - On the 'wsrep_cluster_size' section you will see the value '1', which means the Percona XtraDB Cluster is initialized with 1 server. You will also get server IP addresses on the 'wsrep_incoming_address' section. Lastly, the node is in the Synced state, which means it is fully connected and ready for write-set replication.
With this, the first server of Percona XtraDB Cluster 'pxc-rock01' server is initialized. In the next step, you will add the 'pxc-rock02' and 'pxc-rock03' servers to the cluster.
Adding Server pxc-rock02 to Percona XtraDB Cluster
After the first Percona XtraDb Cluster is initialized, you will now add the pxc-rock02 server to the cluster. The way to add a server to Percona XtraDB Cluster is similar to the initialization process, you need to modify the default MySQL server config file '/etc/my.cnf' and define the list of servers for the cluster, then start the MySQL service normally.
Enter the following nano editor command to open the MySQL config file '/etc/my.cnf'.
sudo nano /etc/my.cnf
Add the list of your Percona XtraDB Cluster server IP addresses to the 'wsrep_cluster_address' parameter and add the parameter 'default_storage_engine=InnoDB'.
# Cluster connection URL contains the IPs of pxc-rock01, pxc-rock02, and pxc-rock03
wsrep_cluster_address=gcomm://192.168.5.80,192.168.5.81,192.168.5.82

# Using the MyISAM storage engine is not recommended.
default_storage_engine=InnoDB

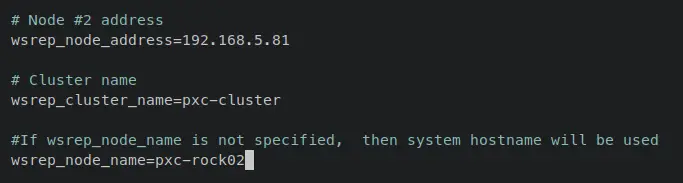
Change the 'wsrep_node_address' with the current server IP address, the 'wsrep_node_name' with the system hostname, and the 'wsrep_cluster_name' with the name of your cluster will be.
# Node #2 address
wsrep_node_address=192.168.5.81
# Node Name
wsrep_node_name=pxc-rock02

# Cluster name
wsrep_cluster_name=pxc-cluster
Lastly, at the bottom of the line, add the following config to enable a secure SSL/TLS connection between Percona XtraDB Cluster servers and the sst connection.
# enable ssl/tls connection
wsrep_provider_options="socket.ssl_key=server-key.pem;socket.ssl_cert=server-cert.pem;socket.ssl_ca=ca.pem"

[sst]
encrypt=4
ssl-key=server-key.pem
ssl-ca=ca.pem
ssl-cert=server-cert.pem

Save and close the file when finished.
Next, enter the following systemctl command utility to start the MySQL service. This will also make the 'pxc-rock02' server join the initialized Percona XtraDB Cluster.
sudo systemctl start mysql
Lastly, to ensure that the pxc-rock02 server is added to Percona XtraDB Cluster, you must log in to the MySQL shell as the root user via the following command. When prompted, input your MySQL root password.
sudo mysql -u root -p
Now enter the following query to check the detail 'wsrep%' status.
SHOW STATUS LIKE 'wsrep%';
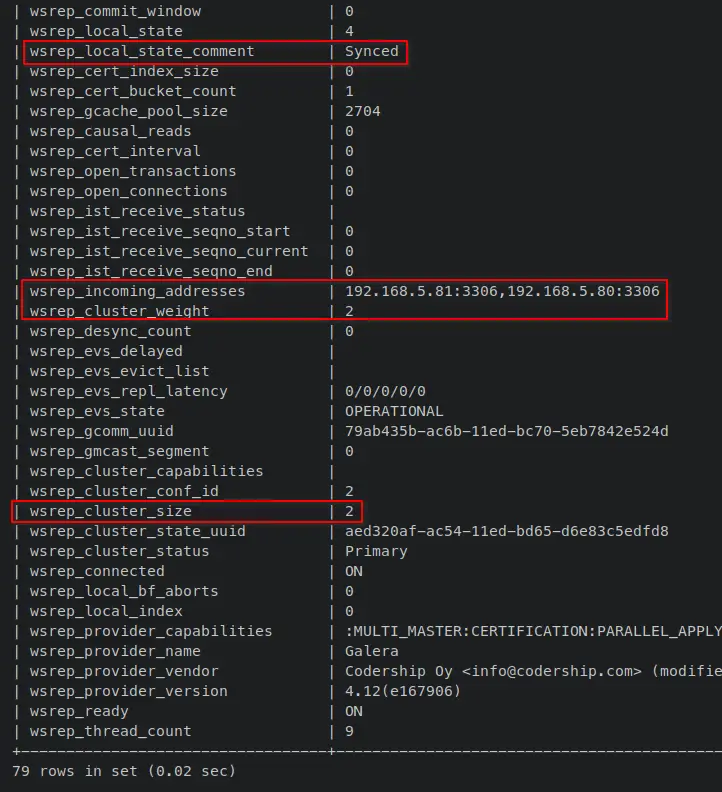
You should receive an output like this - On the 'wsrep_cluster_size' section you will see the value '2', which means there are two servers available on the Percona XtraDB Cluster. You will also get server IP addresses on the 'wsrep_incoming_address' section, which are the pxc-rock01 and pxc-rock02 server IP addresses. Lastly, the node is in the Synced state, which means it is fully connected and ready for write-set replication.
Adding Server pxc-rock03 Server to Percona XtraDB Cluster
In this section, you will now add the third server pxc-rock03 server to the Percona XtraDB Cluster.
Open the config file '/etc/my.cnf' file using the following nano editor command.
sudo nano /etc/my.cnf
Add the list of your Percona XtraDB Cluster server IP addresses to the 'wsrep_cluster_address' parameter and add the parameter 'default_storage_engine=InnoDB'.
# Cluster connection URL contains the IPs of pxc-rock01, pxc-rock02, and pxc-rock03
wsrep_cluster_address=gcomm://192.168.5.80,192.168.5.81,192.168.5.82

# Using the MyISAM storage engine is not recommended.
default_storage_engine=InnoDB

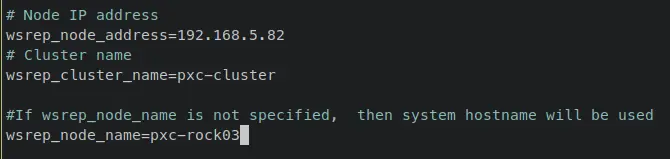
Change the 'wsrep_node_address' with the current server IP address, the 'wsrep_node_name' with the system hostname, and the 'wsrep_cluster_name' with the name of your cluster will be.
# Node #3 address
wsrep_node_address=192.168.5.82
# Node Name
wsrep_node_name=pxc-rock02

# Cluster name
wsrep_cluster_name=pxc-cluster
Lastly, at the bottom of the line, add the following config to enable a secure SSL/TLS connection between Percona XtraDB Cluster servers and the sst connection.
# enable ssl/tls connection
wsrep_provider_options="socket.ssl_key=server-key.pem;socket.ssl_cert=server-cert.pem;socket.ssl_ca=ca.pem"

[sst]
encrypt=4
ssl-key=server-key.pem
ssl-ca=ca.pem
ssl-cert=server-cert.pem

Save and close the file when finished.
Next, enter the following systemctl command utility to start the MySQL service and join the current server pxc-rock03 to the Percona XtraDB Cluster.
sudo systemctl start mysql
Lastly, enter the following mysql command to log in to the MySQL shell and verify the 'wsrep%' status. When prompted, input your MySQL root password.
sudo mysql -u root -p
Now enter the following query to check the detail 'wsrep%' status.
SHOW STATUS LIKE 'wsrep%';
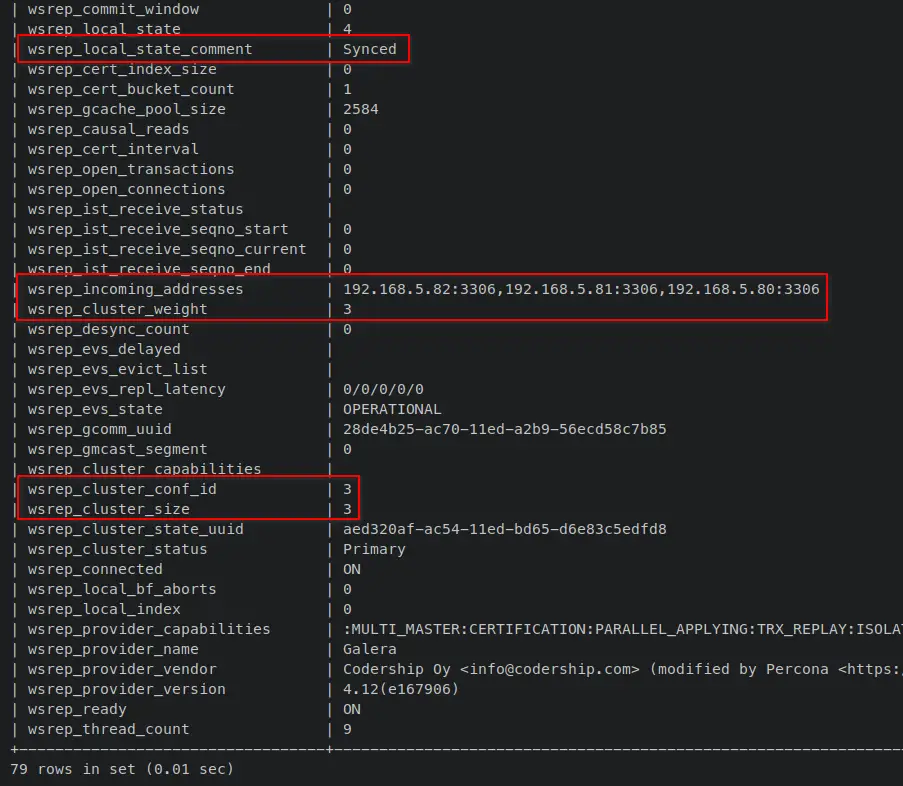
You should receive an output like this - On the 'wsrep_cluster_size' section you will see the value '3', which means there are three servers available on the Percona XtraDB Cluster. You will also get server IP addresses on the 'wsrep_incoming_address' section, which are the pxc-rock01, pxc-rock02, and pxc-rock03 server IP addresses. Lastly, the node is in the Synced state, which means it is fully connected and ready for write-set replication.
At this point, you have now configured Percona XtraDB Cluster with three different Rocky Linux 9 servers. And with this, database replication should be working between the server on Percona XtraDB Cluster. In the next step, you will verify the replication of your database between multiple servers.
Testing Database Replication
In this section, you will verify the database replication on Percona XtraDB CLuster. This will ensure that your installation successful and finished.
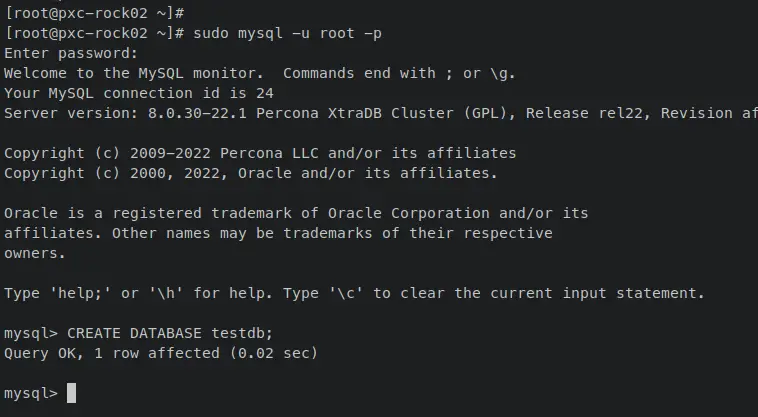
First, log in to the MySQL shell from the pxc-rock02 server and create a new database called 'testdb'.
sudo mysql -u root -p
CREATE DATABASE testdb;
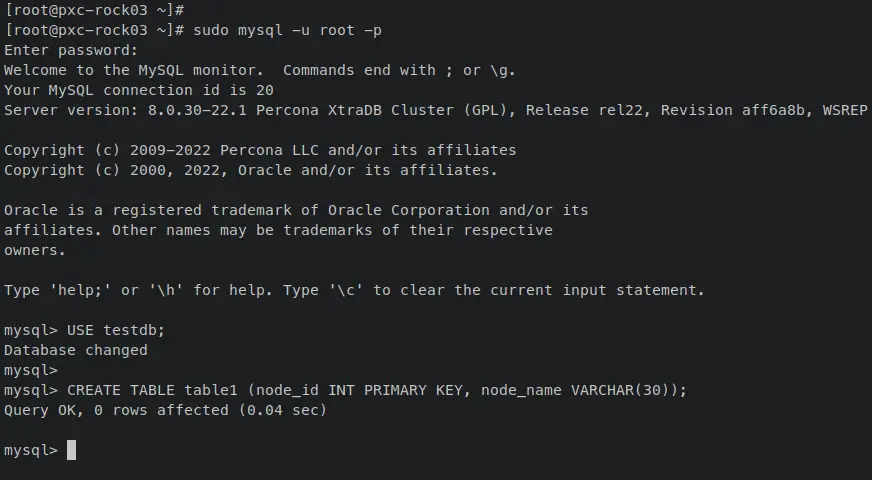
Now move to the pxc-rock03 server, connect to MySQL shell via a root user, then change the default working database to 'testdb'.
sudo mysql -u root -p
USE testdb;
Enter the following query to create a new table called 'table1'.
CREATE TABLE table1 (node_id INT PRIMARY KEY, node_name VARCHAR(30));
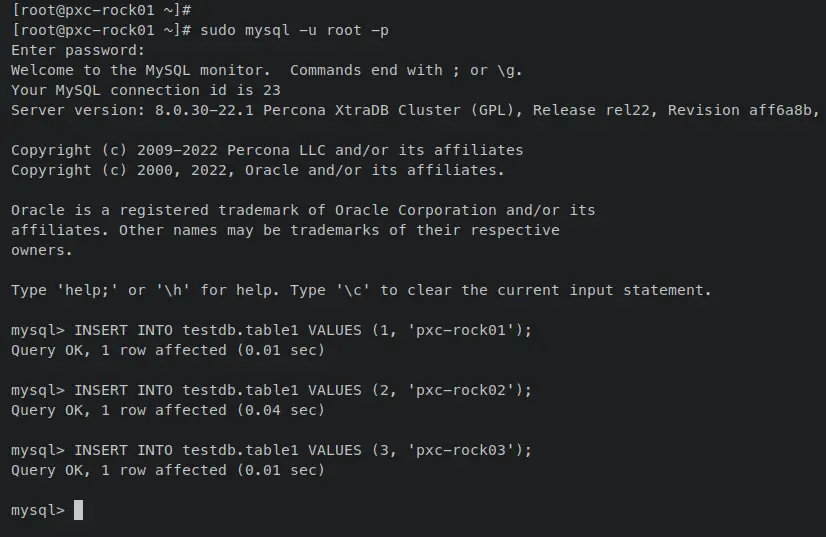
Next, move to the pxc-rock01 server, log in to the MySQL shell, then insert new data to the database 'testdb' via the 'INSERT' query below.
sudo mysql -u root -p
INSERT INTO testdb.table1 VALUES (1, 'pxc-rock01');
INSERT INTO testdb.table1 VALUES (2, 'pxc-rock02');
INSERT INTO testdb.table1 VALUES (3, 'pxc-rock03');
Once the data is added, move back to the pxc-rock02 server and enter the SELECT query below to retrieve all available data on the database 'testdb' and the table 'table1'.
SELECT * FROM testdb.table1;
If replication is successful, you should have your inserted data available on the pxc-rock02 server. Your data will be stored in all servers of the Percona XtraDB Cluster.
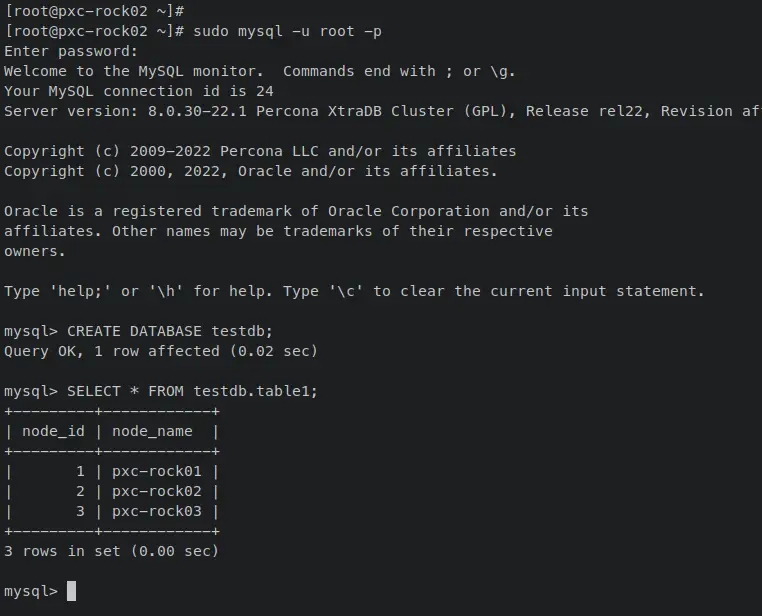
This confirms that installing the Percona XtraDB Cluster on Rocky Linux 9 servers was successful.
Conclusion
You have installed and deployed Percona XtraDB Cluster in this guide on three Rocky Linux 9 servers. You've learned how to install Percona XtraDB Cluster, secure the deployment via firewalld, initialize the cluster, and also adding nodes to the cluster.
In addition to that, you have also secured Percona XtraDB Cluster installation by encrypting traffic between all servers using SSL/TLS certificates and the option 'pxc-encrypt-cluster-traffic', which is enabled by default on Percona XtraDB Cluster 8.0.
With this, you can add more servers to your current Percona XtraDB Cluster by using the steps you've learned on adding pxc-rock02 and pxc-rock03 servers. Or you can also set up load balancing and high availability with third-party applications such as ProxySQL and HAPROXY. To learn more, visit the Percona XtraDB Cluster's official documentation.

