How to Install Apache Solr on AlmaLinux 9
Apache Solr or Solr is an enterprise-grade search platform based on the Apache Lucene library. SOlr stands for Searching On Lucene with Replication and is a free, open-source search platform written in Java. Solr is one of the most popular search platforms in the industry and offers high availability through replication and automatic failover and recovery.
Solr is a highly scalable and reliable search platform for building enterprise applications and offers high performance. It supports distributed indexing and offers fault tolerance. Some major internet companies such as Adobe, Netflix, Instagram, Magento and Bloomberg use Apache Solr as a search engine platform for their products.
In this tutorial you will learn how to install Apache Solr on an AlmaLinux 9 server. You will also set up MaxHeapMemory for Solr, set limits and set up basic authentication for Solr.
Prerequisites
To complete this guide, ensure that you have the following:
- An AlmaLinux 9 server with at least 2/4 GB of memory. This example uses an AlmaLinux with hostname almalinux9 and memory of 8 GB.
- A non-root user with sudo/root administrator privileges.
Installing Java OpenJDK 11
At the time of this writing, the latest version of Apache Solr is v9.x and required the Java JRE (Java Runtime Environment) at least v11 or higher. In this first step, you will install the Java OpenJDK 11 via the AlmaLinux appstream repository.
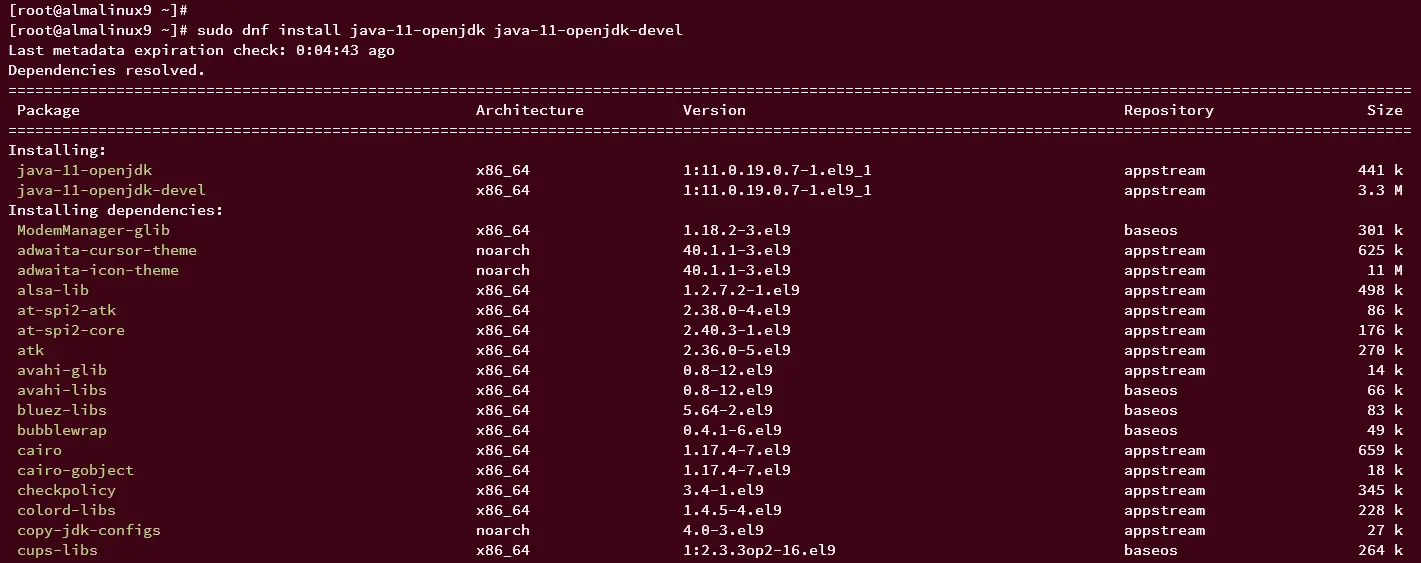
Enter the following dnf command to install Java OpenJDK 11 to your AlmaLinux server. When prompted, input y to confirm and press ENTER.
sudo dnf install java-11-openjdk java-11-openjdk-devel
After Java OpenJDK is installed, run the following command to verify the Java version and ensure the installation succeeds.
java --version
The following output confirms that Java OpenJDK 11 is installed.

Installing Apache Solr
After installing Java OpenJDK 11, you will start the Apache Solr installation. Multiple binary packages of Apache Solr are available for multiple operating systems, including Linux, macOS, and Windows.
In this section, you will install Apache Solr via the official binary package on your AlmaLinux server.
Before downloading Apache Solr, install the following packages to your AlmaLinux server using the command below.
sudo dnf install curl lsof chkconfig -y
Next, download the binary package of Apache Solr 9.2.1 using the following curl command.
curl -qO https://downloads.apache.org/solr/solr/9.2.1/solr-9.2.1.tgz
Run the following command to extract the installer script from the Apache Solr binary package 'solr-9.2.1.tgz'.
tar xzf solr-9.2.1.tgz solr-9.2.1/bin/install_solr_service.sh --strip-components=2
You should see the Apache Solr installer script 'install_solr_service.sh' in your current directory.
Picture
Next, install Apache Solr by executing the installer script 'install_solr_service.sh' like this:
sudo bash ./install_solr_service.sh solr-9.2.1.tgz
When the installation is successful, the output you receive should be similar to this:
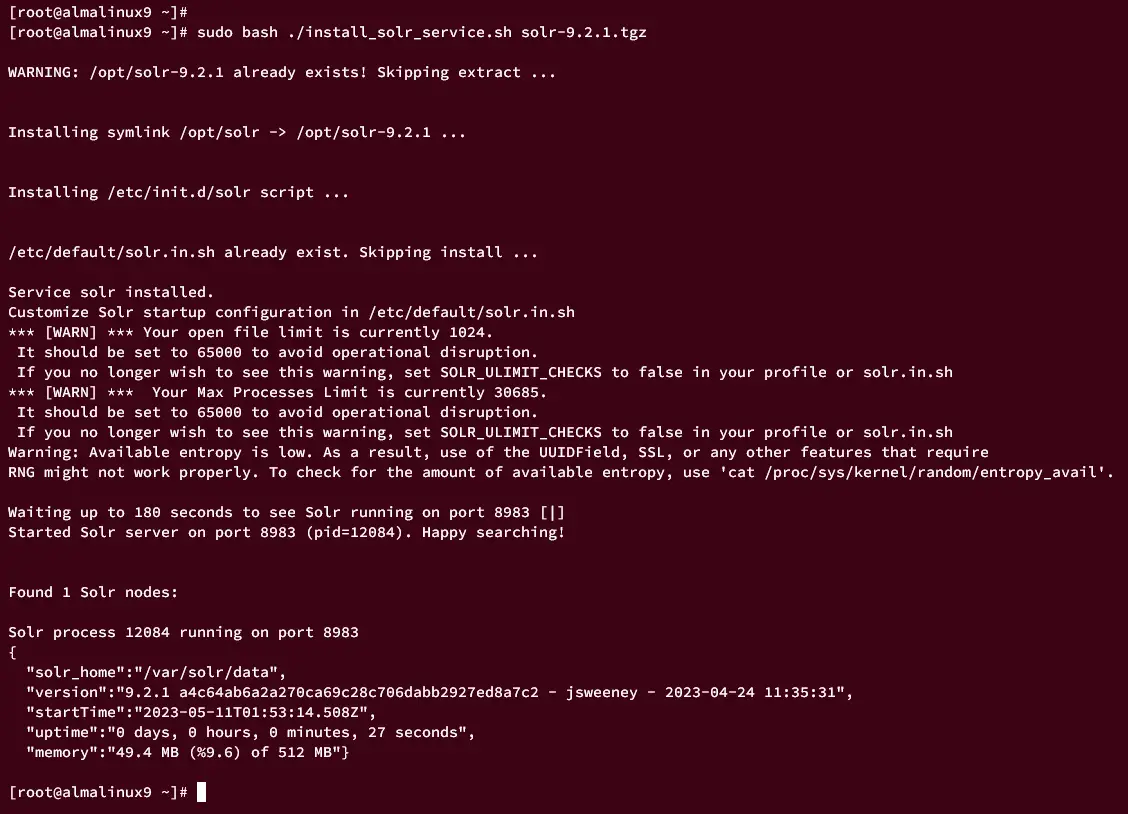
The Apache Solr is running on default port 8983 with the SOLR_HOME directory /var/solr/data. And at this time, it's running on PID (Process ID) 12084.
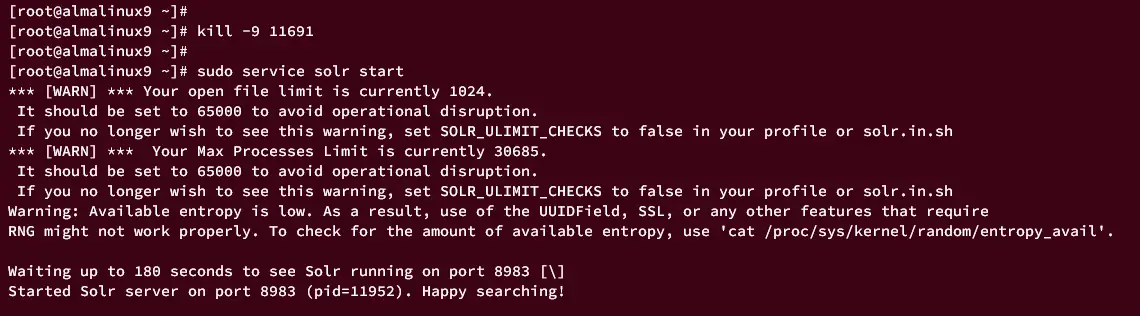
Now, run the following command to stop the current Apache Solr process that running on PID 12084.
kill -9 12084
Then, you can start the Apache Solr service using the command below.
sudo service solr start
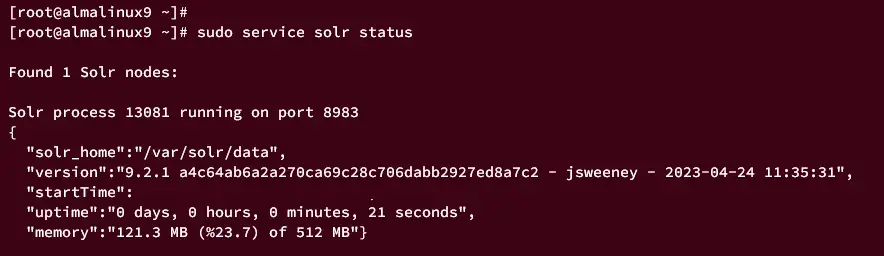
Lastly, verify the Apache Solr service using the following command.
sudo service solr status
If Apache Solr runs, a similar output will be displayed on your terminal.
Optimizing Apache Solr Installation
In this section, you will set up and optimize how Apache Solr should be running. In this example, the Apache Solr will be running with max heap memory of 4 GB and an internal IP address of '192.168.10.15'.
First, increase the shmmax and nr_hugepages values by running the following command.
sudo echo 4294967295 > /proc/sys/kernel/shmmax
sudo echo 1536 > /proc/sys/vm/nr_hugepages
Open the file '/etc/default/solr.in.sh' using the nano editor command.
sudo nano /etc/default/solr.in.sh
Uncomment the parameter SOLAR_HEAP and change the value with the max heap memory that you want to use. Be sure to adjust the value with the total memory on your server.
SOLR_HEAP="4g"
Uncomment the SOLR_JETTY_HOST and SOLR_HOST parameters and change the value with your internal IP address. In this example, the Apache Solr will be running on '192.168.10.15'.
SOLR_HOST="192.168.10.15"
SOLR_JETTY_HOST="192.168.10.15"
Save the changes and close the editor when you're finished.
Next, run the following command to restart the Apache Solr service and apply the changes.
sudo service solr restart
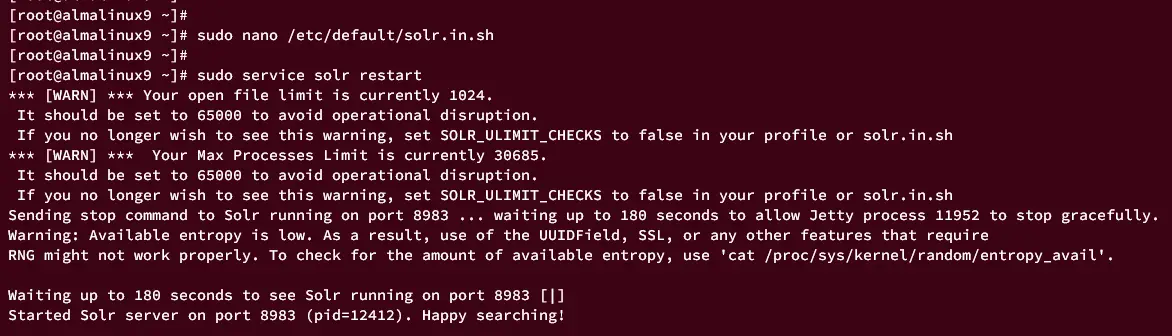
Lastly, run the following command to verify the Apache Solr status. If the Apache Solr configuration is successful, you should see the max heap memory is changed. In this example, it changed to 4 GB.
sudo service solr status

Setup Ulimits and Firewalld
Another important system configuration to run Apache Solr is configuring max processes and max open files, which required at least 65.000. To achieve this, you need to modify the file '/etc/security/limits.conf'. And after that, you also need to set up firewalld and open port 8983 for Apache Solr.
Open the file '/etc/security/limits.conf' using the nano editor command below.
sudo nano /etc/security/limits.conf
Add the following configuration to the end of the line.
solr   soft   nofile   65000
solr   hard   nofile   65000
solr   soft   nproc    65000
solr   hard   nproc    65000
Save the file and close the editor.
Now, run the following command to check the max processes and max open files on your system. If successful, you should see a value of 65.000 on both settings.
sudo -H -u solr bash -c "ulimit -aH"
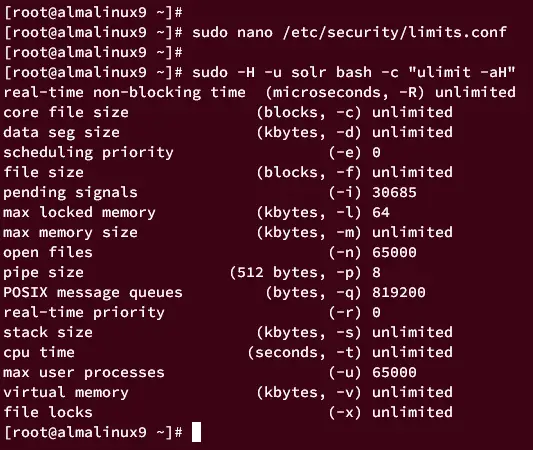
Now run the following command to ensure the ulimit configuration is success.
sudo service solr restart
The ulimit warning messages disappear, which confirms that the configueration is successful.

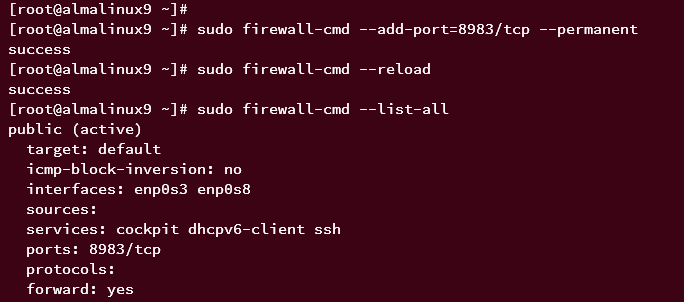
Next, open port 8983 on the firewalld using the command below.
sudo firewall-cmd --add-port=8983/tcp --permanent
Then, reload firewalld to apply the changes and verify the list of firewalld rules.
sudo firewall-cmd --reload
sudo firewall-cmd --list-all
If the firewalld configuration is successful, you should see port 8983 on the firewalld list rules.
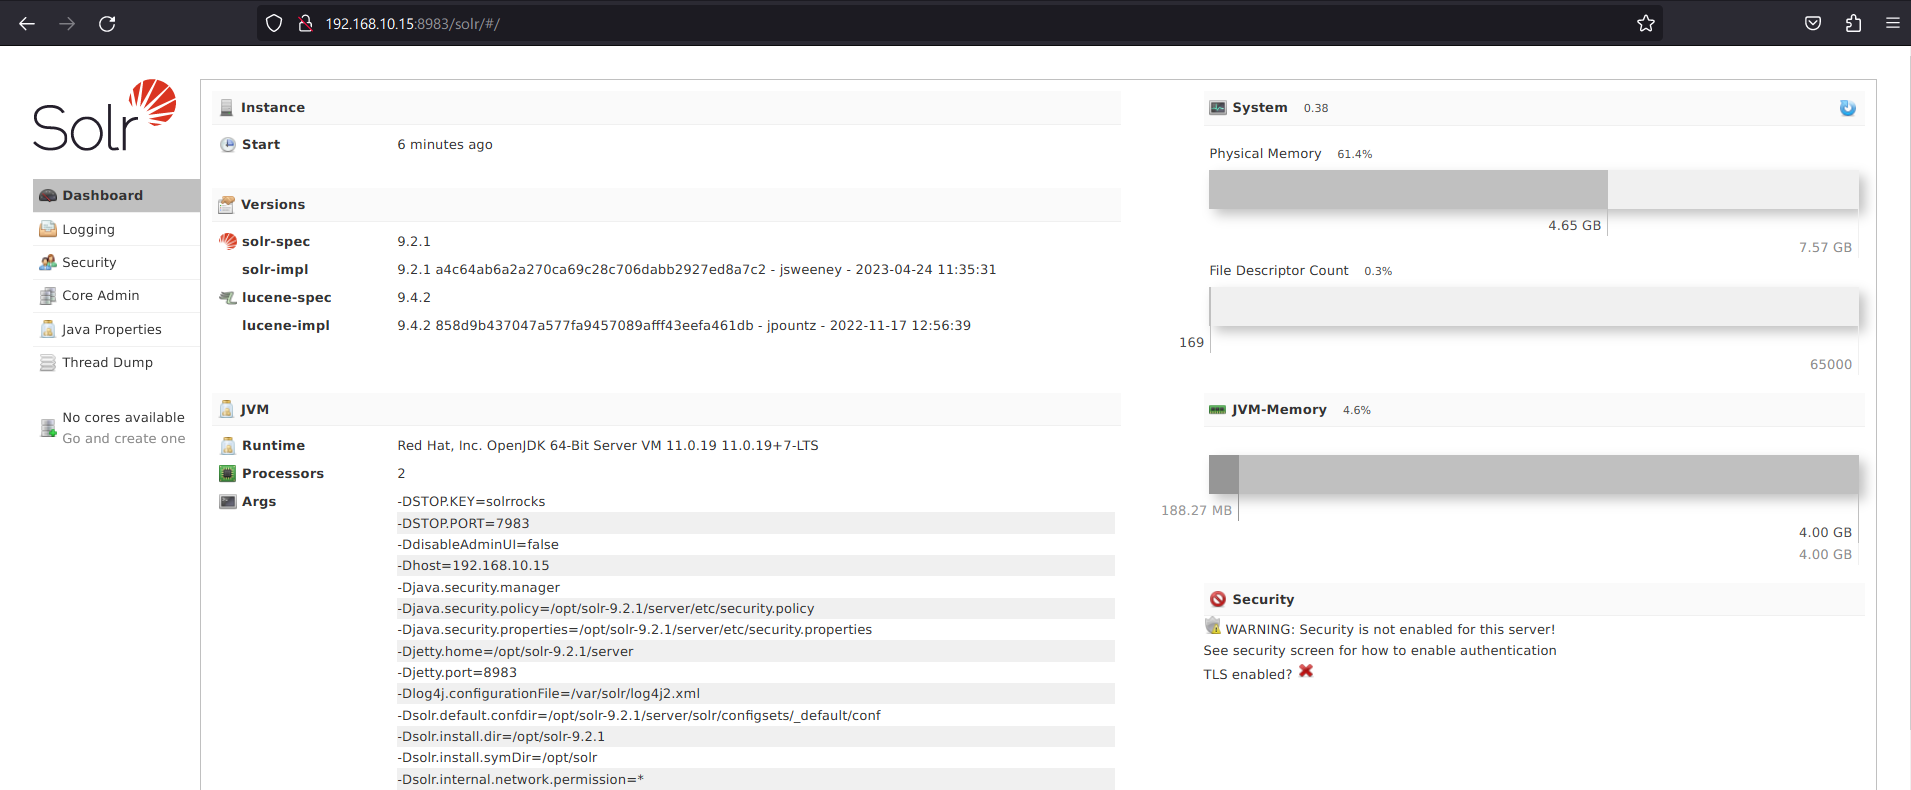
Lastly, launch your web browser and navigate to your server IP address followed by port 8983 (i.e: http://192.168.10.15:8983/). You should get the Apache Solr dashboard like the following:
Securing Apache Solr with Basic Authentication
By default, the Apache Solr is installed without authentication. To secure it, you can use multiple methods such as Basic Authentication, Kerberos Authentication, JWT Authentication, and Rulebased Authentication. In this example, you will secure the Apache Solr via basic authentication.
Create a new file security.json under the Apache Solr data directory /var/solr/data/ using the nano editor below.
sudo nano /var/solr/data/security.json
Insert the following configuration to create a new user solr with password SolrRocks.
{
  "authentication":{
    "blockUnknown": true,
    "class":"solr.BasicAuthPlugin",
    "credentials":{"solr":"IV0EHq1OnNrj6gvRCwvFwTrZ1+z1oBbnQdiVC3otuq0= Ndd7LKvVBAaZIF0QAVi1ekCfAJXr1GGfLtRUXhgrF8c="},
    "realm":"My Solr users",
    "forwardCredentials": false
  },
  "authorization":{
    "class":"solr.RuleBasedAuthorizationPlugin",
    "permissions":[{"name":"all", "role":"admin"}],
    "user-role":{"solr":"admin"}
  }
}
Save and exit the editor when you're finished.
Next, run the following command to restart Apache Solr and apply the changes.
sudo service solr restart
At this point, the Apache Solr is now up and running with basic authentication enabled.
Now back to the web browser and refresh the Apache Solr administration dashboard. Or you can just visit i.e: http://192.168.10.15:8983/. If successful, you should get the Apache Solr login page like this:
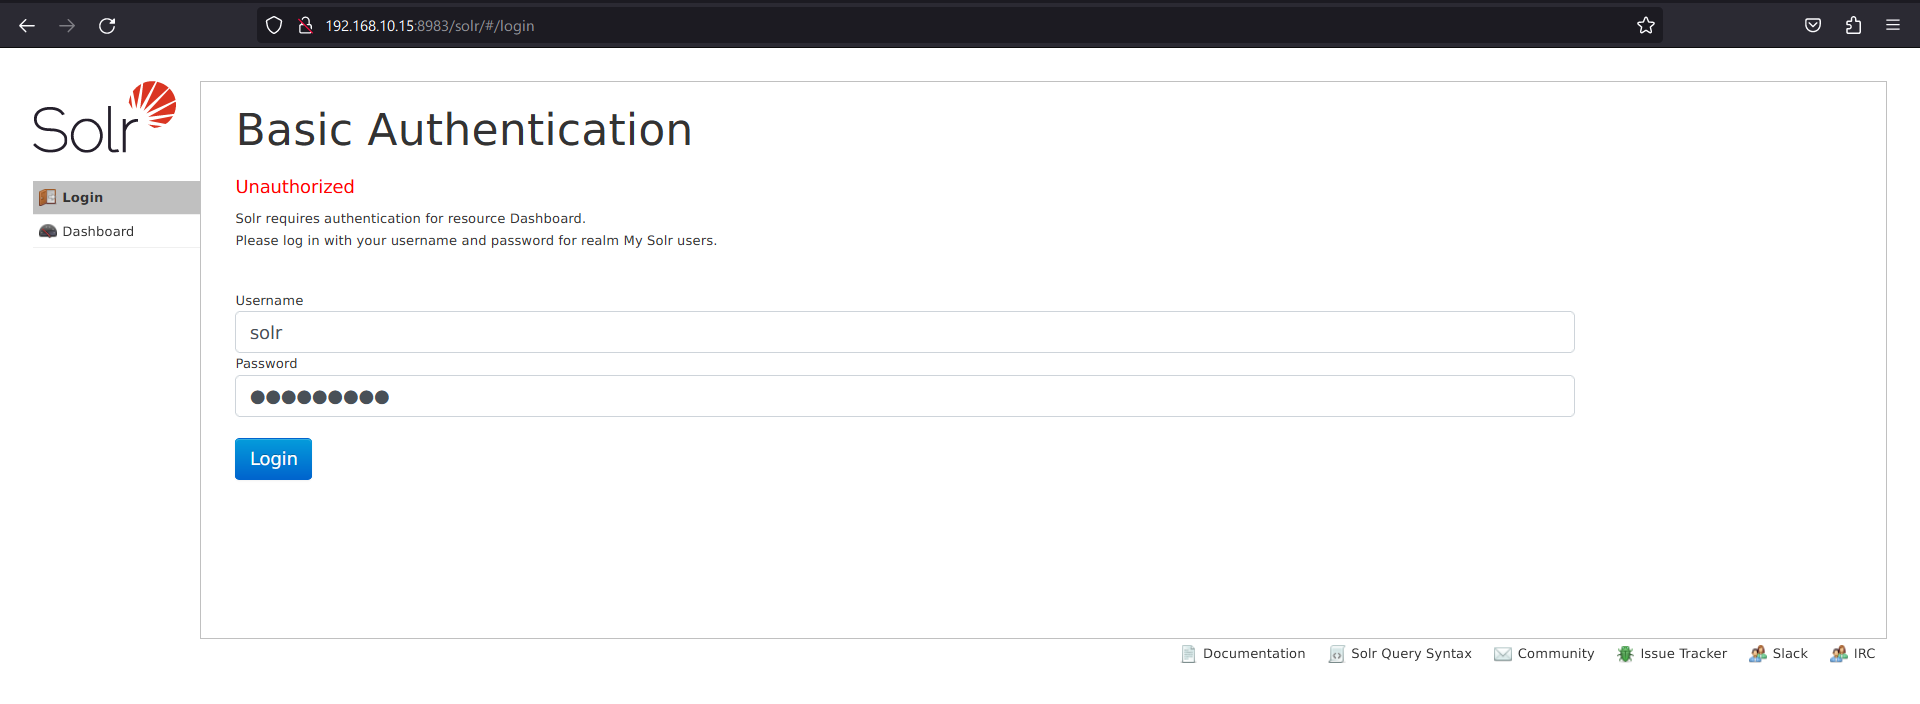
Input Apache Solr user solr and password SolrRocks, then click Login. If authentication is successful, you should get the Apache Solr dashboard.
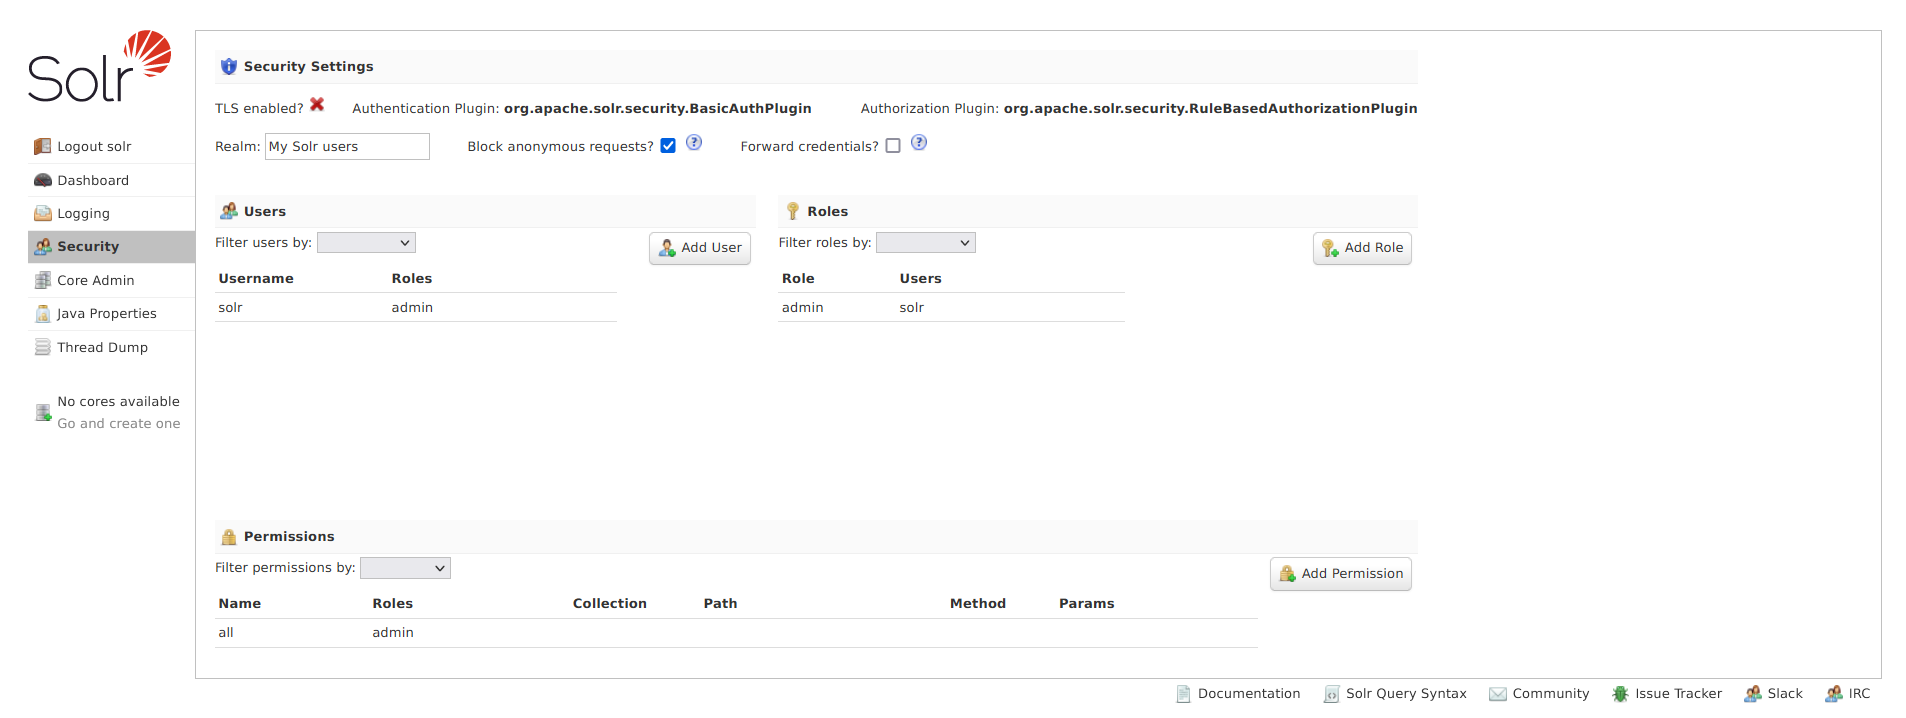
In addition to that, click on the Security menu and you will notice that Apache Solr is running with the basic_auth plugin enabled.
Create First Index
With everything configured, you're ready to create a first Solr index.
First, open file /etc/default/solr.in.sh using the following nano editor command.
sudo nano /etc/default/solr.in.sh
Uncomment the parameter SOLR_AUTH_TYPE and SOLR_AUTHENTICATION_OPTS.
SOLR_AUTH_TYPE="basic"
SOLR_AUTHENTICATION_OPTS="-Dbasicauth=solr:SolrRocks"
Save and exit the file when you're finished.
Now run the following command to restart Apache Solr and apply the changes.
sudo service restart solr
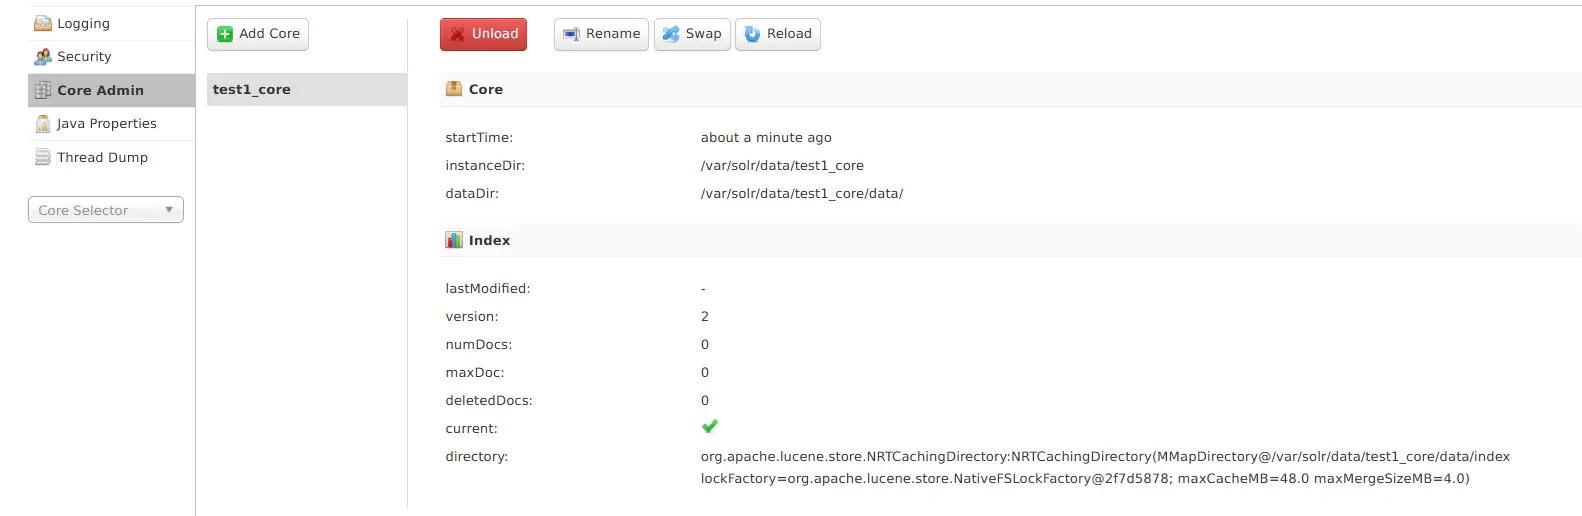
Next, create a new Solr index named test_core using the following command.
su - solr -c "/opt/solr/bin/solr create -c test1_core -n Test1Core"
Once created, you should get an output "Created new core test1_core".

Back to the Apache web administration dashboard, click the menu Core Admin and you should get the test1_core available.
Conclusion
Congratulations! You've now successfully installed Apache Solr on AlmaLinux 9 server. You have also configured ulimit to optimize Apache Solr and firewalld to secure Apache Solr. Lastly, you have also enabled basic authentication on Apache Solr, accessed the Apache Solr web administration dashboard, and created the first Solr Index.

