How to Install a Load Balancing MySQL Server with ProxySQL on Debian 11
ProxySQL is a high-performance MySQL proxy with a small footprint that can be installed in multiple environments such as VM, K8s, bare-metal, and Docker containers. ProxySQL is an open-source solution that provides high availability for your MySQL Cluster with support of connection multiplexing, provides query Rules to route writes to primaries, and distributes reads across replicas.
ProxySQL supports both AMD64 (x86_64) and ARM64 compliant. It provides an application layer proxy for your application and also provides advanced queries with failover detection.
In this guide, you will install and set up load balancing of MySQL Cluster via ProxySQL on a Debian 11 server. You will install ProxySQL v2 with percona XtraDB Client, then add the Percona XtraDB Cluster to the ProxySQL, set up ProxySQL monitoring user, then add the database and user that will be used for your applications.
Prerequisites
To start with this guide, you must have the following requirements:
- A Linux server running Debian 11 system - This example uses a Debian server with hostname 'proxysql-deb'.
- A non-root user with sudo/root administrator privileges.
- Fully configured MySQL Cluster or Percona XtraDB Cluster.
That's it. When all requirements are ready, you can now start the ProxySQL installation.
Setup Repositories
The first step you must do for this guide is to add both ProxySQL and Percona XtraDB repositories to your server. The Percona XtraDB repository will be used for installing the 'percona-xtradb-cluster-client' package, which ProxySQL requires.
To start, install some basic dependencies by entering the following apt command. Input y when prompted and press ENTER to proceed.
sudo apt install wget gnupg2 lsb-release curl apt-transport-https ca-certificates

Next, download the repository file for Percona XtraDB and install it via the 'dpkg' command below.
wget -q https://repo.percona.com/apt/percona-release_latest.generic_all.deb
sudo dpkg -i percona-release_latest.generic_all.deb
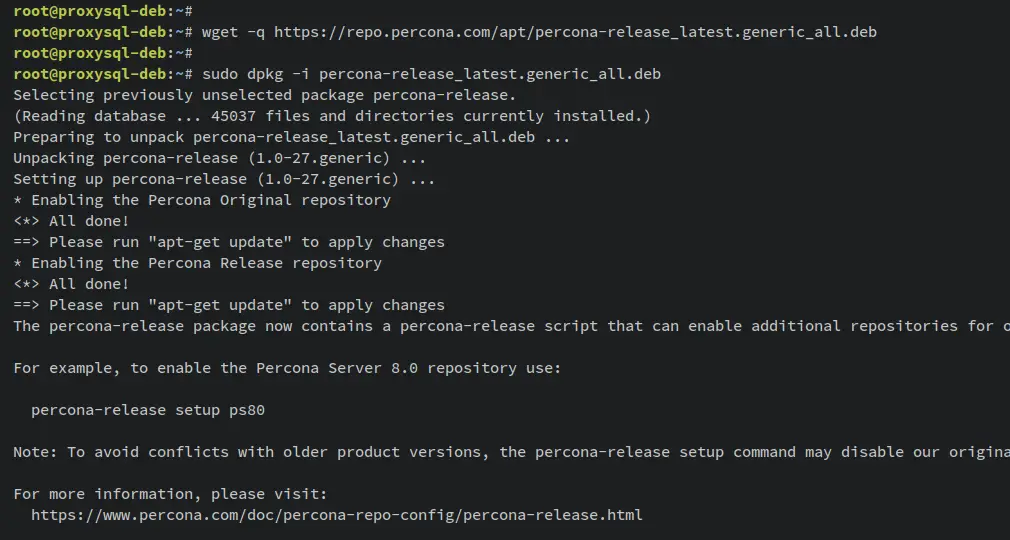
Now update and refresh your Debian package index using the following apt command below. You should see the new Percona XdtraDB repository has been added.
sudo apt update
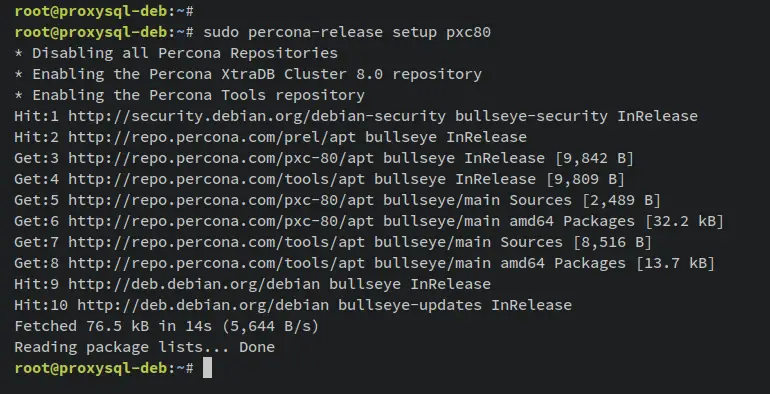
Then, enter the 'percona-release' command to enable the Percona XtraDB Cluster 8.0 repository.
sudo percona-release setup pxc80
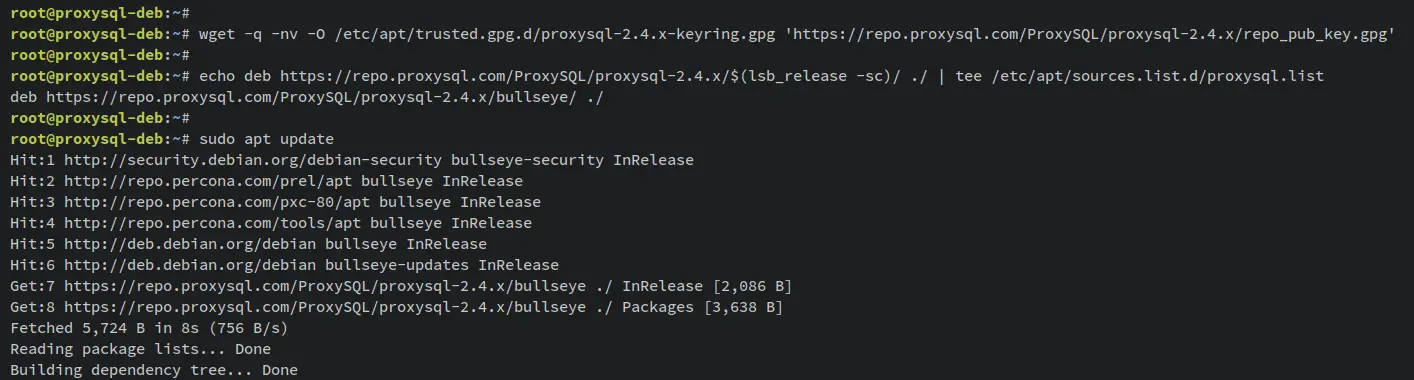
With the Percona XtraDB repository added, now run the following command to add the GPG key and repository for the ProxySQL.
wget -q -nv -O /etc/apt/trusted.gpg.d/proxysql-2.4.x-keyring.gpg 'https://repo.proxysql.com/ProxySQL/proxysql-2.4.x/repo_pub_key.gpg'
echo deb https://repo.proxysql.com/ProxySQL/proxysql-2.4.x/$(lsb_release -sc)/ ./ | tee /etc/apt/sources.list.d/proxysql.list
Update and refresh again your Debian package index to apple the new repository.
sudo apt update
With both Percona XtraDB and ProxySQL repositories added, you can install the ProxySQL and Percona XtraDB client packages.
Installing ProxySQL and Percona XtraDB Cluster Client
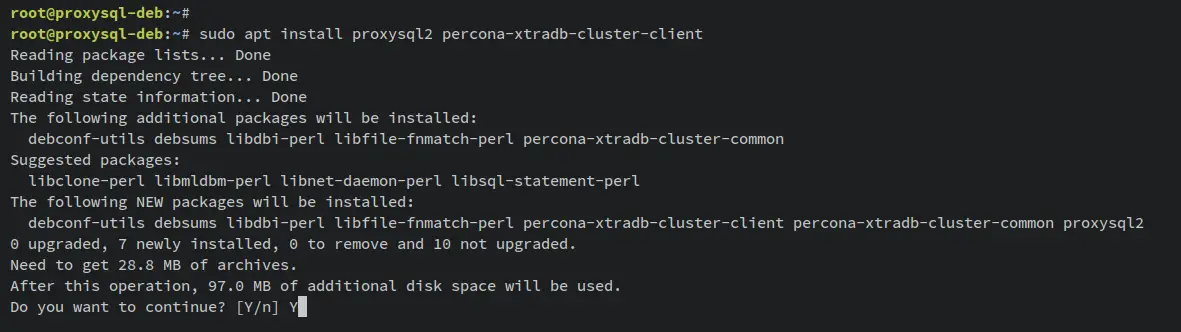
In this section, you will install the ProxySQL v2 package with the Percona XtraDB client package. Enter the following apt command to install both ProxySQL and Percona XtraDB client packages.
sudo apt install proxysql2 percona-xtradb-cluster-client
When prompted, Input y to confirm and press ENTER to proceed.
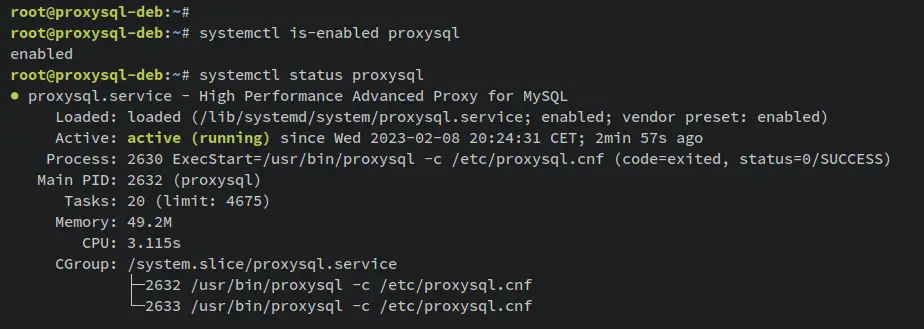
Once ProxySQL is installed, it will automatically run and start automatically at system startup. Enter the following systemctl command utility to verify the ProxySQL service status.
sudo systemctl is-enabled proxysql
sudo systemctl start proxysql
An output 'enabled' confirms that the ProxySQL will start automatically upon the system bootup. And the output 'active (running)' confirms that the ProxySQL is running.
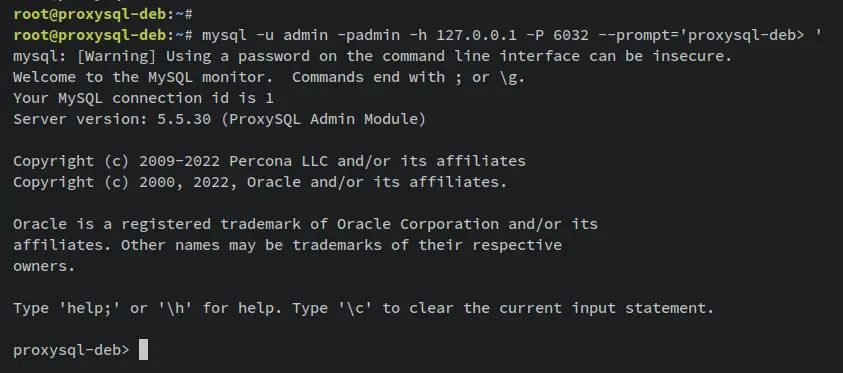
Next, enter the following mysql command to log in to the ProxySQL server with the default user and password 'admin'.
mysql -u admin -padmin -h 127.0.0.1 -P 6032 --prompt='proxysql-deb> '
Once successful, you should get the ProxySQL shell as the following. You have connected to the ProxySQL admin module via the Percona XtraDB client.
Now enter the following query to get the list of databases on the ProxySQL server. You should see multiple databases available on the ProxySQL server.
SHOW DATABASES;

With the ProxySQL server and Percona XtraDB Cluster client installed, you're ready to add MySQL or Percona XtraDB Cluster to the ProxySQL server and set up load balancing.
Adding MySQL Cluster/Percona XtraDB Cluster to ProxySQL
The first step you must do after installing the ProxySQL server is to add your MySQL or percona XtraDB Cluster to the ProxySQL server. And this can be achieved via ProxySQL shell. This example uses Percona XtraDB Cluster with the following details:
Hostname    IP Address      Port
---------------------------------
pxc01       192.168.5.15    3306
pxc02       192.168.5.16    3306
pxc03       192.168.5.17    3306
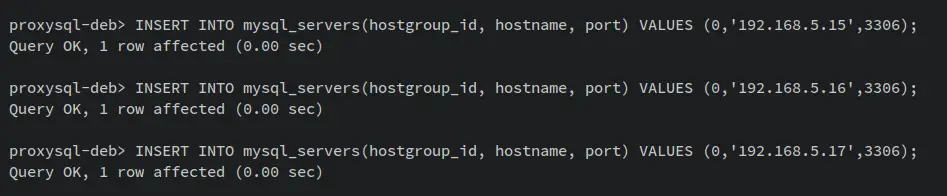
Before you start, ensure that you have logged in to the ProxySQL shell. Then, enter the following queries to add your MySQL servers to the ProxySQL. Be sure to change the details of IP addresses and ports with your MySQL cluster details.
INSERT INTO mysql_servers(hostgroup_id, hostname, port) VALUES (0,'192.168.5.15',3306);
INSERT INTO mysql_servers(hostgroup_id, hostname, port) VALUES (0,'192.168.5.16',3306);
INSERT INTO mysql_servers(hostgroup_id, hostname, port) VALUES (0,'192.168.5.17',3306);
An output 'Query OK, 1 row affected' confirms that the MySQL server added to the ProxySQL server.
Enter the following query to verify the list of MySQL servers that are available on ProxySQL. You should see three MySQL servers added to the ProxySQL server.
SELECT * FROM mysql_servers;

With the MySQL or Percona XtraDB Cluster added to ProxySQL, you will next need to set up the monitoring of the Percona XtraDB Cluster on ProxySQL.
Setting ProxySQL Monitoring User
To ensure that MySQL or Percona XtraDB Cluster is healthy, ProxySQL will monitor all available MySQL servers' backend continuously. To achieve this, you must create a new user on your percona XtraDB Cluster, then define the monitoring user on the ProxySQL server.
Log in to your Percona XtraDB Cluster server, access the MySQL shell via the 'mysql' command, then execute the following MySQL queries to create a new user 'monitor' with the password 'monitor'.
CREATE USER 'monitor'@'%' IDENTIFIED WITH mysql_native_password by 'monitor';
GRANT USAGE ON *.* TO 'monitor'@'%';
FLUSH PRIVILEGES;
SELECT USER,host FROM mysql.user;
SHOW GRANTS FOR 'monitor'@'%';

Next, move to the ProxySQL server and execute the following query to define the user that will be used for monitoring Percona XtraDB Cluster. This will change the default variable 'mysql-monitor_username' with the user 'monitor' and the 'mysql-monitor_password' variable for the password 'monitor'.
UPDATE global_variables SET variable_value='monitor' WHERE variable_name='mysql-monitor_username';
UPDATE global_variables SET variable_value='monitor' WHERE variable_name='mysql-monitor_password';
Enter the following query to update some additional parameters for monitoring the Percona XtraDB Cluster on the ProxySQL server.
UPDATE global_variables SET variable_value='2000' WHERE variable_name IN ('mysql-monitor_connect_interval','mysql-monitor_ping_interval','mysql-monitor_read_only_interval');
Save the changes that you've made on 'global_variables' within the ProxySQL server by executing the following queries.
LOAD MYSQL VARIABLES TO RUNTIME;
SAVE MYSQL VARIABLES TO DISK;
You should receive an output like this.

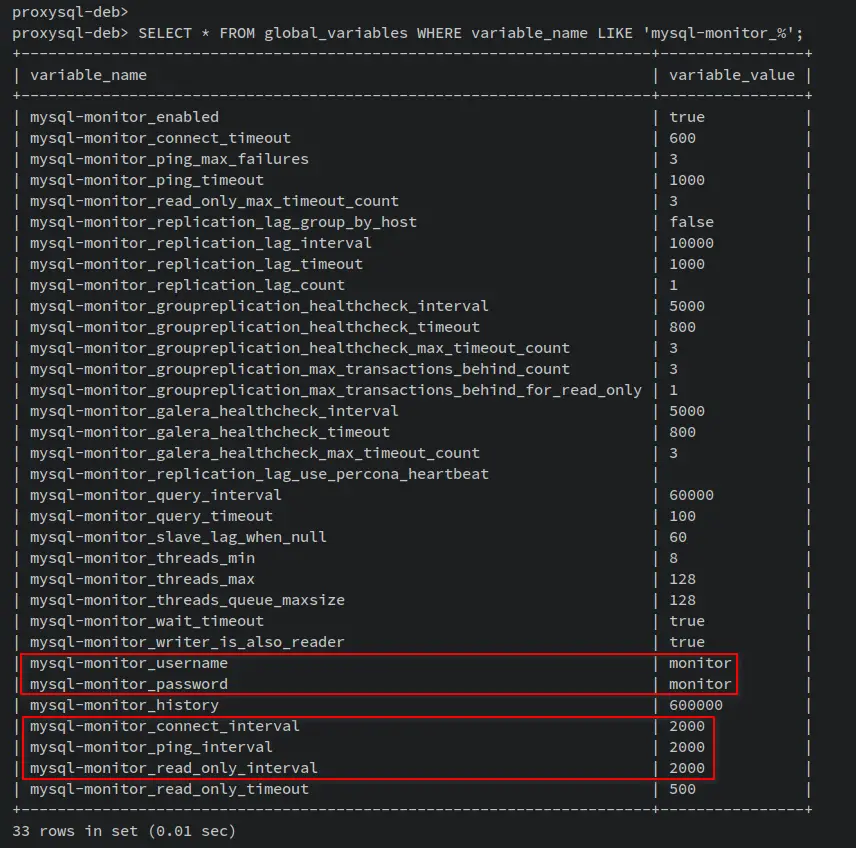
Now run the following query to verify the list of 'global_variables' for 'mysql-monitor_' on the ProxySQL server.
SELECT * FROM global_variables WHERE variable_name LIKE 'mysql-monitor_%';
You should get an output like the following screenshot - The variable 'mysql-monitor_username' must have the value as the user 'monitor' and the variable 'mysql-monitor_password' for the password is 'monitor'. Also, you can see the value of the variables 'mysql-monitor_connect_interval','mysql-monitor_ping_interval','mysql-monitor_read_only_interval' is changed to '2000'.
Lastly, enter the following queries to verify the monitoring status of the Percona XtraDB Cluster on the ProxySQL server. This will show you logs of the last log status and last ping from the ProxySQL server to all available Percona XtraDB Cluster servers.
SELECT * FROM monitor.mysql_server_connect_log ORDER BY time_start_us DESC LIMIT 6;
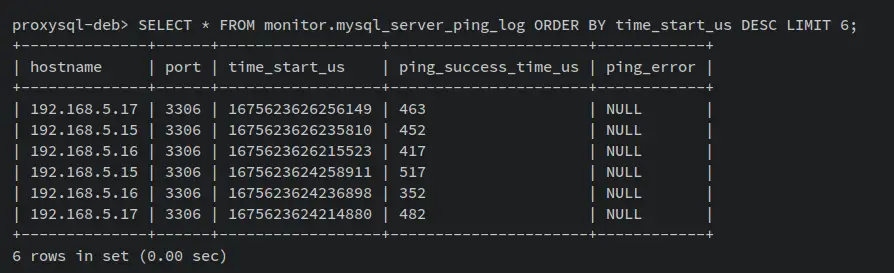
SELECT * FROM monitor.mysql_server_ping_log ORDER BY time_start_us DESC LIMIT 6;
When successful, you should receive an output like this.
The last connect logs of the ProxySQL server to Percona XtraDB Cluster.

The last ping logs of ProxySQL server to Percona XtraDB Cluster.
With the MySQL or Percona XtraDB Cluster monitored by the ProxySQL server, you're now ready to go to set up a new user that your applications will use.
Setting up Database User for Applications
With the ProxySQL server installed and configured, and the MySQL or Percona XtraDB Cluster added as the database backend, You'll now set up a new user that your applications will use. So, instead of connecting to the MySQL server directly, your applications should connect to the ProxySQL server that runs by default on port '6033'.
To set up a new user for your applications, you must have the following steps:
- Create a new user on the MySQL cluster or Percona XtraDB Cluster and set up privileges.
- Add your Percona XtraDB Cluster user to the ProxySQL server - insert to table 'mysql_users'.
To start, back to your Percona XtraDB Cluster server and log in to the MySQL shell via the root user. Then, create a new MySQL user and grant the user privileges to access all databases by entering the following queries. In this example, you will create a new user 'sbuser' with the password 'sbpass'. Also, be sure to change the IP address '192.168.5.85' with the ProxySQL serve IP address.
CREATE USER 'sbuser'@'192.168.5.85' IDENTIFIED WITH mysql_native_password by 'sbpass';
GRANT ALL PRIVILEGES ON *.* TO 'sbuser'@'192.168.5.85';
FLUSH PRIVILEGES;

Next, back to the ProxySQL server and run the following query to add your new MySQL user to the ProxySQL server. Your MySQL users should be added to the 'mysql_users' table on the ProxySQL server. Also, at the time of this writing, the ProxySQL server not yet supports encrypted password.
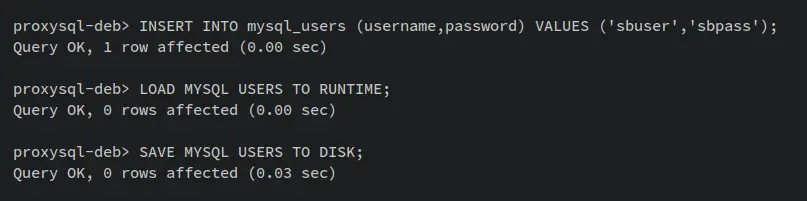
INSERT INTO mysql_users (username,password) VALUES ('sbuser','sbpass');
Now enter the following queries to confirm and save the changes on your ProxySQL server. With this, your new user is ready and you can use this MySQL user for your applications.
LOAD MYSQL USERS TO RUNTIME;
SAVE MYSQL USERS TO DISK;
With this, your application should now connect to the ProxySQL server with user 'sbuser' and password 'sbpass' with the port 6033.
Verify Database and User
In this section, you will verify the ProxySQL installation by connecting to the ProxySQL server using the user and password you created.
Enter the following 'mysql' command to log in to the ProxySQL server with the new user 'sbuser' and password 'sbpass'. When successful, you should see the ProxySQL server shell.
mysql -u sbuser -psbpass -h 127.0.0.1 -P 6033 --prompt='proxysql-deb> '

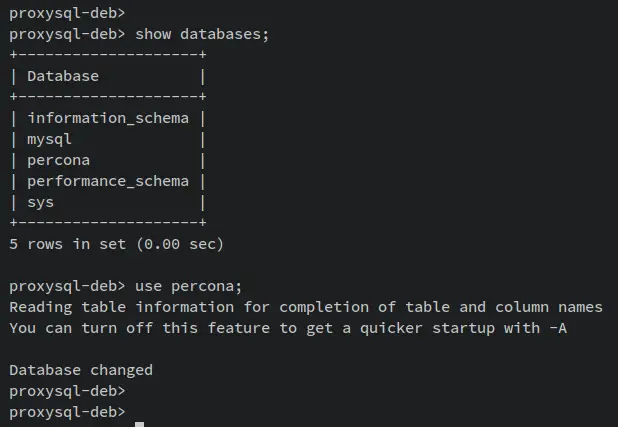
Enter the following query to check the list of databases on the Percona XtraDB Cluster. In this example, there is one database 'percona' on the Percona XtraDB Cluster.
show databases;
Switch to the database 'percona' via the 'USE' query below.
use percona
Next, enter the following queries to check the list tables on the database 'percona'. Then, retrieve available data on the current database that you're working in.
show tables;
select * from example;
You should receive an output like this - Databases that are stored at the Percona XtraDB Cluster are accessible from the ProxySQL server. This means that your installation of ProxySQL as a load balancer for the Percona XtraDB Cluster was successful.

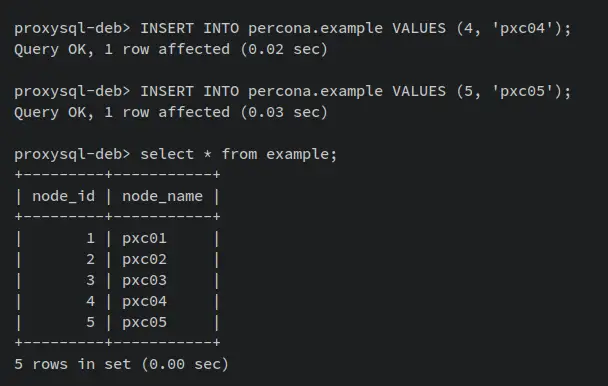
Next, enter the following queries to insert new data to the database 'percona' and table 'example'.
INSERT INTO percona.example VALUES (4, 'pxc04');
INSERT INTO percona.example VALUES (5, 'pxc05');
Then, verify again the newly updated data using the following query. if successful, you should get the new data available in the table 'example'. This confirms that your user can read and write to databases on Percona XtraDB Cluster.
select * from example;
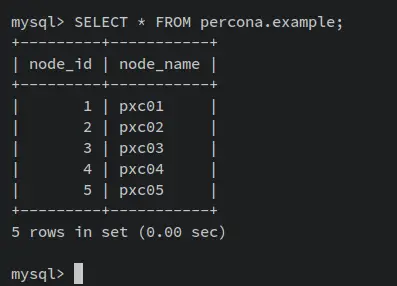
Lastly, to ensure that your new data is updated on Percona XtraDB Cluster, you must verify directly from the percona XtraDB Cluster server.
Log to your Percona XtraDB Cluster server, access the MySQL shell via the root user, then run the following query to retrieve the data from the database 'percona' table 'example'.
select * from percona.example;
When successful, you should get the new data that you've added via the ProxySQL server.
With this in mind, your installation of the ProxySQL server as a load balancer for MySQL Cluster or Percona XtraDB Cluster is successful.
Conclusion
In this guide, you configured a Load Balancing of MySQL Cluster or Percona XtraDB Cluster via ProxySQL on a Debian 11 server. You've installed ProxySQLv2, added the Percona XtraDB Cluster to ProxySQL, and configured Percona XtraDB Cluster monitoring on ProxySQL.
In addition to that, you have also created and configured MySQL or Percona XtraDB Cluster users that can be used for your applications. You've also verified the load balancing of MySQL Cluster or Percona XtraDB Cluster via ProxySQL that enables high availability and fault-tolerance of your database server and your applications.
With this, you can now add more percona XtraDB Cluster nodes to your load-balancing database server. Also, you can set up Read/Write split via ProxySQL, set up ProxySQL sharding, and set up SSL connection from proxySQL to the Percona XtraDB Cluster. To learn more about ProxySQL, visit ProxySQL's official documentation.

