How to Install SuiteCRM on Rocky Linux 9
On this page
- Prerequisites
- Step 1 - Configure Firewall
- Step 2 - Install Nginx
- Step 3 - Install PHP and its extensions
- Step 4 - Install MySQL
- Step 5 - Configure MySQL
- Step 6 - Install SSL
- Step 7 - Download SuiteCRM
- Step 8 - Configure SELinux
- Step 9 - Configure Nginx and PHP
- Step 10 - Install and Access SuiteCRM
- Step 11 - Configure Cron Jobs
- Conclusion
SuiteCRM is an open-source customer relationship management solution written in PHP. It's a fork of the popular SugarCRM software after SugarCRM stopped releasing its community edition. It is used to create a central repository for all your customer data to gain insights that can be used to enhance and nurture your business relationships.
Some of its features include Document Storage, Email marketing, Calendar, Social Media Integration, Territory management, Segmentation, Marketing Automation, Lead qualification, Internal Chat integration, Customer support, Social CRM, Sales-force automation, marketing campaigns, Mobile CRM, and reporting. It can be integrated with third-party SMTP relay services like Mandrill, SendGrid, Amazon SES, etc. You can install plugins to extend the functionality of SuiteCRM. It can be integrated with third-party apps like Mautic, Facebook, Twitter, MailChimp, Zoom, Quickbooks, DocuSign, etc.
In this post, you will learn how to install SuiteCRM using the Nginx web server and Let's Encrypt SSL on a Rocky Linux 9 server.
Prerequisites
-
A server running Rocky Linux 9.
-
A non-root user with sudo privileges.
-
A fully qualified domain name (FQDN) like
suitecrm.example.com. -
Make sure everything is updated.
$ sudo dnf update
-
Few packages that your system needs.
$ sudo dnf install wget curl nano unzip yum-utils policycoreutils-python-utils -y
Some of these packages may already be installed on your system.
Step 1 - Configure Firewall
The first step is to configure the firewall. Rocky Linux uses Firewalld Firewall. Check the firewall's status.
$ sudo firewall-cmd --state
running
The firewall works with different zones, and the public zone is the default one that we will use. List all the services and ports active on the firewall.
$ sudo firewall-cmd --permanent --list-services
It should show the following output.
cockpit dhcpv6-client ssh
SuiteCRM needs HTTP and HTTPS ports to function. Open them.
$ sudo firewall-cmd --permanent --add-service=http
$ sudo firewall-cmd --permanent --add-service=https
Reload the firewall to apply the changes.
$ sudo firewall-cmd --reload
List all the services again.
$ sudo firewall-cmd --permanent --list-services
You should get the following output.
cockpit dhcpv6-client http https ssh
Step 2 - Install Nginx
Rocky Linux 9 ships with an older version of Nginx. You need to download the official Nginx repository to install the latest version.
Create and open the /etc/yum.repos.d/nginx.repo file for creating the official Nginx repository.
$ sudo nano /etc/yum.repos.d/nginx.repo
Paste the following code in it.
[nginx-stable]
name=nginx stable repo
baseurl=http://nginx.org/packages/centos/$releasever/$basearch/
gpgcheck=1
enabled=1
gpgkey=https://nginx.org/keys/nginx_signing.key
module_hotfixes=true

[nginx-mainline]
name=nginx mainline repo
baseurl=http://nginx.org/packages/mainline/centos/$releasever/$basearch/
gpgcheck=1
enabled=0
gpgkey=https://nginx.org/keys/nginx_signing.key
module_hotfixes=true
Save the file by pressing Ctrl + X and entering Y when prompted.
Install the Nginx server.
$ sudo dnf install -y nginx
Verify the installation.
$ nginx -v
nginx version: nginx/1.24.0
Enable and start the Nginx server.
$ sudo systemctl enable nginx --now
Check the status of the server.
$ sudo systemctl status nginx
? nginx.service - nginx - high performance web server
     Loaded: loaded (/usr/lib/systemd/system/nginx.service; enabled; preset: disabled)
    Drop-In: /usr/lib/systemd/system/nginx.service.d
             ??php-fpm.conf
     Active: active (running) since Thu 2023-05-18 22:32:50 UTC; 4s ago
       Docs: http://nginx.org/en/docs/
    Process: 3955 ExecStart=/usr/sbin/nginx -c /etc/nginx/nginx.conf (code=exited, status=0/SUCCESS)
   Main PID: 3957 (nginx)
      Tasks: 2 (limit: 5922)
     Memory: 2.1M
        CPU: 6ms
     CGroup: /system.slice/nginx.service
             ??3957 "nginx: master process /usr/sbin/nginx -c /etc/nginx/nginx.conf"
             ??3958 "nginx: worker process"
Step 3 - Install PHP and its extensions
We need to install PHP 8.1 for SuiteCRM to work. The first step is to grab the Epel repository.
$ sudo dnf install epel-release -y
Next, install the Remi repository.
$ sudo dnf install https://rpms.remirepo.net/enterprise/remi-release-9.rpm
Check for available PHP streams.
$ dnf module list php -y
Name                                   Stream                   Profiles                                        Summary
php                                    8.1                      common [d], devel, minimal                      PHP scripting language

Remi's Modular repository for Enterprise Linux 9 - x86_64
Name                                   Stream                   Profiles                                        Summary
php                                    remi-7.4                 common [d], devel, minimal                      PHP scripting language
php                                    remi-8.0                 common [d], devel, minimal                      PHP scripting language
php                                    remi-8.1                 common [d], devel, minimal                      PHP scripting language
php                                    remi-8.2                 common [d], devel, minimal                      PHP scripting language

Hint: [d]efault, [e]nabled, [x]disabled, [i]nstalled
The default version is 8.1. Enable Remi's PHP 8.1 repository.
$ sudo dnf module reset php -y
$ sudo dnf module enable php:remi-8.1
Install PHP and the required extensions required by SuiteCRM.
$ sudo dnf install -y php-fpm php-mysql php-bcmath php-xml php-zip php-curl php-mbstring php-gd php-tidy php-intl php-cli php-opcache php-soap php-imap php-ldap
Verify the installation.
$ php --version
PHP 8.1.19 (cli) (built: May 10 2023 13:43:03) (NTS gcc x86_64)
Copyright (c) The PHP Group
Zend Engine v4.1.19, Copyright (c) Zend Technologies
    with Zend OPcache v8.1.19, Copyright (c), by Zend Technologies
Enable and start the PHP-FPM service.
$ sudo systemctl enable php-fpm --now
Step 4 - Install MySQL
Rocky Linux 9 ships with the latest version of MySQL. You can install it with a single command.
$ sudo dnf install mysql-server
Check the version of MySQL.
$ mysql --version
mysql  Ver 8.0.32 for Linux on x86_64 (Source distribution)
Enable and start the MySQL service.
$ sudo systemctl enable mysqld --now
Run the MySQL secure install script.
$ sudo mysql_secure_installation
You will be asked to install the Validate Password Component. It checks the strength of passwords used in MySQL. Press Y to install it. Next, you will be asked to set the level of the password validation policy. Choose 2 as it is the strongest one.
Securing the MySQL server deployment.

Connecting to MySQL using a blank password.

VALIDATE PASSWORD COMPONENT can be used to test passwords
and improve security. It checks the strength of password
and allows the users to set only those passwords which are
secure enough. Would you like to setup VALIDATE PASSWORD component?

Press y|Y for Yes, any other key for No: Y

There are three levels of password validation policy:

LOW    Length >= 8
MEDIUM Length >= 8, numeric, mixed case, and special characters
STRONG Length >= 8, numeric, mixed case, special characters and dictionary                  file

Please enter 0 = LOW, 1 = MEDIUM and 2 = STRONG: 2
Next, you will be asked to set a new root password. Enter the password according to the requirements specified above. Enter Y when prompted to continue with the chosen root password.
Please set the password for root here.

New password:

Re-enter new password:

Estimated strength of the password: 100
Do you wish to continue with the password provided?(Press y|Y for Yes, any other key for No) : Y
Next, enter Y to remove anonymous users, disallow remote root logins, remove the test database, and reload the privilege tables.
By default, a MySQL installation has an anonymous user,
allowing anyone to log into MySQL without having to have
a user account created for them. This is intended only for
testing, and to make the installation go a bit smoother.
You should remove them before moving into a production
environment.

Remove anonymous users? (Press y|Y for Yes, any other key for No) : Y
Success.


Normally, root should only be allowed to connect from
'localhost'. This ensures that someone cannot guess at
the root password from the network.

Disallow root login remotely? (Press y|Y for Yes, any other key for No) : Y
Success.

By default, MySQL comes with a database named 'test' that
anyone can access. This is also intended only for testing,
and should be removed before moving into a production
environment.


Remove test database and access to it? (Press y|Y for Yes, any other key for No) : Y
 - Dropping test database...
Success.

 - Removing privileges on test database...
Success.

Reloading the privilege tables will ensure that all changes
made so far will take effect immediately.

Reload privilege tables now? (Press y|Y for Yes, any other key for No) : Y
Success.

All done!
Step 5 - Configure MySQL
Log in to the MySQL shell. Enter your root password when prompted.
$ sudo mysql -u root -p
Create a sample database.
mysql> CREATE DATABASE suitecrm;
Create an SQL user account.
mysql> CREATE USER 'suiteuser'@'localhost' IDENTIFIED BY 'Your_password2';
Grant all privileges on the database to the user.
mysql> GRANT ALL PRIVILEGES ON suitecrm.* TO 'suiteuser'@'localhost';
Flush user privileges.
mysql> FLUSH PRIVILEGES;
Exit the shell.
mysql> exit
Step 6 - Install SSL
We need to install Certbot to generate the SSL certificate.
We will use the Snapd package installer for that. Since Rocky Linux doesn't ship with it, install the Snapd installer. It requires the EPEL repository to work which we installed before for PHP so we can skip the step.
Install Snapd.
$ sudo dnf install -y snapd
Enable and Start the Snap service.
$ sudo systemctl enable snapd --now
Install the Snap core package, and ensure that your version of Snapd is up to date.
$ sudo snap install core && sudo snap refresh core
Create necessary links for Snapd to work.
$ sudo ln -s /var/lib/snapd/snap /snap
$ echo 'export PATH=$PATH:/var/lib/snapd/snap/bin' | sudo tee -a /etc/profile.d/snapd.sh
Issue the following command to install Certbot.
$ sudo snap install --classic certbot
Use the following command to ensure that the Certbot command can be run by creating a symbolic link to the /usr/bin directory.
$ sudo ln -s /snap/bin/certbot /usr/bin/certbot
Verify the installation.
$ certbot --version
certbot 2.6.0
Run the following command to generate an SSL Certificate.
$ sudo certbot certonly --nginx --agree-tos --no-eff-email --staple-ocsp --preferred-challenges http -m [email protected] -d suitecrm.example.com
The above command will download a certificate to the /etc/letsencrypt/live/suitecrm.example.com directory on your server.
Generate a Diffie-Hellman group certificate.
$ sudo openssl dhparam -dsaparam -out /etc/ssl/certs/dhparam.pem 4096
Check the Certbot renewal scheduler service.
$ sudo systemctl list-timers
You will find snap.certbot.renew.service as one of the services scheduled to run.
NEXT                        LEFT          LAST                        PASSED        UNIT                      ACTIVATES
.....
Sun 2023-05-21 06:32:00 UTC 9h left       Sat 2023-05-21 18:04:05 UTC 2h 59min ago  snap.certbot.renew.timer  snap.certbot.renew.service
Sun 2023-05-21 06:43:20 UTC 9h left       Sat 2023-05-21 10:49:23 UTC 10h ago       apt-daily-upgrade.timer   apt-daily-upgrade.service
Sun 2023-05-21 09:00:06 UTC 11h left      Sat 2023-05-21 20:58:06 UTC 5min ago      apt-daily.timer           apt-daily.service
Do a dry run of the process to check whether the SSL renewal is working fine.
$ sudo certbot renew --dry-run
If you see no errors, you are all set. Your certificate will renew automatically.
Step 7 - Download SuiteCRM
Create the web root directory for SuiteCRM.
$ sudo mkdir /var/www/html/suitecrm -p
Switch to the web root directory.
$ cd /var/www/html/suitecrm
Download the SuiteCRM 8.x version. Grab the link to the latest version from the SuiteCRM downloads page.
$ sudo wget https://suitecrm.com/download/140/suite83/562304/suitecrm-8-3-0.zip
Extract the files in the archive.
$ sudo unzip -q suitecrm*.*
Delete the zip file.
$ sudo rm suitecrm-8-3-0.zip
Set the correct file permissions and user ownership to the Nginx user. Also, set the file bin/console executable for running the SuiteCRM console.
$ sudo find . -type d -not -perm 2755 -exec chmod 2755 {} \;
$ sudo find . -type f -not -perm 0644 -exec chmod 0644 {} \;
$ sudo find . ! -user nginx -exec chown nginx:nginx {} \;
$ sudo chmod +x bin/console
Step 8 - Configure SELinux
Change the file security context for SuiteCRM.
$ sudo semanage fcontext -a -t httpd_sys_rw_content_t "/var/www/html/suitecrm(/.*)?"
Apply the policy.
$ sudo restorecon -Rv /var/www/html/suitecrm/
Apply the policy to allow Nginx to give access to MySQL.
$ sudo setsebool -P httpd_can_network_connect_db 1
Apply the policy to allow connections to be made to outside hosts. This is needed for sending emails.
$ sudo setsebool -P httpd_can_network_connect 1
Step 9 - Configure Nginx and PHP
Configure PHP-FPM
Open the file /etc/php-fpm.d/www.conf.
$ sudo nano /etc/php-fpm.d/www.conf
We need to set the Unix user/group of PHP processes to nginx. Find the user=www-data and group=www-data lines in the file and change them to nginx.
...
; Unix user/group of processes
; Note: The user is mandatory. If the group is not set, the default user's group
;       will be used.
; RPM: apache user chosen to provide access to the same directories as httpd
user = nginx
; RPM: Keep a group allowed to write in log dir.
group = nginx
...
Next, uncomment the socket file owner, group, and default permission line and alter them as shown below.
; Set permissions for unix socket, if one is used. In Linux, read/write
; permissions must be set in order to allow connections from a web server.
; Default Values: user and group are set as the running user
;                 mode is set to 0660
listen.owner = nginx
listen.group = nginx
listen.mode = 0660
Next, comment out the following line as shown by putting a semi-colon in front of it.
;listen.acl_users = apache,nginx
Save the file by pressing Ctrl + X and entering Y when prompted.
Increase the execution time for PHP-FPM and PHP-CLI to 60 seconds.
$ sudo sed -i 's/max_execution_time = 30/max_execution_time = 60/' /etc/php.ini
Increase the memory limit for PHP-FPM from 128 MB to 256 MB.
$ sudo sed -i 's/memory_limit = 128M/memory_limit = 256M/' /etc/php.ini
PHP by default sets the file size limit for the media library as 2MB. Run the following commands to increase the file size limit to 25MB.
$ sudo sed -i 's/upload_max_filesize = 2M/upload_max_filesize = 25M/g' /etc/php.ini
$ sudo sed -i 's/post_max_size = 8M/post_max_size = 25M/g' /etc/php.ini
Restart the PHP-FPM service.
$ sudo systemctl restart php-fpm
Change the group of the PHP sessions directory to Nginx.
$ sudo chgrp -R nginx /var/lib/php/session
Configure Nginx
Create and open the file /etc/nginx/conf.d/suitecrm.conf for editing.
$ sudo nano /etc/nginx/conf.d/suitecrm.conf
Paste the following code in it.
server {
    listen 443 ssl http2;
    listen [::]:443 ssl http2;
    server_name suitecrm.example.com;

    root /var/www/html/suitecrm/public;
    error_log /var/log/nginx/suitecrm.error.log;
    access_log /var/log/nginx/suitecrm.access.log;
    client_max_body_size 25M;

    index index.php index.html index.htm;

    ssl_certificate      /etc/letsencrypt/live/suitecrm.example.com/fullchain.pem;
    ssl_certificate_key  /etc/letsencrypt/live/suitecrm.example.com/privkey.pem;
    ssl_trusted_certificate /etc/letsencrypt/live/suitecrm.example.com/chain.pem;

    ssl_session_timeout  5m;
    ssl_session_cache shared:MozSSL:10m;
    ssl_session_tickets off;

    ssl_protocols TLSv1.2 TLSv1.3;
    ssl_prefer_server_ciphers on;
    ssl_ciphers ECDHE-ECDSA-AES128-GCM-SHA256:ECDHE-RSA-AES128-GCM-SHA256:ECDHE-ECDSA-AES256-GCM-SHA384:ECDHE-RSA-AES256-GCM-SHA384:ECDHE-ECDSA-CHACHA20-POLY1305:ECDHE-RSA-CHACHA20-POLY1305:DHE-RSA-AES128-GCM-SHA256:DHE-RSA-AES256-GCM-SHA384;
    ssl_ecdh_curve X25519:prime256v1:secp384r1:secp521r1;
    ssl_stapling on;
    ssl_stapling_verify on;
    ssl_dhparam /etc/ssl/certs/dhparam.pem;

    location / {
        try_files $uri /index.php;
    }

    location ~ \.php$ {
        try_files $uri =404;
        fastcgi_pass unix:/run/php-fpm/www.sock;
        fastcgi_index index.php;
        fastcgi_param SCRIPT_FILENAME $document_root$fastcgi_script_name;
        include fastcgi_params;

        fastcgi_buffer_size 128k;
        fastcgi_buffers 256 16k;
        fastcgi_busy_buffers_size 256k;
        fastcgi_temp_file_write_size 256k;
    }

    # Don't log favicon
    location = /favicon.ico {
        log_not_found off;
        access_log off;
    }

    # Deny all attempts to access hidden files/folders such as .htaccess, .htpasswd, .DS_Store (Mac), etc...
    location ~ /\. {
        deny all;
    }

    # A long browser cache lifetime can speed up repeat visits to your page
    location ~* \.(jpg|jpeg|gif|png|webp|svg|woff|woff2|ttf|css|js|ico|xml)$ {
        expires           360d;
    }
}

# enforce HTTPS
server {
    listen       80;
    listen       [::]:80;
    server_name  suitecrm.example.com;
    return 301   https://$host$request_uri;
}
Notice the root directory to be used in the Nginx configuration is /var/www/html/suitecrm/public. In earlier SuiteCRM versions (7.x), it was /var/www/html/suitecrm. The public directory was introduced with SuiteCRM 8.x version.
Save the file by pressing Ctrl + X and entering Y when prompted once finished.
Open the file /etc/nginx/nginx.conf for editing.
$ sudo nano /etc/nginx/nginx.conf
Add the following line before the line include /etc/nginx/conf.d/*.conf;.
server_names_hash_bucket_size 64;
Save the file by pressing Ctrl + X and entering Y when prompted.
Verify the Nginx configuration file syntax.
$ sudo nginx -t
nginx: the configuration file /etc/nginx/nginx.conf syntax is ok
nginx: configuration file /etc/nginx/nginx.conf test is successful
Restart the Nginx service.
$ sudo systemctl restart nginx
Step 10 - Install and Access SuiteCRM
There are two ways to install SuiteCRM. The first method is to use the web installer and the second involves using the SuiteCRM console command line.
Method 1 - Web Wizard
Open the URL https://suitecrm.example.com in the browser and you will be presented with the setup wizard.
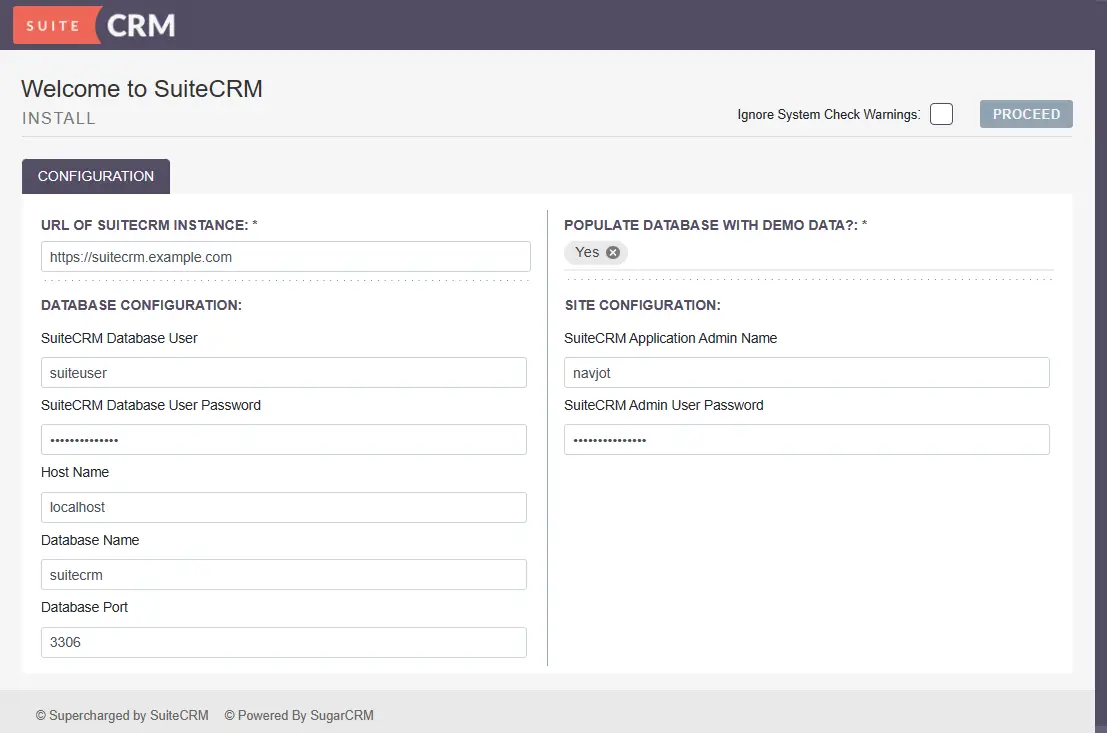
Fill in the URL, database credentials, and your administrator account login information. Enter localhost as the hostname and 3306 as the database port. Click the Proceed button to open the login page.
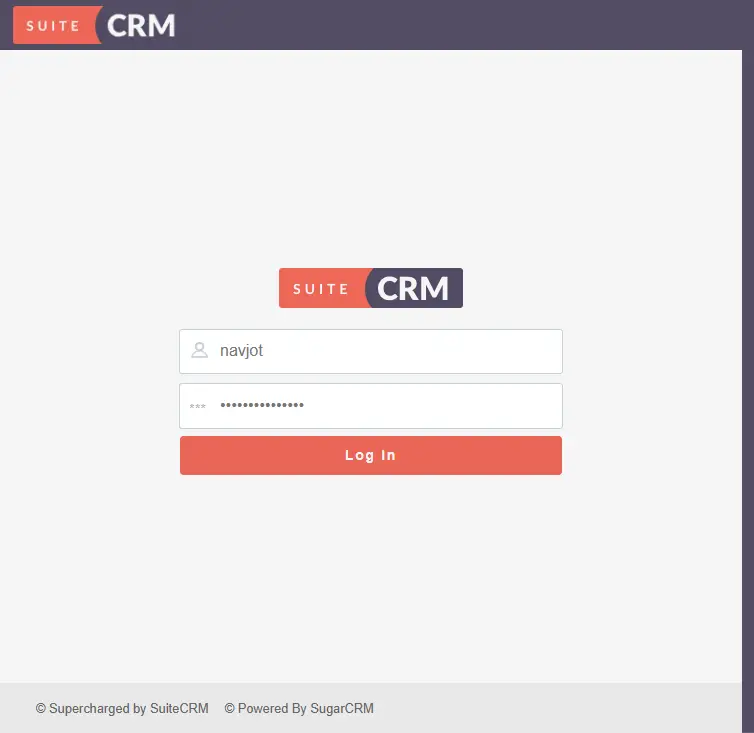
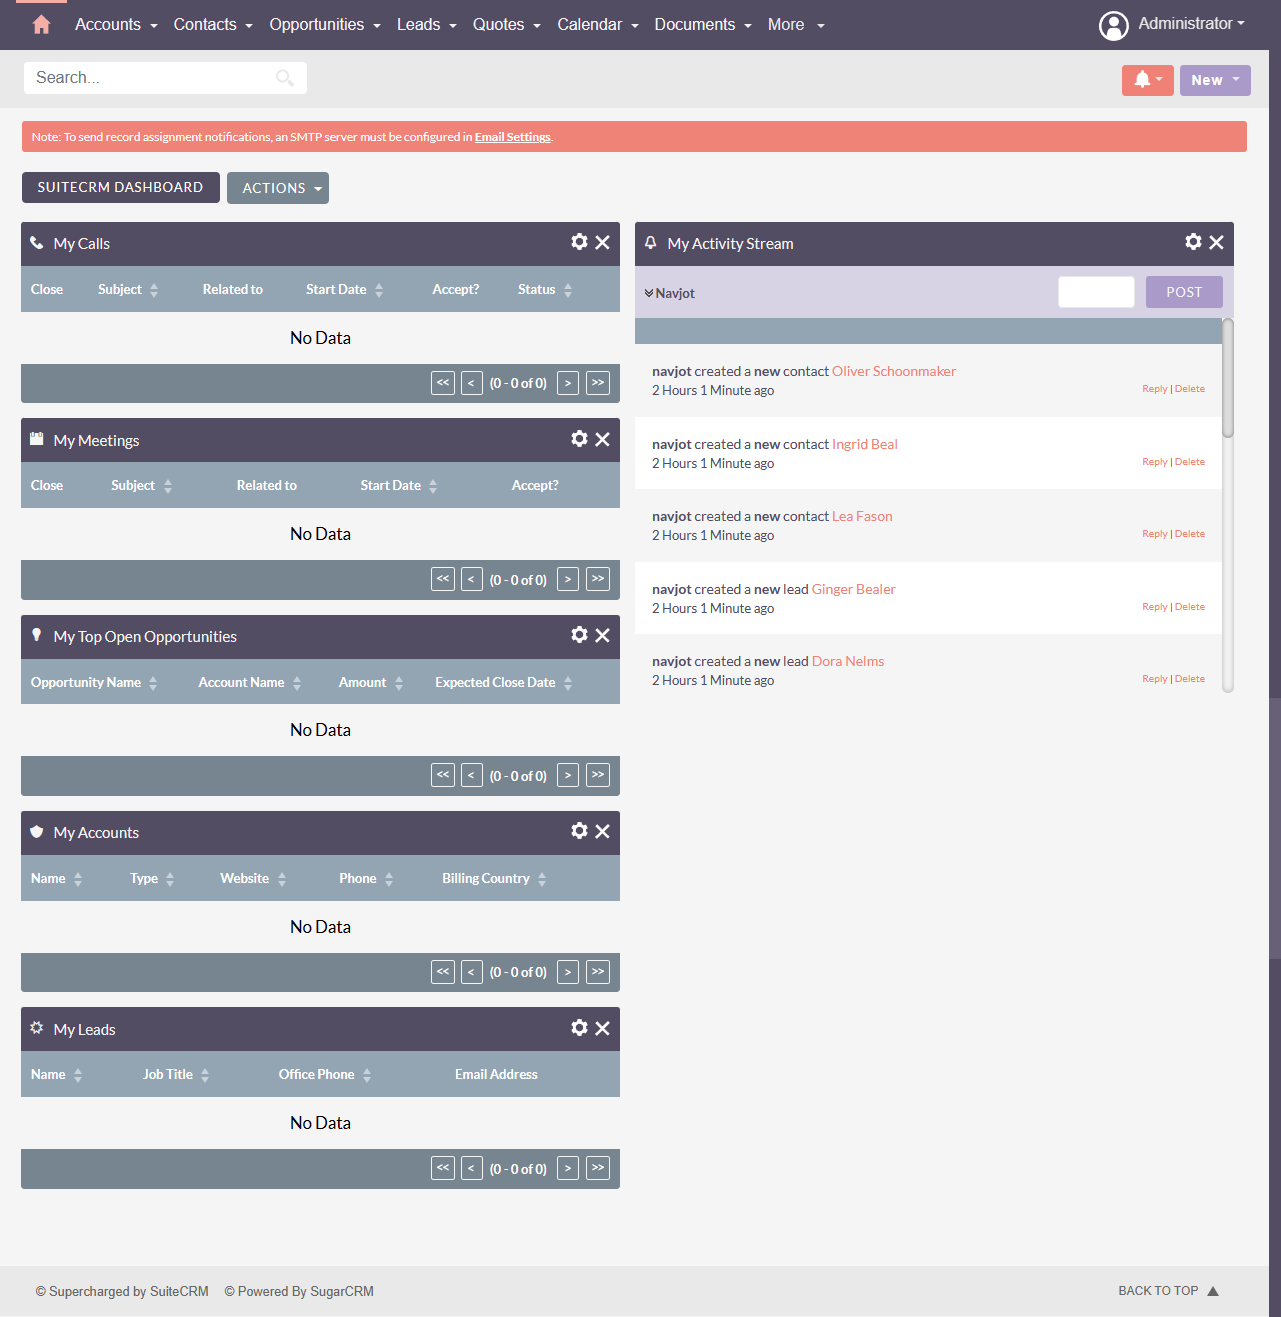
Enter your account details and click the Log in button to open the SuiteCRM dashboard.
Previous versions of SuiteCRM gave you the option of configuring the email provider during setup. That is not the case now. To configure the email provider, click the Administrator drop-down menu on the top right corner and click the Admin option.
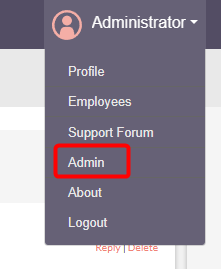
You will be taken to the following Admin Panel of SuiteCRM.
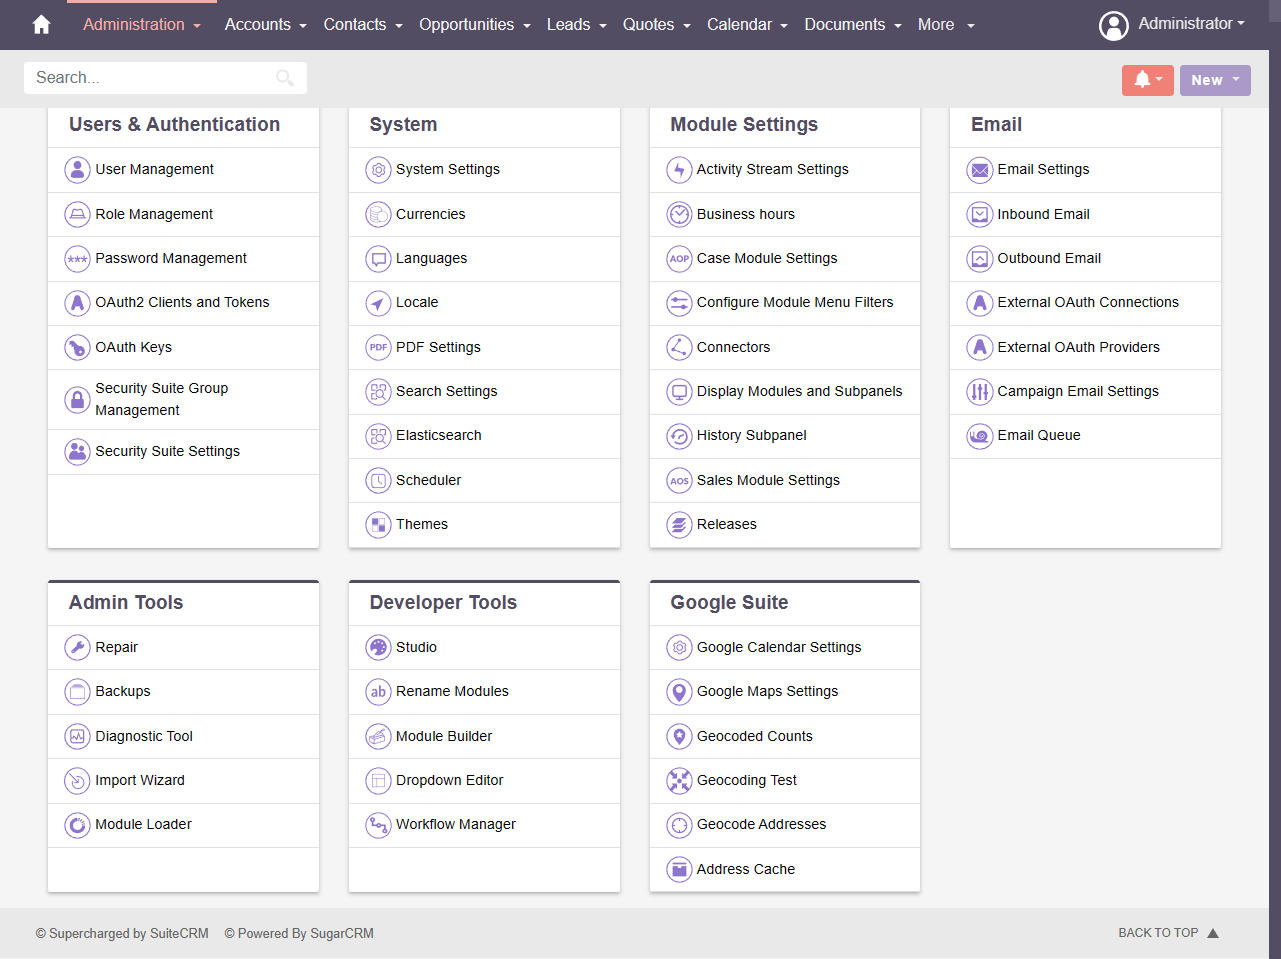
Click the Email Settings link to open the email providers page.
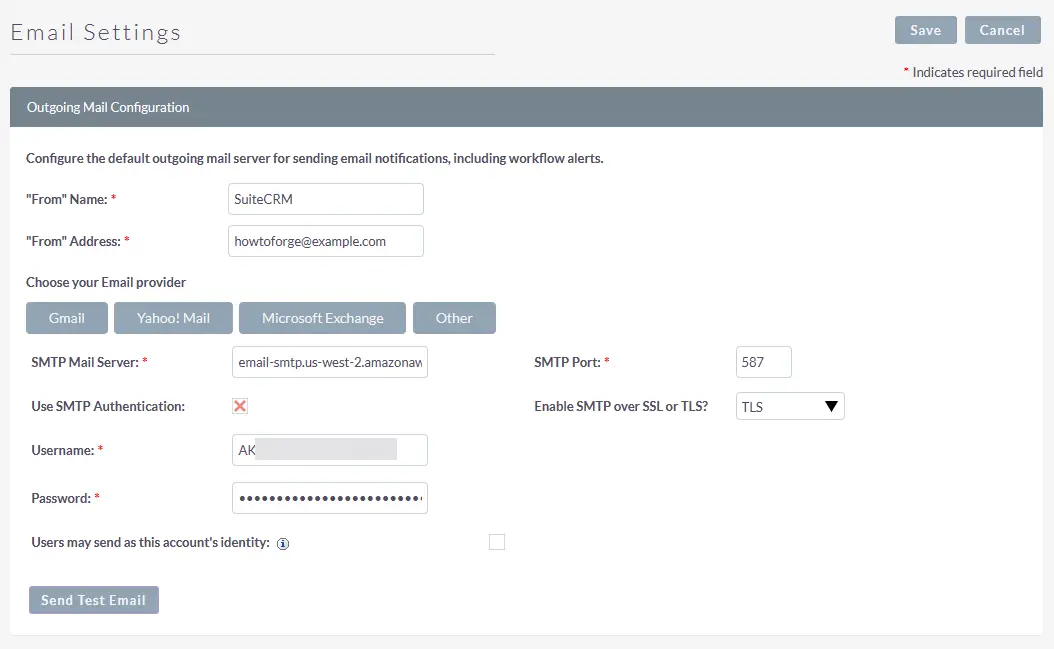
If you are using Gmail or Microsoft Exchange, you can use the dedicated buttons to configure them. For our tutorial, we are using Amazon SES. If you want your users to use your SMTP settings, you can enable the option for it. Click the Send Test Email button to open the following popup and fill in an email id where you want to receive the test email.
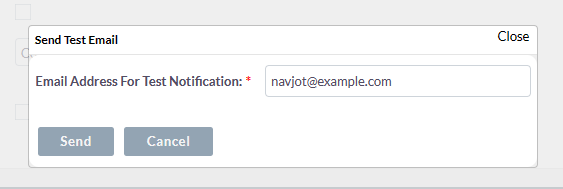
Click the Send button to send a test email. If you receive the following email, it means your settings are working correctly.
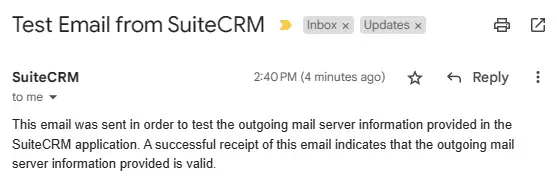
Click the Save button on top of the email settings page to save your settings. You can now start using SuiteCRM to manage your customers and business.
Method 2 - SuiteCRM Command Console
Switch to the SuiteCRM directory.
$ cd /var/www/html/suitecrm
Run the following command to install SuiteCRM.
$ sudo ./bin/console suitecrm:app:install -u "admin_username" -p "admin_password" -U "db_user" -P "db_password" -H "localhost" -N "dbname" -S "https://suitecrm.example.com" -d "yes" -Z "3306"
If you don't want the demo data, you can skip the d "yes" flag in the above command.
You can even run the installer without supplying any variables. In that case, it will ask you for the information.
$ sudo ./bin/console suitecrm:app:install
Open the URL https://suitecrm.example.com in your browser and open the login page and proceed from there.
Step 11 - Configure Cron Jobs
SuiteCRM needs cron jobs to function correctly. Edit the nginx user's crontab file. Rocky Linux uses the Vim editor by default. The following command will open the crontab in Nano editor which is easier to use.
$ sudo EDITOR=nano crontab -e -u nginx
Add the following line at the end of the file.
* * * * * cd /var/www/html/suitecrm/public/legacy; php -f cron.php > /dev/null 2>&1
Save and close the file by pressing Ctrl + X and entering Y when prompted once finished.
Conclusion
This concludes the tutorial on installing SuiteCRM using the Nginx server with Let's Encrypt SSL on a Rocky Linux 9 machine. If you have any questions, post them in the comments below.

