How to Install Puppet Server and Agent on AlmaLinux 9
Puppet is a centralized configuration management and automation tool. DevOps creates configuration management to deploy servers and applications, and all configuration for automation is stored on the central "Puppet Server". After that "Agent" nodes will pull a new configuration from the "Puppet Server" and apply the state as defined.
All connections between "Puppet Server" and "Agent" nodes are encrypted by default using SSL/TLS certificate. Puppet uses Domain Specific Language (DSL) to describe system configuration, and it's similar to Ruby syntax.
This guide shows you how to install Puppet Server and Agent on AlmaLinux servers. We'll also show you how to start with the Puppet configuration management tool by creating the first Puppet deployment for LAMP Stack.
Prerequisites
Ensure that you have the following before starting:
- 2 AlmaLinux servers - This example uses AlmaLinux 8 servers:
- hostname: pp-server - IP address: 192.168.10.20 - Used as: Puppet Server
- hostname: agent1 - IP address: 192.168.10.21 - Used as: Puppet Agent
- A non-root user can execute sudo to get the root privileges.
Setup /etc/hosts File
Before you jump to the Puppet installation, using a local domain name or FQDN (Fully Qualified Domain Name) is recommended instead of an IP address for the Puppet environment.
In this example, you will be using the system fqdn for both Puppet Server and Agent. Each server is reachable via fqdn and system hostname.
To start, run the following command to set up fqdn on each server.
Run this on the Puppet Server.
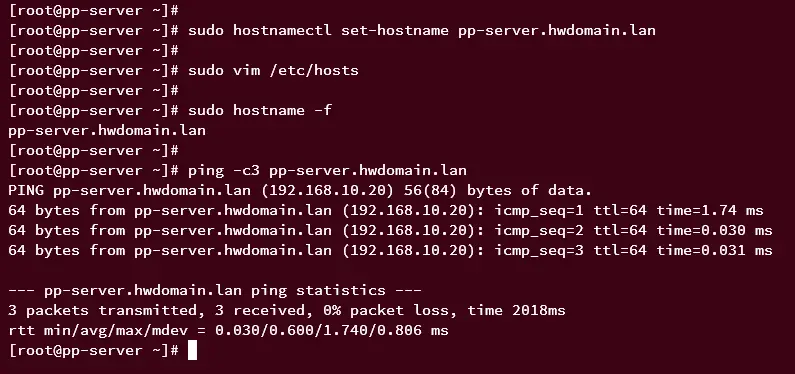
sudo hostnamectl set-hostname pp-server.hwdomain.lan
And this is on the Agent machine.
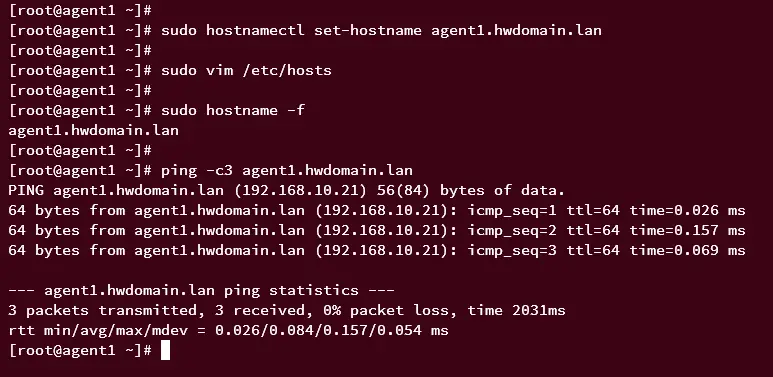
sudo hostnamectl set-hostname agent1.hwdomain.lan
Open the /etc/hosts file using the nano editor command below.
sudo nano /etc/hosts
Insert the following configuration and be sure to change the detailed IP address and the fqdn.
192.168.10.20   pp-server.hwdomain.lan   pp-server
192.168.10.21   agent1.hwdomain.lan    agent1
Save and close the file.
Next, run the following command to verify the fqdn on both Puppet Server and Agent.
sudo hostname -f
You should get the fqdn on Puppet Server as pp-server.hwdomain.lan and for Agent machine agent1.hwdomain.lan.
Lastly, run the ping command below to ensure that each hostname and fqdn are pointed to the correct internal IP address of the server.
ping -c3 pp-server.hwdomain.lan
ping -c3 pp-server
ping -c3 agent1.hwdomain.lan
ping -c3 agent1
Setup hostname and fqdn on the Puppet Server.
Setup hostname and fqdn on the Puppet Agent.
Installing Puppet
In this section, you will start the installation of the Puppet Server and Agent. You will set up the Puppet repository on both Puppet Server and Agent, then install the respective Puppet package to each machine.
Adding Puppet Repository
Be sure to run this command on both Puppet Server and Agent.
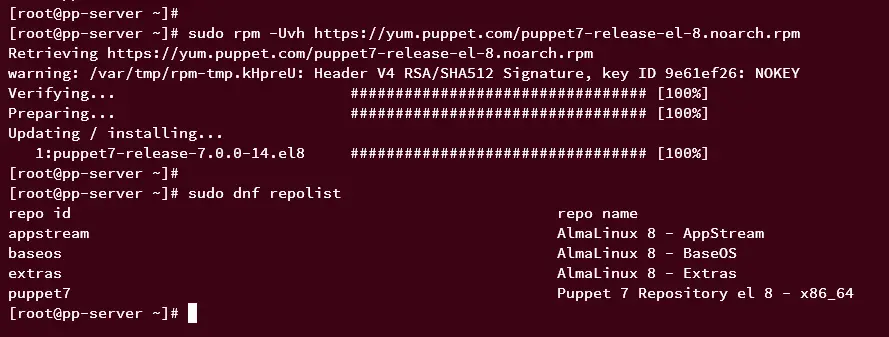
Add the Puppet repository to both the Puppet Server and Agent using the following command.
sudo rpm -Uvh https://yum.puppet.com/puppet7-release-el-8.noarch.rpm
Once the repository is added, run the dnf command below to verify the list of available repositories on both servers.
sudo dnf repolist
You should see the Puppet repository in the repository list.
Installing and Configuring Puppet Server
Once the repository is added, you can start the Puppet Server installation.
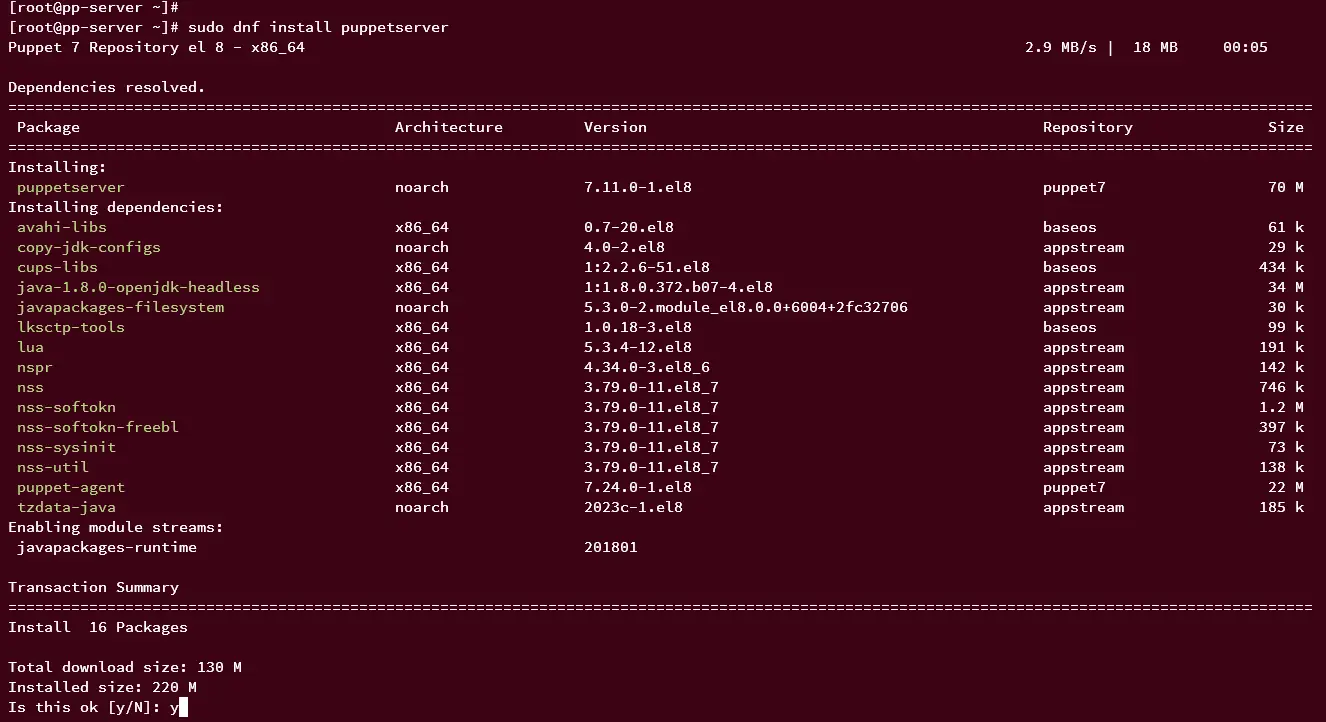
First, run the dnf command below to install the puppetserver package on the pp-server.
sudo dnf install puppetserver
Input y when prompted, and press ENTER to proceed.
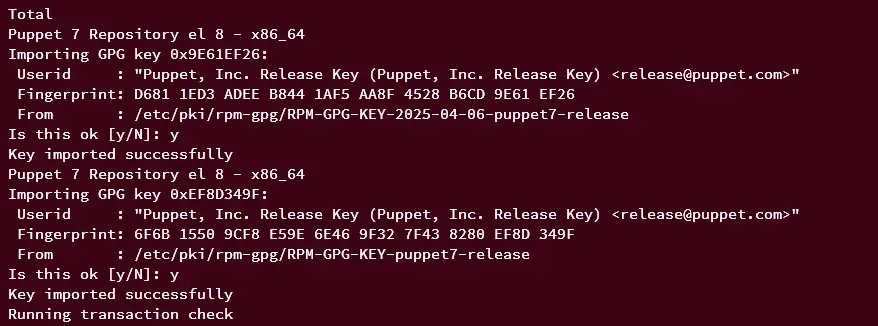
Also, input y when to add the GPG key of the Puppet repository.
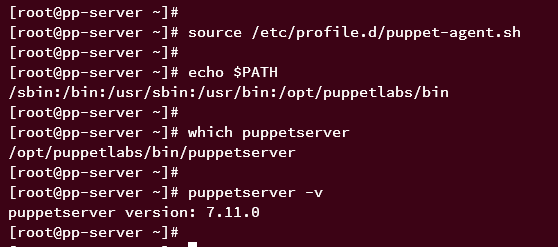
After installation is complete, run the following command to load the Puppet system profile to your system. Then, verify the PATH environment variable to ensure that the Puppet Server bin directory is added.
source /etc/profile.d/puppet-agent.sh
echo $PATH
If successful, you should see the directory /opt/puppetlabs/bin is available on the system PATH.
Next, run the following command to locate the puppetserver binary file and verify the puppsetserver version.
which puppetserver
puppetserver -v
In this output, you should see the puppetserver binary file is available at /opt/puppetlabs/bin/puppetserver. And the current puppetserver that is installed is v7.11.
Installing Puppet Agent
You're ready to install the Puppet Agent on the agent1.hwdomain.lan machine.
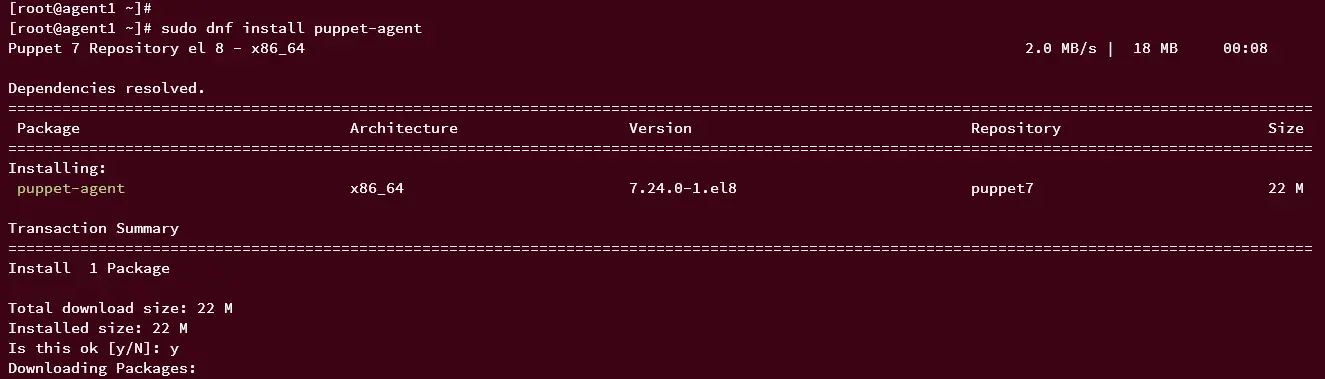
On the Agent machine, run the following command to install the puppet-agent package. Input y when prompted and press ENTER.
sudo dnf install puppet-agent
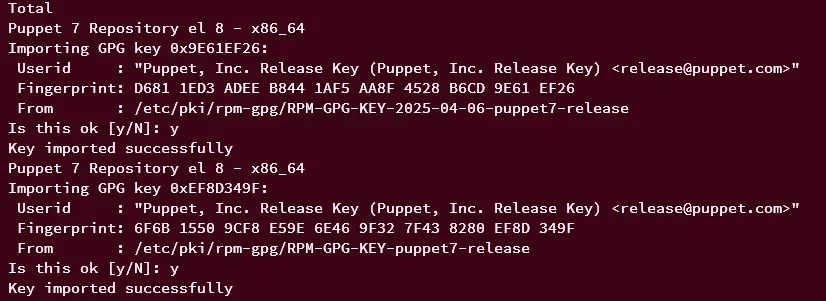
Also, input y again to add the GPG key of the Puppet repository.
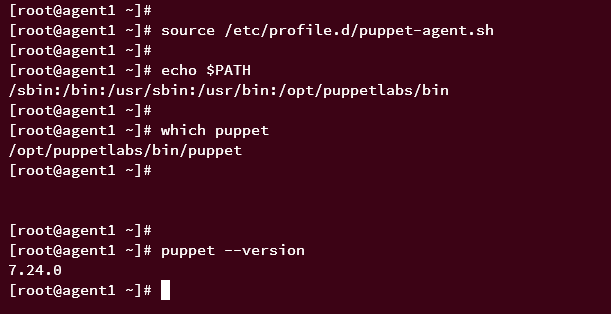
After puppet-agent is installed, run the following command to load the Puppet system profile to your current session. Then, check the system PATH environment variable.
source /etc/profile.d/puppet-agent.sh
echo $PATH
If the Puppet system profile is loaded, you should see the directory /opt/puppetlabs/bin available on the system PATH.
Run the following command to locate the puppet binary file and verify the puppet-agent version.
which puppet
puppet -v
You should see the puppet binary file is located at /opt/puppetlabs/bin/puppet and the puppet-agent version is v7.11.
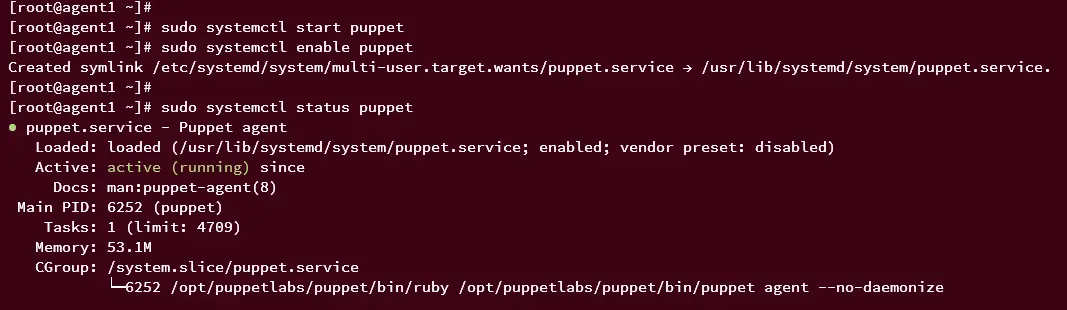
Lastly, run the systemctl command below to start and enable the puppet service on the Agent machine.
sudo systemctl start puppet
sudo systemctl enable puppet
Then, run the following command to ensure the puppet service runs.
sudo systemctl status puppet
If everything goes well, you should see the output like this:
Configuring Puppet Server
With both Puppet Server and Agent installed, the next step you will configure the Puppet Server installation. You will set up the default server name for Puppet Server, set up the runinterval for agents, then start and enable the Puppe Server service.
First, open file /etc/sysconfig/puppetserver using the vim editor.
sudo nano /etc/sysconfig/puppetserver
In the JAVA_ARGS parameter, increase the max memory allocation for Puppet Server. This configuration depends on your current system memory. In this example, the Puppet Server has 4GB of memory and will allocate 2GB for Puppet Server.
# Modify this if you'd like to change the memory allocation, enable JMX, etc
JAVA_ARGS="-Xms2g -Xmx2g"
Save the file and exit the editor after finishing.
Now, run the puppet command below to change the default server name to pp-server.hwdomain.lan and the runinterval to 1 hour. The runinterval parameter means how often Agent applies Puppet catalogs.
puppet config set server pp-server.hwdomain.lan --section main
puppet config set runinterval 1h --section main
Next, run the following command to set up the default environment to production and alternative names for the Puppet Server to pp-server and pp-server.hwdomain.lan.
puppet config set environment production --section server
puppet config set dns_alt_names pp-server,pp-server.hwdomain.lan --section server

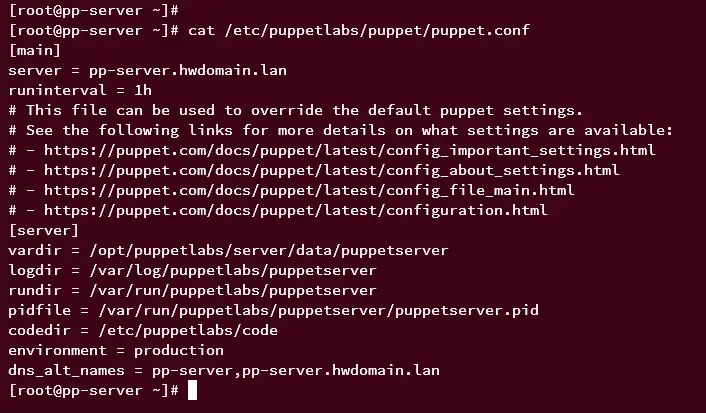
Once those puppet commands are executed, the settings will be stored at the default Puppet configuration /etc/puppetlabs/puppet/puppet.conf. Run the following command to show the file /etc/puppetlabs/puppet/puppet.conf content.
cat /etc/puppetlabs/puppet/puppet.conf
You should get a similar configuration like this:
Now run the following command to reload the systemd manager.
sudo systemctl daemon-reload
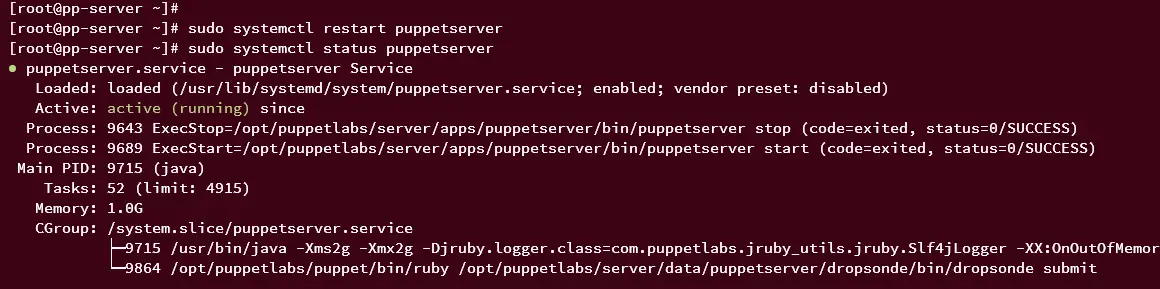
Then start and enable the puppetserver service using the following systemctl command.
sudo systemctl start puppetserver
sudo systemctl enable puppetserver
Once the puppetserver is started, please run the following command to verify it.
sudo systemctl status puppetserver
If puppetserver is running, you should get an output like this:
Configuring Firewalld on Puppet Server
After configuring Puppet Server, you must open port 8140 on the Puppet Server and allow your network to access it. We'll now turn to set up the firewalld and open port 8140 on the pp-server.hwdomain.lan.
Run the following command to add your local network to the firewalld and open the TCP port 8140 that Puppet Server will use.
sudo firewall-cmd --add-source=192.168.10.0/24 --permanent
sudo firewall-cmd --add-port=8140/tcp --permanent
Then, reload the firewalld and verify the list of enabled rules using the following command.
sudo firewall-cmd --reload
sudo firewall-cmd --list-all
You should see the network 192.168.10.0/24 added to the firewalld and port 8140 is available on firewalld.
Registering Puppet Agent to the Puppet Server
This section covers adding and registering Puppet Agent to the Puppet Server. You will register the agent.hwdomain.lan to the Puppet Server pp-server.hwdomain.lan.
To do that, follow these steps:
- Define the default Puppet Server on the agent side and restart the Puppet Agent.
- Initialize the certificate signing request from Puppet Agent.
- Signing certificate request on the Puppet Server.
- Verify the list signed certificate.
Define the default Puppet Server that the agent can connect and the ca_server that will be used for agent verification. In this example, the Puppet Server is running within the fqdn pp-server.hwdomain.lan.
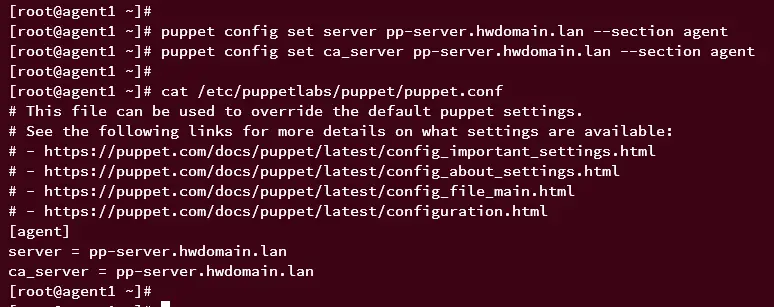
puppet config set server pp-server.hwdomain.lan --section agent
puppet config set ca_server pp-server.hwdomain.lan --section agent
Run the following command to verify the Puppet Agent configuration /etc/puppetlabs/puppet/puppet.conf. Ensure that you have the correct server and ca_server configuration.
cat /etc/puppetlabs/puppet/puppet.conf
You should receive a similar output:
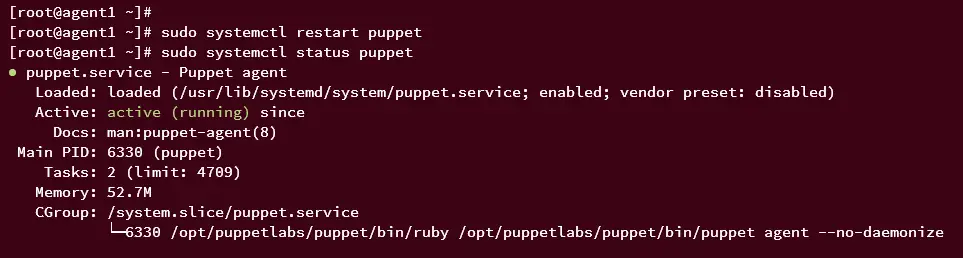
Now run the following command to restart the puppet service on the Agent machine and verify its status of it.
sudo systemctl restart puppet
sudo systemctl status puppet
If you have proper Puppet Agent configuration, you should see the Puppet server with status running.
Next, run the following command to initialize the Puppet Agent machine.
puppet ssl bootstrap
This will generate a new certificate on the Agent machine and authenticate to the Puppet Server.

Move to the Puppet Server and run the following command to verify the list of certificates (both pending and accepted) certificates. then, accept and sign the certificate request from the Agent machine agent1.hwdomain.lan.
puppetserver ca list --all
puppetserver ca sign --certname agent1.hwdomain.lan
After Puppet Server signs the certificate, you should see the message "Successfully signed certificate request for agent1.hwdomain.lan".

Then on the Puppet Agent machine, you should see the message "Notice: Completed SSL initialization".
Lastly, recheck the list of signed certificates on the Puppet Server using the following command.
puppetserver ca list --all
If everything is successful, you should see the agent1.hwdomain.lan machine certificate in the Signed Certificates section.

Now, you have successfully installed and configured Puppet Server and Agent on two different AlmaLinux servers. In the next step, you will create the first Puppet manifest for the automatic deployment of your application.
Creating FIrst Puppet Manifest
This section is dedicated as starting point to use Puppet cas configuration management to automate the deployment of your applications. You will create your first Puppet manifest for installing LAMP Stack on the Puppet Agent agent1.hwdomain.lan.
Be sure to run the following command and create Puppet manifests on the Puppet Server.
Go to /etc/puppetlabs/code/environments/production/ directory and create a new modules directory for your project modules/lamp/.
cd /etc/puppetlabs/code/environments/production/
mkdir -p modules/lamp/{manifests,files}
Move to the modules/lamp/ directory and create a new file manifests/init.pp using the nano editor.
cd modules/lamp/
nano manifests/init.pp
Insert the following Puppet script into the file. This will install LAMP Stack packages on the agent machine, ensure LAMP stack services are running and enabled, create the custom index.html file to /var/www/html/index.html directory, and create a new PHPINFO file /var/www/html/info.php.
class lamp {

    Package { ensure => 'installed' }
    $lamppackages = [ 'httpd', 'mariadb-server', 'php' ]
    package { $lamppackages: }

    Service { ensure => 'running', enable => 'true'}
    $lampsvc = [ 'httpd', 'mariadb' ]
    service { $lampsvc: }

    file { '/var/www/html/index.html':
     ensure  => file,
     content => "<h1><center>Welcome to httpd - Managed by Puppet</center></h1>",
     mode    => '0644',
    }

    file { '/var/www/html/info.php':
     ensure  => file,
     content => "<?php phpinfo(); ?>",
     mode    => '0644',
    }

}
Save and close the file when done.
Next, move again to the directory /etc/puppetlabs/code/environments/production/ and create another file manifests/sites.pp using nano editor.
cd /etc/puppetlabs/code/environments/production/
nano manifests/sites.pp
Define the Puppet Agent and the module that you want to use. In this example, you will deploy the module lamp to the Agent machine agent1.hwdomain.lan.
node 'agent1.hwdomain.lan' {
    include lamp
}
Save the file and exit the editor.
Applying Puppet Manifests on Agent
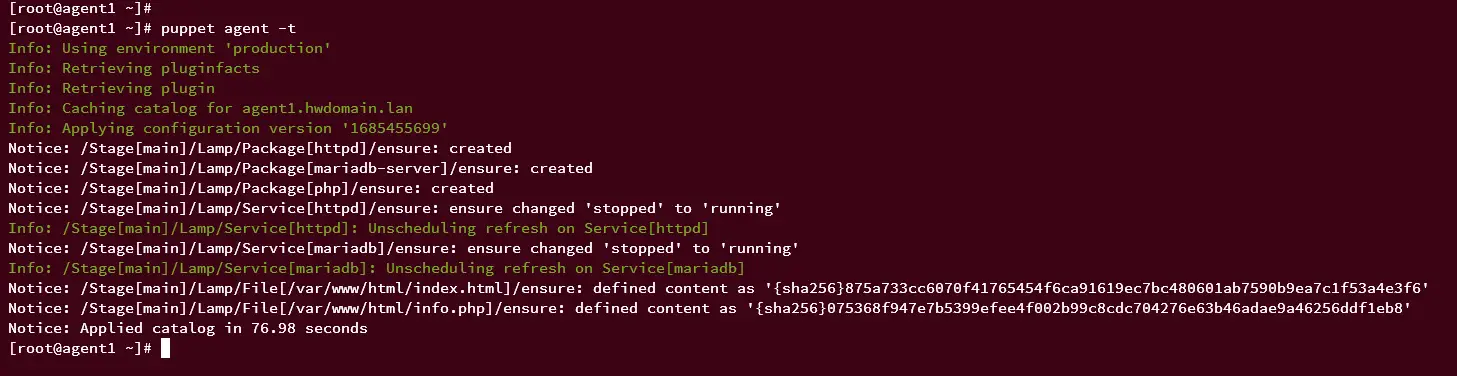
On the Agent machine, run the following command to pull and apply the deployment.
puppet agent -t
The Puppet Agent should now retrieve the catalog deployment from the Puppet Server, cache it on the Agent machine, then apply the deployment.
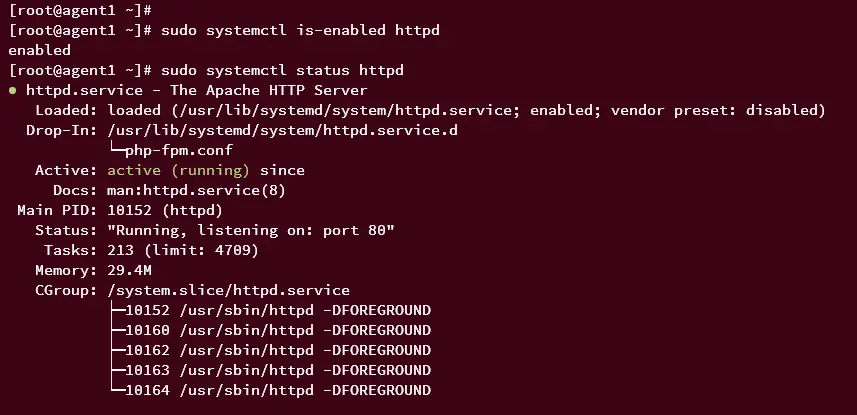
Once everything is finished, run the systemctl command below to verify both httpd and MariaDB services.
Check the httpd service to ensure it's running and enabled.
sudo systemctl is-enabled httpd
sudo systemctl status httpd
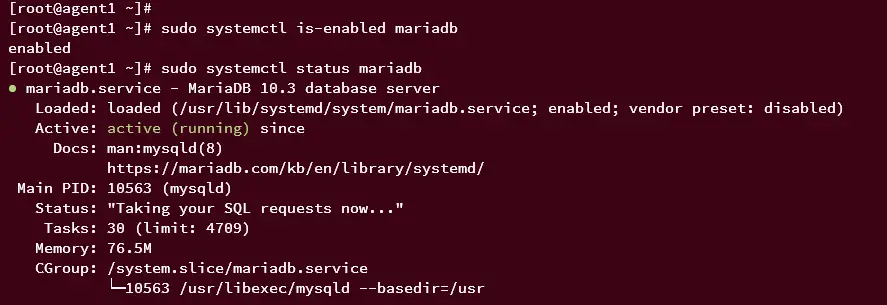
Check the MariaDB service to ensure it's running and enabled.
sudo systemctl is-enabled mariadb
sudo systemctl status mariadb
Launch your web browser and visit the Puppet Agent IP address (i.e: http://192.168.10.21/). If the deployment is successful, you should get the custom index.html page like this:

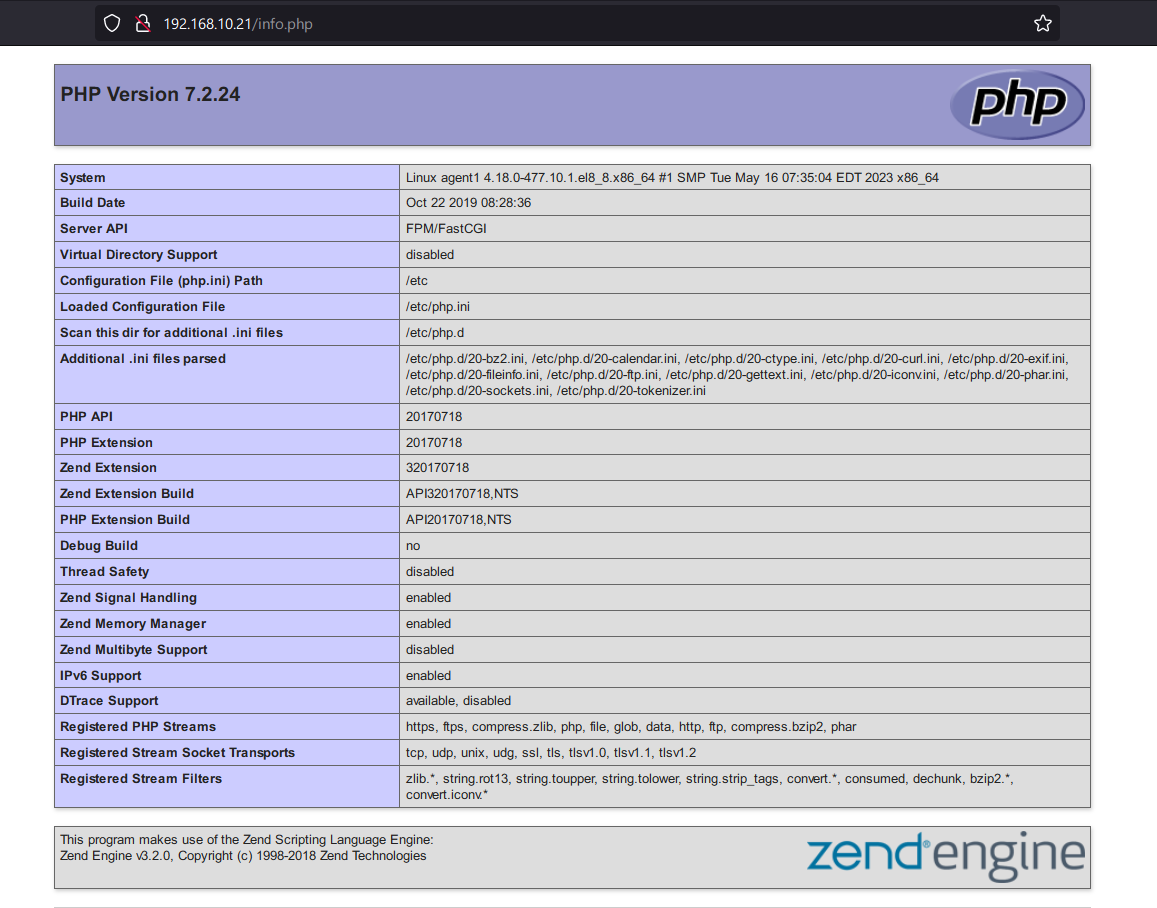
Now navigate to the URL path /info.php (i.e: http://192.168.10.21/info.php). If PHP is installed, you should get the detailed page of PHPINFO like this:
Conclusion
Congratulations, you've successfully completed the installation of Puppet Server and Agent on your AlmaLinux servers. You have also created your first Puppet manifest for deploying the LAMP stack, which is good as for starting point. You can now create your own Puppet manifest to deploy your applications.

