
XWiki is open-source software written in Java. It is a free wiki software that runs on a Java servlet machine. Xwiki stores its information in MySQL or PostgreSQL database.
It has many features such as version control, easy exportation to different formats, page editing, content import, etc. In this tutorial, we are going to configure XWiki with Nginx as a reverse proxy.
Installing XWiki on Debian 11 is a straightforward process that may take up to 15 minutes. Let’s get started!
Table of Contents
Prerequisites
- A server with Debian 11 as OS
- Valid domain pointed to the servers IP address
- User privileges: root or non-root user with sudo privileges
Step 1. Update the System
Before we start with the installation, we need to update the system packages to their latest version available:
sudo apt-get update -y && sudo apt-get upgrade -y
Step 2. Install Java
Since XWiki is written in Java, we need to install it with the following command:
sudo apt install default-jdk -y
To verify the installed version, execute the following command:
java --version
You should get output similar to this:
root@host:~# java --version
openjdk 11.0.18 2023-01-17
OpenJDK Runtime Environment (build 11.0.18+10-post-Debian-1deb11u1)
OpenJDK 64-Bit Server VM (build 11.0.18+10-post-Debian-1deb11u1, mixed mode, sharing)
Step 3. Install MySQL
First, we need to download the repo of MySQL because it is not added to the repo of Debian 11.
wget http://repo.mysql.com/mysql-apt-config_0.8.24-1_all.deb
Once the repo is downloaded, install the release package:
sudo apt install ./mysql-apt-config_0.8.24-1_all.deb
Last is to install the MySQL server with the following command:
sudo apt update

sudo apt install mysql-server -y
After installation, start and enable the service:
sudo systemctl start mysql && sudo systemctl enable mysql
To check the status of the MySQL service, execute the following command:
sudo systemctl status mysql
You should get the following output:
root@host:~# sudo systemctl status mysql
● mysql.service - MySQL Community Server
     Loaded: loaded (/lib/systemd/system/mysql.service; enabled; vendor preset: enabled)
     Active: active (running) since Tue 2023-04-18 11:40:52 CDT; 14s ago
       Docs: man:mysqld(8)
             http://dev.mysql.com/doc/refman/en/using-systemd.html
   Main PID: 5782 (mysqld)
     Status: "Server is operational"
      Tasks: 38 (limit: 4675)
     Memory: 370.6M
        CPU: 1.096s
     CGroup: /system.slice/mysql.service
             └─5782 /usr/sbin/mysqld
Step 4. Install XWiki
Before we can install XWiki, we need to add the repo and the GPG key since they are not added in the default repo of Debian 11.
wget https://maven.xwiki.org/xwiki-keyring.gpg -O /usr/share/keyrings/xwiki-keyring.gpg

wget "https://maven.xwiki.org/stable/xwiki-stable.list" -O /etc/apt/sources.list.d/xwiki-stable.list

sudo apt-get update -y
Once the repo is added, you can list all available installations with the following command:
sudo apt search xwiki
The output will be similar to this:
xwiki-tomcat8-mariadb/stable 15.2 all
  XWiki is a free wiki software platform written in Java with a design emphasis

xwiki-tomcat8-mysql/stable 15.2 all
  XWiki is a free wiki software platform written in Java with a design emphasis

xwiki-tomcat8-pgsql/stable 15.2 all
  XWiki is a free wiki software platform written in Java with a design emphasis

xwiki-tomcat9-common/stable 15.2 all
  XWiki is a free wiki software platform written in Java with a design emphasis

xwiki-tomcat9-mariadb/stable 15.2 all
  XWiki is a free wiki software platform written in Java with a design emphasis

xwiki-tomcat9-mysql/stable 15.2 all
  XWiki is a free wiki software platform written in Java with a design emphasis

xwiki-tomcat9-pgsql/stable 15.2 all
  XWiki is a free wiki software platform written in Java with a design emphasis
We are going to install xwiki-tomcat9-mysql/stable 15.2 version with the following command:
sudo apt install xwiki-tomcat9-mysql -y
While installing, there will be a couple of windows with information. On the first window, hit Yes. It is for MySQL confirmation.

The second window is for the MySQL user password for the XWiki installation.

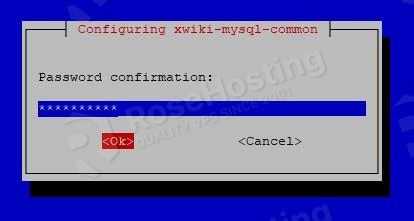
The third step is password confirmation.
The last window is to set a password for the administrative user “root” for XWiki.

Step 5. Install Nginx Web Server
Since we will configure reverse proxy in order to access XWiki via domain name, we need to install the Nginx web server first.
sudo apt-get install nginx -y
After installation, start and enable the service:
sudo systemctl start nginx && sudo systemctl enable nginx
To check the status of the Nginx service, execute the following command:
sudo systemctl status nginx
You should get the following output:
● nginx.service - A high performance web server and a reverse proxy server
     Loaded: loaded (/lib/systemd/system/nginx.service; enabled; vendor preset: enabled)
     Active: active (running) since Tue 2023-04-18 12:13:57 CDT; 44s ago
       Docs: man:nginx(8)
    Process: 9753 ExecStartPre=/usr/sbin/nginx -t -q -g daemon on; master_process on; (code=exited, status=0/SUCCESS)
    Process: 9754 ExecStart=/usr/sbin/nginx -g daemon on; master_process on; (code=exited, status=0/SUCCESS)
   Main PID: 9755 (nginx)
      Tasks: 4 (limit: 4675)
     Memory: 4.3M
        CPU: 71ms
     CGroup: /system.slice/nginx.service
             ├─9755 nginx: master process /usr/sbin/nginx -g daemon on; master_process on;
Step 6. Create Reverse Proxy
To create an Nginx configuration file and set up the reverse proxy so you can access it via the domain name.
Go into the Nginx directory and create a configuration file for the XWiki.
cd /etc/nginx/conf.d/

touch xwiki.conf
Open the file, paste the following lines of code, save the file and close it.
server {
    listen       80;
    server_name  YourDomainName;
    charset utf-8;
    client_max_body_size 64M;

    root /var/www/html;

    location /
    {
        rewrite ^ $scheme://$server_name/xwiki$request_uri? permanent;
    }

    location ^~ /xwiki
    {
       proxy_pass              http://127.0.0.1:8080;
       proxy_cache             off;
       proxy_set_header        X-Real-IP $remote_addr;
       proxy_set_header        X-Forwarded-For $proxy_add_x_forwarded_for;
       proxy_set_header        Host $host;
       proxy_set_header        X-Forwarded-Proto $scheme;
       expires                 $expires;
    }
}
Check the syntax:
nginx -t
You should receive the following output:
root@vps:~# nginx -t
Syntax OK
If the syntax is OK, restart the Nginx service.
systemctl restart nginx
Step 7. Finish XWiki installation
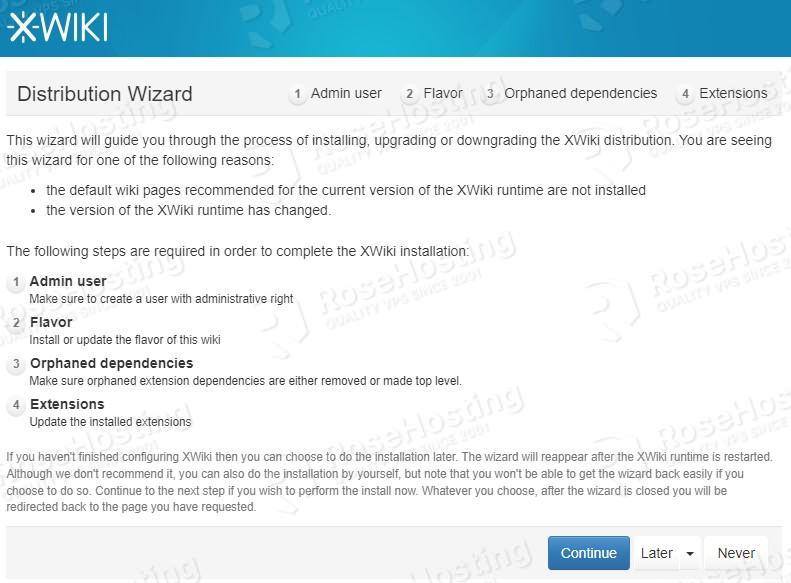
To finish the XWiki installation, access your domain name in the browser http://YourDomainName.
On the first window, click on the Continue button.
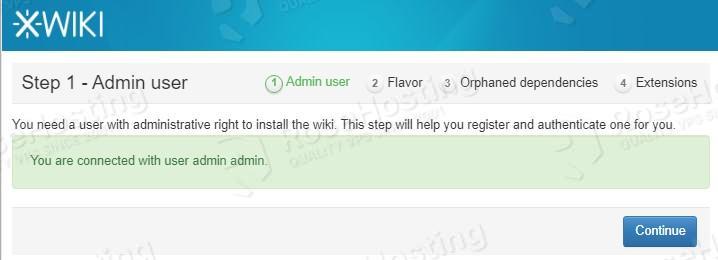
Then, fill in the information about your Admin user:
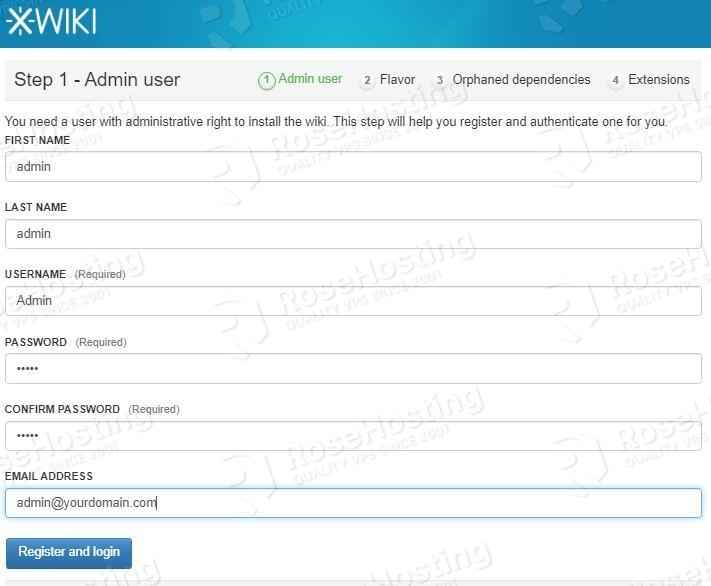
XWiki will create them for you after submitting them:
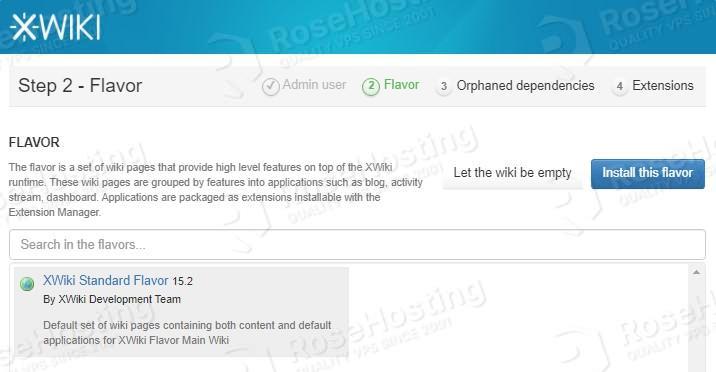
On the next window, click on Let the wiki be empty
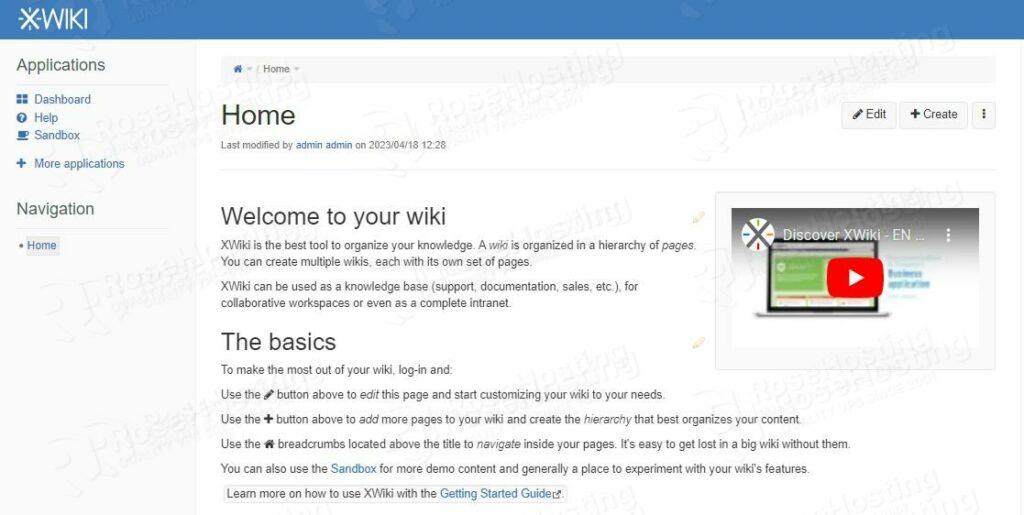
The installation will be complete, and you will be redirected to the home page of XWiki.
Congratulations! You successfully installed Xwiki on Debian 11 with Nginx as a reverse proxy. If you find it difficult to complete these steps, feel free to contact us anytime you want. We are available 24/7.
If you liked this post on installing XWiki on Debian 11, please share it with your friends on social networks or simply leave a reply below. Thanks.