
Elgg is a free and open-source social networking engine that is easy to install and set up, and then used to power your social network. Elgg is built using PHP and is based on the MVC (Model-View-Controller) design pattern. It uses a MySQL/MariaDB database to store data.
Table of Contents
Prerequisites
- Apache or Nginx web server with support for URL rewriting
- PHP (version 8.0 or better) with GD graphics library and mbstring extension library.
- MySQL/MariaDB installed on your Debian VPS.
Step 1. Update the System
Before we start with the installation, we need to update the system packages to their latest version available:
# apt-get update && apt-get upgrade
Step 2. Install Nginx
To install the Nginx web server execute the following command:
# apt install nginx
After successful installation, the Nginx service will be automatically started. To check the status of Nginx, execute the following command:
# systemctl status nginx
Step 3. Install PHP
The latest version of Elgg requires a PHP version “>= 8.0.0”. First, add the GPG key and the repo with the following commands:
# apt -y install lsb-release apt-transport-https ca-certificates

# wget -O /etc/apt/trusted.gpg.d/php.gpg https://packages.sury.org/php/apt.gpg

# echo "deb https://packages.sury.org/php/ $(lsb_release -sc) main" | tee /etc/apt/sources.list.d/php.list

# apt-get update
Once the PHP key and repo are added, you can install the PHP with extensions using this long command:
# apt install php8.2 php8.2-common php8.2-curl php8.2-fpm php8.2-imap php8.2-cli php8.2-xml php8.2-zip php8.2-mbstring php8.2-gd php8.2-mysql
After successful installation, check the PHP version:
# php -v
You should get the following output:
# php -v
PHP 8.2.8 (cli) (built: Jul 16 2023 11:01:56) (NTS)
Copyright (c) The PHP Group
Zend Engine v4.2.8, Copyright (c) Zend Technologies
    with Zend OPcache v8.2.8, Copyright (c), by Zend Technologies
Step 4: Install MariaDB
You can install MariaDB using the following command:
# apt install mariadb-server mariadb-client
Start and enable the mariadb.service with the following commands:
# systemctl start mariadb && systemctl enable mariadb
Check the status of the mariadb.service
# systemctl status mariadb
Step 5. Create an Elgg Database and User
Once the installation is completed, you can access MariaDB using the command:
# mysql -u root
Now create a new database and user who will have full permission to this database:
 CREATE DATABASE elgg;
 CREATE USER 'elgg'@'localhost' IDENTIFIED BY 'StrongPasswordHere';
 GRANT ALL PRIVILEGES ON elgg.* TO 'elgg'@'localhost';
 FLUSH PRIVILEGES;
 EXIT;
Step 6: Download Elgg
Download the latest version of Elgg from the official website using the following command:
# wget https://elgg.org/download/elgg-5.0.2.zip
Extract the downloaded archive in the /var/www directory using the following command:
# unzip elgg-5.0.2.zip -d /var/www
Rename the elgg-5.0.2 directory to elgg:
# mv /var/www/elgg-5.0.2 /var/www/elgg
Elgg needs a special folder to store uploaded files, such as profile icons and photos. For security reasons, it is also recommended that this directory be created outside the document root directory of our Elgg installation.
The directory will be called data, and you can create it with the following command:
# mkdir -p /var/www/data
To change the owner and set the correct permissions for these files, you need to run the following command:
# chown -R www-data:www-data /var/www/elgg
# chown -R www-data:www-data /var/www/data
Step 7: Configure Nginx
Create the virtual host file by executing the following command:
# nano /etc/nginx/conf.d/elgg.conf
And enter the following information:
server {
  listen 80;

  server_name your-domain.com;
  root /var/www/elgg;

  index index.php;

  access_log /var/log/nginx/your-domain.com_access.log;
  error_log /var/log/nginx/your-domain.com_error.log;

  location / {
    try_files $uri $uri/ /index.php?$query_string;
  }

  location ~ \.php$ {
    fastcgi_index index.php;
    fastcgi_split_path_info ^(.+\.php)(.*)$;
    fastcgi_keep_conn on;
    fastcgi_pass unix:/var/run/php/php8.2-fpm.sock;
    include /etc/nginx/fastcgi_params;
    fastcgi_param SCRIPT_FILENAME $document_root$fastcgi_script_name;
  }
}
Check if there are errors with the newly created Nginx configuration:
# /usr/sbin/nginx -t
nginx: the configuration file /etc/nginx/nginx.conf syntax is ok
nginx: configuration file /etc/nginx/nginx.conf test is successful
If the syntax is OK and there are no errors, we can restart Nginx.
# systemctl restart nginx
Step 8. Finish Elgg Installation
Access the URL at http://your-domain.com. You should see the following screen:

Click “Next” at the bottom of the page to continue to the next step.

If there are some missing dependencies, you should install them on your server and then refresh the page again. Once you make sure everything is set up properly, you can click on the “Next” button.
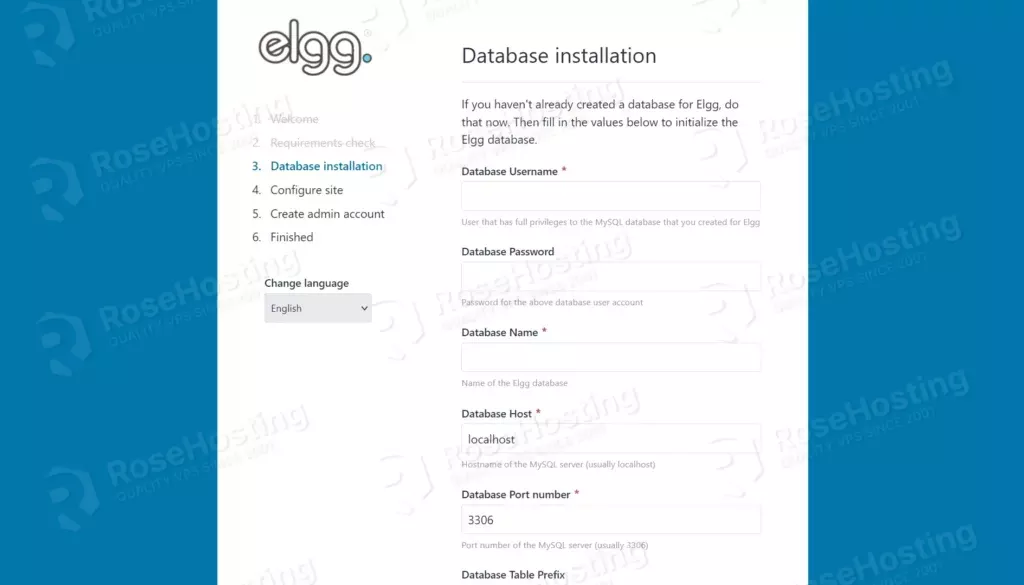
Now you need to enter your database information. Also, you need to enter the Data Directory path (/var/www/data) and enter your Site URL (http://your-domain.com/):
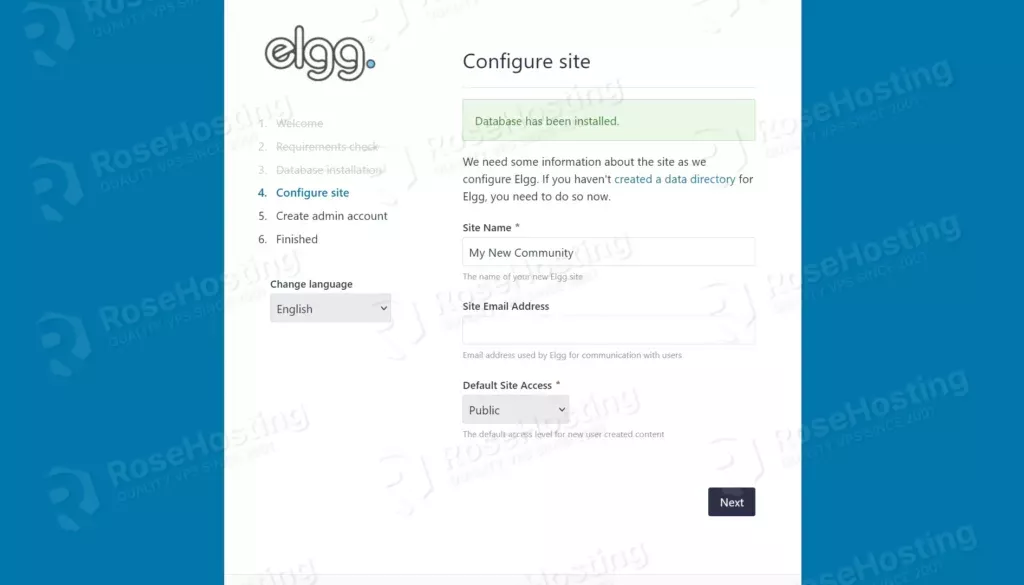
Next, you will need to enter your Site name and create an admin account:

Once this is done, Elgg has been successfully installed on your system.
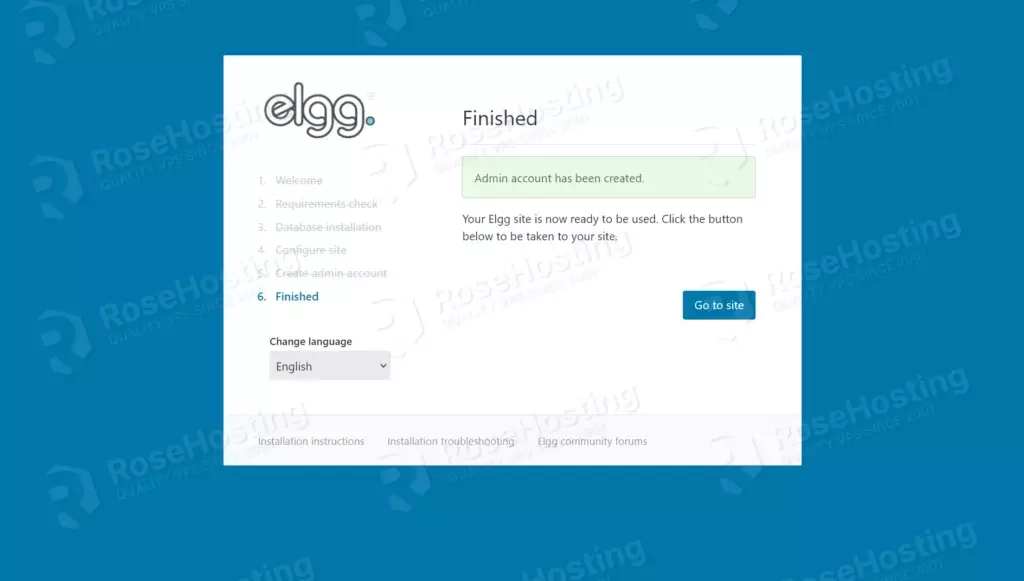
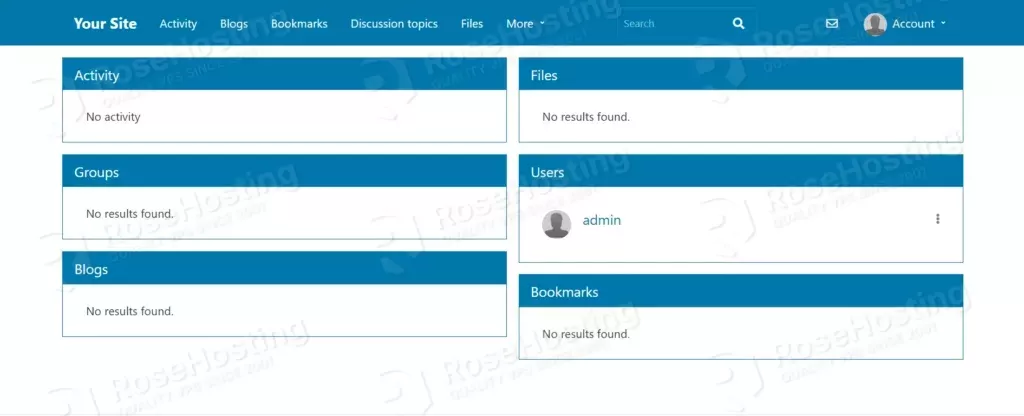
You can now access your admin panel and log in with your admin account at http://your-domain.com/admin
That’s it. You successfully installed and configured Elgg on Debian 11. Of course, you do not have to do this if you find the setup complex. You can always contact our Technical support.
We are available 24/7 and will help you with the Elgg installation and configuration.
If you liked this about installing Elgg on Debian 11, please share it with your friends on social networks or leave a reply below. Thanks.