
Teamspeak server is a popular voice and chat communication software among online game users and other communities. It is a proprietary VOIP application for voice communication between users on a chat channel.
It offers some features like mobile connectivity, an advanced permission system, perfect voice quality, etc. Both Teamspeak server and client can be installed on multiple operating systems like Linux, FreeBSD, MacOS, and Windows in both 32 and 64-bit. In this article, we will show you how to install the Teamspeak server on Ubuntu 22.04.
Table of Contents
Prerequisites
- An Ubuntu VPS
- Root access or regular system user with sudo privileges
Step 1. Log in to your server via SSH
First, you will need to log in to your AlmaLinux 8 VPS via SSH as the root user:
ssh root@IP_Address -p Port_number
You will need to substitute the ‘IP_Address’ and ‘Port_number’ with your server’s respective IP address and SSH port number. Additionally, replace ‘root’ with the username of the system user with sudo privileges.
You can check whether you have the proper AlmaLinux version installed on your server with the following command:
# lsb_release -a
It will return an output like this.
No LSB modules are available.
Distributor ID: Ubuntu
Description: Ubuntu 22.04 LTS
Release: 22.04
Codename: jammy
Step 2. Create User
In this step, we are going to create a new system user to run the TeamSpeak server. Let’s execute the command below, you can substitute ‘teamspeak’ with any username you like.
# useradd -mrd /opt/teamspeak teamspeak -s "$(which bash)"
The command above will automatically create the directory /opt/teamspeak as the home directory for user ‘teamspeak’. We will use this directory for installation purposes.
Step 3. Download and Install Teamspeak Server
We created a new user to run the Teamspeak server in the last step, Now let’s switch to that account and download the Teamspreak server.
# su - teamspeak
$ wget https://files.teamspeak-services.com/releases/server/3.13.7/teamspeak3-server_linux_amd64-3.13.7.tar.bz2 -O teamspeak-server.tar.bz2
For a more recent version of the server, you can check the Teamspeak download page and make sure to download the 64bit version for Linux.
Once downloaded, we can extract the file.
$ tar xvfj teamspeak-server.tar.bz2 --strip-components 1
The command above will extract all contents directly in the path where we execute the command, /opt/teamspeak.
Now, let’s accept the license agreement by creating a blank file.
$ touch ~/.ts3server_license_accepted
Once created, let’s logout from user ‘teamspeak’
$ exit
Step 4. Create Systemd Service File
We need to create a systemd service file to manage our Teamspeak service. Let’s create a systemd service file for Teamspeak.
# nano /etc/systemd/system/teamspeak.service
Paste the following into the systemd service file, then save it.
[Unit]
Description=Teamspeak Service
Wants=network.target

[Service]
WorkingDirectory=/opt/teamspeak
User=teamspeak
ExecStart=/opt/teamspeak/ts3server_minimal_runscript.sh
ExecStop=/opt/teamspeak/ts3server_startscript.sh stop
ExecReload=/opt/teamspeak/ts3server_startscript.sh restart
Restart=always
RestartSec=15

[Install]
WantedBy=multi-user.target
Save the file, exit from nano editor then reload systemd for changes to take effect.
# systemctl daemon-reload
Now, let’s enable Teamspeak to run on boot and run the service now.
# systemctl enable --now teamspeak
The command above will return an output like this:
Created symlink /etc/systemd/system/multi-user.target.wants/teamspeak.service → /etc/systemd/system/teamspeak.service.
At this point, the Teamspeak server should be up and running, and it will automatically run on boot. To verify, run this command:
# systemctl status teamspeak
You will see an output similar to this
root@ubuntu22:~# systemctl status teamspeak
● teamspeak.service - Teamspeak Service
Loaded: loaded (/etc/systemd/system/teamspeak.service; enabled; vendor preset: enabled)
Active: active (running) since Thu 2023-07-20 10:54:12 UTC; 1s ago
Main PID: 2319 (ts3server)
Tasks: 21 (limit: 4516)
Memory: 19.3M
CPU: 1.847s
CGroup: /system.slice/teamspeak.service
└─2319 ./ts3server

Jul 20 10:54:13 ubuntu22 ts3server_minimal_runscript.sh[2319]: I M P O R T A N T
Jul 20 10:54:13 ubuntu22 ts3server_minimal_runscript.sh[2319]: ------------------------------------------------------------------
Jul 20 10:54:13 ubuntu22 ts3server_minimal_runscript.sh[2319]: ServerAdmin privilege key created, please use it to gain
Jul 20 10:54:13 ubuntu22 ts3server_minimal_runscript.sh[2319]: serveradmin rights for your virtualserver. please
Jul 20 10:54:13 ubuntu22 ts3server_minimal_runscript.sh[2319]: also check the doc/privilegekey_guide.txt for details.
Jul 20 10:54:13 ubuntu22 ts3server_minimal_runscript.sh[2319]: token=EmrA4H5Qh9jxRjhQlQ++Tf3eTyRN09YKoQJg6QBF
Jul 20 10:54:13 ubuntu22 ts3server_minimal_runscript.sh[2319]: ------------------------------------------------------------------
Jul 20 10:54:13 ubuntu22 ts3server_minimal_runscript.sh[2319]: 2023-07-20 10:54:13.209525|INFO |Query | |listening for query on 0.0.0.0:10011, [::]:10011
Jul 20 10:54:13 ubuntu22 ts3server_minimal_runscript.sh[2319]: 2023-07-20 10:54:13.209676|INFO | | |creating QUERY_SSH_RSA_HOST_KEY file: ssh_host_rsa_key
Jul 20 10:54:13 ubuntu22 ts3server_minimal_runscript.sh[2319]: 2023-07-20 10:54:13.461073|INFO | | |myTeamSpeak identifier revocation list was downloaded successfully - all related features are activat>
Please make a note of the token shown there. You will need it to connect from the Teamspeak client for the first time.
EmrA4H5Qh9jxRjhQlQ++Tf3eTyRN09YKoQJg6QBF
The token key is unique; you will see your own token key.
Step 5. Create Admin Password
In this step, we will need to set an admin password for TeamSpeak. We need this password to connect from a Teamspeak client.
First, stop the TeamSpeak service with the following command:
# systemctl stop ts3server
Then, let’s switch to user ‘teamspeak’ and start the TeamSpeak service by passing the password parameter:
# su - teamspeak
$ ./ts3server_startscript.sh start serveradmin_password=m0d1fyth15
Next, we also need to whitelist your Teamspeak server and client IP addresses. Let’s add your server IP and client IP to the TeamSpeak allowlist file:
$ nano /opt/teamspeak/query_ip_allowlist.txt
Add the IPs, one IP per line.
Step 6. Connect to Teamspeak Server
In this step, we can download a Teamspeak client for our desktop machine. Please go to their download page and download the correct installation file that suits your desktop operating system.
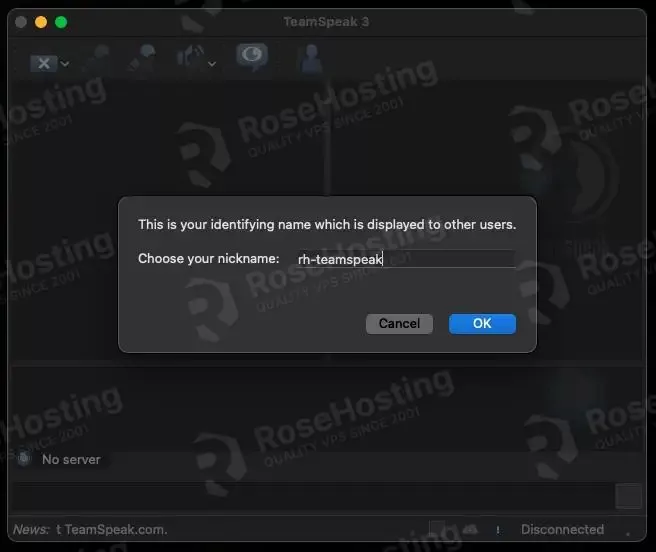
Once downloaded and installed, you will be asked to create a nickname
Then you need to input your Teamspeak server IP address and its password; the password is the one we created earlier.
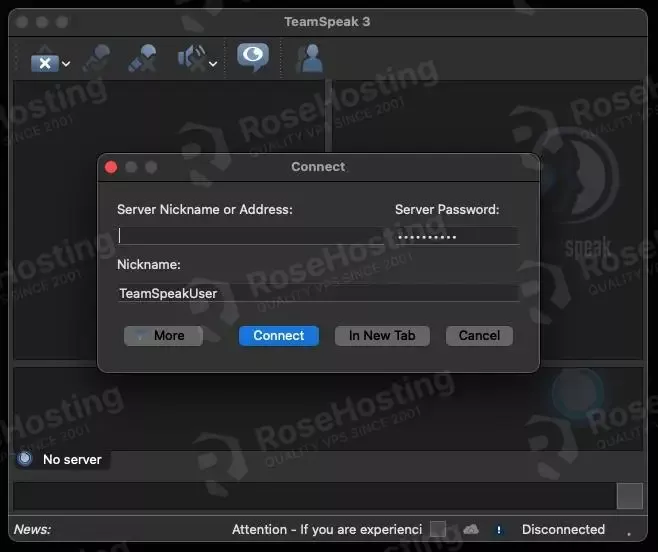
Click Connect to connect to the Teamspeak server
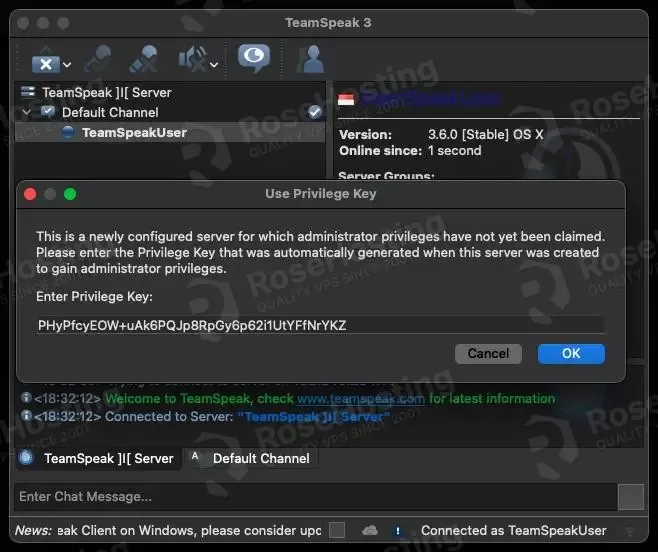
Then, you will be prompted for the privilege/token key. It is the key we mentioned earlier when running the systemctl status teamspeak. You can also find this token key by running this command.
# grep -i token /opt/teamspeak/logs/*
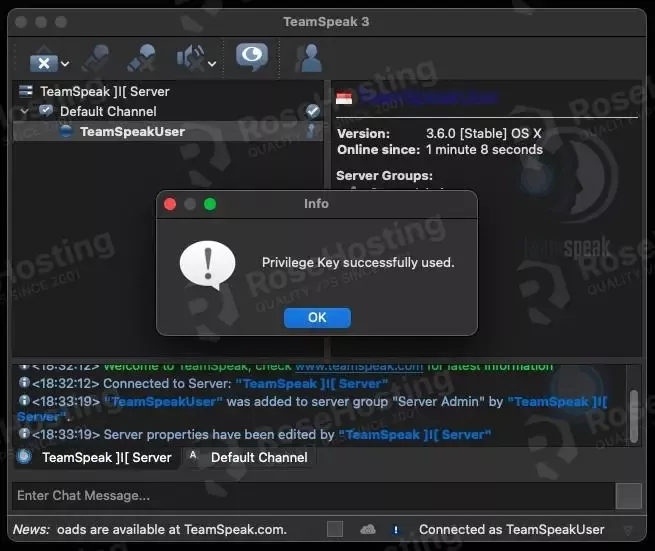
Click OK to proceed.
That’s it; you are successfully connected to your Teamspeak server. After connecting to the Teamspeak server, you can stop it and use the systemd service to manage the service.
# su - teamspeak
$ ./ts3server_startscript.sh stop
$ exit
Finally, run the Teamspeak server using the systemd service file
# systemctl start teamspeak
Congratulation! You followed this article, and now you have successfully installed the Teamspeak server on your Ubuntu 22.04 machine.
Of course, you don’t have to spend your time and follow this article to install the Teamspeak server on Ubuntu 22.04 if you have an active Ubuntu VPS Hosting service with us, in which case you can simply ask our expert Linux admins to install the Teamspeak server for you. Our admins are available 24×7 and will respond to your request immediately.
PS. If you liked this post on how to install the TeamSpeak server on Ubuntu 22.04, please share it with your friends on social networks or simply leave a reply below. Thanks.