This guide will walk you through the simple steps of enabling automatic login in Fedora, both from the command line and the graphical user interface (GUI).
Before configuring automatic login in Fedora, let's discuss some important security considerations.
Table of Contents
Security Considerations Before Enabling Automatic Login
Enabling automatic login in your Fedora Linux operating system can be convenient, but it comes with certain security concerns that you should be aware of before enabling it. Here are some of the key security concerns:
- Unauthorized Access: When automatic login is enabled, anyone who has physical access to your computer can easily gain access to your user account without needing a password. This poses a significant security risk if your computer is in a shared or public environment.
- Data Privacy: Enabling automatic login means that anyone with physical access to your computer can potentially access your personal files, documents, and data. If you store sensitive or confidential information on your computer, automatic login may not be suitable.
- No Password Protection: Automatic login bypasses the password prompt at startup, which is a security measure designed to protect your user account. Without this password protection, your computer becomes more vulnerable to unauthorized access.
- Software Installation and Updates: Automatic login can allow unauthorized users to install software, modify system settings, or apply updates without your knowledge or consent. This could lead to potential system vulnerabilities or instability.
- Online Accounts: If your user account is linked to online services or accounts (e.g., email, social media), enabling automatic login means that those accounts could be accessed if someone gains access to your computer.
- Remote Access: Enabling automatic login may make it easier for attackers to gain remote access to your computer if they can exploit vulnerabilities in your network or the services running on your computer.
To mitigate these security concerns, consider the following precautions:
- Use Automatic Login Only in Secure Environments: If you must use automatic login, limit it to secure environments where you have physical control over your computer.
- Use a Guest Account: If your computer is shared, consider creating a guest account with limited privileges instead of enabling automatic login for your primary user account.
- Lock Your Computer: When stepping away from your computer, manually lock the screen (e.g., by pressing
Super + L) to prevent unauthorized access. - Enable Disk Encryption: Use full-disk encryption tools like LUKS or BitLocker to protect your data even if someone gains physical access to your computer.
- Create a Strong Password: Ensure that your user account has a strong and unique password to protect it in case you need to disable automatic login temporarily.
Ultimately, the decision to setup automatic login in Fedora should be based on your specific needs and the security risks associated with your computing environment. Balance the convenience of automatic login with the need to protect your data and maintain the security of your system.
Enable Automatic Login in Fedora from Command Line
Enabling automatic login in Fedora is a multi-step process, so I'll break it down into simple, easy-to-follow steps. Remember that enabling automatic login can pose a security risk, as anyone with physical access to your computer can access your files and data. Use this feature judiciously, especially if you're using a laptop or a device that others can easily access.
The following instructions are generally applicable to recent Fedora versions with GNOME desktop environment. However, if you're using an older version, some steps might differ.
Step 1: Open the Terminal
You can find the Terminal in your applications menu, often under "System Tools" or similar categories. Click on the Terminal icon to open it.
Step 2: Edit the GDM (GNOME Display Manager) Configuration File
Open the GDM Custom Configuration File using your favorite text editor. I am going to use nano editor.
$ sudo nano /etc/gdm/custom.conf
Step 3: Modify GDM Configuration File
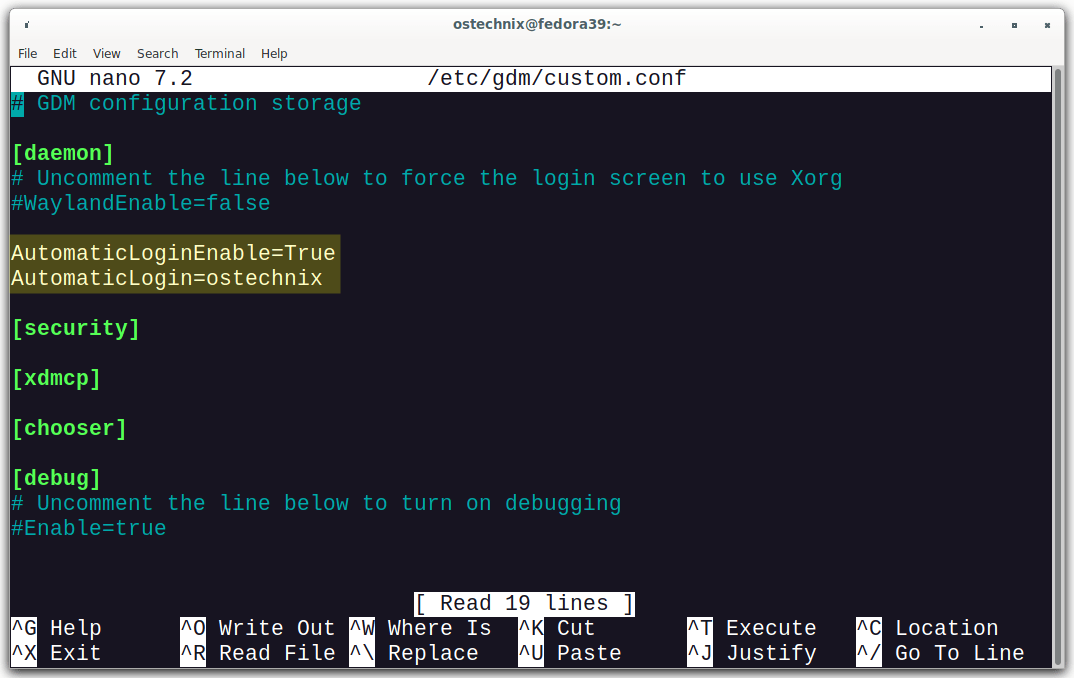
In the custom.conf file, look for a section labeled [daemon].
Under the [daemon] section, add or modify the following lines:
AutomaticLoginEnable=True
AutomaticLogin=[YourUsername]
Replace [YourUsername] with your actual username. For example, if your username is ostechnix, it should read AutomaticLogin=ostechnix.
Press Ctrl + O to save the file and press Ctrl + X to exit the editor.
Step 4: Restart Your Computer
After saving and closing the file, restart your computer for the changes to take effect. You can do this from the GUI, or type reboot in the Terminal and press Enter.
Step 5: Verify Automatic Login
Upon restarting, your Fedora system should log you in automatically without asking for a password.
As mentioned earlier, automatic login can be a security risk. Be cautious, especially if you're using a shared or easily accessible computer.
How to Disable Automatic Login Feature
To disable automatic login in Fedora, edit the GDM configuration file and set the value of AutomaticLoginEnable parameter to False.
AutomaticLoginEnable=False
Enable Automatic Login in Fedora from GUI
Enabling automatic login in Fedora through the graphical user interface (GUI) is a user-friendly process, especially for beginners. Here’s how you can do it step by step. Note that the exact steps might slightly vary depending on the version of Fedora you are using, but the general process remains the same.
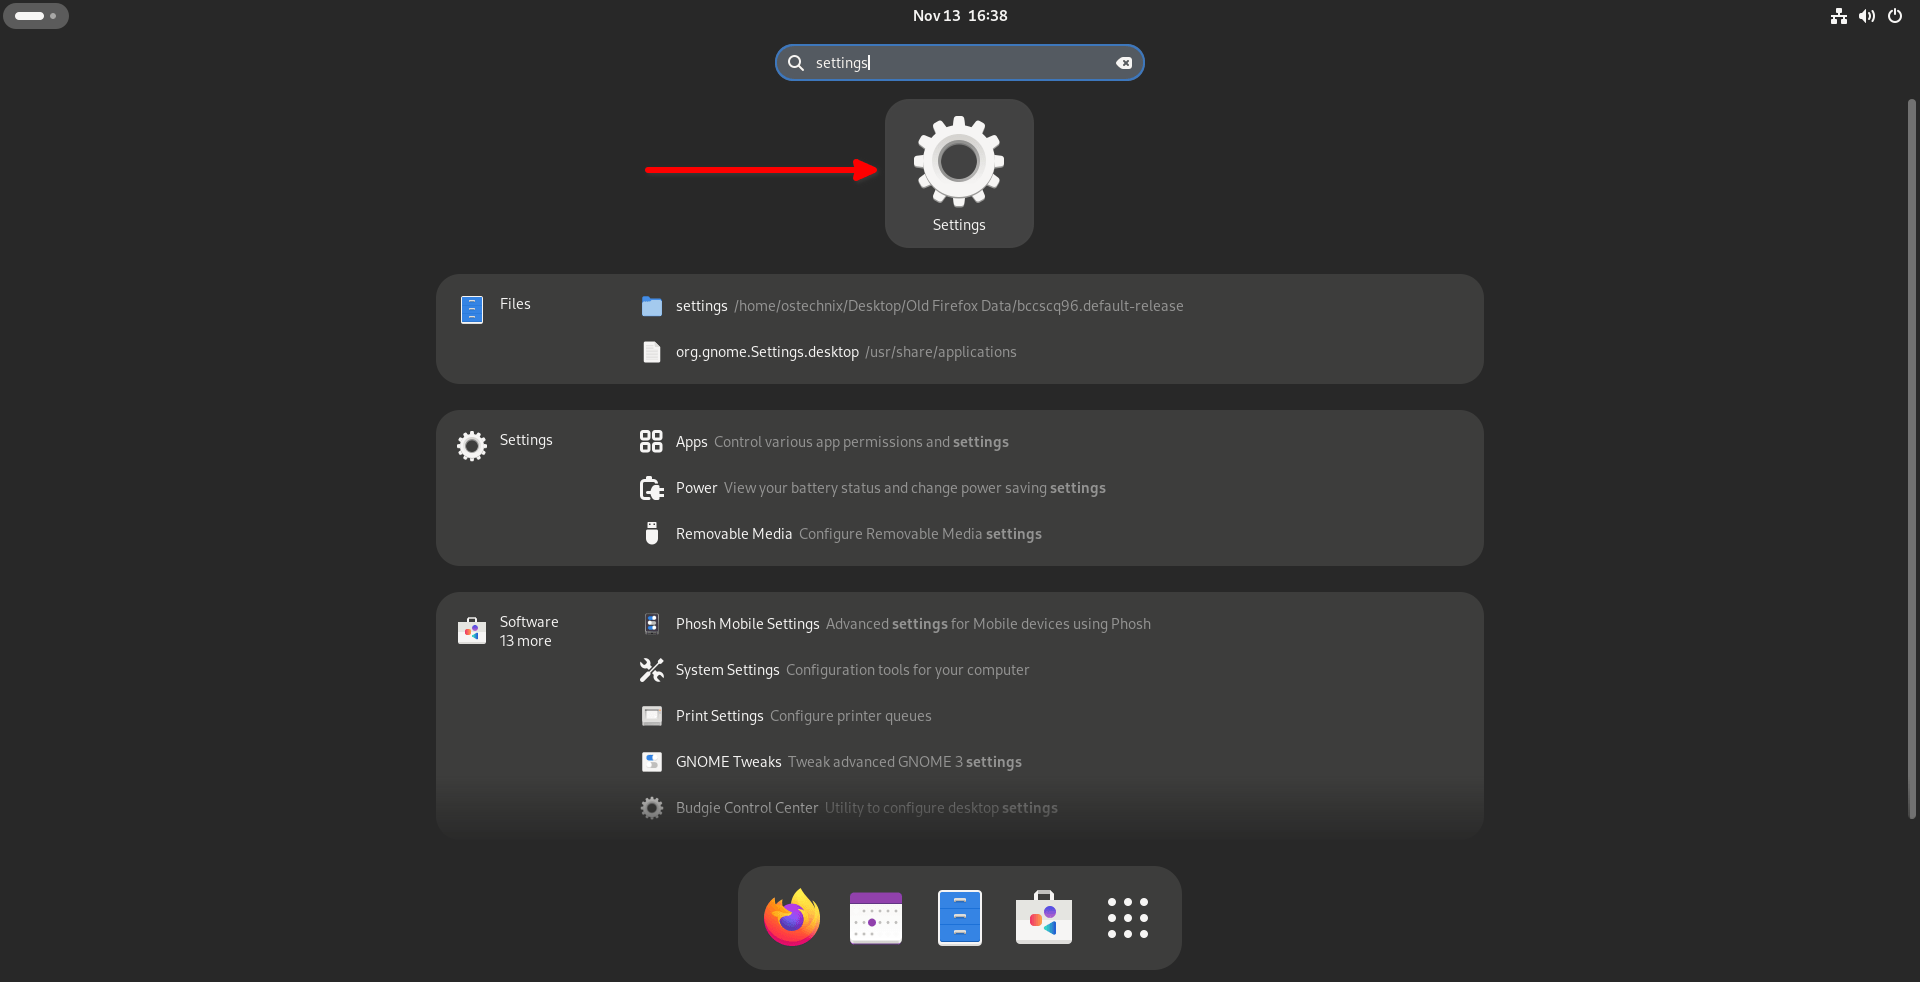
Step 1: Access System Settings
Click on the "Activities" or "Show Applications" button (usually at the bottom left or top left corner of the screen). Then, find and click on the "Settings" icon. This opens the main system settings menu.
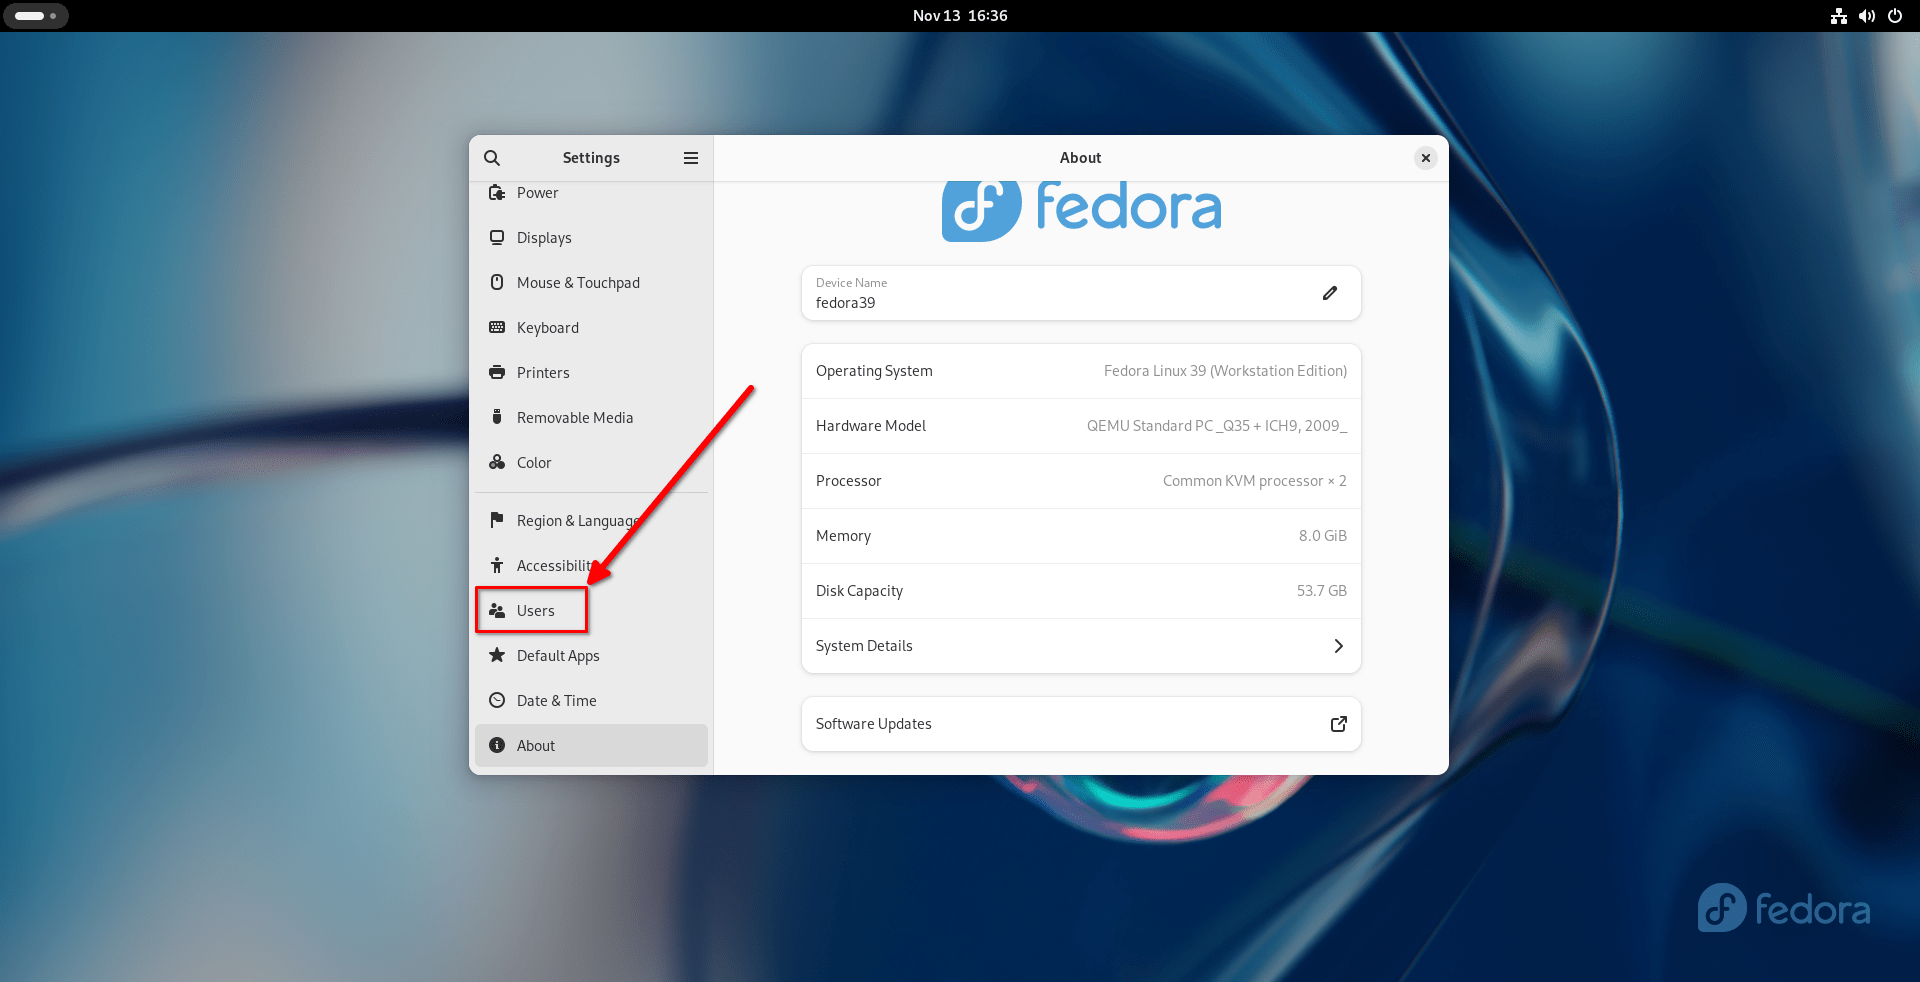
Step 2: Navigate to Users Settings
In the settings menu, look for a section called "Users". This section allows you to manage user settings, including login options.
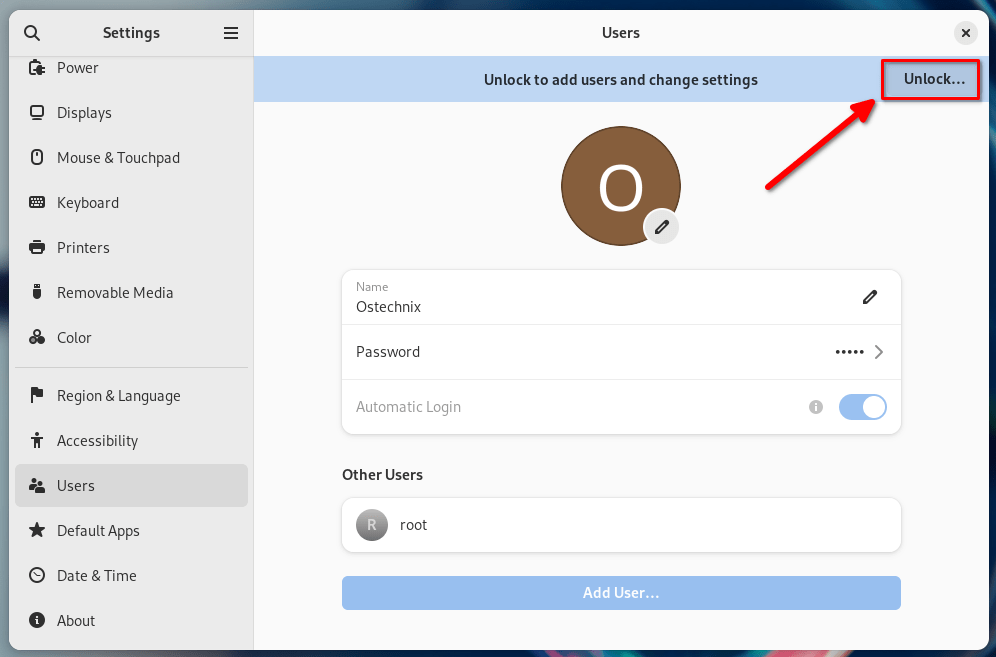
Step 3: Unlock User Settings
If your settings are locked, you'll see a "Unlock" button usually at the top right corner of the window. Click it. You may be prompted to enter your password. This is to ensure that only authorized users can make changes to user accounts.
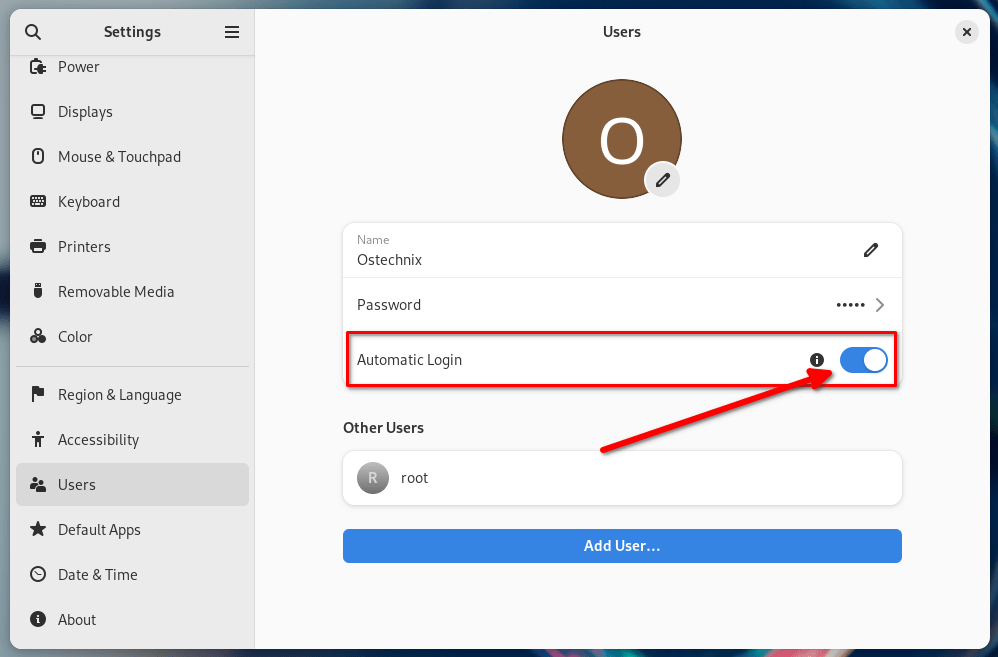
Step 4: Enable Automatic Login
Click on your user account from the list shown. Make sure you select the account for which you want to enable automatic login.
Look for an option labeled "Automatic Login", "Enable Automatic Login", or something similar.
Toggle the switch box next to "Automatic Login" to enable it. This action sets your account to log in automatically without a password prompt.
Step 5: Confirm and Close
If there’s an "Apply" or "OK" button, click it to save your changes. If there is no such button, simply close the settings window.
Step 6: Restart Your Computer
For the changes to take effect, restart your computer. You can do this by clicking the top right corner of the screen, where your user menu is, and selecting the “Restart” option.
Step 7: Verify Automatic Login
After your computer restarts, it should automatically log in to your user account without asking for a password.
Security Implications: Keep in mind that enabling automatic login can be a security risk, particularly if others have physical access to your computer. It’s not recommended for laptops or public/shared computers.
This method is generally easier and safer for beginners, as it avoids the need to edit configuration files manually.
Conclusion
In conclusion, enabling automatic login in Fedora Linux can be accomplished both through the command line and the graphical user interface (GUI).
While the command line method involves editing the GNOME Display Manager's configuration file, the GUI approach provides a more straightforward and beginner-friendly process, involving a few simple steps within the system settings.
Both methods are effective, but it's crucial to consider the security implications of automatic login, especially on devices that are shared or easily accessible.
Related Read: How To Enable Automatic Login In Ubuntu Desktop And Server
Featured Image by Gerd Altmann from Pixabay.

