
In this tutorial, we are going to explain in step-by-step detail how to install Uptime Kuma on Debian 12.
Uptime Kuma (or just Kuma) is an open-source monitoring tool used for monitoring services over HTTP, HTTPS, DNS, and other protocols. Uptime Kuma offers a variety of features such as multi-languages, multiple status pages, proxy support, etc.
In this blog post, we will configure Uptime Kuma with Apache serving as a reverse proxy. Installing Uptime Kuma on Debian 12 with Apache as a reverse proxy will take up to 20 minutes. Let’s get started!
Table of Contents
Prerequisites
- A Debian 12 VPS
- User privileges: root or non-root user with sudo privileges
Step 1. Update the System
Every fresh installation of the OS requires the system packages to be updated to the latest versions available.
sudo apt-get update -y && sudo apt-get upgrade -y
If you have a kernel update pending, you will need to reboot in order for the new kernel version to be loaded. Once the updates are complete, you can continue to the next step.
Step 2. Install Apache Web Server
To install Apache, execute the following command:
sudo apt install apache2 -y
Once Apache is installed, you can start and enable the service like so:
sudo systemctl enable apache2 && sudo systemctl start apache2
Check if the service is up and running:
sudo systemctl status apache2
You should receive the following output:
root@host:~# sudo systemctl status apache2
● apache2.service - The Apache HTTP Server
     Loaded: loaded (/lib/systemd/system/apache2.service; enabled; preset: enabled)
     Active: active (running) since Wed 2023-10-05 06:26:23 CDT; 1 day 5h ago
       Docs: https://httpd.apache.org/docs/2.4/
   Main PID: 661 (apache2)
      Tasks: 10 (limit: 4644)
     Memory: 29.6M
        CPU: 9.372s
     CGroup: /system.slice/apache2.service
Step 3. Install NodeJS
To install NodeJS execute the following command:
sudo apt install nodejs -y
To check the installed NodeJS version, execute the following command:
node -v

root@host:~# node -v
v18.13.0
After successful installation of NodeJS, we need to install NPM as well:
sudo apt install npm -y
To check the installed NPM version execute the following command:
npm -v

root@host:~# npm -v
9.2.0
Step 4. Install Uptime Kuma
Now with all the required software installed, we can start to install Uptime Kuma itself. First, we need to clone the Uptime Kuma repository from GitHub:
cd /opt

git clone https://github.com/louislam/uptime-kuma.git
You should allow some time for the repo to be cloned into the /opt directory:
root@host:/opt# git clone https://github.com/louislam/uptime-kuma.git
Cloning into 'uptime-kuma'...
remote: Enumerating objects: 28276, done.
remote: Counting objects: 100% (5082/5082), done.
remote: Compressing objects: 100% (446/446), done.
remote: Total 28276 (delta 4745), reused 4771 (delta 4619), pack-reused 23194
Receiving objects: 100% (28276/28276), 21.69 MiB | 5.30 MiB/s, done.
Resolving deltas: 100% (21463/21463), done.
Once downloaded, go into the uptime-kuma directory, and install the pm2 production process manager:
sudo npm install pm2 -g
After this run the following command for the setup:
npm run setup
Once installed, start the Uptime Kuma server with the following command:
pm2 start server/server.js --name uptime-kuma
Once started, you should get the following output:
[PM2] Spawning PM2 daemon with pm2_home=/root/.pm2
[PM2] PM2 Successfully daemonized
[PM2] Starting /opt/uptime-kuma/server/server.js in fork_mode (1 instance)
[PM2] Done.
│ id │ name       │ namespace   │ version │ mode    │ pid   │ uptime │ ↺ │ status │ cpu  │ mem  │ user
│ 0  │ uptime-kuma    │ default     │ 1.23.2  │ fork    │ 17161 │ 0s    │ 0 │ online │ 0% │ 42.3mb│ root
After this, we need enable the pm2 service to start on system boot with the following command:
pm2 startup
You should get the following output:
[PM2] Writing init configuration in /etc/systemd/system/pm2-root.service
[PM2] Making script booting at startup...
[PM2] [-] Executing: systemctl enable pm2-root...
Created symlink /etc/systemd/system/multi-user.target.wants/pm2-root.service → /etc/systemd/system/pm2-root.service.
[PM2] [v] Command successfully executed.
+---------------------------------------+
[PM2] Freeze a process list on reboot via:
$ pm2 save

[PM2] Remove init script via:
$ pm2 unstartup systemd
With all of the installation done, you can access the Uptime Kuma instance at http://YourServerIPAddress:3001. Keep in mind that you will have to add the port number 3001 at the end of your URL in order for the service to be accessed.
Step 5. Set up Apache as a reverse proxy
While Uptime Kuma is installed, it is not convenient to have to use its port number to access the service. To fix that, we’ll use Apache as the frontend which will sit between the visitor and the Uptime Kuma instance. This also can make your Uptime Kuma instance more secure by restricting access using Apache.
Apache can be installed using apt install apache2 if you don’t have it installed. Enter Apache’s configuration directory and create a configuration file for the Uptime Kuma instance.
cd /etc/apache2/sites-available/
touch kuma.conf
Open the file, paste the following lines of code, save the file and close it. Make sure to change yourdomain.com to the domain name you plan to use to access the Kuma instance.
<VirtualHost *:80>
ServerName yourdomain.com
DocumentRoot /var/www/html/

ProxyPass / http://localhost:3001/
RewriteEngine on
RewriteCond %{HTTP:Upgrade} websocket [NC]
RewriteCond %{HTTP:Connection} upgrade [NC]
RewriteRule ^/?(.*) "ws://localhost:3001/$1" [P,L]

ErrorLog ${APACHE_LOG_DIR}/error.log
CustomLog ${APACHE_LOG_DIR}/access.log combined

</VirtualHost>
Enable the Apache configuration for Kuma and enable Apache’s rewrite, proxy, and proxy_http modules.
a2dissite 000-default.conf

sudo a2enmod rewrite

sudo a2enmod proxy

sudo a2enmod proxy_http

sudo a2ensite kuma.conf
Check the syntax:
apachectl -t
You should receive the following output:
root@vps:~# apachectl -t
Syntax OK
If the syntax is OK, restart the Apache service.
systemctl restart apache2
Step 6. Finish Uptime Kuma installation
If everything is configured properly, you will able to access the Uptime Kuma instance at http://YourDomainName.
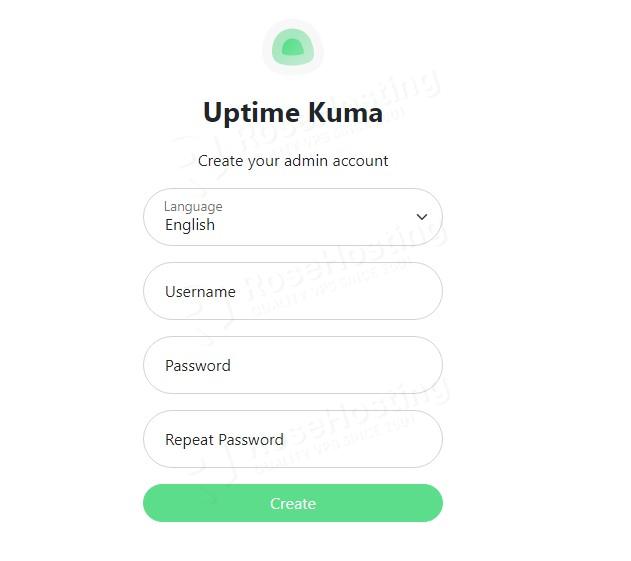
Enter a username and a strong password.
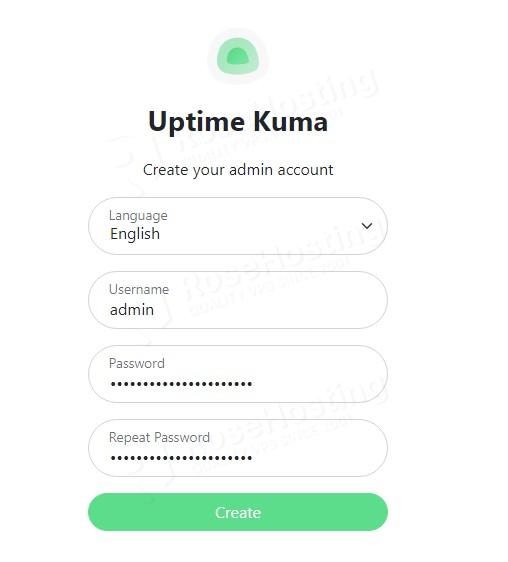
Once you click on the Create button, you will be redirected to the Uptime-Kuma dashboard.
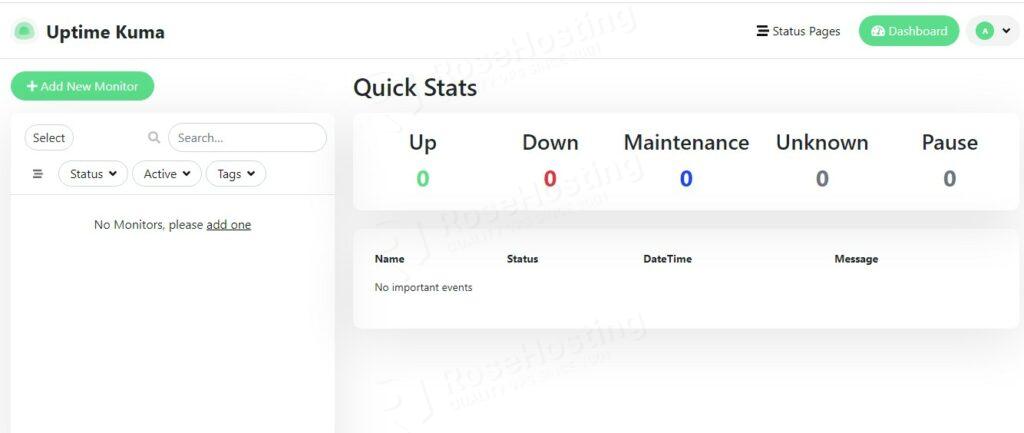
Congratulations! In this tutorial, you learned how to install Uptime Kuma on Debian 12. You can now set it up and add the hosts and services you want monitored.
If you do not want to install Uptime Kuma by yourself, or if you find this setup difficult, you can sign up for one of our VPS plans and our team of expert administrators will do the rest. You’ll also get one of the fastest servers in the Please note, that you can always contact us since we are available 24/7.
If you liked this post on how to install Uptime Kuma on Debian 12, please share it with your friends on the social networks using the buttons on the left or simply leave a reply below. Thanks.