
TYPO3 CMS is a free and open-source content management system (CMS) used for creating and managing websites and web applications. It is written in PHP and utilizes a MySQL database to store content and configuration data. In this tutorial, we are going to show you how to install TYPO3 CMS on AlmaLinux 9.
TYPO3 is known for its flexibility, scalability, and extensibility, making it a popular choice for a wide range of website types, from small personal blogs to large corporate websites and intranets. We’ll be using Nginx to access TYPO3, and we’ll show you how to set that up. Let’s begin.
Table of Contents
Prerequisites
- A server with AlmaLinux 9, or one of our AlmaLinux VPS plans
- User privileges: root or non-root user with sudo privileges
Step 1. Update the System
After a fresh installation of AlmaLinux, we need to update the packages to the latest versions available:
# dnf update && dnf upgrade
Step 2. Install the Nginx web server
Install the Nginx web server using the following command:
# dnf install nginx
To start and enable the Nginx service, execute the following command:
# systemctl start nginx && systemctl enable nginx
Check the status of the Nginx service:
# systemctl status nginx
You should get the following output:
● nginx.service - The nginx HTTP and reverse proxy server
     Loaded: loaded (/usr/lib/systemd/system/nginx.service; enabled; vendor preset: disabled)
    Drop-In: /usr/lib/systemd/system/nginx.service.d
             └─php-fpm.conf
     Active: active (running)
   Main PID: 18114 (nginx)
      Tasks: 2 (limit: 10907)
     Memory: 2.2M
        CPU: 28ms
     CGroup: /system.slice/nginx.service
             ├─18114 "nginx: master process /usr/sbin/nginx"
             └─18115 "nginx: worker process"
Step 3. Configure Firewall
By default, AlmaLinux 9.1 comes with the firewalld service enabled. Run the following command to allow HTTP traffic through the firewall:
# firewall-cmd --add-service=http --permanent
# firewall-cmd --reload
Step 4. Install PHP
Since the latest stable version of TYPO3 CMS supports PHP 8.1 or PHP 8.2, you need to add the EPEL and Remi repositories to your system.
First, install the EPEL repository with the following command:
# dnf install https://dl.fedoraproject.org/pub/epel/epel-release-latest-9.noarch.rpm
Then, install the Remi repository with the following command,
# dnf install https://rpms.remirepo.net/enterprise/remi-release-9.rpm
Now install PHP 8.2 via the remi repository with the following command:
# dnf module install php:remi-8.2
Run this command below to install the required extensions:
# dnf install php-{cli,common,fpm,gmp,curl,mysqlnd,json,intl,mbstring,xml,gd,xml,zip}
To verify that PHP is successfully installed, run the following command:
# php -v
You should get the following output on your screen:
PHP 8.2.11 (cli) (built: Sep 26 2023 11:11:58) (NTS gcc x86_64)
Copyright (c) The PHP Group
Zend Engine v4.2.11, Copyright (c) Zend Technologies
Once all the packages are installed, you will need to edit the php.ini file and modify some settings:
# nano /etc/php.ini
Make sure your settings match the ones below, though you can adjust the time zone to match your local time zone.
max_execution_time = 240
memory_limit = 256M
upload_max_filesize = 32M
post_max_size = 32M
max_input_vars = 1500
date.timezone = America/Chicago
Next, open the PHP-FPM pool configuration /etc/php-fpm.d/www.conf file:
# nano /etc/php-fpm.d/www.conf
Change the default value of the user and group parameter to nginx:
user = nginx
group = nginx
Save the file and exit the editor.
Restart the php-fpm service for the changes to take effect.
# systemctl restart php-fpm
Step 5. Install MySQL and Create a Database
To install the MySQL server, execute the following command:
# dnf install mysql-server mysql
Start and enable the mysqld.service with the following commands:
# systemctl start mysqld && systemctl enable mysqld
Check the status of the mysqld.service
# systemctl status mysqld
You should receive the following output:
● mysqld.service - MySQL 8.0 database server
     Loaded: loaded (/usr/lib/systemd/system/mysqld.service; enabled; vendor preset: disabled)
     Active: active (running)
   Main PID: 16863 (mysqld)
     Status: "Server is operational"
      Tasks: 39 (limit: 10907)
     Memory: 456.1M
        CPU: 5.476s
     CGroup: /system.slice/mysqld.service
             └─16863 /usr/libexec/mysqld --basedir=/usr
To create the MySQL database, database user and grant permissions to that user, log in to the MySQL console and execute the commands below:
mysql> CREATE DATABASE typo3;
mysql> CREATE USER 'typo3'@'localhost' IDENTIFIED BY 'StrOngPassw0rdHere';
mysql> GRANT ALL PRIVILEGES ON typo3.* TO 'typo3'@'localhost';
mysql> FLUSH PRIVILEGES;
mysql> EXIT;
Step 6: Install TYPO3 CMS
Run the Composer command below to download the TYPO3 CMS source code.
# cd /var/www
# composer create-project typo3/cms-base-distribution:^12 typo3
For a fresh TYPO3 CMS server install, create a file named FIRST_INSTALL inside the web root directory.
# touch /var/www/typo3/public/FIRST_INSTALL
Set the Nginx user to be the owner of all TYPO3 files:
# chown -R nginx:nginx /var/www/typo3/
# chmod u+rw /var/www/typo3
Step 7. Configure the Nginx site for TYPO3
Create a new server block with the following content by creating a file in the directory /etc/nginx/conf.d:
# nano /etc/nginx/conf.d/typo3.conf
server {
    listen       80;
    server_name  yourdomain.com;

    root         /var/www/typo3/public;
    index index.php;

location ~ \.js\.gzip$ {
    add_header Content-Encoding gzip;
    gzip off;
    types { text/javascript gzip; }
}
location ~ \.css\.gzip$ {
    add_header Content-Encoding gzip;
    gzip off;
    types { text/css gzip; }
}

if (!-e $request_filename) {
    rewrite ^/(.+)\.(\d+)\.(php|js|css|png|jpg|gif|gzip)$ /$1.$3 last;
}

location ~* composer\.(?:json|lock) {
    deny all;
}

location ~* flexform[^.]*\.xml {
    deny all;
}

location ~* locallang[^.]*\.(?:xml|xlf)$ {
    deny all;
}

location ~* ext_conf_template\.txt|ext_typoscript_constants\.txt|ext_typoscript_setup\.txt {
    deny all;
}

location ~* /.*\.(?:bak|co?nf|cfg|ya?ml|ts|typoscript|tsconfig|dist|fla|in[ci]|log|sh|sql|sqlite)$ {
    deny all;
}

location ~ _(?:recycler|temp)_/ {
    deny all;
}

location ~ fileadmin/(?:templates)/.*\.(?:txt|ts|typoscript)$ {
    deny all;
}

location ~ ^(?:vendor|typo3_src|typo3temp/var) {
    deny all;
}

location ~ (?:typo3conf/ext|typo3/sysext|typo3/ext)/[^/]+/(?:Configuration|Resources/Private|Tests?|Documentation|docs?)/ {
    deny all;
}

location / {
    try_files $uri $uri/ /index.php$is_args$args;
}

location = /typo3 {
    rewrite ^ /typo3/;
}

location /typo3/ {
    absolute_redirect off;
    try_files $uri /typo3/index.php$is_args$args;
}

location ~ [^/]\.php(/|$) {
    fastcgi_split_path_info ^(.+?\.php)(/.*)$;
    if (!-f $document_root$fastcgi_script_name) {
        return 404;
    }
    fastcgi_buffer_size 32k;
    fastcgi_buffers 8 16k;
    fastcgi_connect_timeout 240s;
    fastcgi_read_timeout 240s;
    fastcgi_send_timeout 240s;

    fastcgi_pass         unix:/var/run/php-fpm/www.sock;
    fastcgi_index        index.php;
    include              fastcgi.conf;
}
}
Make sure to replace yourdomain.com with your actual domain name.
Save and close the file then verify the Nginx configuration using the command below:
# nginx -t
If everything is fine, you will get the following output:
nginx: the configuration file /etc/nginx/nginx.conf syntax is ok
nginx: configuration file /etc/nginx/nginx.conf test is successful
Finally, restart the Nginx service to apply the changes:
# systemctl restart nginx
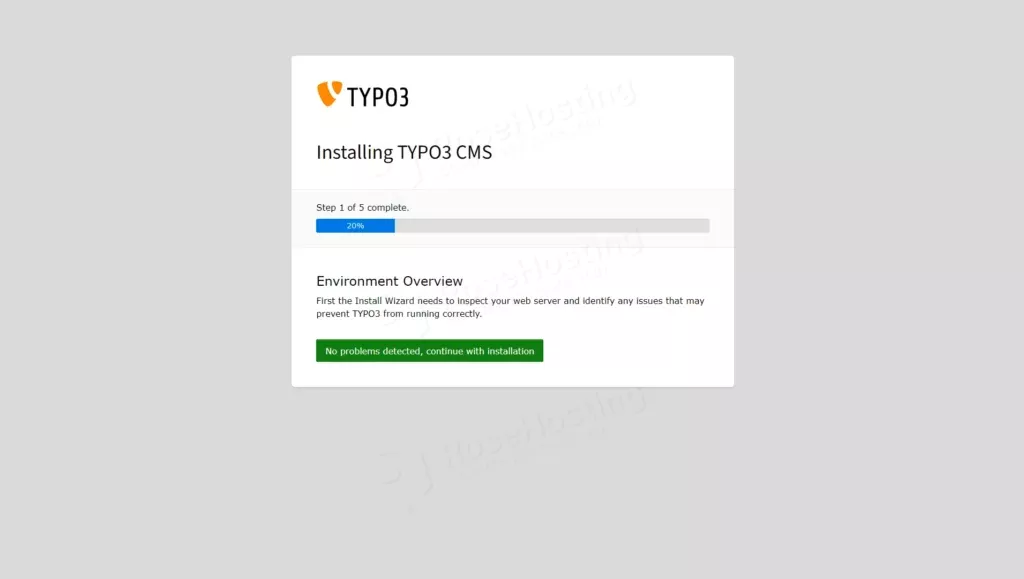
Step 8: Installing TYPO3 Using the Web Interface
You can now go to your http://yourdomain.com/typo3/install.php and follow the on-screen instructions to complete the TYPO3 installation.
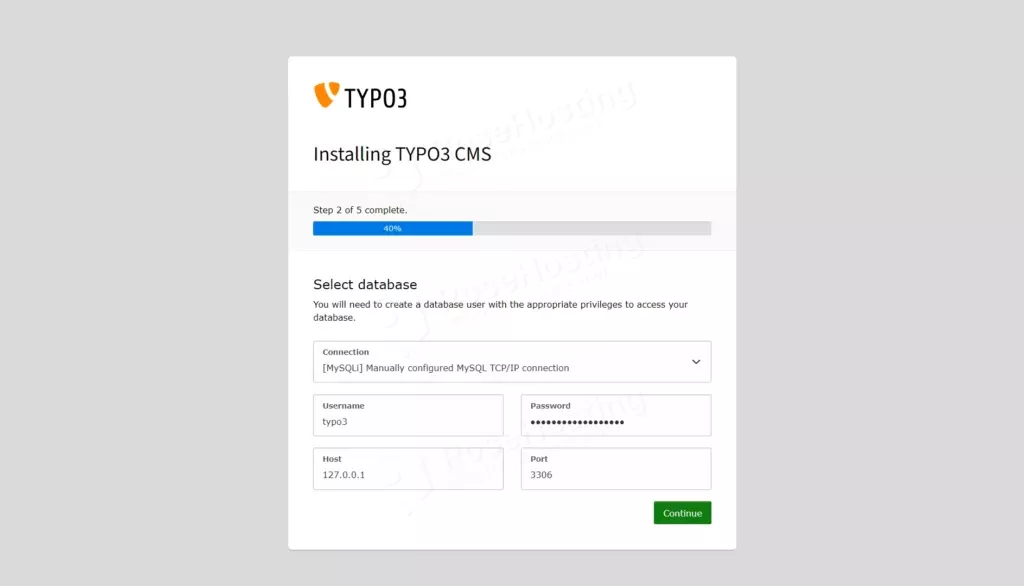
Fill your database username and password and click Continue.
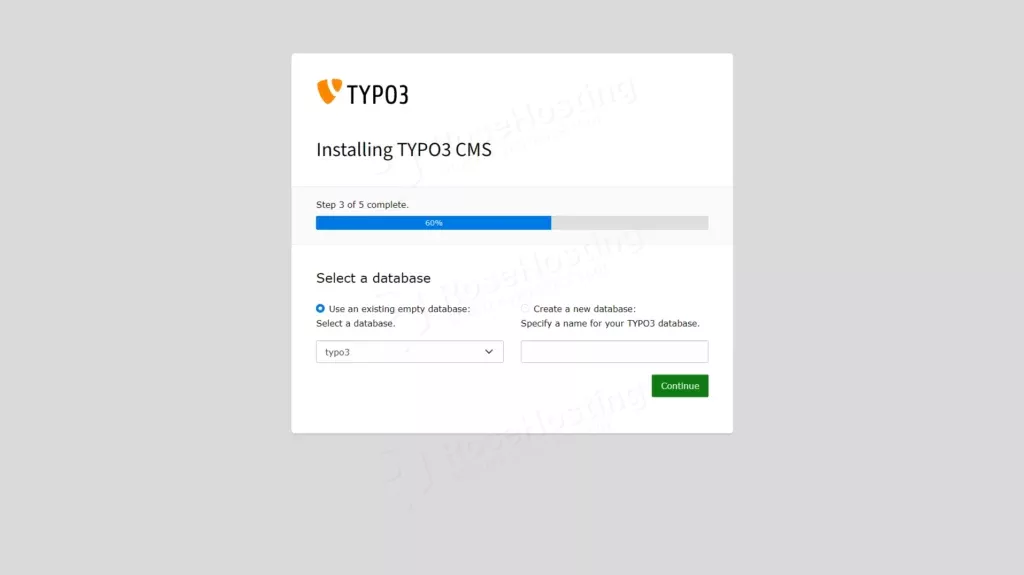
Select the option Use an existing empty database and select the database typo3, then click Continue.
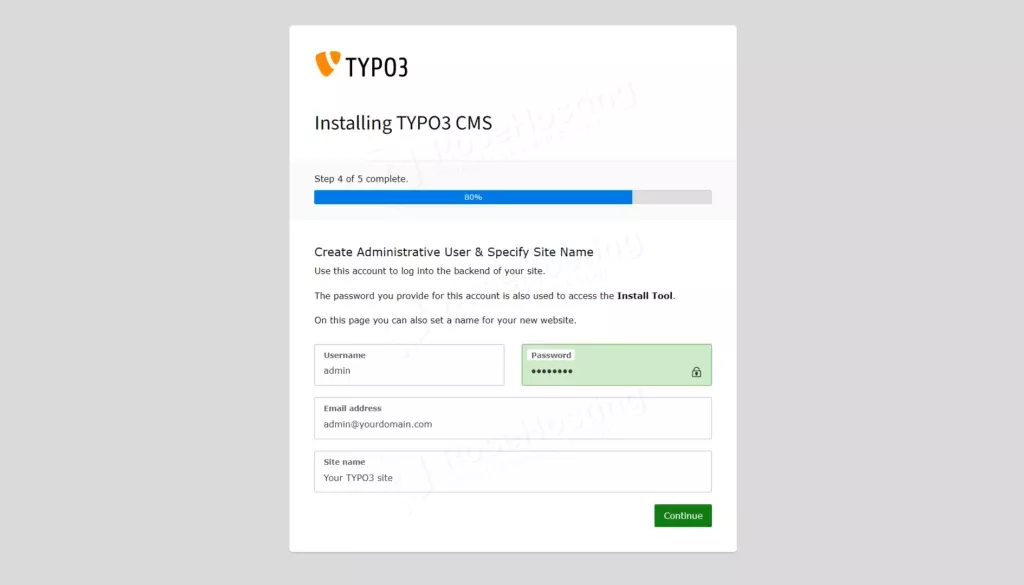
Provide your admin username, password, and site name, then click Continue:
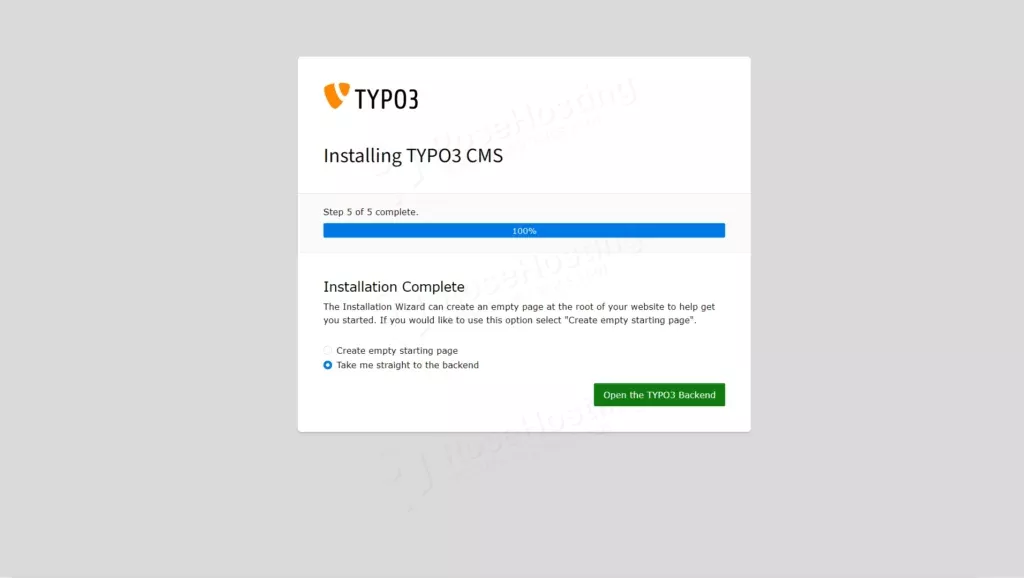
The TYPO3 CMS installation is now completed. Click the button Open the TYPO3 Backend to continue.
You will see the Login page:

Fill the administrator user and password that you have created, then click Login. You will see the TYPO3 dashboard:
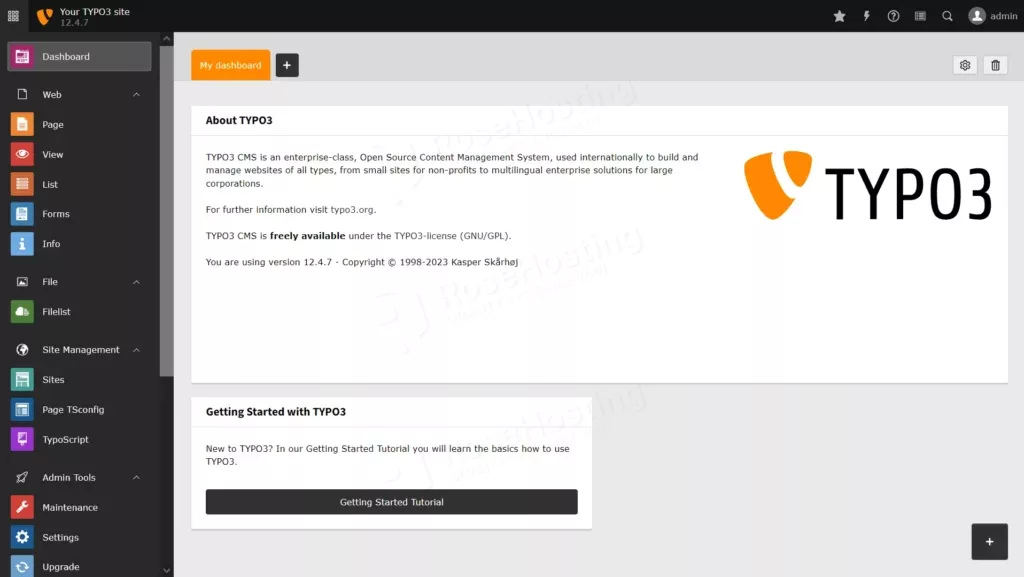
Congratulation! You have successfully installed TYPO3 CMS on AlmaLinux 9.
If you are one of our web hosting customers and use our managed Linux Hosting, you don’t have to follow this tutorial and install TYPO3 CMS on an AlmaLinux 9 VPS yourself; our Linux admins will set up and configure TYPO3 CMS for you as well as any other software you might need. They are available 24×7 and will take care of your request immediately, and all you need to do is submit a ticket; you can count on our support team.
PS. If you liked this post, please share it with your friends on social networks or simply leave a reply below. Thanks.