
Odoo, formerly known as OpenERP, is a suite of open-source Business applications. It is a widely used open-source enterprise resource planning (ERP) software. Odoo offers a range of modules that can be installed which makes this platform very popular these days. The latest version of Odoo, Odoo 17 offers additional features that further enhance its usability. The latest interface incorporates keyboard shortcuts to streamline the process of selecting records and making multiple selections effortlessly. In this article, we will show you how to install Odoo 17 on Debian 12 server.
Table of Contents
Prerequisites
- A Debian 12 VPS with at least 2GB of RAM. Our NVMe 2GB is the perfect starting point.
- SSH root access, or a user with sudo privileges.
Conventions
# – given commands should be executed with root privileges either directly as a root user or by use of sudo command
$ – given commands should be executed as a regular user
Step 1. Install Dependencies
To start this Odoo installation, we need to install some Python dependencies. Let’s run this command below to install them.
# apt install build-essential wget git python3-pip python3-dev python3-venv \
    python3-wheel libfreetype6-dev libxml2-dev libzip-dev libsasl2-dev \
    python3-setuptools node-less libjpeg-dev zlib1g-dev libpq-dev \
    libxslt1-dev libldap2-dev libtiff5-dev libopenjp2-7-dev libcap-dev
Wait until it finishes and proceed to the next step.
Step 2. Add a System User
In this article, Odoo will be installed and running under a regular system user. So, let’s create a new system user.
# adduser \
   --system \
   --shell /bin/bash \
   --gecos 'Odoo user' \
   --group \
   --home /opt/odoo17 \
odoo17
Done, a new system user named ‘odoo17’ has been added, and its home directory is /opt/odoo17.
Step 3. Install PostgreSQL
For data storage, Odoo only supports PostgreSQL. Let’s execute the command below to install PostgreSQL on Debian 12.
# apt install postgresql
Wait until it finishes, and then add a PostgreSQL user for our Odoo 17. You can do that by executing this command:
# su - postgres -c "createuser -s odoo17"
Step 4. Install wkhtmltopdf
Wkhtmltopdf, a command line tool, is available as an open-source solution for converting HTML data into PDF format using the Qt webkit. However, since the .DEB package for Debian 12 is not available at the time of writing this, we can install the one from the default Debian 12 repository.
# apt install wkhtmltopdf
Please note that the wkhtmltopdf package from Debian 12 repository is not built against a forked version of Qt, hence some options are not supported. You can check and download once the .DEB package for Debian 12 is available at https://wkhtmltopdf.org/downloads.html. Alternatively, you can also download and install the one for Debian 11 (Bullseye).
Step 5. Install Odoo
In the previous step, we added a new system user to install and run Odoo. Let’s switch to system user ‘odoo’ to download Odoo from GitHub and create a new python environment.
# su - odoo17
Now, let’s download Odoo from github
$ git clone https://www.github.com/odoo/odoo --depth 1 --branch 17.0 odoo17
Create a Python virtual environment
By using a Python virtual environment, this Odoo installation method will allow you install multiple Odoo instances on your server, including different versions simultaneously. Now that Odoo 17 has been downloaded to /opt/odoo/odoo17, it is time to create a Python virtual environment.
$ python3 -m venv odoo17-venv
Now, we have a new virtual environment, we need to activate it prior to installing Odoo.
$ source odoo17-venv/bin/activate
Once invoked, your shell prompt would look like this:
(odoo17-venv) odoo17@debian12:~$
Next, let’s install Odoo:
(odoo17-venv) odoo17@debian12:~$ pip3 install wheel
(odoo17-venv) odoo17@debian12:~$ pip3 install -r odoo17/requirements.txt
That’s it. Odoo has been installed under the directory /opt/odoo17/odoo17. We can create a new directory to store our custom Odoo addons.
$ mkdir /opt/odoo17/odoo17/custom-addons
Done, let’s exit from user ‘odoo17’ and create the Odoo configuration file.
$ exit
The command above should bring you back to the previous user, in this case, root. Open the configuration file:
# nano /etc/odoo17.conf
Paste the following content into the file.
[options]
admin_passwd = m0d1fyth15
db_host = False
db_port = False
db_user = odoo17
db_password = False
addons_path = /opt/odoo17/odoo17/addons,/opt/odoo17/odoo17/custom-addons
Replace m0d1fyth15 with something harder and stronger. This will be your Odoo’s master password. Save the file, then exit from the nano editor.
Step 6. Create Odoo Systemd Unit file
In this step, we will create a systemd unit file, it is required to manage our Odoo installation, such as starting/stopping/restarting it.
# nano /etc/systemd/system/odoo17.service
Insert the following content into the systemd unit file.
[Unit]
Description=odoo17
Requires=postgresql.service
After=network.target postgresql.service

[Service]
Type=simple
SyslogIdentifier=odoo17
PermissionsStartOnly=true
User=odoo17
Group=odoo17
ExecStart=/opt/odoo17/odoo17-venv/bin/python3 /opt/odoo17/odoo17/odoo-bin -c /etc/odoo17.conf
StandardOutput=journal+console

[Install]
WantedBy=multi-user.target
Save the file then exit. We can now reload the systemd service and then run Odoo.
# systemctl daemon-reload
# systemctl enable --now odoo17
Check if Odoo is starting by running this command:
# systemctl status odoo17
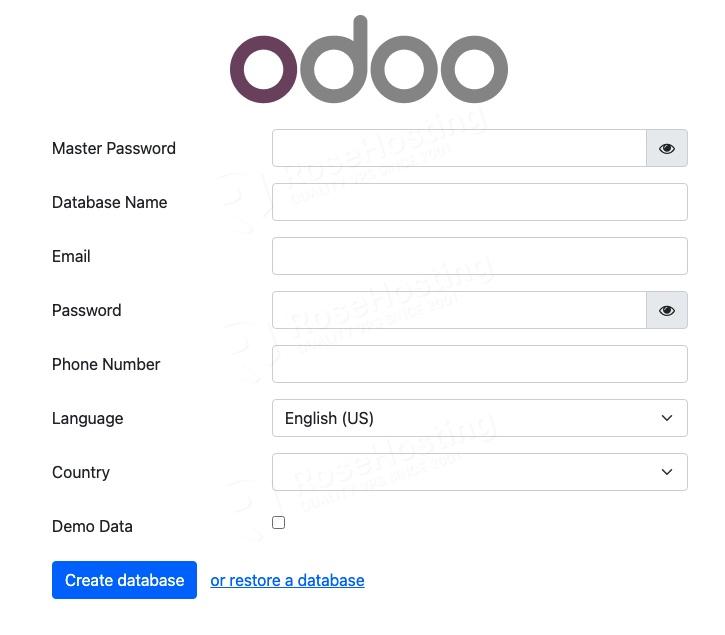
Go open your favorite web browser and navigate to http://YOUR_SERVER_IP_ADDRESS:8069 you will see default Odoo page
Step 7. Install and Configure Reverse Proxy
To access your Odoo website at http://yourdomain.com instead of http://YOUR_SERVER_IP_ADDRESS:8069, we need to install a web server and configure it as a reverse proxy. In this step, we are going to install Nginx or Apache. You will need to choose only one web server and skip the other option.
Install and Configure Nginx
To use Nginx, we can install it by running this command below:
# apt install nginx
On Debian 12 server, Nginx should be up and running upon installation. Let’s create a new Nginx server block now.
# nano /etc/nginx/conf.d/odoo.conf
Insert the following into that file.
upstream odoo17 {
   server 127.0.0.1:8069;
   }

upstream odoochat {
   server 127.0.0.1:8072;
   }

server {
   listen 80;
   server_name yourdomain.com;

   access_log /var/log/nginx/odoo17.access.log;
   error_log /var/log/nginx/odoo17.error.log;

   proxy_buffers 16 64k;
   proxy_buffer_size 128k;

location / {
   proxy_pass http://odoo17;
   proxy_next_upstream error timeout invalid_header http_500 http_502 http_503 http_504;
   proxy_redirect off;

   proxy_set_header Host $host;
   proxy_set_header X-Real-IP $remote_addr;
   proxy_set_header X-Forwarded-For $proxy_add_x_forwarded_for;
   proxy_set_header X-Forwarded-Proto https;
   }

location /longpolling {
   proxy_pass http://odoochat;
   }


location ~* /web/static/ {
   proxy_cache_valid 200 60m;
   proxy_buffering on;
   expires 864000;
   proxy_pass http://odoo17;
   }
}
Replace yourdomain.com with your actual domain name or subdomain name pointing to your server IP address. Then, save the file and exit from the editor.
To apply the changes, we can restart Nginx:
# systemctl restart nginx
That’s it! You should be able to access Odoo 17 at http://yourdomain.com now.
Install and Configure Apache
If you prefer Apache over Nginx, or you already have Apache installed on your system, you can follow this step.
# apt install apache2
Once Apache is installed, we can create a new virtual host.
# nano /etc/apache2/sites-enabled/odoo.conf
Insert the following into that odoo.conf file.
<VirtualHost *:80>
ServerName yourdomain.com
ServerAlias www.yourdomain.com

ErrorLog ${APACHE_LOG_DIR}/yourdomain-error.log
CustomLog ${APACHE_LOG_DIR}/access.log combined

ProxyRequests Off
<Proxy *>
Order deny,allow
Require all granted
</Proxy>

ProxyPass / http://127.0.0.1:8069/
ProxyPassReverse / http://127.0.0.1:8069/
<Location />
Order allow,deny
Require all granted
</Location>
</VirtualHost>
Make sure to replace yourdomain.com with your actual domain name, then restart Apache.
# systemctl restart apache2
Congratulations! You have followed this article and successfully installed Odoo 17 on your Debian 12 server.
Of course, you don’t have to install Odoo 17 on Debian 12 if you use one of our Odoo VPS Hosting services, in which case you can simply ask our expert Linux admins to install Odoo 17 on Debian 12, for you. Our expert administrators are available 24×7 and will take care of your requests immediately. Simply log in to the client area and submit a ticket – your Odoo 17 install should be up and running in no time.
PS. If you liked this post on installing Odoo 17 on Debian 12, please share it with your friends through social networks or simply leave a comment in the comments section. Thanks.
Great article has gotten me the farthest, but still facing an issue. When I go to the browser to login http://:8069 I get a “Internal Server error”. I think it has to do with the postgres account forodoo17 but not sure how to overcome. Any thoughts?
You should check the error logs of Apache and Odoo. Also, check if the Odoo instance and Apache is running.
Only article i found that actually explained how to set up odoo and worked !!!! Thank you VM