
Odoo offers a wide range of applications, from accounting and inventory management to CRM and e-commerce, making it a popular choice for businesses of all sizes. Its steep increase in popularity over the last few years is proof of its reliability and flexibility. We’re here to tell you how to install Odoo 17 on AlmaLinux 9.
This tutorial will walk you through the installation process, ensuring that you have a fully functional Odoo instance up and running on your AlmaLinux system.
Follow each step carefully, and feel free to refer back to this guide whenever needed. Happy installing!
Table of Contents
Prerequisites
- An AlmaLinux 9 VPS
- At least 2GB of RAM (Our NVMe 2 is perfect for this)
- SSH root access or a system user with sudo privileges
Step 1. Update System Packages
To start, log in to your AlmaLinux 9 VPS using SSH:
ssh root@IP_Address -p Port_numberReplace ‘IP_Address’ and ‘Port_number’ with your server’s actual IP address and SSH port number. If needed, replace ‘root’ with the username of your sudo account.
Once logged in, you must make sure that all AlmaLinux OS packages installed on the server are up to date. You can do this by running the following commands:
dnf update && dnf upgradeStep 2. Install Dependencies
Next, install essential dependencies on your server. Run the following command to install these dependencies:
dnf install git gcc redhat-rpm-config libxslt-devel bzip2-devel openldap-devel libjpeg-devel freetype-devel curl unzip openssl-devel wget yum-utils make libffi-devel zlib-devel tar libpq5-develStep 3. Enable PowerTools Repository
The PowerTools repository is necessary to install the psycopg2 module required by Odoo to connect to PostgreSQL. You can activate it by running the below command:
dnf config-manager --set-enabled crbStep 4. Install Python 3.10
Odoo 17 requires Python 3.10 or later to run. Let’s download the source code for the latest Python 3.10 version, which is 3.10.13 at the time of writing. Use the following command:
wget https://www.python.org/ftp/python/3.10.13/Python-3.10.13.tgzHere’s how the output should look:
# wget https://www.python.org/ftp/python/3.10.13/Python-3.10.13.tgz
--2023-11-27 14:45:01-- https://www.python.org/ftp/python/3.10.13/Python-3.10.13.tgz
Resolving www.python.org (www.python.org)... 199.232.96.223, 2a04:4e42:58::223
Connecting to www.python.org (www.python.org)|199.232.96.223|:443... connected.
HTTP request sent, awaiting response... 200 OK
Length: 26111363 (25M) [application/octet-stream]
Saving to: ‘Python-3.10.13.tgz’
Python-3.10.13.tgz
100%[==========================================================>]
24.90M 4.54MB/s in 5.5s
2023-11-27 14:45:07 (4.53 MB/s) - ‘Python-3.10.13.tgz’ saved [26111363/26111363
Next, extract the downloaded file using the following command:
tar xvf Python-3.10.13.tgzAfter extracting, navigate into the Python installation folder and start the configuration by running the following commands:
cd Python-3.10.13
./configure --with-system-ffi --with-computed-gotos --enable-loadable-sqlite-extensions
This step will set up the Python installation and configure it for compilation.
Next, we compile and install the source code using the make command. Use the following commands:
make -j ${nproc}
make altinstall
After the installation finishes, verify the Python version by using the following command:
python3.10 -VYou should get the following output:
# python3.10 -V
Python 3.10.13
Step 5. Install PostgreSQL
Odoo 17 utilizes PostgreSQL as its database system and requires version 12.0 or later. For this, you will need to add the official PostgreSQL Repository for AlmaLinux by running the below command:
dnf install -y https://download.postgresql.org/pub/repos/yum/reporpms/EL-9-x86_64/pgdg-redhat-repo-latest.noarch.rpmNow install the latest version of PostgreSQL with the following command:
dnf install -y postgresql16-server postgresql16 postgresql16-develOnce the installation is complete, initialize the PostgreSQL database:
/usr/pgsql-16/bin/postgresql-16-setup initdbNext, initiate and enable the PostgreSQL service with the following command. This command will start PostgreSQL and configure it to launch automatically during boot.
systemctl enable postgresql-16 && systemctl start postgresql-16After installing PostgreSQL, create a new PostgreSQL user for Odoo with the following command:
su - postgres -c "createuser -s odoo17"Step 6. Install Wkhtmltopdf
To use PDF export functions in Odoo 17, you will need a wkhtmltopdf version greater than 0.12.5.
Wkhtmltopdf is a command-line tool that transforms HTML content into PDF format using Qt WebKit. To install wkhtmltopdf on your Alma Linux server, use the following command:
dnf install -y https://github.com/wkhtmltopdf/packaging/releases/download/0.12.6.1-2/wkhtmltox-0.12.6.1-2.almalinux9.x86_64.rpmYou can then check the version of the installed package like so:
wkhtmltopdf --versionHere’s how the output will look:
# wkhtmltopdf --version

wkhtmltopdf 0.12.6.1 (with patched qt)
We now have all of our required dependencies installed. You can now proceed to install Odoo 17 on AlmaLinux 9.
Step 7. Install and Configure Odoo 17
We’re setting up an Odoo 17 instance using a dedicated system user account. To do this, let’s create a new system account named “odoo17” using the following command:
useradd -m -d /opt/odoo17 -U -r -s /bin/bash odoo17Next, switch users to the “odoo17” user and clone the Odoo 17 repository from GitHub:
su - odoo17

git clone https://www.github.com/odoo/odoo --depth 1 --branch 17.0 /opt/odoo17/odoo
Next, we’re creating a new Python virtual environment. This adds a lot of flexibility, like running more than one Odoo instance on the same server, or even multiple versions. Let’s create the Python virtual environment for your Odoo 17 instance with the following command:
python3.10 -m venv odoo17-venvNext, activate your virtual environment:
source odoo17-venv/bin/activateNext, install all required Python dependencies using the following command:
pip3 install -r odoo/requirements.txtNow you can deactivate the virtual environment and create a new directory to upload your custom Odoo add-ons:
deactivate

mkdir /opt/odoo17/custom-addons
Once Odoo installation is completed, exit from user ‘odoo17’ and create the Odoo log directory.
exit

mkdir /var/log/odoo17
Make sure to set permissions to the log folder to match your Odoo user:
chown -R odoo17: /var/log/odoo17/Next, create an Odoo configuration file with the following command:
nano /etc/odoo17.confCopy and paste the following content into the Odoo configuration file:
[options]
admin_passwd = StrongPassword
db_host = False
db_port = False
db_user = odoo17
db_password = False
xmlrpc_port = 8069
logfile = /var/log/odoo17/odoo.log
addons_path = /opt/odoo17/odoo/addons,/opt/odoo17/custom-addons
Be sure to update the value of the “admin_passwd” key above with a more secure password. This is used as your Odoo master password, which is necessary for creating, deleting, and restoring databases.
Step 8. Create Odoo Systemd Service File
Now that Odoo is installed and configured. To start, restart, or stop it, you need to create a Systemd service file. You can create it using the following command:
nano /etc/systemd/system/odoo17.serviceAdd the following lines:
[Unit]
Description=Odoo17
Requires=postgresql-16.service
After=network.target postgresql-16.service

[Service]
Type=simple
SyslogIdentifier=odoo17
PermissionsStartOnly=true
User=odoo17
Group=odoo17
ExecStart=/opt/odoo17/odoo17-venv/bin/python3 /opt/odoo17/odoo/odoo-bin -c /etc/odoo17.conf
StandardOutput=journal+console

[Install]
WantedBy=multi-user.target
Save and close the file, then reload the systemd daemon to apply the changes:
systemctl daemon-reloadNext, initiate and enable the Odoo 17 service with the following command. This command will start Odoo 17 and configure it to launch automatically during boot.
systemctl start odoo17 && systemctl enable odoo17Check if the Odoo 17 service is started correctly using the following command:
systemctl status odoo17If the service starts correctly, its output should be similar to the following:
# systemctl status odoo17
● odoo17.service - Odoo17
Loaded: loaded (/etc/systemd/system/odoo17.service; enabled; preset: disabled)
Active: active (running) since Mon 2023-11-27 13:50:48 CST; 1h 31min ago
Main PID: 45691 (python3)
Tasks: 5 (limit: 11059)
Memory: 294.8M
CPU: 1min 37.736s
CGroup: /system.slice/odoo17.service
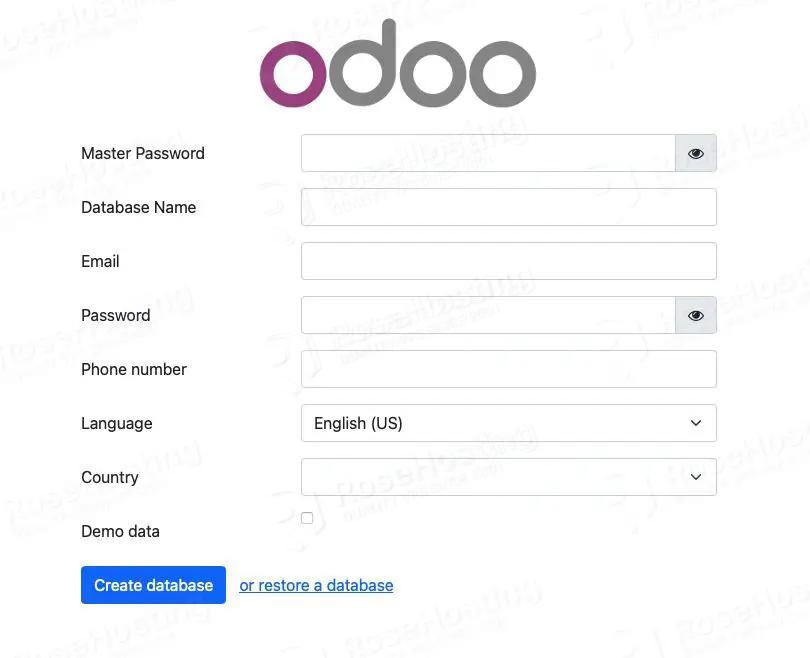
└─45691 /opt/odoo17/odoo17-venv/bin/python3 /opt/odoo17/odoo/odoo-bin -c /etc/odoo17.confYou can access the Odoo backend using the URL http://YOUR_SERVER_IP:8069. You should see the following page:
Step 9. Configure Reverse Proxy
If you want to use a domain name instead of your server’s IP address, a web server is required. In this tutorial, we’ll install and use Nginx. Execute the following command to install Nginx:
dnf install -y nginxNext, create a Nginx server block:
nano /etc/nginx/conf.d/odoo17.confAdd the following lines:
upstream odoo {
  server 127.0.0.1:8069;
}

upstream odoochat {
  server 127.0.0.1:8072;
}

map $http_upgrade $connection_upgrade {
  default upgrade;
  ''      close;
}

server {

  listen 80;
  server_name odoo.mydomain.com;
  proxy_read_timeout 720s;
  proxy_connect_timeout 720s;
  proxy_send_timeout 720s;
  access_log /var/log/nginx/odoo.access.log;
  error_log /var/log/nginx/odoo.error.log;

  location /websocket {
    proxy_pass http://odoochat;
    proxy_set_header Upgrade $http_upgrade;
    proxy_set_header Connection $connection_upgrade;
    proxy_set_header X-Forwarded-Host $host;
    proxy_set_header X-Forwarded-For $proxy_add_x_forwarded_for;
    proxy_set_header X-Forwarded-Proto $scheme;
    proxy_set_header X-Real-IP $remote_addr;
  }

  location / {
    proxy_set_header X-Forwarded-Host $host;
    proxy_set_header X-Forwarded-For $proxy_add_x_forwarded_for;
    proxy_set_header X-Forwarded-Proto $scheme;
    proxy_set_header X-Real-IP $remote_addr;
    proxy_redirect off;
    proxy_pass http://odoo;
  }

  gzip_types text/css text/scss text/plain text/xml application/xml application/json application/javascript;
  gzip on;

}
Be sure to update “odoo.mydomain.com” with your domain name.
Save and close the file, then reload the Nginx service to apply the changes:
systemctl reload nginxYou can now access Odoo using your domain name at http://odoo.mydomain.com and begin working on your project. For additional details about Odoo 17, its features, and configuration, refer to their official documentation.
Of course, you don’t have to install Odoo 17 on AlmaLinux 9 if you use one of our Odoo VPS Hosting services, in which case you can simply ask our expert Linux admins to install and configure Odoo 17 on AlmaLinux 9 for you. They are available 24×7 and will take care of your request immediately.
PS. If you liked this post on installing Odoo 17 on AlmaLinux 9, please share it with your friends on social networks or simply leave a comment in the comments section. Thank you.
I have been following this article sentence by sentence on a brand new AmaLinux server and I allways get to the point of installing the pythoon packages with pip3 and cannot continue.
Please check if all Python dependencies are satisfied.
I found these two errors that once solved allowed me get to the backend web page to configure odoo
– missing libpq5-devel package to be installed for psycopg2 to work
– it is postgresql16-devel and not postgresql16-deve
Thank you, this has been corrected.