ISP Server Setup - OpenSUSE 10
Version 1.2
Author: Till Brehm <t.brehm [at] projektfarm [dot] de>, Falko Timme
Last edited: 03/09/2006
This is a detailed description about the steps to be taken to setup a OpenSUSE 10.0 based server that offers all services needed by ISPs and hosters (web server (SSL-capable), mail server (with SMTP-AUTH and TLS!), DNS server, FTP server, MySQL server, POP3/IMAP, Quota, Firewall, etc.) and the ISPConfig control panel.
I will use the following software:
- Web Server: Apache 2.0.x
- Mail Server: Postfix (easier to configure than sendmail; has a shorter history of security holes than sendmail)
- DNS Server: BIND9
- FTP Server: proftpd (ISPConfig will not work with vsftpd on OpenSUSE 10.0)
- POP3/IMAP: I will use Maildir format and therefore install Courier-POP3/Courier-IMAP.
- Webalizer for web site statistics
In the end you should have a system that works reliably and is ready for the free webhosting control panel ISPConfig (i.e., ISPConfig runs on it out of the box).
I want to say first that this is not the only way of setting up such a system. There are many ways of achieving this goal but this is the way I take. I do not issue any guarantee that this will work for you!
Requirements
To install such a system you will need the following:
- OpenSUSE 10.0. I downloaded the 5 CD iso images from here: http://ftp-stud.fht-esslingen.de/pub/Mirrors/ftp.opensuse.org/opensuse/distribution/SL-10.0-OSS/iso/
- an internet connection...
1 The Base System
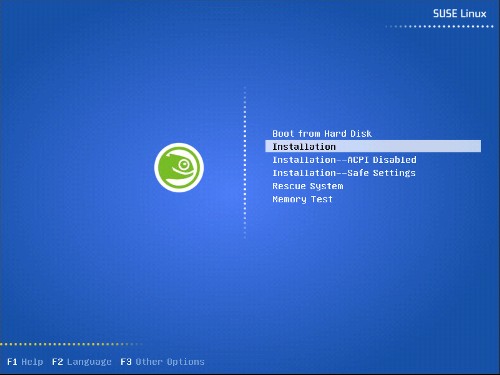
Boot from your first OpenSUSE 10-CD and select Installation from the boot screen:
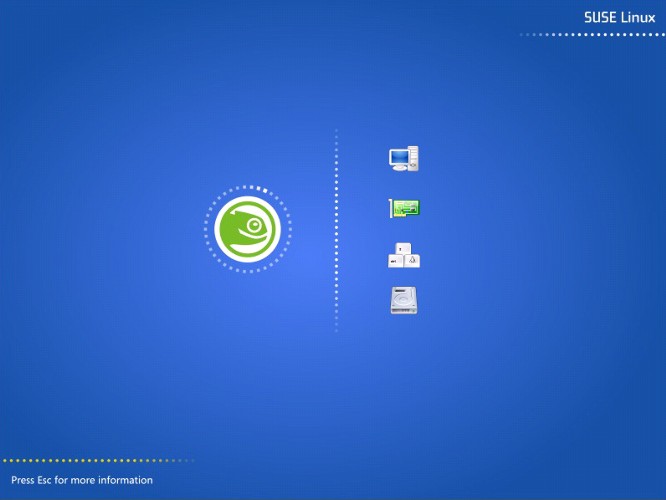
SuSe Linux is booting, to see a more detailed booting progress press Escape:
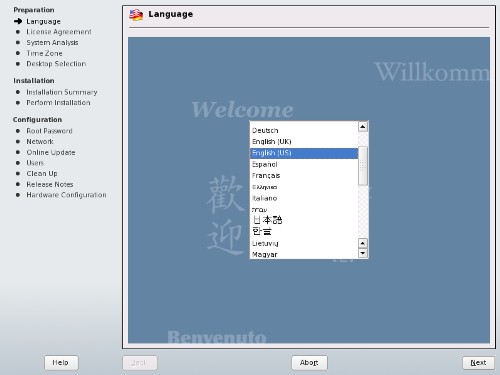
Select your language:
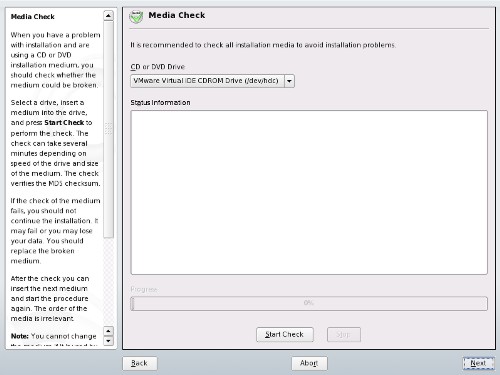
Skip the media check by clicking on Next:
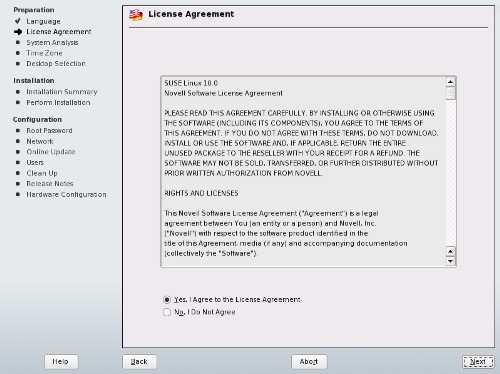
Accept the licence agreement:
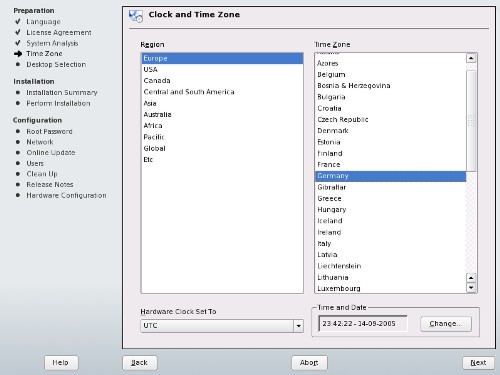
The installer analyzes your system. Select your time zone next:
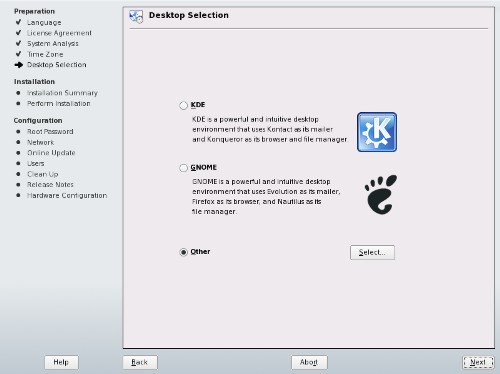
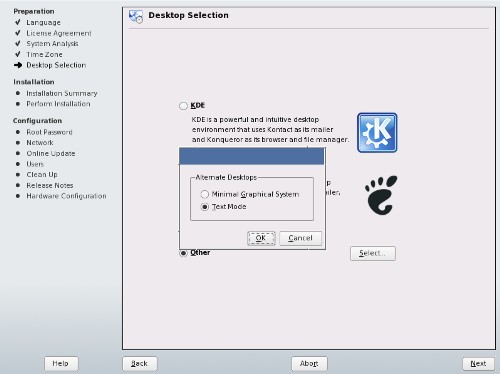
Select Other and click on Select...:
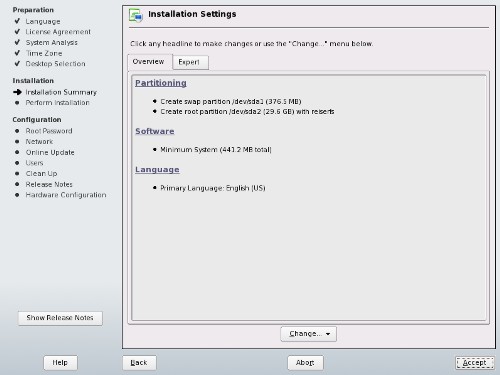
For a server setup, I select Text Mode and go with Next to the next installation step which lists the installation settings on the following screen (Installation Settings). You can change each of its choices by navigating to the appropriate headline. First, I change the partitioning scheme:
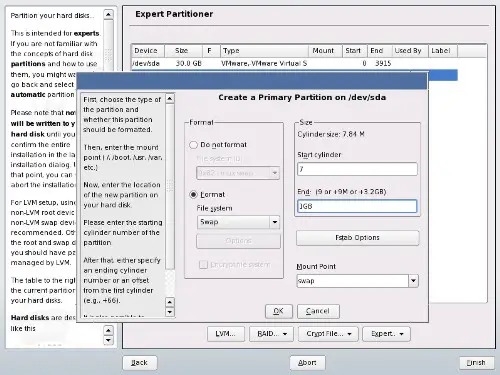
Click on Partitioning and then on Create Custom Partition Setup and click Next:
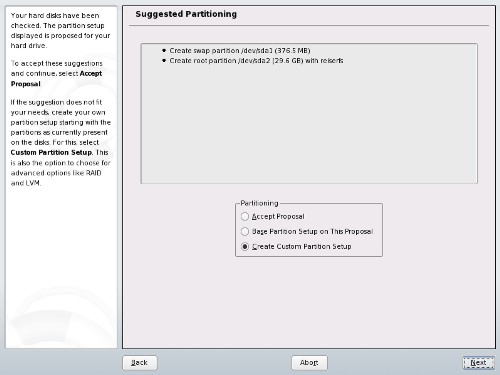
Select Custom Partitioning (for experts):
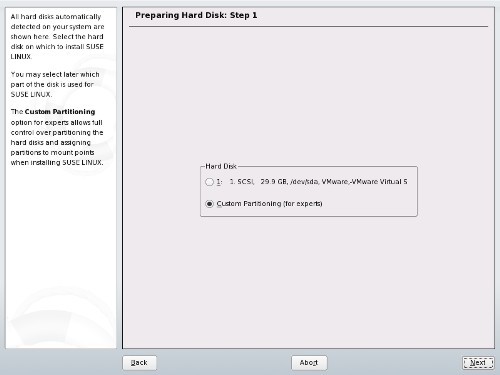
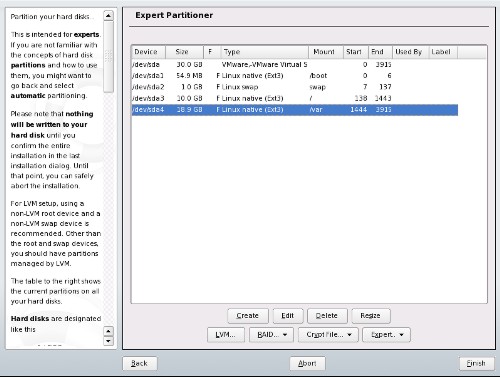
Now we create the partitions. I will use the following partition scheme:
/boot 50 MB
/swap 1GB
/ 10 GB
/var the rest of the hard disk
Creating a partition: Click on create, select primary partition, select the format. I will use EXT3 for all partitions except the swap partition, that is of type swap. Then select the mountpoint corresponding to the above partitioning scheme.
Your partition table should look now similar to this one here, depending on your hard disk size. Click on Finish to proceed to the next step.