How To Harden PHP5 With Suhosin (Debian Etch/Ubuntu)
Version 1.0
Author: Falko Timme
This tutorial shows how to harden PHP5 with Suhosin on Debian Etch and Ubuntu servers. From the Suhosin project page: "Suhosin is an advanced protection system for PHP installations that was designed to protect servers and users from known and unknown flaws in PHP applications and the PHP core. Suhosin comes in two independent parts, that can be used separately or in combination. The first part is a small patch against the PHP core, that implements a few low-level protections against bufferoverflows or format string vulnerabilities and the second part is a powerful PHP extension that implements all the other protections."
This document comes without warranty of any kind! I want to say that this is not the only way of setting up such a system. There are many ways of achieving this goal but this is the way I take. I do not issue any guarantee that this will work for you!
1 Preliminary Note
I have tested this on a Debian Etch server with the IP address 192.168.0.100.
I will install both Suhosin parts in this tutorial, the Suhosin patch (for which we need to recompile PHP5) and the Suhosin PHP extension (which is available as a Debian/Ubuntu package). To see what Suhosin can do, please refer to http://www.hardened-php.net/suhosin/a_feature_list.html. The features of the Suhosin patch are listed under Engine Protection (only with patch); all the other features come with the Suhosin extension.
2 Installing Apache2 And PHP5 (Optional)
(This chapter is optional if you already have Apache2 and PHP5 installed - please skip to the next chapter.)
If you don't have Apache2 and PHP5 installed on your server, install it now:
apt-get install libapache2-mod-php5 php5 apache2-mpm-prefork php5-dev
This installs PHP5 with basic functionality; if you need special PHP5 modules, you can search for them like this:
apt-cache search php5
From the output, pick the modules you need and install them like this:
apt-get install php5-auth-pam php5-clamavlib php5-common php5-curl php5-gd php5-idn php5-imagick php5-imap php5-json php5-ldap php5-mcrypt php5-memcache php5-mhash php5-ming php5-mysql php5-odbc php5-pgsql php5-ps php5-pspell php5-recode php5-snmp php5-sqlite php5-tidy php5-uuid php5-xapian php5-xmlrpc php5-xsl
You will see the following question:
Continue installing libc-client without Maildir support? <-- Yes
If you have chosen to install php5-clamavlib, you should now also install ClamAV:
apt-get install clamav
3 Getting Details About Your PHP5 Installation
Unless you have already created virtual hosts in your Apache installation, the document root of the default web site is /var/www. We will now create a small PHP file (info.php) in that directory (if you have created virtual hosts, place it in any of the virtual hosts that has PHP enabled) and call it in a browser. The file will display lots of useful details about our PHP installation, such as the installed PHP version.
vi /var/www/info.php
<?php phpinfo(); ?> |
Now we call that file in a browser (e.g. http://192.168.0.100/info.php):
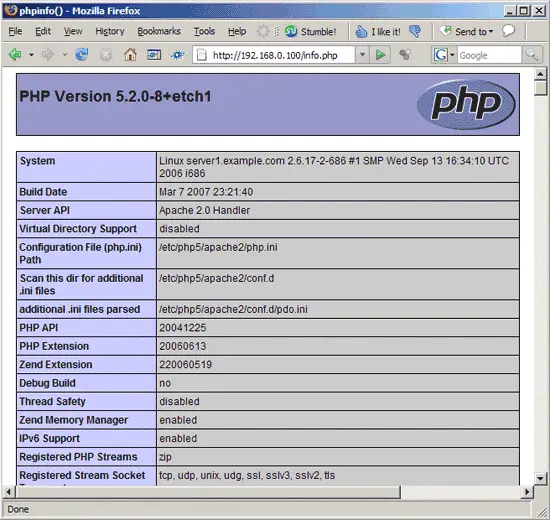
As you see, our PHP version is 5.2.0-8+etch1.

