Video Surveillance With ZoneMinder On Ubuntu
ZoneMinder is the top Linux video camera security and surveillance solution. In this document I will cover how to get ZoneMinder up and running on Ubuntu 6.06.1 LTS or Dapper Drake with the recent updates included.
Hardware Requirements
The surveillance system I am covering here utilizes 4 Dome CCTV cameras hooked up to a single Kodicom kmc-8800 capture card, in addition I also used infrared LEDs so my cameras could see in the dark (honestly I'm abit scared to look). ZoneMinder also does a good job with IP Cameras, unfortunatly they are considerably expensive in my part of the world, hence 4 cameras would blow my budget.
For an in-depth guide of supported hardware one may refer to this link http://www.zoneminder.com/wiki/index.php/Supported_hardware.
In building a system like this one must be aware that it would be storage hungry, therefore an LVM partitioning scheme would be wise to anticipate growth of the system.
In my experience a rig with 4 cameras clogged up my Pentium 4 1,7GHz test system therefore on a production system I used the following resources.
egrep "processor|name" /proc/cpuinfo
processor : 0
model name : Intel(R) Pentium(R) 4 CPU 3.06GHz
processor : 1
model name : Intel(R) Pentium(R) 4 CPU 3.06GHz
cat /proc/meminfo | grep MemTot
MemTotal: 515264 kB
First step after assembly of hardware and strategically placing each CCTV camera, is the Operating System installation. Here I installed a base system without any X-window.
Then we must set an static IP for the system:
cat /etc/network/interfaces
auto lo
iface lo inet loopback
auto eth0
iface eth0 inet static
address 192.168.1.202
netmask 255.255.255.0
gateway 192.168.1.1
cat /etc/hosts | grep cctv
192.168.1.202 cctv.bigwisu.com cctv
Then we edit the /etc/apt/source.list to include mulitverse and universe repositories.
deb http://id.archive.ubuntu.com/ubuntu/ dapper main restricted multiverse universe
Afterwards we update and upgrade our system:
sudo apt-get update
sudo apt-get upgrade
In my setup a reboot was required. Next step after reboot is to install Apache, php and MySQL:
sudo apt-get install apache2 php5-mysql libapache2-mod-php5 mysql-server
Then we need to install the following applications and libraries:
sudo apt-get install ffmpeg libarchive-tar-perl libarchive-zip-perl libdate-manip-perl libdevice-serialport-perl
sudo apt-get install libjpeg62 libmime-perl libstdc++6 libwww-perl zlib1g
Afterwards we download the .deb from the maintainer website:
wget ftp://www.northern-ridge.com.au/zoneminder/ubuntu/dapper/zoneminder_1.22.3-8_i386.deb
Next we install it with the following command:
sudo dpkg -i zoneminder_1.22.3-8_i386.deb
My system had a few dependancy errors, therfore I ran:
sudo apt-get -f install
which automagically fixed any problems.
Here we have already installed all the required packages, next we need some configuration.
First we configure Apache:
sudo ln -s /etc/zm/apache.conf /etc/apache2/conf.d/zoneminder.conf
sudo /etc/init.d/apache2 force-reload
This surveillance application is run by the apache, therefore to enable access to the Video device we must add www-data to the video group:
sudo adduser www-data video
Now we can access the ZoneMinder GUI, from our favorite browser we type in the URL:
http://IP_ADDRESS_CCTV_SYSTEM/zm
From this interface first step is to add cameras:
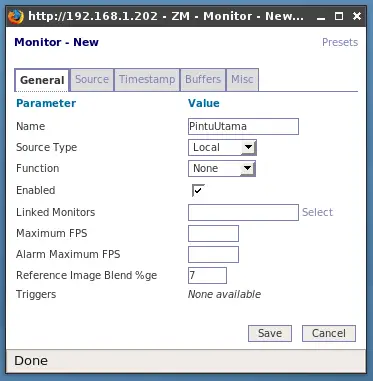
Here we specify the device, dimension and color:

Result of the newly added camera:
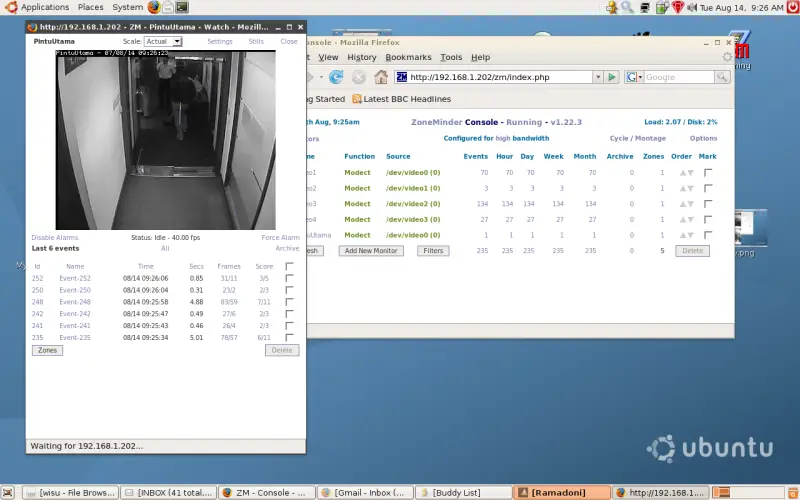
Then we tell ZoneMinder how to process captured images:
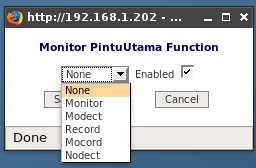
In my case I chose to Motion Detect my system, where recording will only take place upon movement.
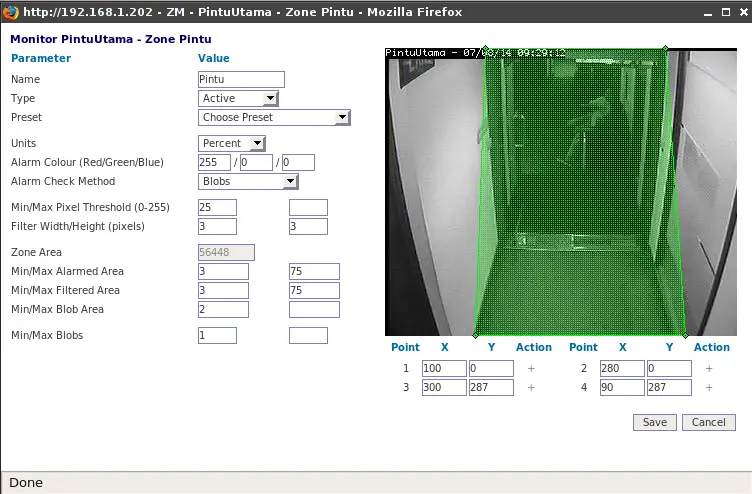
I can also choose which area to monitor for movement, here is a sample on the main entrance:
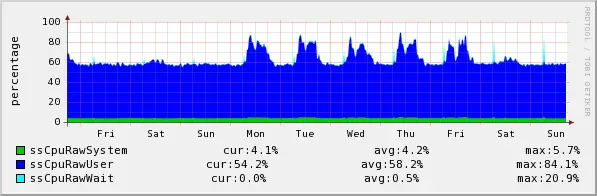
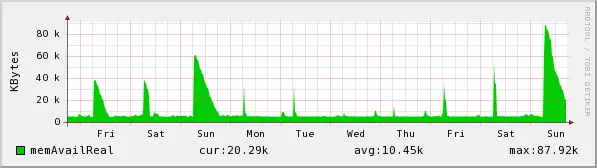
Here is my 4 camera CCTV system:

It requires resources as follows: