 Typesetter is an open source CMS written in PHP that allows website developers to create feature rich and flexible websites using an easy to use true WYSIWYG editor. It uses flat file storage, and this is one of the main differences between Typesetter and other content management systems, so there is no need of database to store and retrieve the actual data.
It is fairly easy to install Typesetter CMS on a CentOS VPS. The installation process should take about 5 minutes if you follow the very easy steps described below. This install guide assumes that Apache and PHP are already installed and configured on your server.
At the time of writing this tutorial, the latest stable version of Typesetter CMS is 5.0 and it requires:
- PHP 5.3 or later with GD graphics library PHP extension enabled or ImageMagick installed on your server. Also, Safe Mode, Register Globals and Magic Quotes should be disabled in php.ini;
- Apache Web Server installed on your Linux VPS, compiled with mod_rewrite module and with the following directives allowed: RewriteEngine, RewriteBase, RewriteCond and RewriteRule;
Download the latest version of Typesetter CMS available at ‘https://www.typesettercms.com/Download’ to a directory on the server using the following commands:
Extract the archive and move the Typesetter CMS files to the document root directory of your website:
The web server user (Apache) needs to be able to write to certain Typesetter files and directories, so you can easily accomplish that by executing the following command:
Locate the php configuration file using the following command:
Edit the ‘php.ini’ configuration file and disable Safe Mode, Register Globals and Magic Quotes if it is not already done so:
Create a new virtual host directive in Apache. For example, edit your Apache configuration file (‘/etc/httpd/conf/httpd.conf’ by default) and un-comment the following line:
#NameVirtualHost *:80
Then, add the following lines at the end:
Restart the Apache web server for the changes to take effect:
Open your favorite web browser, navigate to http://your-domain.com/ and if you configured everything correctly the Typesetter CMS installer should be starting. You should follow the easy instructions on the install screen inserting the necessary information as requested: enter email address, administrator login credentials and click ‘Install’.
For security reasons, it is recommended to delete the install.php file from your server:
That is it. The Typesetter CMS installation is now complete.
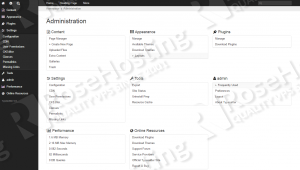
Head over to the Typesetter administrator back-end at http://your-domain.com/admin , install and configure plugins, install new theme and start creating your blog.
Of course you don’t have to do any of this if you use one of our Linux VPS Hosting services, in which case you can simply ask our expert Linux admins to install Typesetter CMS for you. They are available 24×7 and will take care of your request immediately.
PS. If you liked this post please share it with your friends on the social networks using the buttons on the left or simply leave a reply below. Thanks.