In this tutorial, we’ll go over the steps needed to install Open eShop on an Ubuntu 18.04 VPS.
 Open eShop is a free and open-source PHP-based web interface that allows its users to easily sell their digital goods such as MP3s, eBooks, Movies, Software, or any other downloadable item on offer. The installation of Open eShop is pretty easy, and this tutorial will go into details on how to install and configure Open eShop on an Ubuntu 18.04 VPS with Apache web server, MySQL database server and PHP.
Some of the main Open eShop features are listed below:
- Different payment methods supported – Paypal or credit or debit card (using Paymill, Stripe, and Bitpay). The products are only downloadable by paid users.
- Create discount coupons with unique codes and limits
- Integrated customer support system with easy interface
- Fully mobile-friendly
- SEO-friendly
- Fully customizable with themes and widgets
and much more..
Let’s begin with the installation.
Table of Contents
Prerequisites:
- VPS with Ubuntu 18.04 OS
- LAMP stack
- System user with root privileges, or access to the root user itself
Step 1: Log in and Update the Server
Login to your Ubuntu 18.04 server via SSH as the root user (or as an admin account):
Don’t forget to replace ‘IP_Address‘ and ‘Port_number‘ with your server’s actual IP address and SSH port number.
and run the following command to update all installed packages on your server:
Step 2: Install the Apache Web Server
In order to run Open eShop, a web server is required. We will install and use the Apache web server, which is the most popular web server in the world. It can be easily installed using the following command:
Once it is installed, start the web server and enable it to automatically start after a server reboot:
Step 3: Install PHP
Open eShop is built entirely in PHP, so we have to install PHP and several PHP modules on our server.
Since the Mcrypt PHP extension is not available in PHP 7.2, but is required by Open eShop, we will have to install few additional packages in order to install the extension with pecl:
Then restart the web server for the changes to take effect:
Step 4: Install the MySQL Database Server
Open eShop needs an empty database in which it’ll store its information. For this purpose we will install the MySQL database server:
Start MySQL and enable it to automatically start upon a reboot:
To improve the security of the MySQL database server and set up a password for the MySQL root user, you can run the mysql_secure_installation post installation script, which is included with the MySQL package. You can use the following text as a guide (we suggest answering with ‘Y’ for yes to all prompts):
Step 5: Create a MySQL User and Database
Now that we have the MySQL database server installed and running, next we can create the new user and database that are needed for Open eShop. Log in to the MySQL CLI as the root user using the password you set earlier in this tutorial when going through the secure installation setup. If you chose not to set that up, the root password is blank, so when prompted, just press the [Enter] key to authenticate.
Replace ‘PASSWORD‘ with a strong password.
Step 6: Download Open eShop
Create a directory for Open eShop inside the document root diretory.
And download Open eShop’s installation script
All Open eShop files have to be readable by the web server user, so we’ll need to change the permissions of those files:
Step 7: Create an Apache Virtual Host
In order to be able to access Open eShop with your domain name, you’ll have to create an Apache virtual host directive for the specific domain name. Create a configuration file with your preferred text editor (we use nano):
Then enter the following contents:
Replace ‘your_domain.com‘ with your unique registered domain name.
Enable the virtual host and restart Apache:
Step 8: Complete the installation
Open eShop requires the ‘short_open_tag’ PHP directive to be enabled, so open the PHP configuration file as shown below and make the necessary changes:
Make sure there’s a line in the file that looks identical to this:
Then save and exit the file.
Enable the Apache mod_rewrite module:
and restart the Apache web server for the changes to take effect
At this point you should be able to access Open eShop with your favorite web browser at http://yourdomain.com . The installation wizard will check if all requirements are met before starting the installation, as shown below:
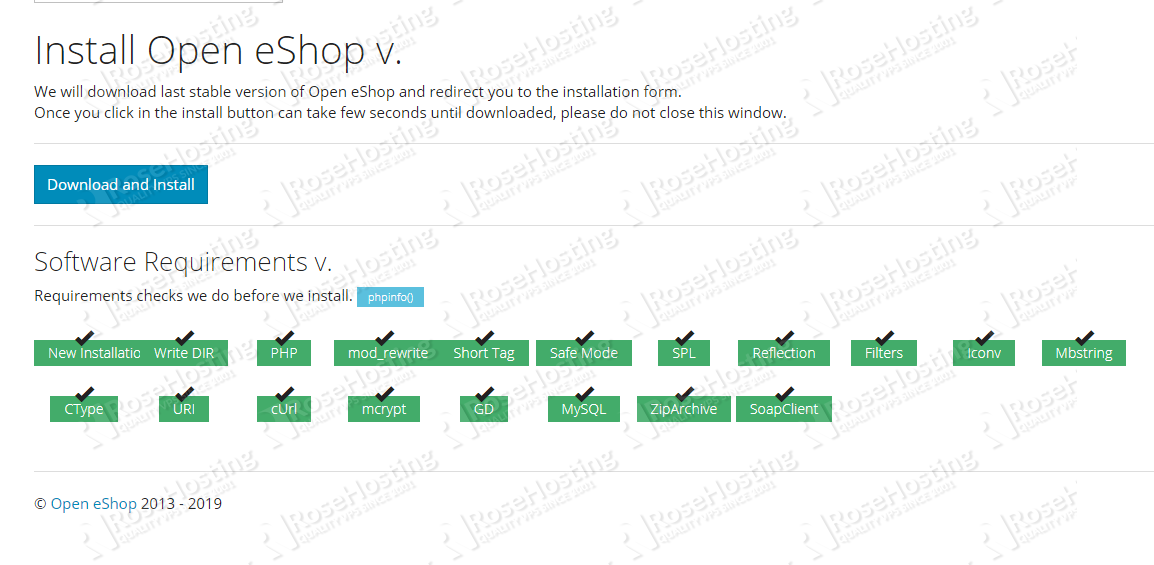
Click the ‘Download and Install’ button to complete the Open eShop installation. Congratulations! You have finished with the installation of Open eShop.
Fore more information on how to use and configure this application, please check their official documentation.
 Of course, if you are one of our Managed Ubuntu Hosting customers, you don’t have to install Open eShop on your Ubuntu 18.04 VPS – simply ask our admins, sit back, and relax. Our admins will install Open eShop on Ubuntu 18.04 for you immediately.
PS. If you liked this post about how to install Open eShop on an Ubuntu 18.04 VPS, please share it with your friends on the social networks using the buttons below, or simply leave a comment in the comments section. Thanks.