
VNC or Virtual Network Computing is a graphical desktop sharing tool that allows you to remotely control a computer (server or desktop) from another computer (client). A VNC server transmits all keyboard and mouse events from the client computer to the server computer. If you are not yet familiar with CLI commands such as the terminal, etc., you can use VNC to help you manage files, software, and system settings on remote computers.
In this tutorial, we will guide you step-by-step through setting up the VNC server on Ubuntu 20.04. We will install a Linux desktop XFCE on the server, then install and configure the VNC server using TightVNC.
Prerequisites
- Ubuntu 20.04
- Root privileges
What we will do
- Update System and Create User
- Install XFCE Desktop and TightVNC
- Initial VNC Configuration
- Configure TightVNC
- Running TightVNC as a Service
- Connect to the VNC Server Through SSH Tunnel
Step 1 - Update System and Create User
Update your Ubuntu repository, then upgrade your system using the apt commands below.
sudo apt update
sudo apt upgrade
For this guide, the VNC desktop will be available for a non-root user. So, we need to create a new user and add it to the sudo group for root access.
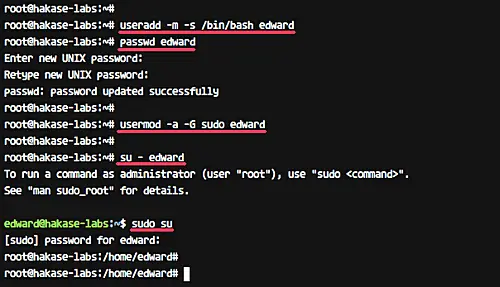
Create a new user named 'edward' and give the user a password.
useradd -m -s /bin/bash edward
passwd edward
Now add the user 'edward' to the sudo group for the root privileges access.
usermod -a -G sudo edward
A new user named 'edward' for VNC access has been created, and the user will be able to access the root privileges.
su - edward
sudo su
Step 2 - Install XFCE Desktop and TightVNC
Linux has several desktop environments such as Gnome, Unity, KDE, LXDE, XFCE etc. For this tutorial, we will be using the XFCE desktop as our VNC desktop environment.
Install XFCE desktop including all dependencies using the apt command below.
sudo apt install xfce4 xfce4-goodies
If the XFCE desktop installation is complete, install the 'tightvncserver' packages.
Run the apt command below.
sudo apt install -y tightvncserver
The XFCE Desktop and tightvncserver have been installed on the Ubuntu 16.04 server.
Step 3 - Initial VNC Configuration
In this step, we will generate the VNC configuration for the 'edward' user.
Login as 'edward'
su - edward
Now initiate the vnc configuration for 'edward' user with command below.
vncserver
You will be asked for the VNC server password - type your password. And for the 'view-only' password, you can enable or disable it. The user who logins to the server using the 'view-only' password will not be able to control the mouse and keyboard.
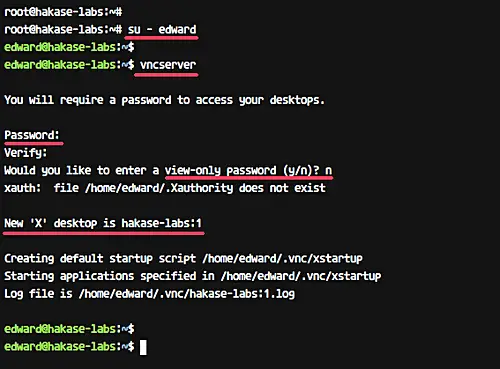
The first time we run the 'vncserver' command, it will automatically create new configuration directory '.vnc' and run the first VNC session.
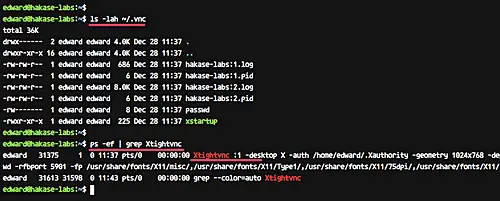
Check it using the command below.
ls -lah ~/.vnc/
ps -ef | grep Xtightvnc
And you will get the result as shown below.
Step 4 - Configure TightVNC
In this step, we will configure the VNC server for using the XFCE desktop. We will edit the VNC configuration file 'xstartup' under '.vnc' directory.
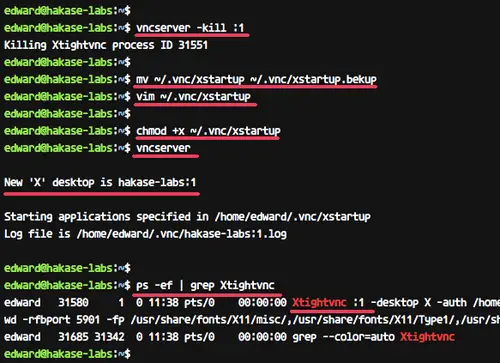
Before we edit the configuration, kill the first VNC session using the command below.
vncserver -kill :1
Now backup the default configuration and create a new one using vim.
mv ~/.vnc/xstartup ~/.vnc/xstartup.bekup
vim ~/.vnc/xstartup
Paste the following configuration there.
#!/bin/bash
 xrdb $HOME/.Xresources
 startxfce4 &
Save and exit.
Now make the script executable using chmod and run again the 'vncserver' command.
chmod +x ~/.vnc/xstartup
vncserver
Check the session list.
ps -ef | grep Xtightvnc
And you will get the result as below.
Step 5 - Running TightVNC as a Service
In this tutorial, we will run the VNC server as a service. So we need to create a new service file for it.
Go to the '/etc/systemd/system' directory and create a new service file '[email protected]'.
cd /etc/systemd/system
vim [email protected]
Paste the following vnc service script there.
[Unit]
 Description=Remote desktop service (VNC)
 After=syslog.target network.target

[Service]
  Type=forking
  User=edward
  PIDFile=/home/edward/.vnc/%H:%i.pid
  ExecStartPre=-/usr/bin/vncserver -kill :%i > /dev/null 2>&1
  ExecStart=/usr/bin/vncserver -depth 24 -geometry 1280x800 :%i
  ExecStop=/usr/bin/vncserver -kill :%i

[Install]
  WantedBy=multi-user.target
Save the file and exit the editor.
Now reload the systemd services and start the VNC server service.
systemctl daemon-reload
systemctl start [email protected]
Assuming everything goes error-free, add the service to the boot time and check the service status using systemctl.
systemctl enable [email protected]
systemctl status [email protected]
Following are the results in our case:
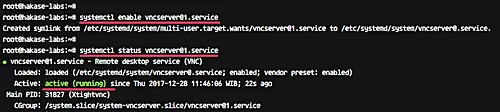
The VNC server is installed, and the first session is now running under 'edward' user.
Step 6 - Connect to the VNC Server Through SSH Tunnel
In this step, we will connect to our VNC server through an ssh tunnel.
Open your terminal and type the ssh command as below.
ssh -L 5901:127.0.0.1:5901 -N -f -l edward 192.168.33.10
Type your SSH login password.
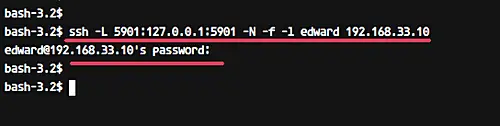
The command will create the tunnel between your localhost and the VNC server. The port 5901 on localhost will be forwarded to the VNC server '192.168.33.10' on port 5901.
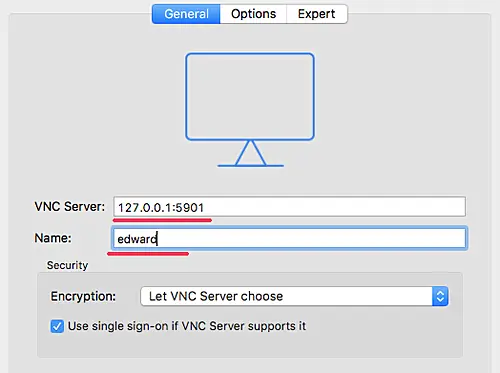
Now open your 'vnc viewer' application, create a new connection, and type the VNC server address with the 127.0.0.1 localhost IP and port 5901 as below.
Connect to the VNC server and you will be asked for the VNC server password. Type your password and click 'OK'.
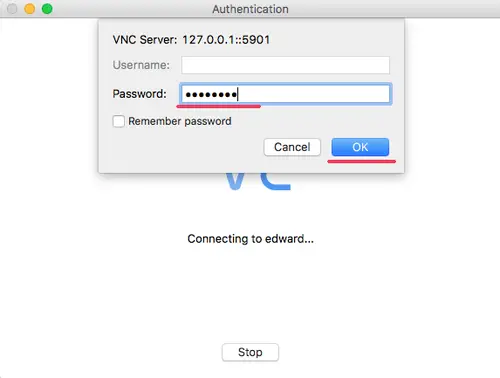
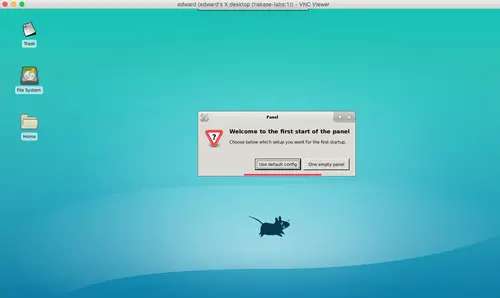
Now you will get the XFCE desktop from your server.
Click the 'use default config' button for the first time, and you will get the XFCE desktop with the default configuration.
Installation of the VNC server using TightVNC on Ubuntu 20.04 has been completed successfully.