Install OpenWRT, Chillispot, FreeRadius Based Managed Hotspot(s) Including PayPal Payment Gateway
1 What are Chillifire Hotspots?
If you have ever tried to implement one of the hotspot HowTos on this and other site, it might have dawned on you that this is not an easy feat to accomplish. Amazingly most solutions also leave out the most important part – how to get paid by the punters using the hotspot. Some will offer prepaid solution or access tickets that need to be printed, but this will require staff being involved on the premises. And in particular, once you want to offer a professional service and not just a ‘toy concept’ it gets tricky – and expensive. Just imagine all the servers you need to provide redundant and load balanced freeradius, mysql and web servers. It is generally not worth the effort and expense for just one hotspot – unless of course you are willing to accept outages, unhappy customers etc.
Because that is so Chillifre has assembled a professional hotspot management service based on OpenWrt, chillispot, openvpn, freeradius, mysql etc. They have combined all the required packages and code tweaks into a router firmware package – it can be downloaded from http://sourceforge.net/projects/chillifire. The chillifire opensource firmware hooks up with a management console on their servers, which allow you, the hotspot owner, to manage your account, your user accounts and review the billings per period. While the look and feel on the logon screen is branded as ‘Chillifire’, you can display your logo and slogan on these screen, so your customers know who they have to thank for their connection – and thus create loyalty to your business. Customers are presented with a very easy login and access time purchase screens. They can use major credit cards or PayPal to purchase time, relieving the hotspot owner (and their staff) from getting involved – the hotspot runs itself.
For non-commercial users Chillifire is free of charge; a non-commercial user is defined as a user with only one deployed router.
But the chillifire concept goes further: it allows you to run your own broadband Wi-Fi business without having to master and build all the IT technology behind it. You can even go for a complete corporate solution with your own ‘skin’ (= your own branding, look and feel, logo etc.) for an entire coffee shop or hotel chain, franchise businesses, condos, or even provide it as an optional service to your customers as ISP.
2 Preliminary Note
This installation guide focuses on how to install Chillifire Hotspot software on a Linksys WRT54GL router and how to create a Chillifire account. The installation will turn your router into a Chillifire Hotspot, enabling you to earn money from your broadband internet connection.
The procedure assumes the router is new and 'out of the box'. If there is already another firmware installed, set it back to its original state by flushing it with Linksys' original firmware and resetting it to 'Factory Defaults'. If you had already installed another firmware you already know how to flush a router with firmware, so I will not explain that procedure in detail, but assume the router has been reset to 'out of the box' firmware and settings. If you had already used the router with just the Linksys original firmware please reset the router to 'Factory Defaults' as explained in step 3.
Before proceeding with the installation, download the latest software version for the install from the site sourceforge.net/projects/chillifire or www.chillifire.net/en/Download onto your PC.
Also, ensure that pop-up blockers are switched off on your PC before installation.
3 Load The Chillifire Firmware On The Router
Remove the sticker on the back of the newrouter. Do NOT run the software on the DVD as requested on the sticker. Instead connect the router to the internet (via your ADSL modem or other internet connection) and your computer as shown in the diagram below.
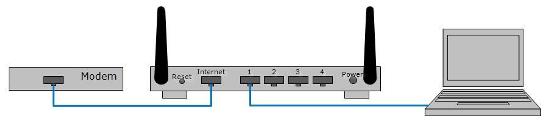
Once these two connections are made, connect the router to its power source. You will see the LCD labelled ‘Power' on the front of the router flashing. Once this light has stopped flashing you can open your preferred browser (Internet Explorer, Firefox, etc.) on your computer.
Type in the address
http://192.168.1.1
into the address bar of the browser and press ‘Enter’.
Note : This paragraph is only relevant, if you had used the router before with the Linksys software. Enter the user name and password you had configured for the router (if you had changed it from 'admin' and 'admin'), click on the 'Administration' tab and then the ‘Factory Defaults’ tab, click ‘Restore Factory Defaults’ to ‘yes’ and press ‘Save Settings’. The router will reboot, wait until the reboot of the router is completed. and type in the address http://192.168.1.1 again and press ‘Enter’. You are now ready to continue below, as if the router was 'out of the box'.
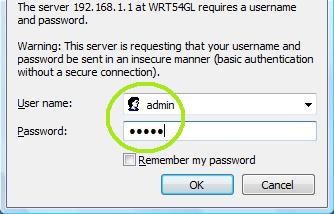
You will now see a pop-up window. Enter ‘admin’ as user name and again ‘admin’ as password and press the ‘OK’ button.
Press the ‘Administration’ tab, and then the ‘Firmware Upgrade’ tab.
On the ‘Firmware Upgrade’ tab press the ‘Browse’ button and locate the Chillifire software you had previously downloaded onto the desktop or laptop. Press the ‘Upgrade’ button.

This is the critical part of the whole procedure. Please note the warning on the screen which says ‘Upgrade must NOT be interrupted’. They are not kidding! Failure to comply may result in your router becoming unusable.
Wait until the ‘Upgrade was successful’ screen shows AND the LCD labelled ‘Power’ has stopped flashing AND the LCD labelled ‘DMZ’ is off, (this may take up to10 minutes).
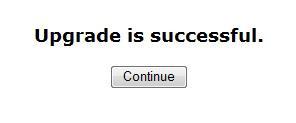
You can now press the ‘Continue’ button.
4 Configure And Register The Router
After a successful upgrade, you will see this screen.
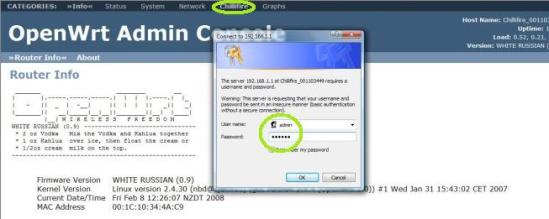
Press the ‘Chillifire’ tab. And you will be presented again with the
logon screen.
Enter ‘admin’ as user
and ‘shae4.’ (notice the dot '.' at the end) as password
(You can change the password later to anything you like.)
The system will perform some router configuration activities in the background. Once they are finished, you will see this screen.

You now need to press the ‘Start Chillifire Configuration’ button in the middle of the screen.
Next you will see the Chillifire login screen.
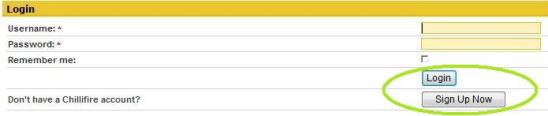
If you already have an account created on the Chillifire website or you are adding another router to your existing account, please type in your account name and password and press the ‘Login’ button.
4.1 Create A Chillifire Account
If you do not have an account yet, please press the ‘Signup Now’ button and fill in your account details on this page.
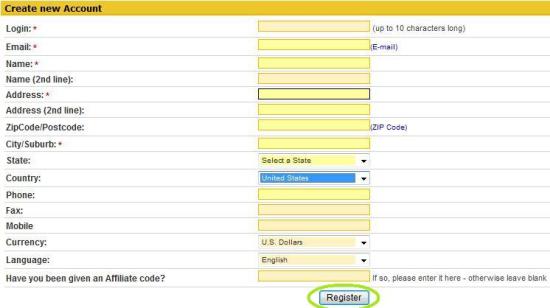
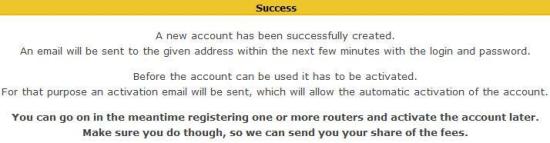
If you pressed the ‘Sign up now’ button, you will see this screen. Choose an account name (up to 10 characters), enter the billing address details of your account (can be different to the physical address of the router(s), choose the default currency for your router(s). You can enter an affiliate code, if you have been given one (otherwise, leave empty). Press the ‘Register’ button on the screen and you will see a success message, once all entries have been made and accepted.
4.2 Register Your Router
The system will direct you automatically to the following screen to register the router against your account (regardless whether you pressed the ‘Login’ or the ‘Sign up now’ button in step 3.
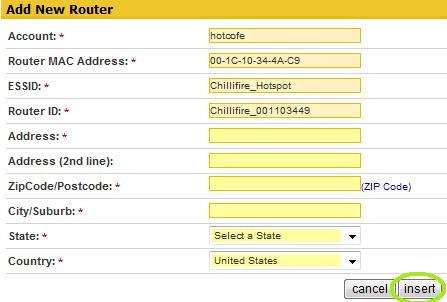
Enter the router location and press ‘Insert’.
The system will return a message to confirm the successful registration of the router.

FAQ: Why do I have to enter an address twice? The address you enter with the account is like your billing address. It is not necessarily the address the router is located at. Consider also that over time you may implement more than one router in different locations. Then you need to be able to store different addresses with your different routers. Storing each router address individually will also allow us to show to potential customers where to find your router on an online street map.

