How To Run Fully-Virtualized Guests (HVM) With Xen 3.2 On Debian Lenny (x86_64)
Version 1.0
Author: Falko Timme
This guide explains how you can set up fully-virtualized guests (HVM) with Xen 3.2 on a Debian Lenny x86_64 host system. HVM stands for HardwareVirtualMachine; to set up such guests, you need a CPU that supports hardware virtualization (Intel VT or AMD-V). Hardware virtualization allows you to install unmodified guest systems (in contrast to paravirtualization where the guest kernel needs to be modified); that way you cannot only virtualize OpenSource operating systems like Linux and BSD, but also closed-source operating systems like Windows where you cannot modify the kernel.
To learn more about the different virtualization techniques, take a look at this VMware whitepaper: http://www.vmware.com/files/pdf/VMware_paravirtualization.pdf.
This document comes without warranty of any kind! I do not issue any guarantee that this will work for you!
1 Preliminary Note
I'm assuming that you're using a Xen 3.2 system on Debian Lenny, set up according to chapter 2 of this tutorial: Virtualization With Xen On Debian Lenny (AMD64)
Please note that full virtualization comes with a performance penalty compared to paravirtualization.
I'm using disk images in this guide for the storage of the virtual machines. I couldn't get HVM to work with real partitions or logical volumes (LVM) - the guest couldn't see the hard drive. I don't know if it's possible to use physical devices with HVM, I couldn't find anything about it on the web. Please drop me a line if you know if and how this can be done. Thanks!
You need a CPU that supports hardware virtualization to install HVM guests. This is how you find out if your CPU supports hardware virtualization (after you have installed Xen!):
xm dmesg | grep -i hvm
If you get something back, then you're lucky; if the command prints nothing and just returns to the prompt, then your CPU does not support hardware virtualization.
On an AMD-V processor, the output looks as follows:
server1:~# xm dmesg | grep -i hvm
(XEN) HVM: SVM enabled
server1:~#
This is how you can find out if your CPU supports hardware virtualization before you install Xen:
egrep '(vmx|svm)' --color=always /proc/cpuinfo
2 Installing The First HVM Guest
I want to create the guest xen1.example.com now. First, we need to create a hard drive image for it, e.g. as follows:
dd if=/dev/zero of=/home/xen1.example.com.img bs=1024k count=4000
(This creates an image of approx. 4GB in size. If you want a bigger image, just increase the count switch.)
We can install the guest either from a CD/DVD inserted into the CD drive, or from an ISO image that you downloaded. You can also create an ISO image from a CD/DVD like this (in this example I create an ISO image of an Ubuntu 8.10 Server AMD64 CD):
dd if=/dev/cdrom of=/home/ubuntu8_10_server_amd64.iso
Next we create the file /etc/xen/xen1.example.com.cfg:
vi /etc/xen/xen1.example.com.cfg
import os, re arch = os.uname()[4] kernel = "/usr/lib/xen-default/boot/hvmloader" builder='hvm' memory = 512 shadow_memory = 8 name = "xen1.example.com" vif = [ 'type=ioemu, bridge=eth0' ] disk = [ 'file:/home/xen1.example.com.img,xvda,w', 'file:/home/ubuntu8_10_server_amd64.iso,xvdc:cdrom,r' ] #disk = [ 'file:/home/xen1.example.com.img,xvda,w', 'phy:/dev/cdrom,xvdc:cdrom,r' ] device_model = '/usr/lib/xen-default/bin/qemu-dm' # boot on floppy (a), hard disk (c) or CD-ROM (d) # default: hard disk, cd-rom, floppy boot="dc" sdl=0 vnc=1 vnclisten="0.0.0.0" vncconsole=1 vncpasswd='howtoforge' stdvga=0 serial='pty' usbdevice='tablet' on_poweroff = 'destroy' on_reboot = 'restart' on_crash = 'restart' |
(Please use the first disk line if you want to install from an ISO image and the second one if you want to install from a CD or DVD.)
boot="dc" makes that the virtual machine will first boot from CD/DVD or an ISO image and then from the hard disk, if there's no CD. It's important the the CD drive is the first boot device when you power on the virtual machine for the first time.
vnc=1 makes that we will be able to connect to the guest using a VNC client. vnclisten="0.0.0.0" makes the host listen for VNC connections on all interfaces (the default is to listen on localhost only which makes remote VNC connections impossible). In the vncpasswd line you can set a password for VNC connections; if you don't want a password, just use vncpasswd=''.
Afterwards, we can power on our guest:
xm create /etc/xen/xen1.example.com.cfg
If you run
netstat -tap
you will notice that the host is now listening on port 5900 (VNC):
server1:/etc/xen# netstat -tap
Active Internet connections (servers and established)
Proto Recv-Q Send-Q Local Address           Foreign Address         State       PID/Program name
tcp        0      0 *:5900                  *:*                     LISTEN      24492/qemu-dm
tcp        0      0 *:42991                 *:*                     LISTEN      2293/rpc.statd
tcp        0      0 *:sunrpc                *:*                     LISTEN      2282/portmap
tcp        0      0 *:ssh                   *:*                     LISTEN      2987/sshd
tcp        0      0 localhost.localdom:smtp *:*                     LISTEN      2803/exim4
tcp        0      0 server1.example.com:ssh 192.168.0.2:4399        ESTABLISHED 4134/2
tcp6       0      0 [::]:ssh                [::]:*                  LISTEN      2987/sshd
server1:/etc/xen#
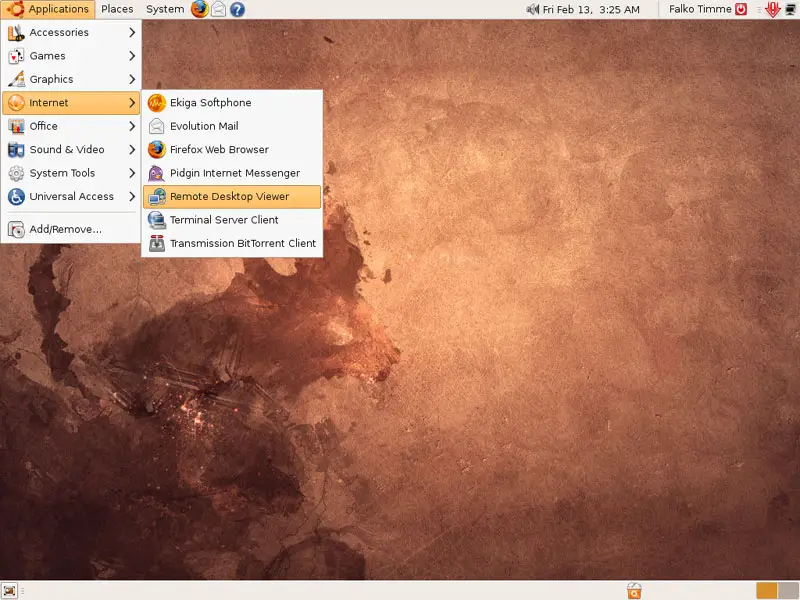
We can now connect to our guest on that port with a VNC client. On Windows, you can install TightVNC; on Ubuntu, there's already a VNC client under Applications > Internet > Remote Desktop Viewer:
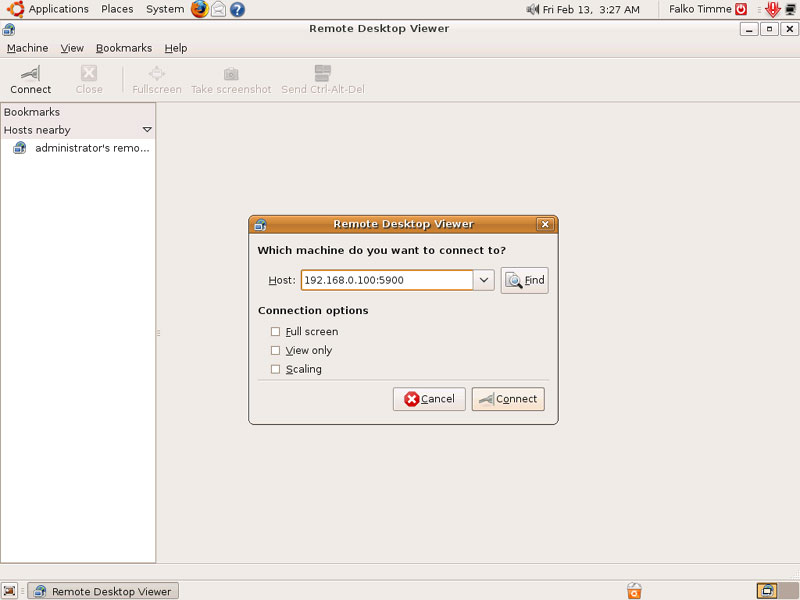
Click on the Connect button and then type in the IP of the Xen host followed by the port number (e.g. 192.168.0.100:5900):
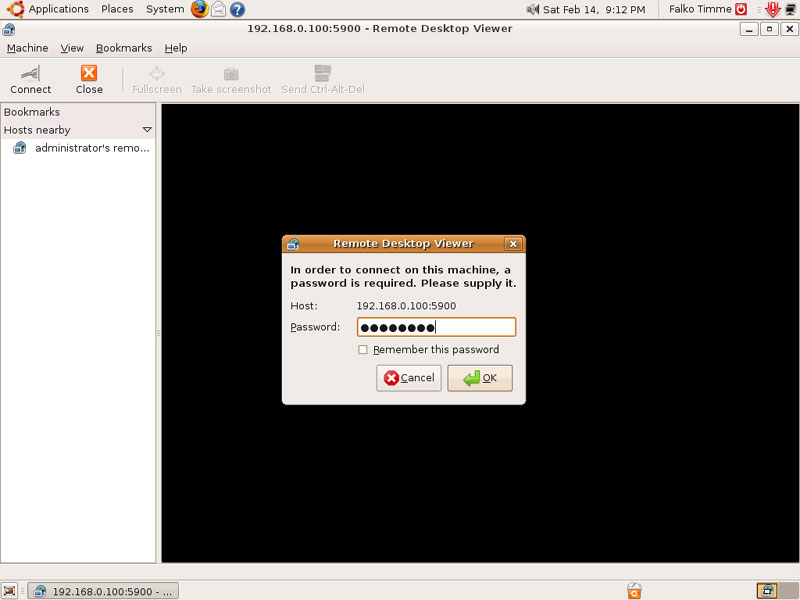
If you've specified a VNC password in the configuration file of the guest, you are now prompted for that password:
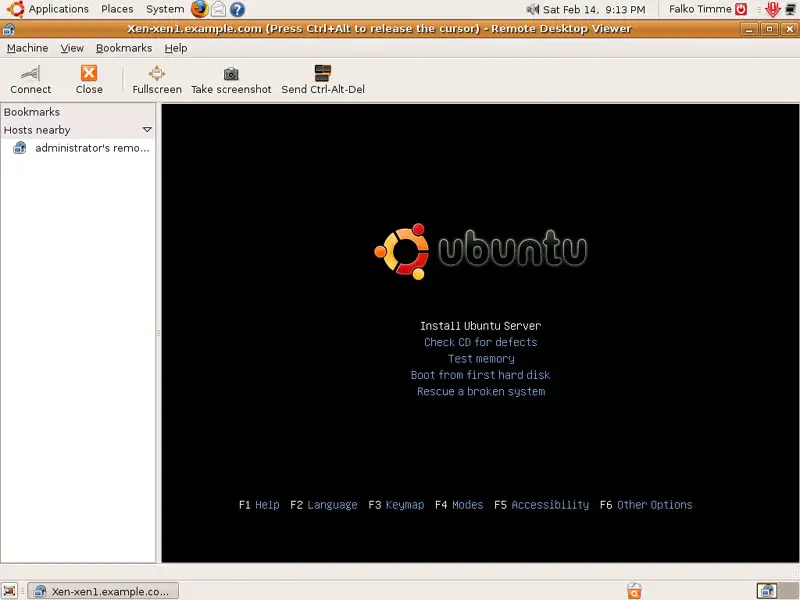
Afterwards, you should see the installer of the operating system that you want to install. Just follow the wizard as if it was a physical system: