How To Upgrade Ubuntu 11.04 (Natty Narwhal) To 11.10 (Oneiric Ocelot) (Desktop & Server)
Version 1.0
Author: Falko Timme  Follow me on Twitter
The new Ubuntu 11.10 (Oneiric Ocelot) has just been released. This guide shows how you can upgrade your Ubuntu 11.04 desktop and server installations to Ubuntu 11.10.
This document comes without warranty of any kind! I do not issue any guarantee that this will work for you!
1 Desktop
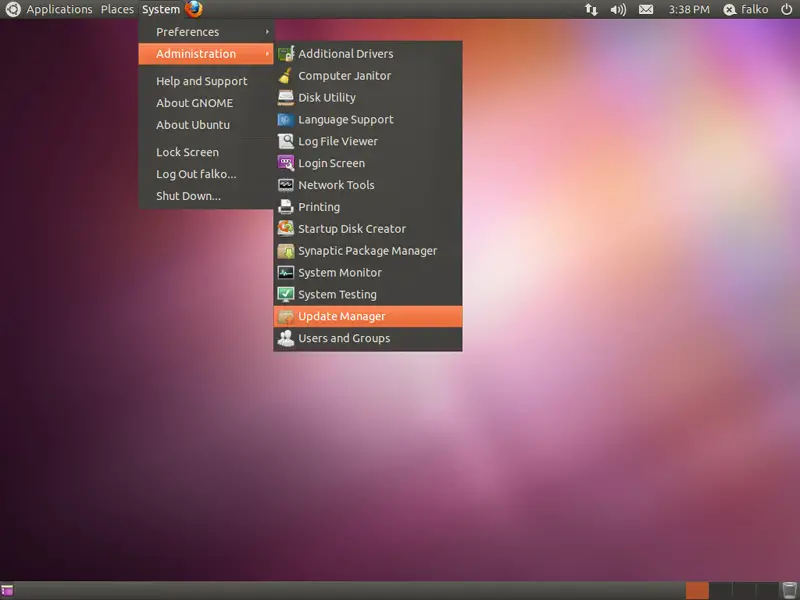
Start the Update Manager (System > Administration > Update Manager):
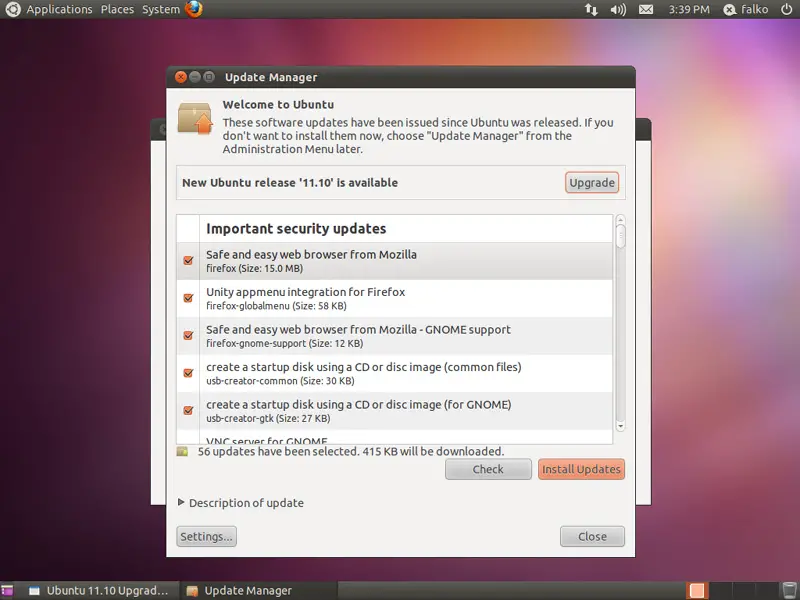
The Update Manager should show that a new distribution release (11.10) is available. Click on the Upgrade button to start the distribution upgrade:
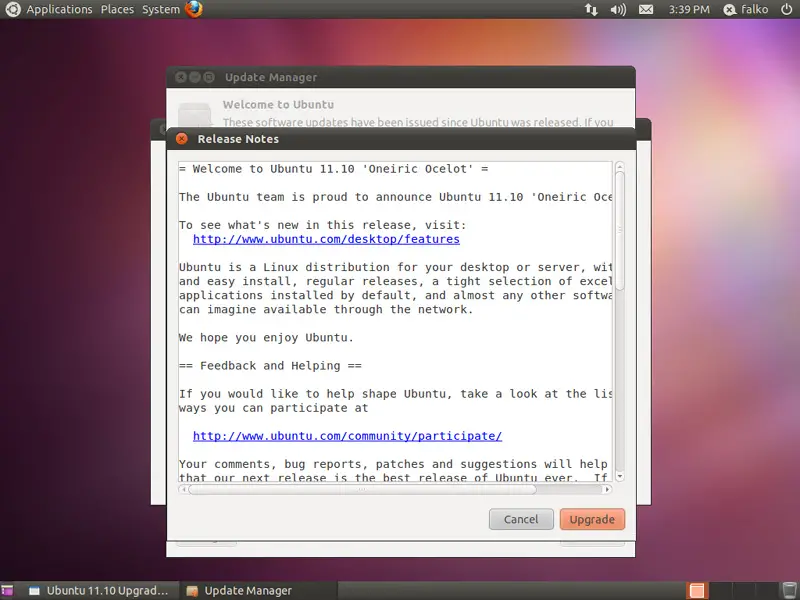
A window with the release notes for 11.10 comes up. Click on Upgrade again:
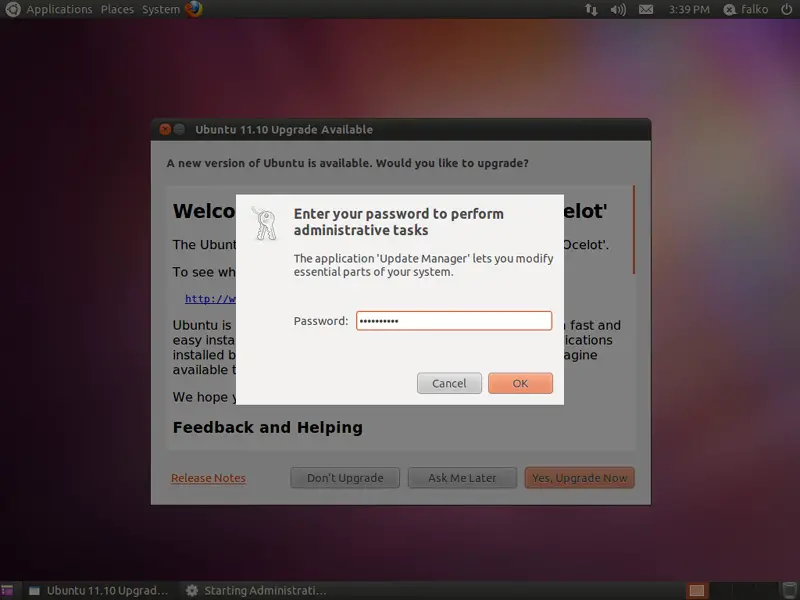
The upgrade tool is now being downloaded. Afterwards, type in your password:
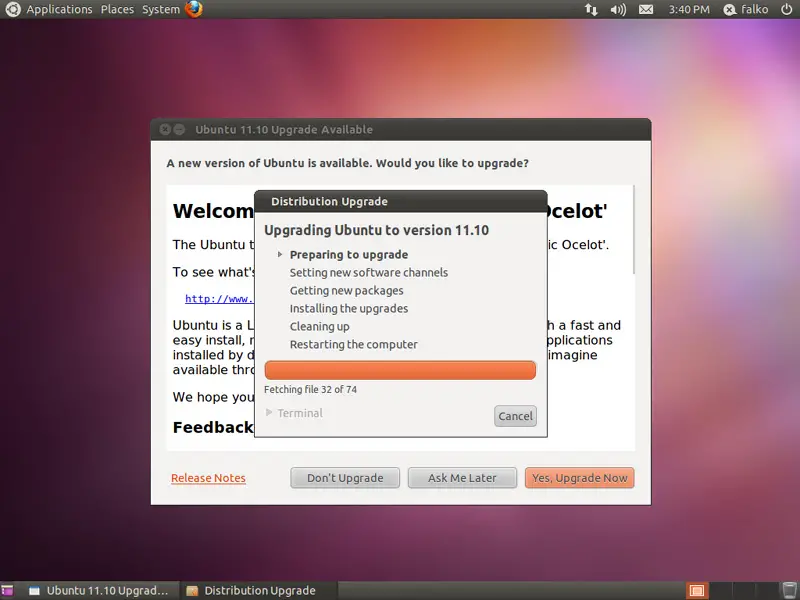
The upgrade is being prepared:
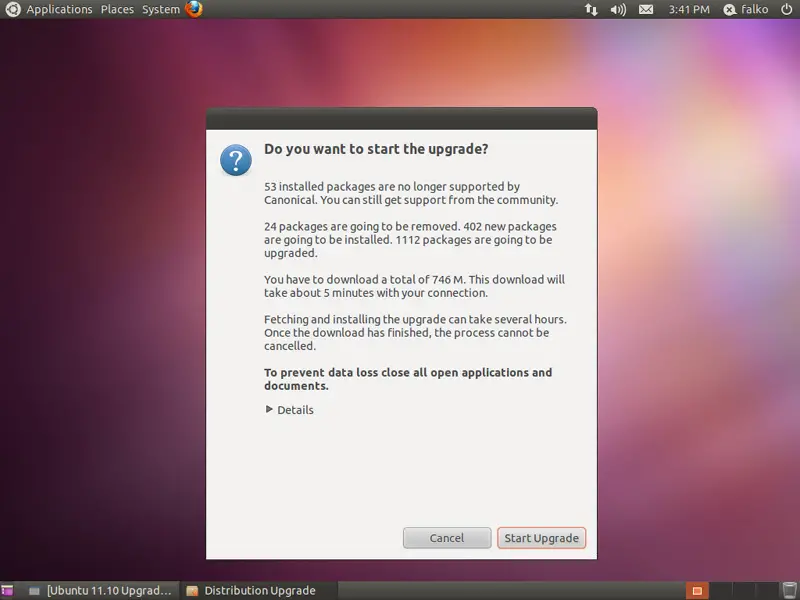
Click on Start Upgrade to finally begin with the upgrade process:
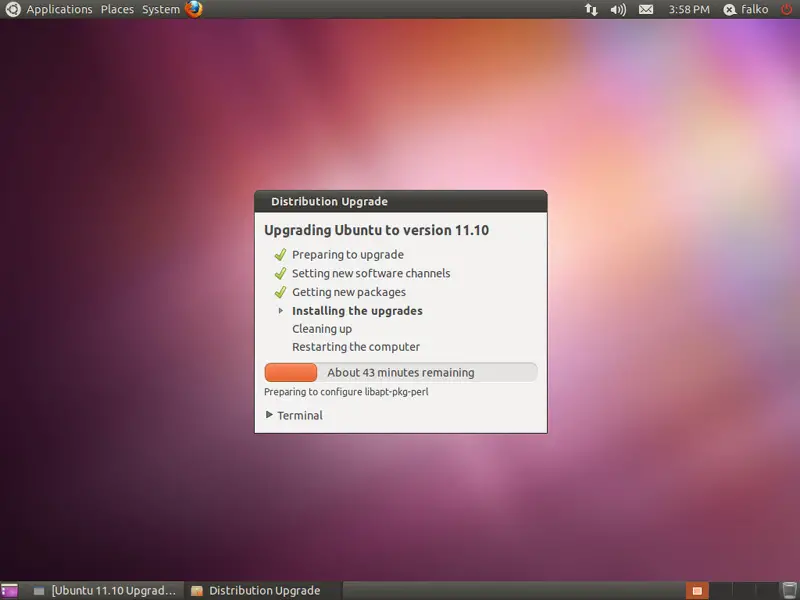
The upgrade packages are now being downloaded...
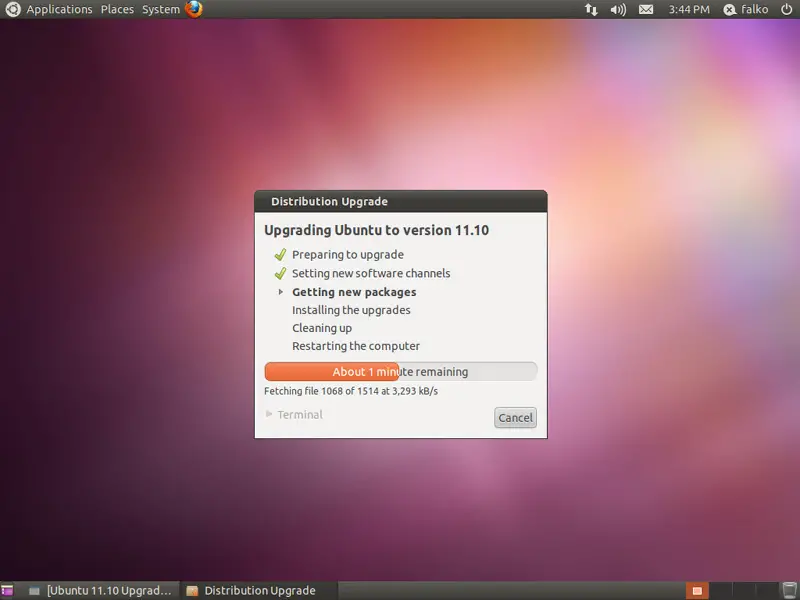
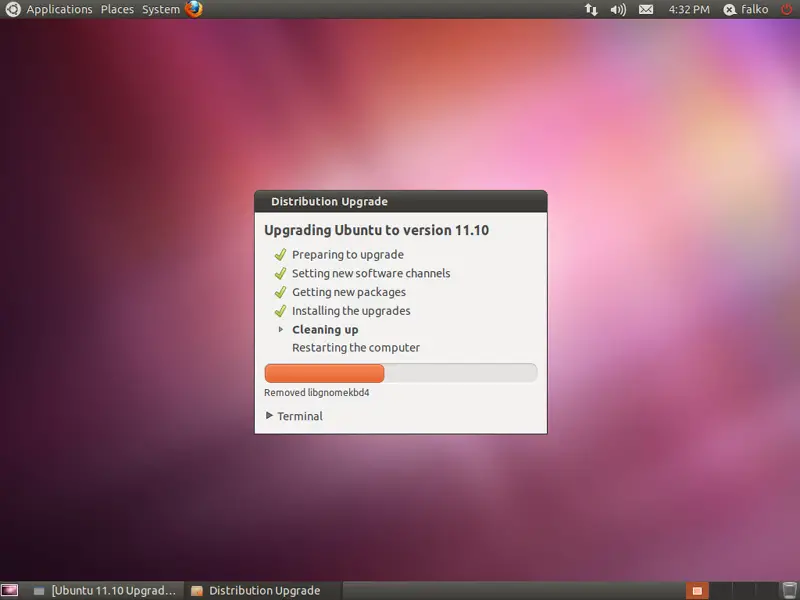
... and installed. This can take some time, so please be patient.
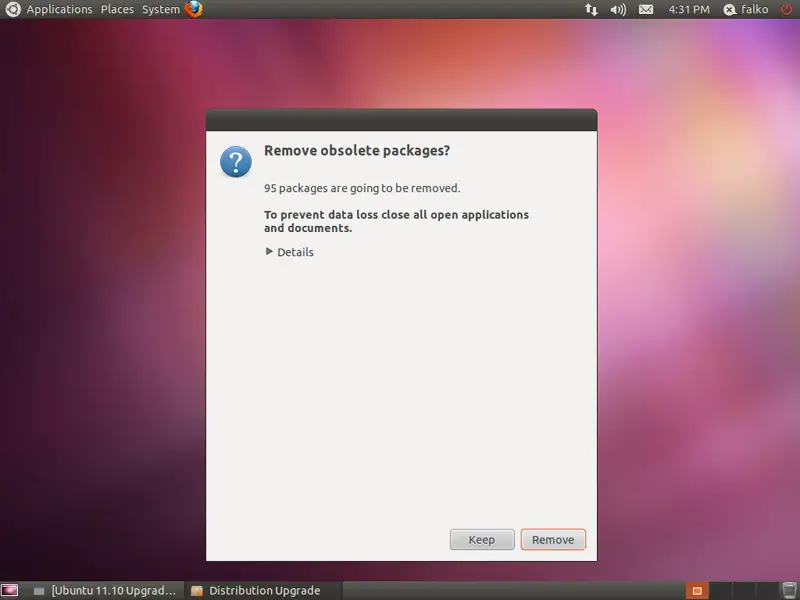
At the end of the upgrade process, you should remove obsolete packages:
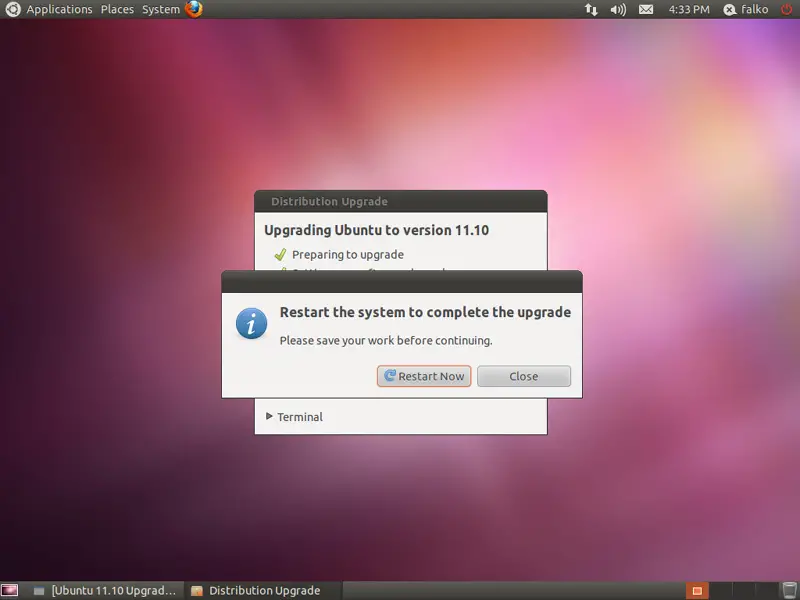
The system needs to be rebooted to complete the upgrade, therefore click on Restart Now:
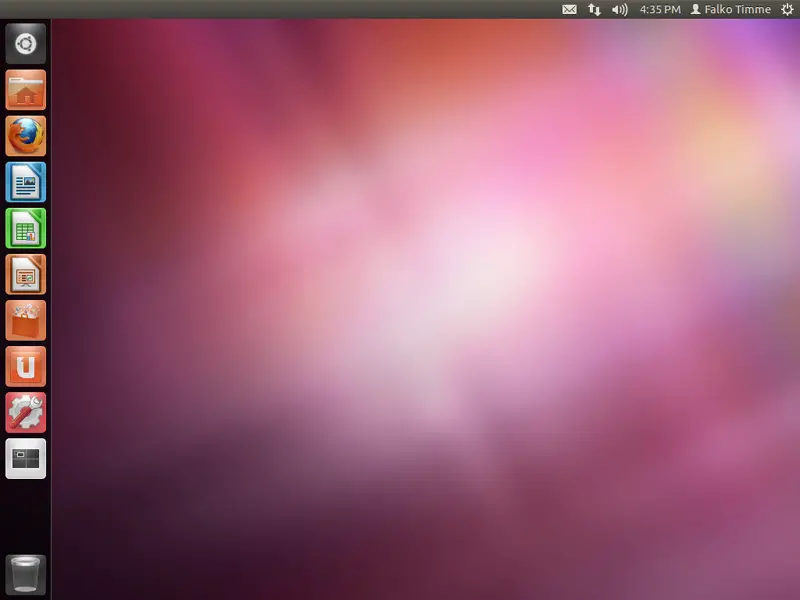
When you log in, Ubuntu 11.10 will by default start the new Unity desktop:
Welcome to your new your new Ubuntu 11.10 desktop:
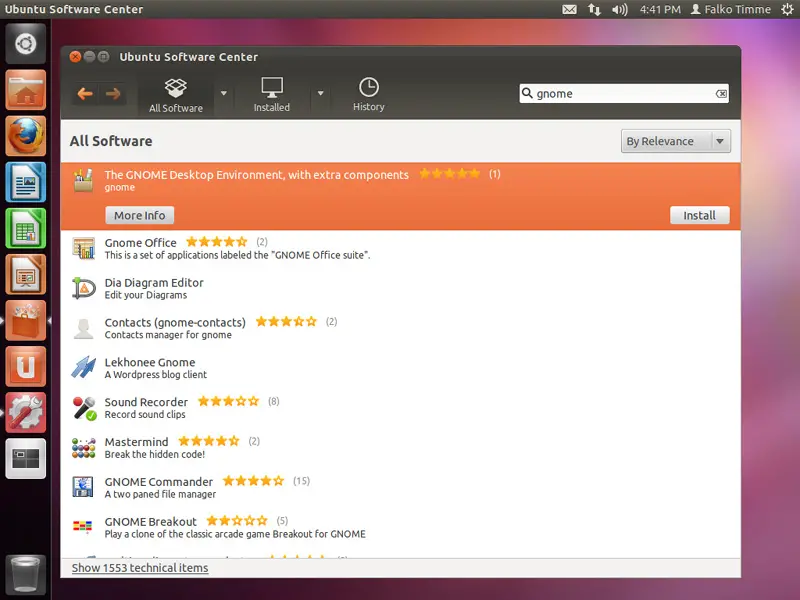
If you want to use GNOME instead of Unity, you must install it first. Open the Ubuntu Software Center and search for gnome. Click on the Install button next to the GNOME package to install the GNOME desktop environment:
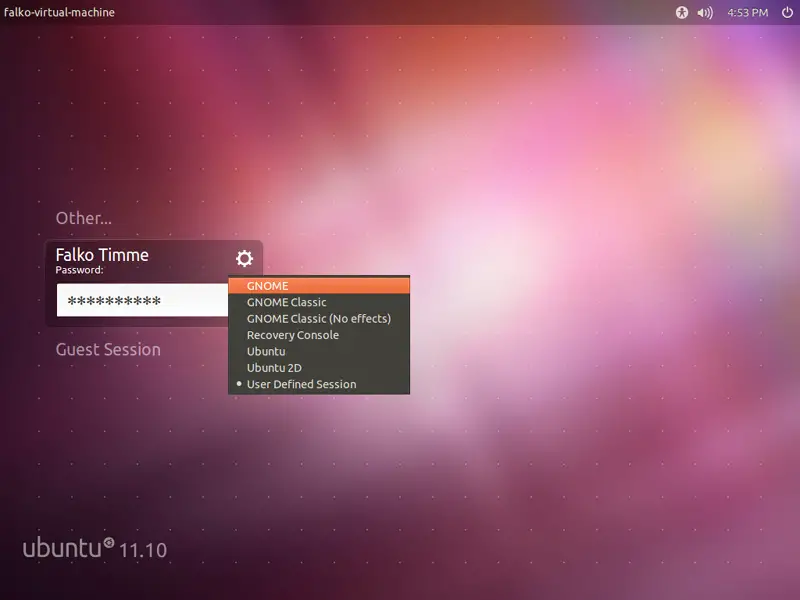
Afterwards log out of your desktop session. Back at the login screen, you now have the option to choose GNOME:
And this is how Ubuntu 11.10 looks with the GNOME desktop: