The Perfect Server - CentOS 6.5 x86_64 (Apache2, Dovecot, ISPConfig 3)
Version 1.0
Author: Falko Timme, updated by Srijan Kishore
This tutorial shows how to prepare a CentOS 6.5 x86_64 server for the installation of ISPConfig 3, and how to install ISPConfig 3. ISPConfig 3 is a webhosting control panel that allows you to configure the following services through a web browser: Apache web server, Postfix mail server, MySQL, BIND nameserver, PureFTPd, SpamAssassin, ClamAV, Mailman, and many more. Since version 3.0.4, ISPConfig comes with full support for the nginx web server in addition to Apache; this tutorial covers the setup of a server that uses Apache, not nginx.
Please note that this setup does not work for ISPConfig 2! It is valid for ISPConfig 3 only!
I do not issue any guarantee that this will work for you!
ISPConfig 3 Manual
In order to learn how to use ISPConfig 3, I strongly recommend to download the ISPConfig 3 Manual.
On more than 300 pages, it covers the concept behind ISPConfig (admin, resellers, clients), explains how to install and update ISPConfig 3, includes a reference for all forms and form fields in ISPConfig together with examples of valid inputs, and provides tutorials for the most common tasks in ISPConfig 3. It also lines out how to make your server more secure and comes with a troubleshooting section at the end.
ISPConfig Monitor App For Android
With the ISPConfig Monitor App, you can check your server status and find out if all services are running as expected. You can check TCP and UDP ports and ping your servers. In addition to that you can use this app to request details from servers that have ISPConfig installed (please note that the minimum installed ISPConfig 3 version with support for the ISPConfig Monitor App is 3.0.3.3!); these details include everything you know from the Monitor module in the ISPConfig Control Panel (e.g. services, mail and system logs, mail queue, CPU and memory info, disk usage, quota, OS details, RKHunter log, etc.), and of course, as ISPConfig is multiserver-capable, you can check all servers that are controlled from your ISPConfig master server.
For download and usage instructions, please visit http://www.ispconfig.org/ispconfig-3/ispconfig-monitor-app-for-android/.
1 Requirements
To install such a system you will need the following:
- Download the two CentOS 6.5 DVDs from a mirror next to you (the list of mirrors can be found here: http://isoredirect.centos.org/centos/6.5/isos/
- Here you can select architecture of your choice.
- a fast Internet connection.
2 Preliminary Note
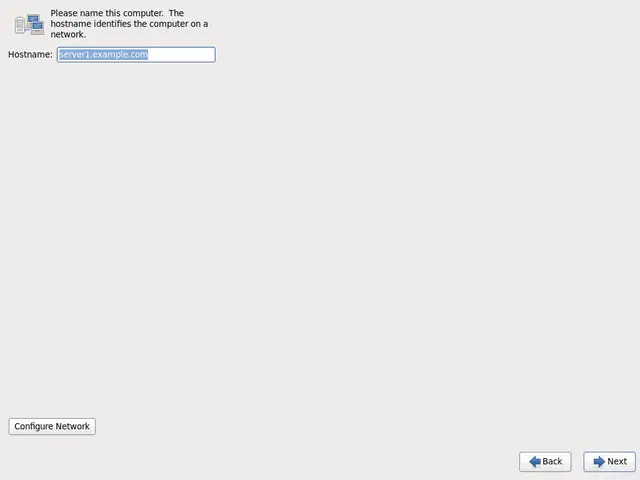
In this tutorial I use the hostname server1.example.com with the IP address 192.168.2.249 and the gateway 192.168.2.254. These settings might differ for you, so you have to replace them where appropriate.
3 Install The Base System
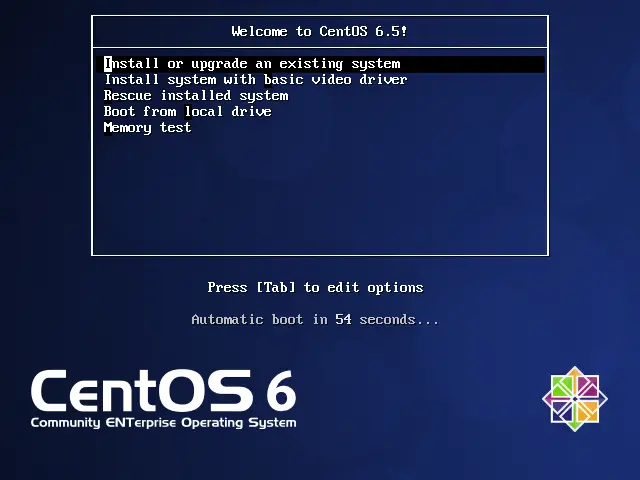
Boot from your first CentOS 6.4 DVD (DVD 1). Select Install or upgrade an existing system:
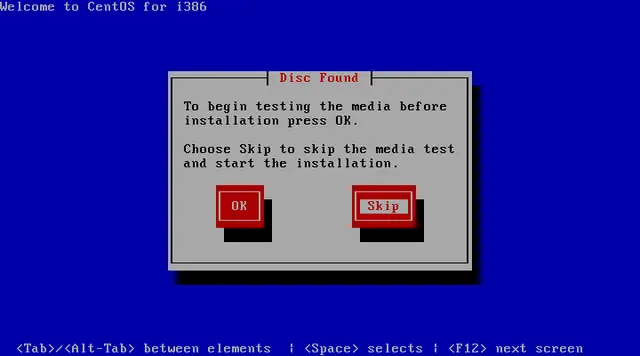
It can take a long time to test the installation media so we skip this test here:
The welcome screen of the CentOS installer appears. Click on Next:

Choose your language next:

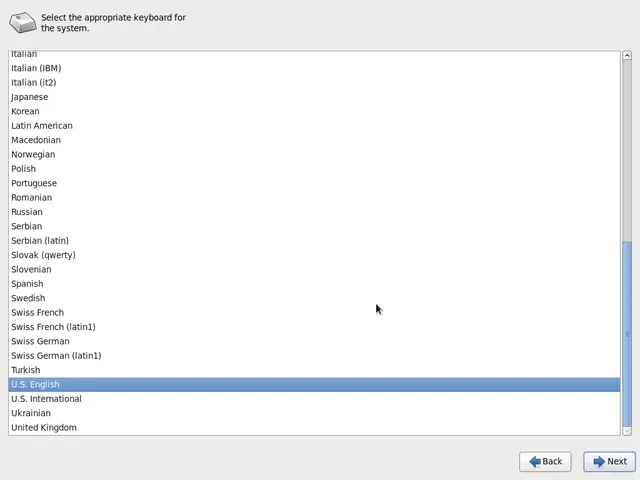
Select your keyboard layout:
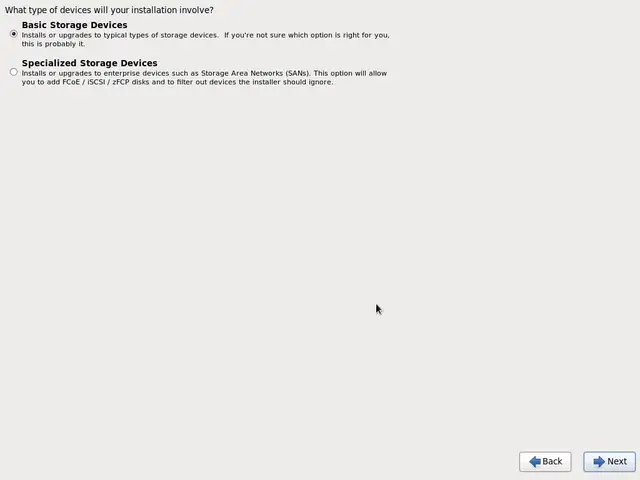
I assume that you use a locally attached hard drive, so you should select Basic Storage Devices here:
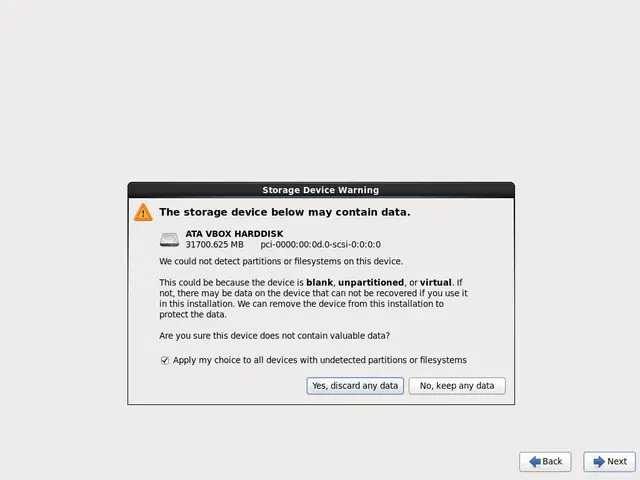
You might see the following warning - Error processing drive. If you see this click on the Re-initialize all button to proceed:
Fill in the hostname of the server (e.g. server1.example.com), then click on the Configure Network button: