Install ownCloud with SSL and Nginx in CentOS 6.5
Version: 3.0
Author: Aaron
CentOS has upgraded a lot packages, and the post that I've wrote 1 year ago no longer works in CentOS 6.5 updated up-to-date.
I did a research and it looks like this will be the first tutorial in 2014 how to install owncloud in centos with nginx, postgresql and ssl. You ain't gonna find CentOS and owncloud installation with nginx nowadays, because most people don't know how to resolve simple issues.
My server was affected and this is the reason that made me to write this post today.
The packages in the EPEL and CentOS repos are obsolete, while nginx, postgresql and owncloud requires bit newer packages. You'll just stay at the log-in page without getting access to your files, being left to scratch your head and asking yourself wtf just happened. The log files won't show you where the issue comes from nor the owncloud itself.
The owncloud requirements are
PostgreSQL >= 9.0, but in EPEL is 8.8, it requires php 5.3.3 as minimum but it does not works with that version, also all of these newer packages will require latest stable nginx version.
The first thing that we should do is to remove all mysql libraries.
yum remove mysql* mysql-server mysql-devel mysql-libs
As usual, we will install 3rd party repos, such as epel, remi and the new one: latest postgresql
rpm -ivh http://dl.fedoraproject.org/pub/epel/6/i386/epel-release-6-8.noarch.rpm
rpm -ivh http://rpms.famillecollet.com/enterprise/remi-release-6.rpm
rpm -ivh http://yum.postgresql.org/9.3/redhat/rhel-6-i386/pgdg-centos93-9.3-1.noarch.rpm
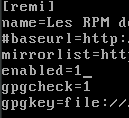
Edit the epel repository and make sure that the top is enabled=1
vi /etc/yum.repos.d/epel.repo
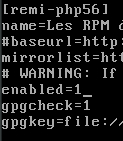
Do the same with the remi repo, but make sure to enable php version 5.6,
vi /etc/yum.repos.d/remi.repo
Create a nginx repo configuration file
vi /etc/yum.repos.d/nginx.repo
and add:
[nginx] name=nginx repo baseurl=http://nginx.org/packages/centos/$releasever/$basearch/ gpgcheck=0 enabled=1
Update your CentOS server in order to add those 3rd party repos
yum update
Install the following packages in order to satisfy the owncloud requirements:
yum install nginx postgresql93 postgresql93-libs postgresql93-server wget php-fpm php-gd php-ldap php-pear php-xml php-xmlrpc php-magickwand php-magpierss php-mbstring php-mcrypt php-shout php-snmp php-soap php-tidy php-pgsql php-pdo
Start the PostgreSQL, start nginx temporary and add it to system startup services with chkconfig
service postgresql-9.3 initdb
service postgresql-9.3 start
chkconfig postgresql-9.3 on
service nginx start
chkconfig nginx on
service nginx stop
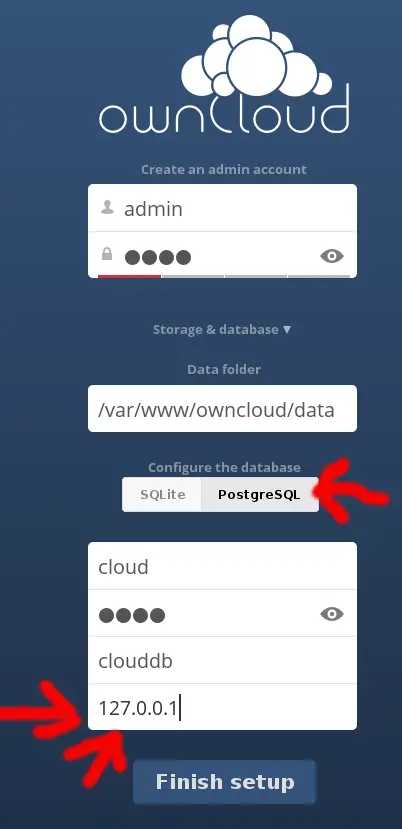
Create new PostgreSQL user and database.
su - -c "psql" postgres
CREATE USER cloud WITH PASSWORD 'userpass';
CREATE DATABASE cloudbase OWNER cloud ENCODING 'UTF8';
GRANT ALL PRIVILEGES ON DATABASE cloudbase TO cloud;
\q
Check and remember your timezone
cat /etc/sysconfig/clock
Edit the php configuration file
vi /etc/php.ini
# search for post_max_size and make it
post_max_size = 2G
# search for cgi.fix_pathinfo, uncomment it and make it
cgi.fix_pathinfo = 0
# search for upload_max_filesize and make it
upload_max_filesize = 2G
# search for date.timezone, uncomment it and make it
date.timezone = "your/timezone"
Edit the php-fpm configuration file in order to use tcp instead unix socket
vi /etc/php-fpm.d/www.conf
Make sure that listen is not pointing /var/run/php-fpm/php-fpm.sock
listen = 127.0.0.1:9000
Start the php-fpm service
chkconfig php-fpm on
service php-fpm start
Edit the postgresql config file to allow password logins:
vi /var/lib/pgsql/9.3/data/pg_hba.conf
and change ident with password - notice the cursor in the following picture:
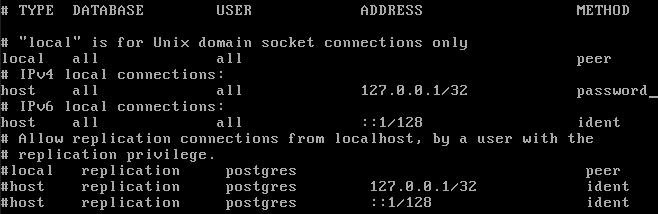
Restart the postgresql database service postgresql-9.3 restart
Create empty folder where we will store our SSL certs
cd /etc/nginx
mkdir -p cert
If you are familiar with apache virtual hosts, then the next file that you will have to create is exactly that.
cd conf.d
vi cloud.conf
upstream php-handler {
	server 127.0.0.1:9000;
    #server unix:/var/run/php5-fpm.sock;
}

server {
        listen 80;
        server_name 10.10.10.110; # replace with your domain name or internal server ip
        return 301 https://$server_name$request_uri;  # enforce https
}


server {
        listen 443 ssl;
        server_name 10.10.10.110; # replace with your domain name or internal server ip

        ssl_certificate /etc/nginx/cert/server.crt;
        ssl_certificate_key /etc/nginx/cert/server.key;

        # Path to the root of your installation
        root /var/www/owncloud/;

        client_max_body_size 10G; # set max upload size
        fastcgi_buffers 64 4K;

        rewrite ^/caldav(.*)$ /remote.php/caldav$1 redirect;
        rewrite ^/carddav(.*)$ /remote.php/carddav$1 redirect;
        rewrite ^/webdav(.*)$ /remote.php/webdav$1 redirect;

        index index.php;
        error_page 403 /core/templates/403.php;
        error_page 404 /core/templates/404.php;

        location = /robots.txt {
            allow all;
            log_not_found off;
            access_log off;
        }

        location ~ ^/(data|config|\.ht|db_structure\.xml|README) {
                deny all;
        }

        location / {
                # The following 2 rules are only needed with webfinger
                rewrite ^/.well-known/host-meta /public.php?service=host-meta last;
                rewrite ^/.well-known/host-meta.json /public.php?service=host-meta-json last;

                rewrite ^/.well-known/carddav /remote.php/carddav/ redirect;
                rewrite ^/.well-known/caldav /remote.php/caldav/ redirect;

                rewrite ^(/core/doc/[^\/]+/)$ $1/index.html;

                try_files $uri $uri/ index.php;
        }

        location ~ ^(.+?\.php)(/.*)?$ {
                try_files $1 = 404;

                include fastcgi_params;
                fastcgi_param SCRIPT_FILENAME $document_root$1;
                fastcgi_param PATH_INFO $2;
                fastcgi_param HTTPS on;
                fastcgi_pass php-handler;
        }

        # Optional: set long EXPIRES header on static assets
        location ~* ^.+\.(jpg|jpeg|gif|bmp|ico|png|css|js|swf)$ {
                expires 30d;
                # Optional: Don't log access to assets
                access_log off;
        }

}
I've uploaded that nginx configuration file to my website, so instead writing it manually just type wget http://linux.sytes.net/img/nginx1-6.conf.txt and rename it to something like cloud.conf
As you specified in the nginx "virtual host" above, our ownCloud server will be using SSL, so let's create these certificates, shall we ?
cd ..
cd cert
openssl req -x509 -nodes -sha384 -days 3650 -newkey rsa:4096 -keyout server.key -out server.crt
chmod 600 server.key
chmod 600 server.csr
Next, download, extract the owncloud archive and set permissions for the owncloud folder. Please note that we will download the development version of owncloud.
cd /var/www
wget http://download.owncloud.org/community/daily/owncloud-daily-master.tar.bz2
tar xjf owncloud-daily-master.tar.bz2
mkdir -p owncloud/data
chmod 770 owncloud/data
chmod 777 owncloud/config/
chown -R root:apache owncloud
rm -rf owncloud-daily-master.tar.bz2
Allow incomming tcp connections to your server ports: 80 and 443. If you or someone else call your server internal ip it will be redirected to https://yourserverinternalip, because you specified that in the nginx "virtual host" earlier.
iptables -I INPUT 4 -p tcp -d 10.10.10.110 --dport 80 -j ACCEPT
iptables -I INPUT 4 -p tcp -d 10.10.10.110 --dport 443 -j ACCEPT
service iptables save
service iptables restart
Restart PostgreSQL for last time, and start nginx with the newer configuration:
service postgresql-9.3 restart
service nginx start
That's all, open up your browser and point your server ip. Choose whatever log-in name and password you like.