How to configure pam-radius for WiKID Two-factor Authentication on Centos 7
Securing SSH On Centos 7 With WiKID Two-Factor Authentication
SSH offers a highly secure channel for remote administration of servers. However, if you face an audit for regulatory or business requirements, such as Visa/Mastercard PCI, you need to be aware of some potential authentication related short-comings that may cause headaches in an audit. For example:
- There is no way to control which users have public key authorization
- There is no way to enforce passphrase complexity (or even be sure that one is being used)
- There is no way to expire a public key
In this document we are going to demonstrate how to configure two-factor authentication from WiKID on Redhat. The WiKID Strong Authentication System is a commercial/open source two-factor authentication solution. First, we will configure a domain on the WiKID server, then add the targeted server as network clients to the WiKID server, and finally configure the Redhat box using pam-radius.
We assume your Centos 7 server is up and running and you are ready to implement two-factor authentication in your environment.
Adding A Domain To The WiKID Server

Please note that the Domain Server Code should be the zero-padded external IP address of your server. So, if you IP is 54.83.0.181, the Server code or domain identifier would be 054083000181.
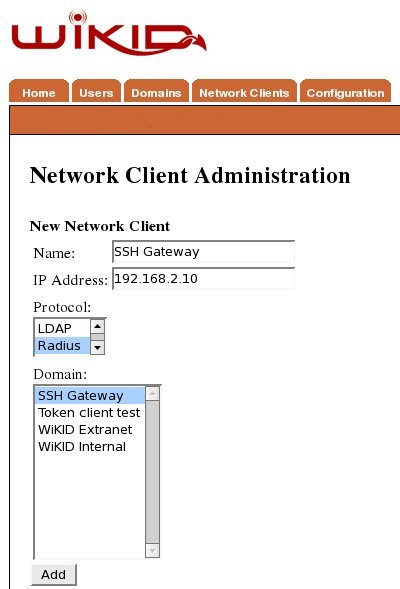
Create A Network Client
After saving the domain information, click on the Network Client tab and Create New Network Client. Enter a name for this client and the IP Address of the SSH gateway on the internal network. Select Radius as the protocol and the domain you created above as the domain.
Click Add to get the next page and enter the shared secret for Radius.
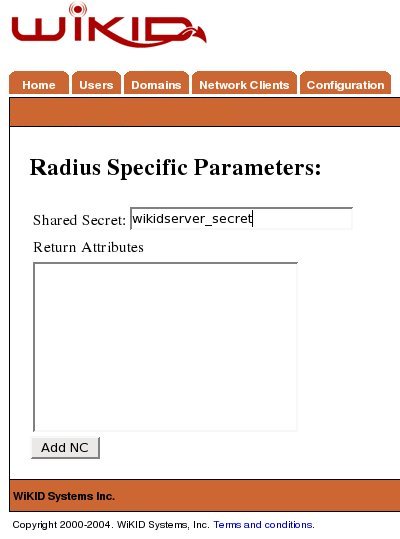
You will need to repeat this process for each server on your network.
Configure SSH On Your Centos 7 Server
Now we will configure SSH on the target machine. Each flavor of linux handles PAM slightly differently. This tutorial covers how to install pam-radius for two-factor authentication on Redhat.
First, download the tar file of the source. The current version is 1.3.17
$ wget ftp://ftp.freeradius.org/pub/radius/pam_radius-1.3.17.tar.gz
Untar the file:
$ tar -xzvf pam_radius-1.3.17.tar.gz
Install pam-devel:
$ sudo yum install pam-devel
Change into the created directory and run make:
$ make
You might see some errors, but if the .so is created, you should be fine. Copy the library to the proper location on 32-bit or 64-bit depending on your architecture:
$ sudo cp pam_radius_auth.so /lib/security/
$ sudo cp pam_radius_auth.so /usr/lib64/security/
Use your favorite editor to tell SSH to use radius for authentication. Add this as the second line:
auth sufficient /lib/security/pam_radius_auth.so
Save the file and quit. Note that this setting still allows passwords for authentication. Change 'sufficient' to 'required' to allow only radius authentication. I typically leave it as sufficient until after I have done a good bit of testing, especially if the server is remote.
Now we need to tell PAM where the radius server is. In this case it is the WiKID server. (NB: another benefit of using radius is that you route the authentication requests through your directory - LDAP or AD for authorization. We highly recommend that.)
Edit or create your /etc/raddb/server file. There is a sample here .
$ sudo vim /etc/pam_radius_auth.conf
Edit the line "other-server other-secret 3" replacing 'other-server' with IP address or hostname of your WiKID Strong Authentication server (or radius server if you have one set up in between WiKID and your servers) and change 'other-secret' the shared secret for this network client.
Now, you are ready to test. I recommend you run 'tail -f /var/log/secure' while you test.
Note that we have not made any changes to the account setup, so the user is expected to have a local account on the machine or you can configure account to use pam_ldap and point it to your AD/LDAP server.
Remote SSH is now extremely secure. No user can get access to the server without first getting a one-time passcode from the WiKID server. The two-factors of authentication are possession of the WiKID token (and it's cryptographic key) and knowledge of the PIN. Because the PIN is validated on the WiKID server, it is very easy to disable a user. Everything is logged and any auditor should be very pleased.
Additionally, you could require a WiKID one-time passcode for root access on internal machines. Just create create a new domain for su and edit /etc/pam.d/su appropriately. This will also allow you to break the servers into different groups for management. Just create For example, if you have a set of servers for HR to which only certain admins have root access, they can be configured for a specific WiKID domain - allowing fine grained access control and strong authentication. Get more information on two-factor authentication from WiKID website.
Links:
- Centos: http://www.centos.org
- PAM RADIUS: http://freeradius.org/pam_radius_auth/
- WIKID Two-factor authentication: https://www.wikidsystems.com

