How To Install PIWIK On Ubuntu 14.04
Version 1.0
Author: Srijan Kishore
Last edited 22/Aug/2014
This document describes how to install and run a PIWIK in Ubuntu 14.04. PIWIK is a downloadable, Free (GPL licensed) web analytics software platform. It provides detailed reports on your website and its visitors, including the search engines and keywords they used, the language they speak, which pages they like, the files they download and so much more. PIWIK aims to be an open source alternative to Google Analytics. PIWIK is PHP MySQL software which you download and install on your own webserver. At the end of the 5-minute installation process you will be given a JavaScript tag. Simply copy and paste this tag on websites you wish to track (or use an existing plugin to do it automatically for you).
1 Preliminary Note
This tutorial is based on Ubuntu 14.04 server, so you should set up a basic Ubuntu 14.04 server installation before you continue with this tutorial. The system should have a static IP address. I use 192.168.0.100 as my IP address in this tutorial and server1.example.com as the hostname. You must have LAMP server installed as explained in this tutorial before continuing further.
2 Installation
PIWIK needs to be downloaded as follows:
cd /var/www/html/
wget http://builds.piwik.org/latest.zip
apt-get install unzip
unzip latest.zip
We need to give appropriate permissions, which will be done as follows:
chown -R www-data:www-data /var/www/html/piwik
chmod -R 0755 /var/www/html/piwik/tmp
3 Creating a New Database
Now we need to add the database to be used in PIWIK:
mysql -u root -p
Enter your Mysql password while installation of the mysql-server at the time of LAMP installation. You can use any value for the PIWIK database and the username, in my case I used:
CREATE DATABASE piwikdb;
CREATE USER piwikadmin@localhost IDENTIFIED BY 'piwikpassword';
GRANT ALL PRIVILEGES ON piwikdb.* TO piwikadmin@localhost;
FLUSH PRIVILEGES;
exit
4 Web installation
Now we are ready for the web-installation part. Goto URL http://192.168.0.100/piwik

Here press Next:
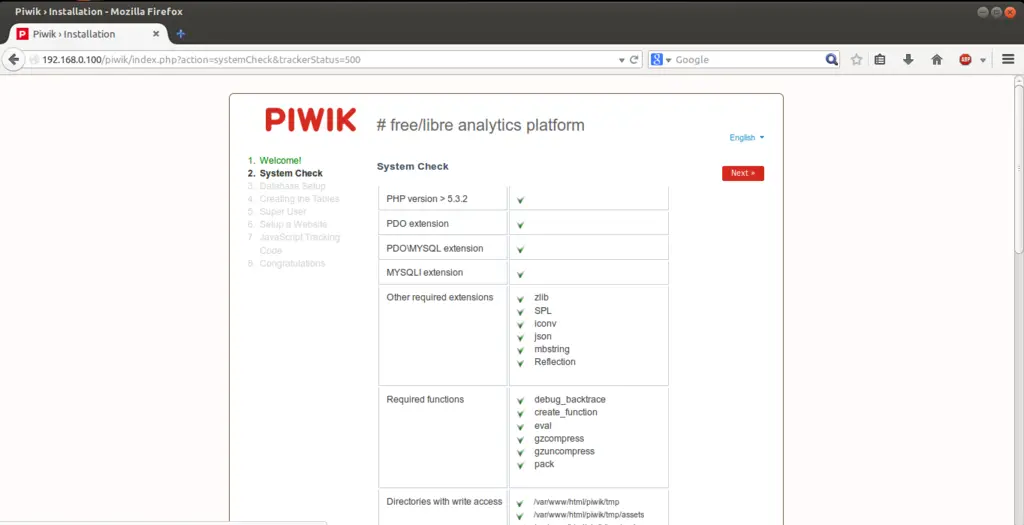
It will show the system check and all parameters needed for PIWIK, just press Next:
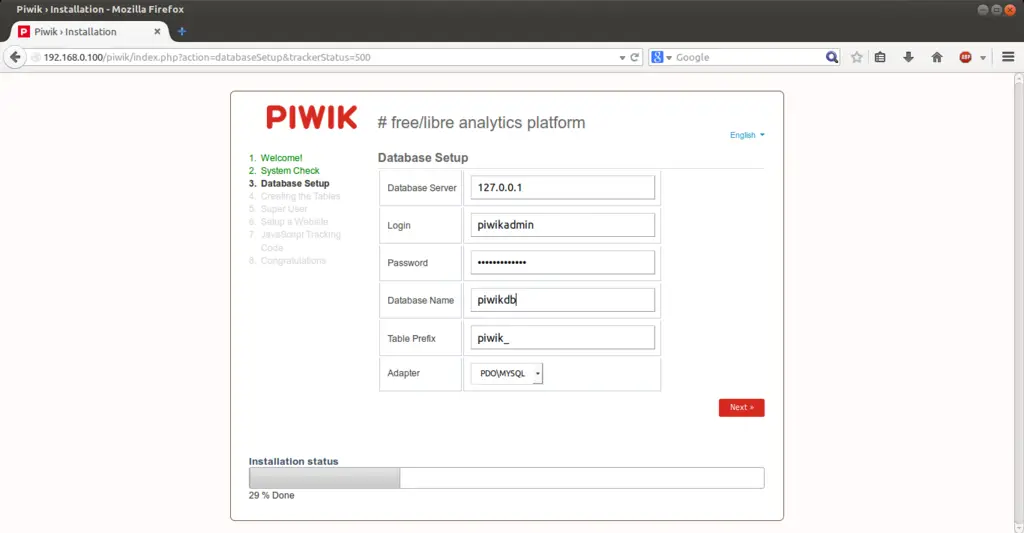
Now make the connections with the Mysql/Mariadb as done before. In my case it was
Adapter = PDO\MYSQL
Database server = 127.0.0.1
Login = piwikadmin
Password = piwikpassword
Database name = piwikdb
Table prefix = piwik_ (you can use any value as per your choice)
and then press Next.
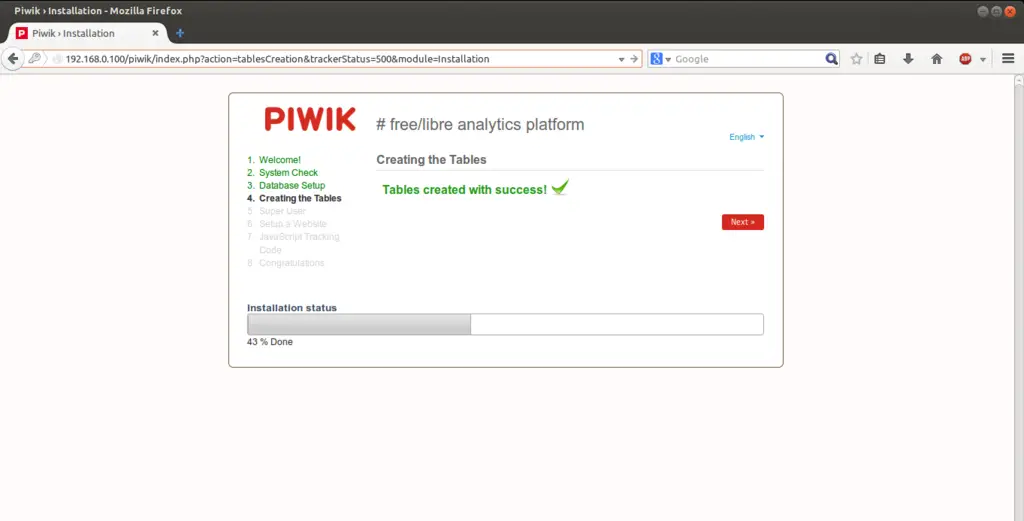
It will create the database connectivity. Press Next
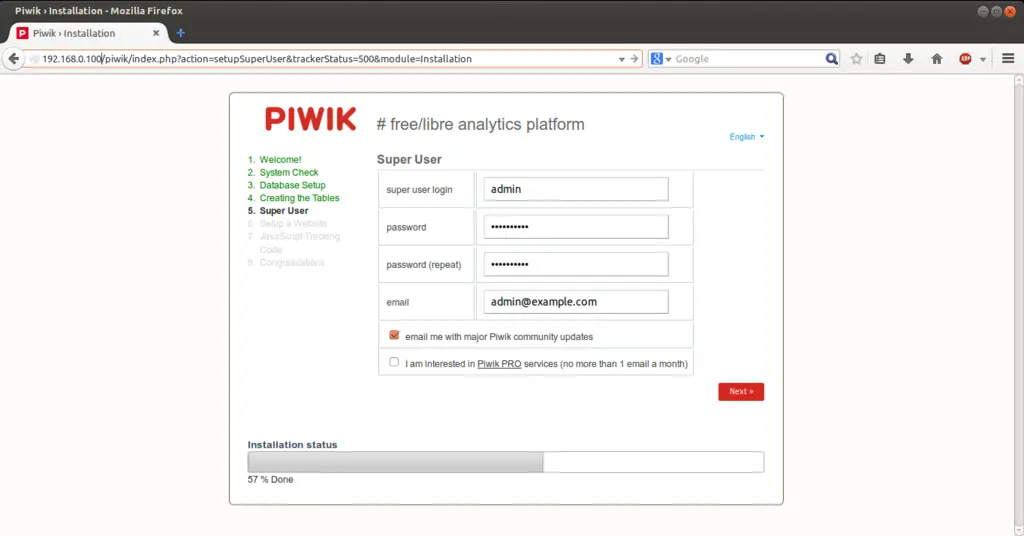
Now create an admin account to be used for the PIWIK webinterface as follows:
Username = admin
Email address = [email protected]
Password = howtoforge
Then press the button Next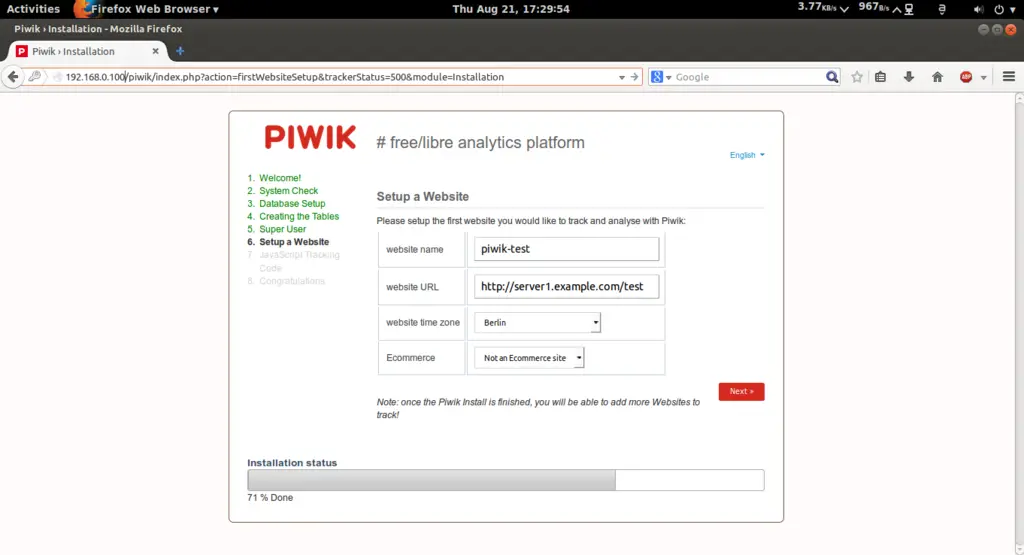
The above screenshot asks for the PIWIK first web statics. After installation you can add any number of websites for analytics. You can use any of your website hosted in your Apache2, either wordpress or joomla hostings. In my case I am using a test website of my server:
website name = piwik-test
website URL = http://server1.example.com/test
website timezone = berlin
Ecommerce = Not an ecommerce site
Above values will differ in your case.
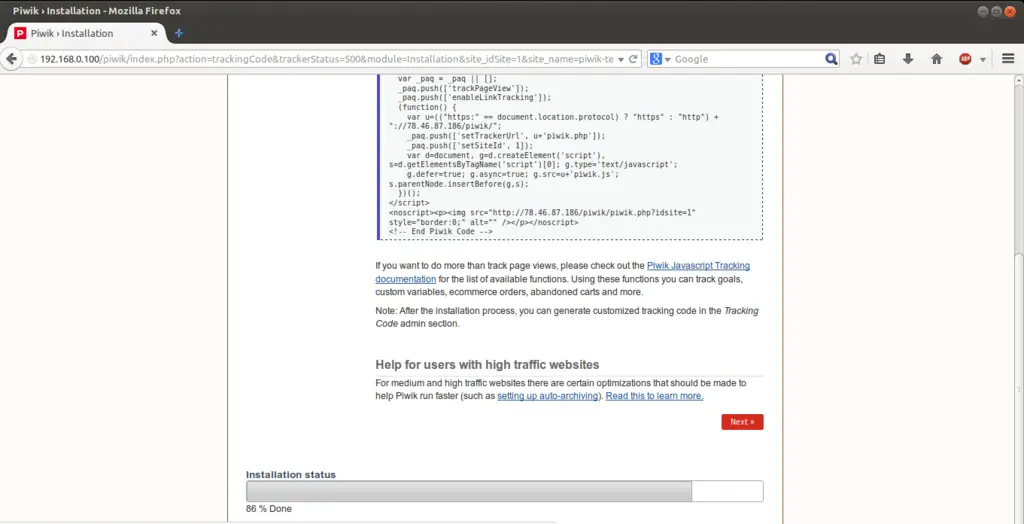
Now moving ahead will generate a JavaScript tag and instructions for howto add the code. You need to add the JavaScipt code in the website as defined by the installer, the information will be available in the PIWIK webinterface also. It will be specific to your website.
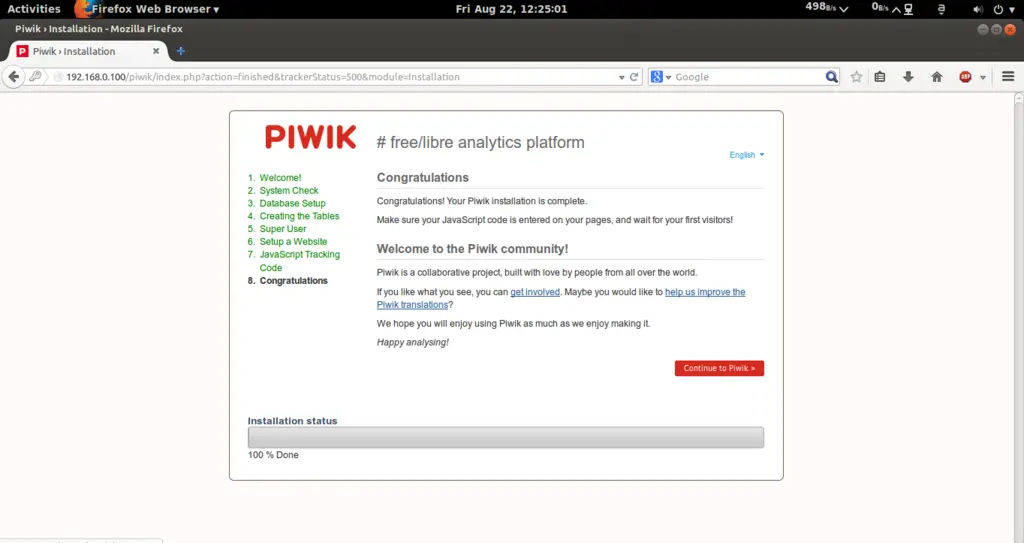
It will proceed to next screen indicating that completion of installation. Next you can press Continue to Piwik:
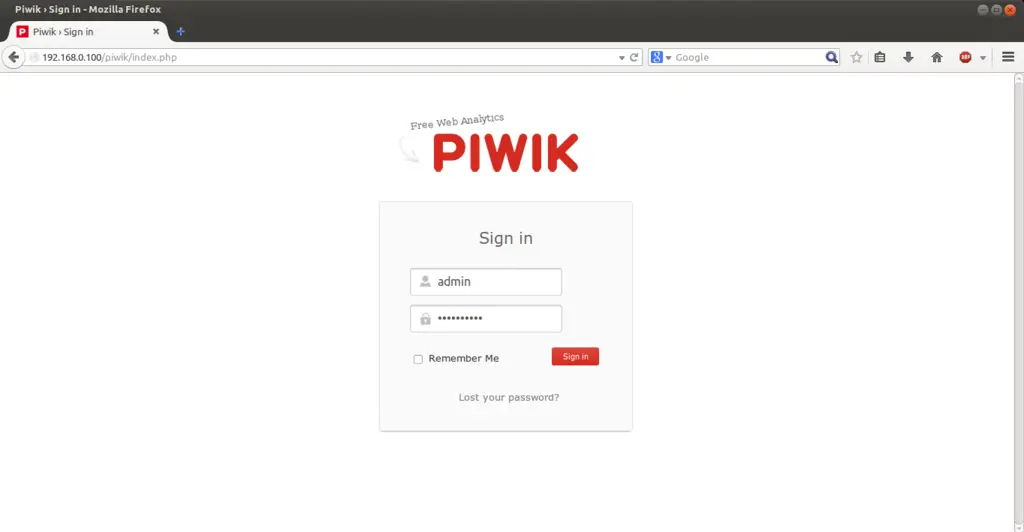
It will direct you to the default login screen:
Further after adding the JavaTag created by installer in the website will start the It will show the visitors log as in my case it was showing the stats as follows: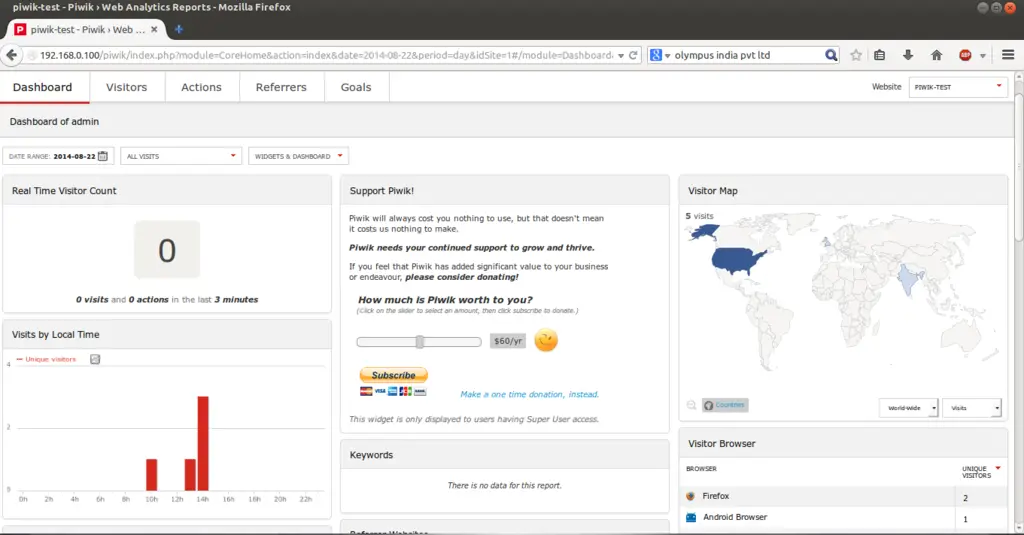
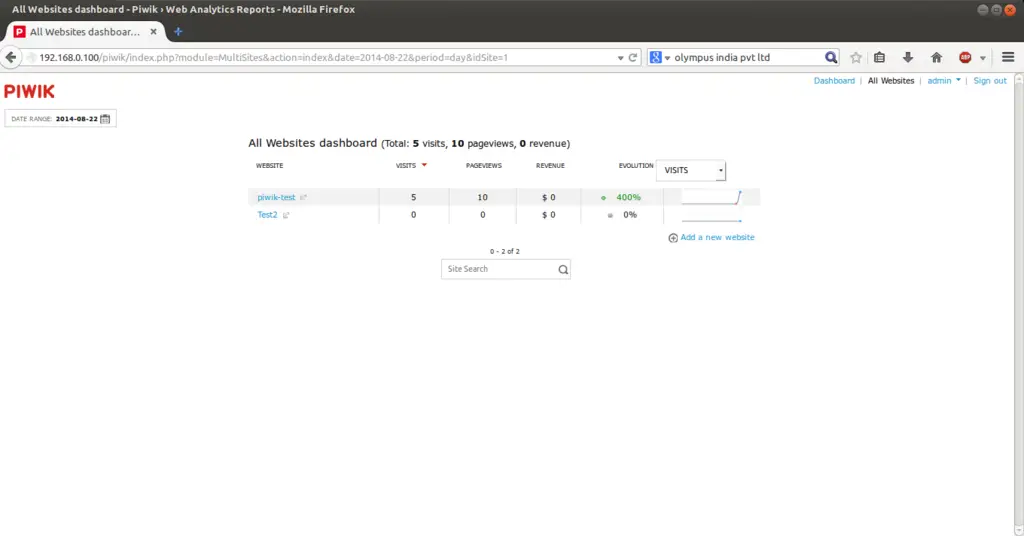
You can add more sites with the tab All websites from here:
Congratulations! You have have fully functional PIWIK with you for analysing the web statistics, installed in Ubuntu 14.04 :)
5 Links
- Ubuntu : http://www.ubuntu.com/
- PIWIK : http://piwik.org/

