How to theme GNOME Shell 3.16 (in five simple steps)
So, you have installed your brand new GNOME Shell desktop environment and it certainly looks indisputably cool as it is. Using it for quite some time though may make this sexy top panel look dull and your icon set look dusty. These are signs that it is time for a change, so here's a guide on how to quickly (and easily) change the appearance of your GNOME Shell desktop using refreshing theming.
1.) Shell Version
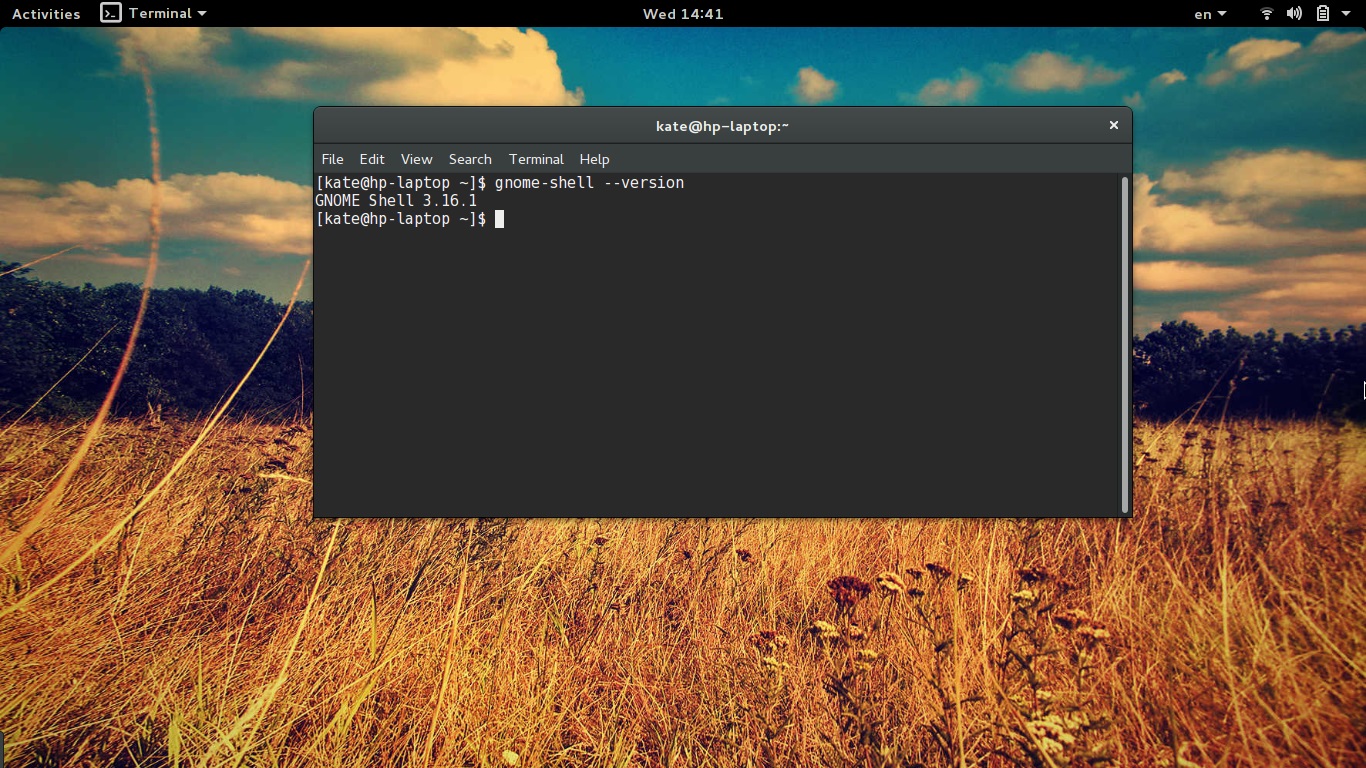
First and foremost, you will have to find out what GNOME Shell version you are using. This is of critical importance as the Shell extensions and themes that are needed to change the appearance of your desktop are only compatible with one particular version of your favorite environment. While older themes may work in more recent GS versions, they will be plagued by bugs and inconsistencies here and there. You can find out what GS version you are using by typing the following command on a terminal: “gnome-shell –version”
2.) Tweak Tool
The Tweak Tool is an essential piece of software that lets GNOME users fiddle with settings that are not available on the control center. While this tool is now part of the official GNOME stack, you may not find it installed out of the box on your distribution. If not, find it by the package name “gnome-tweak-tool”. If you're are using an Ubuntu derivative, you can install the package by opening a terminal and typing: “sudo apt-get install gnome-tweak-tool”.
sudo apt-get install gnome-tweak-tool
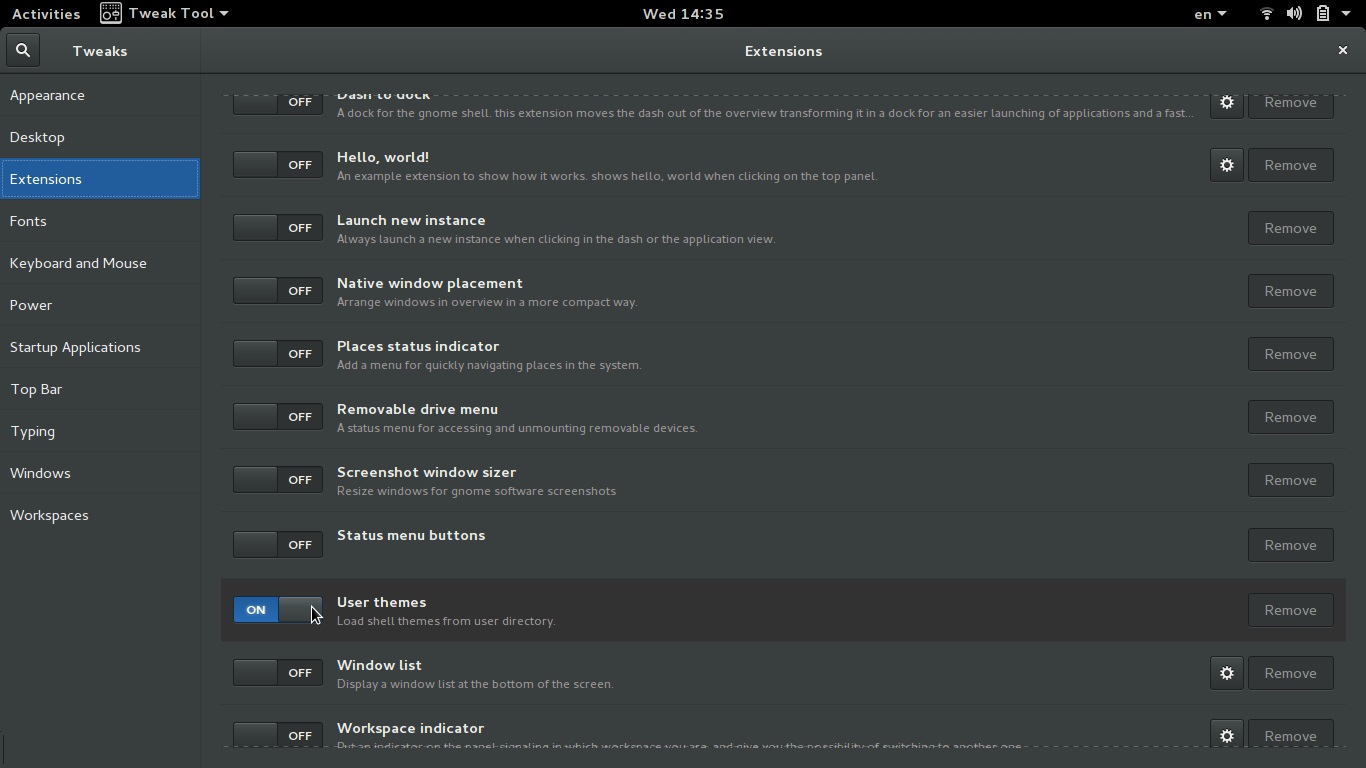
3.) User Theme Extension
In order to allow the theming of your desktop, you will need to install the “user themes” extension and enable it from the corresponding tab on the Tweak Tool, as show in the screenshot below. This extension will be either installed along with the tweak tool package, or available in your distribution's software sources. If not, you can always find it in the official GNOME Shell extensions website (https://extensions.gnome.org/) or directly from git (https://git.gnome.org/browse/gnome-shell-extensions). Make sure to download the right version from git and unzip the file on /.local/share/gnome-shell/extensions/. You may then enable the extension using the tweak tool.
If you're using an Ubuntu derivative but can't find the user theme extension in your default sources, you can always add a repository that contains the packages you need. An example would be using the following repo: “sudo add-apt-repository ppa:webupd8team/gnome3” then “sudo apt-get update” and you should be able to now locate the aforementioned package using the software center.
4.) Choose Theme
There are countless jaw-dropping GNOME Shell themes out there waiting for you to discover them. You should however keep an eye on their GS versions compatibility in order to make sure that the solid operating characteristics of your system won't be affected. The two most populated websites are the gnomelook (http://gnome-look.org/?xcontentmode=191) and a GS dedicated section in DeviantArt (http://www.deviantart.com/browse/all/customization/skins/linuxutil/desktopenv/gnome/gnome/?order=5). There are more places were good GS themes can be found and a simple Google search will reveal a lot of them. Along with the Shell theme of your choice, you may also download its corresponding GTK+ theme while some artists also offer icon sets to complement their creations nicely.
5.) Enable the Theme
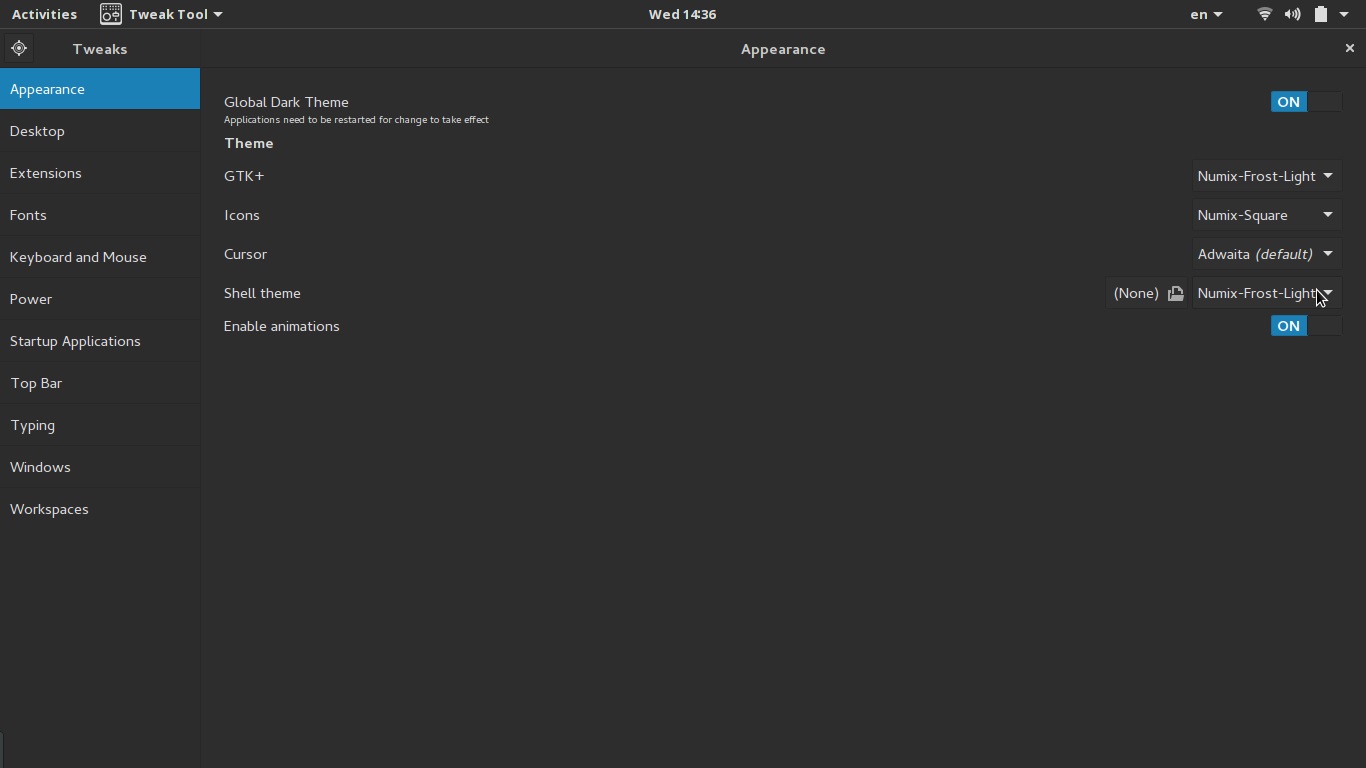
Now all that you have to do is to open the Tweak Tool again and go to the “Appearance” tab. Press the “locate” button and search for the downloaded theme. This should install your new theme in the proper directory (/.themes/). You may then choose the theme from the options menu on the same tab. In my example, I enabled the wonderful Numix GS and GTK+ theme, while I also changed the icon set to match the new looks of my desktop!