Create a desktop/online office on Ubuntu with ONLYOFFICE Desktop Editors
This tutorial explains how to install ONLYOFFICE Desktop Editors and connect them to your web-office account to get a desktop/online office suite on your Ubuntu machine.
ONLYOFFICE Desktop Editors comprise viewers and editors for text documents, spreadsheets and presentations that allow to work with your documents offline and easily switch to the online to co-edit, review, comment or discuss them with others.
ONLYOFFICE Desktop Editors is available as a free to use personal edition and a commercial corporate edition.
System requirements
- CPU: dual-core 2 GHz or better
- RAM: 2 GB or more
- HDD: at least 2 GB of free space
- OS: 64-bit Debian, Ubuntu or other compatible distributive with kernel version 3.8 or later
Installing ONLYOFFICE Desktop Editors using repository
You can always download the latest available version from the official website but a better way to install desktop editors is to add the link to their repository to your Linux OS. To do that, you will need to download GPG signing key:
sudo wget http://download.onlyoffice.com/repo/onlyoffice.key
Then add it to your system:
sudo apt-key add onlyoffice.key
Open the /etc/apt/sources.list file using nano or any other text editor:
sudo nano /etc/apt/sources.list
Note: the root password is required to edit it and save changes.
Add the following record :
deb http://download.onlyoffice.com/repo/debian squeeze main
Update the package manager cache:
sudo apt-get update
Use the following command to install ONLYOFFICE Desktop Editors:
sudo apt-get install onlyoffice-desktopeditors
Getting started with ONLYOFFICE Desktop Editors
To run the desktop editors, go to your computer Application menu >> Office >> ONLYOFFICE or use the terminal command:
desktopeditors
The following window will open:
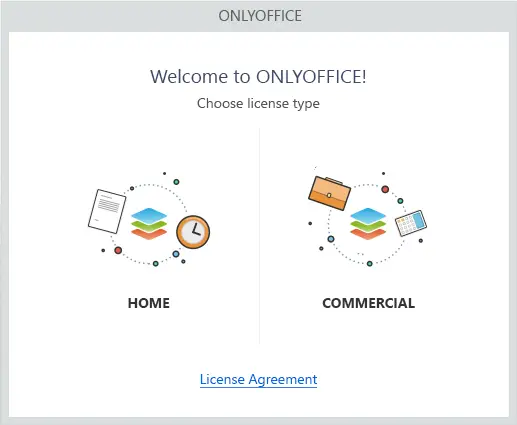
Select the Home option to use the desktop editors for personal use for free. To use them for business purpose, choose the Commercial license type (the 30-day free trial period will start).
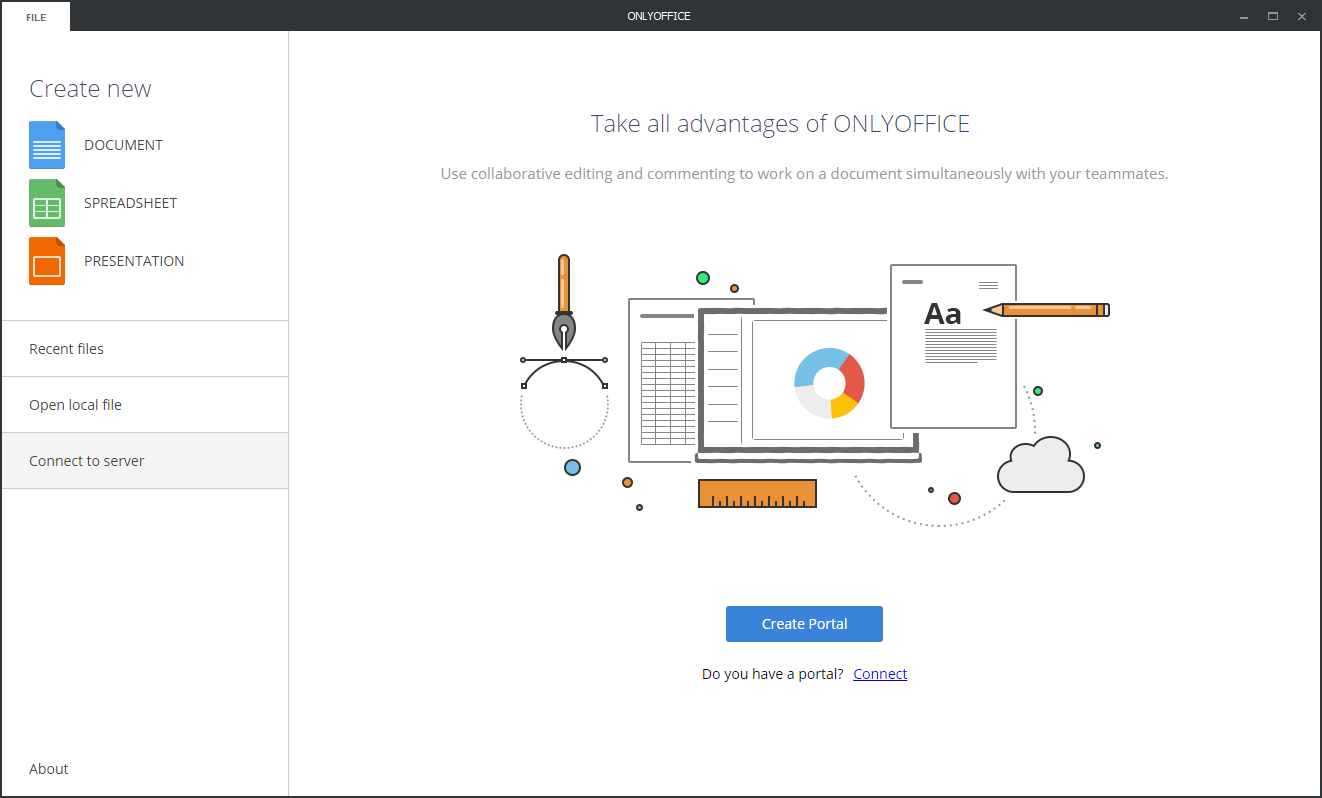
The main screen will be displayed. You can start create a new document, spreadsheet or presentation clicking the corresponding icon or open a document stored on your local machine to edit it.
Connecting the desktop editors to your web-office account
To collaboratively work on your documents with others and edit documents stored in the cloud, ownCloud, Dropbox, OneDrive, etc, you need to connect your desktop editors to an existing ONLYOFFICE account - personal.onlyoffice.com, a free cloud-based office for personal use.
Step 1. Select the Connect to server option on the left panel and click the Connect link.
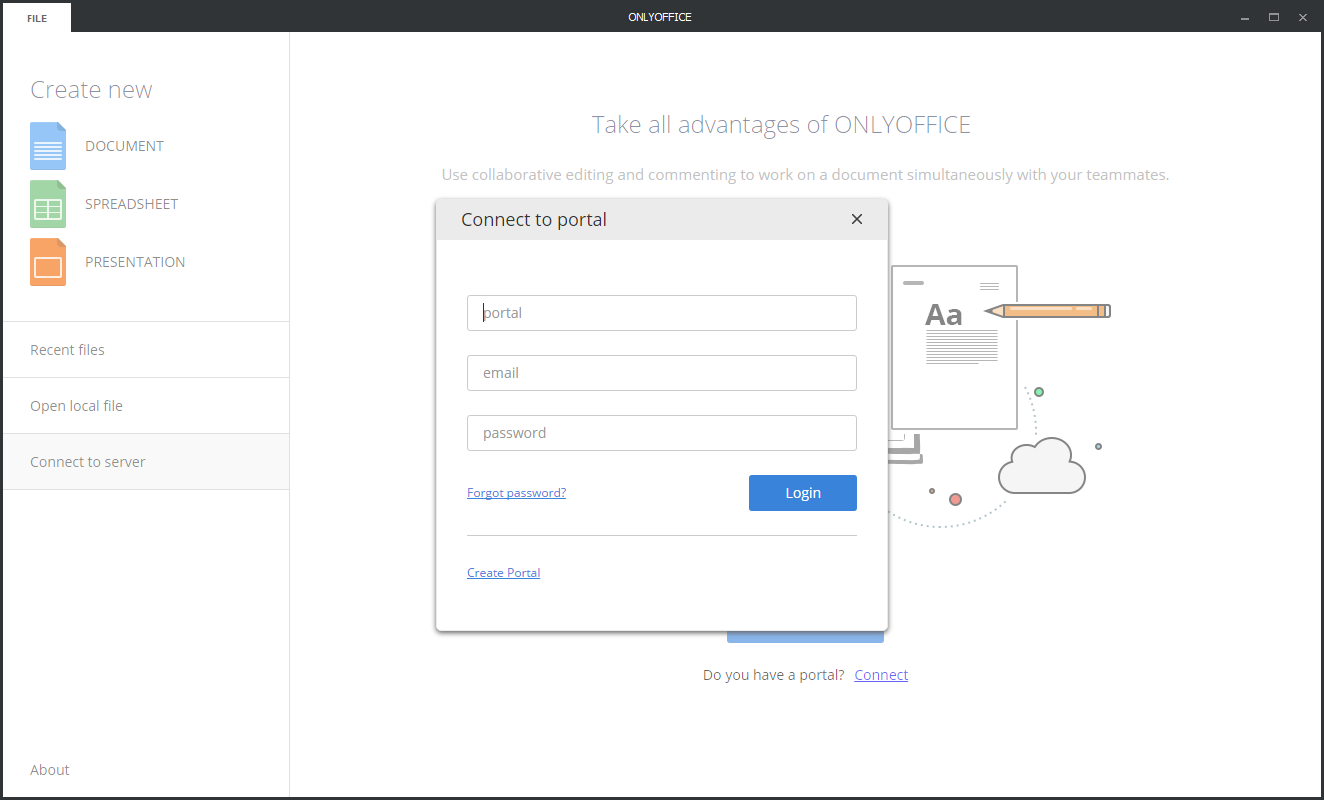
Note: if you have no an ONLYOFFICE account, you need to create it first on personal.onlyoffice.com. Clicking the Create Portal button or link within the desktop editors, you will be suggested to create a web-office for business that offers not only the document management features, but also a set of tools for project management, CRM, mail, calendar, and much more. But this is a paid version with a free 30-day trial period.
Step 2. Enter 'https://personal.onlyoffice.com/' into the portal field, the email and password you use to create this account. Click the Login button.
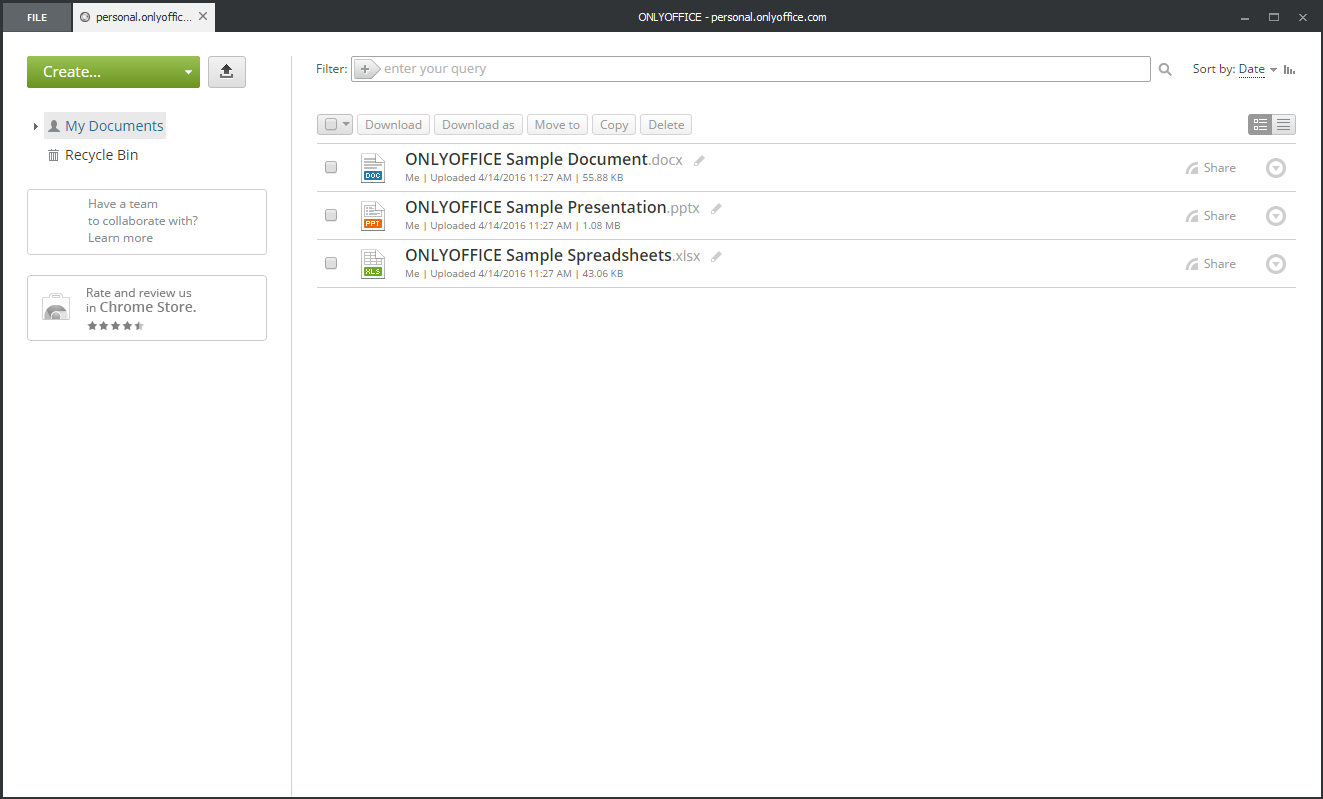
That's all. You can start working with your documents.

