How to Install PostgreSQL and phpPgAdmin on OpenSUSE Leap 42.1
PostgreSQL (most people call it Postgres) is an advanced object-relational database management system (ORDBMS). Postgres is an open source database server with more than 18 years of active development which makes Postgres the best choice for enterprise-class applications.
Postgresql is cross-platform and runs on many operating systems like Linux, OSX, Windows and the BSD family. It's the right choice when you have an application with large database workloads. Postgres has been used by many large organizations including Yahoo, Instagram, and Disqus. Postgres is also offered as software as a service (SaaS) by e.g. Heroku and AWS (Amazon Web Services).
In this tutorial, I will show you how to install Postgres on your own server with OpenSUSE Leap as operating system. Then I will install phpPgAdmin so we can manage our Postgres database from the web browser.
Prerequisite
- OpenSUSE Leap 42.1
- Root privileges
Step 1 - Install PostgreSQL
The openSUSE repository contains two version of Postgres. In this step, we will install PostgreSQL 9.4 on openSUSE with zypper command.
Install PostgreSQL with zypper:
zypper in postgresql94 postgresql94-contrib postgresql94-server
Start postgresql with systemctl:
systemctl start postgresql
Step 2 - Configure Default User
In this step, we will set a password for the postgres user. Postgresql uses a concept that is similar to the Linux user system called "role" for basic authentication and authorization. By default, postgresql creates a new user named "postgres" to manage the postgresql server.
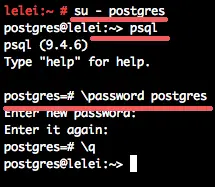
Let's take the first step to configuring the postgresql database by logging into the user postgres from the terminal:
sudo su
su - postgres
Now we will use the psql command. psql is the command line front-end for PostgreSQL, we can directly execute PostgreSQL queries from it.
psql
From the psql shell, we can change the password of the "postgres" user with the "password" command below:
\password postgres
New Password:
Enter your new password for postgres user.
Step 3 - Create a new PostgreSQL User
In this step, we will create a new user/role with superuser privileges and create a new database and grant the user access.
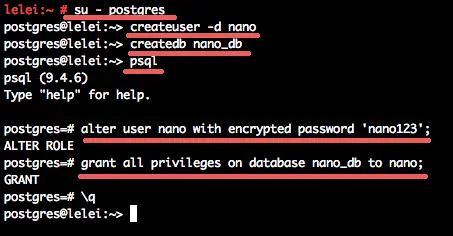
To create a new a user, we must login as postgres user, and then create a new role and database with the command below:
su - postgres
createuser -s nano
createdb nano_db
Note:
-s option is used to give the new user superuser privileges.
nano is new user name.
nano_db is new database name.
Now login to the postgresql shell psql and give our new role a password and grant database access.
psql
alter user nano with encrypted password 'aqwe123@';
grant all privileges on database nano_db to nano;
I will use the password 'aqwe123@' for the user nano here, and grant the privileges to the database nano_db.
This user will be used to login to the postgresql from the web based phpPgAdmin interface because we should not allow any default user or user without a password to login to postgresql from the phpPgAdmin.
Step 4 - Configure PostgreSQL
In this step, we will configure PostgreSQL to listen on the public IP so we can access it with DB modeling tools remotely from our desktop computer.You can skip this step if you don't want to access Postgres remotely.
Go to the postgresql directory "/var/lib/pgsql/" and edit the main configuration file "postgresql.conf" with your favorite editor:
cd /var/lib/pgsql/
cd data/
vim postgresql.conf
Uncomment line 59 and change the value from localhost to "*".
Uncomment line 63 to configure the default port.
listen_addresses = '*'
port = 5432
Save the file and exit the editor.
To allow access from the web application phpPgAdmin to the PostgreSQL database, we need to edit the pg_hba.conf file and change some configuration settings.
Edit the "pg_hba.conf" file with vim:
vim pg_hba.conf
At the end of the line, change the configuration for authentication to md5:
#TYPE   Database    User    Address     Method
local   all             all                                     md5
host    all             all             127.0.0.1/32            md5
host    all             all             ::1/128                 md5
If you want to allow new connections from outside of the server like using PgAdmin3, you can add more "host" records e.g. for the IP of your desktop.
Save and exit.
Now restart the PostgreSQL service with systemctl command:
systemctl restart postgresql
Step 5 - Install and Configure phpPgAdmin
phpPgAdmin is a web-based application to manage PostgreSQL databases. It is based on PHP and provides a GUI to manage databases and to create roles. In this step, we will install phpPgAdmin and because it's accessible from the web browser we will use apache2 as the web server.
Install phpPgAdmin with this zypper command:
zypper in phpPgAdmin
The command will automatically install the dependencies PHP and apache web server.
Next, go to the phpPgAdmin directory and edit the configuration file config.inc.php.
cd /etc/phpPgAdmin/
vim config.inc.php
In the host configuration line 18, set the value to "localhost".
$conf['servers'][0]['host'] = 'localhost';
If you want to allow a user with name "postgres" or "root" to login to the postgresql with phpPgAdmin, you can set the extra security to false, but it's not recommended to set it false. check the line 93.
$conf['extra_login_security'] = true;
Save and exit.
Then activate the PHP and version extension in apache as they are needed by phpPgAdmin:
a2enmod php5
a2enmod version
Now restart all services with systemctl command:
systemctl restart postgresql
systemctl restart apache2
Step 6 - Testing
Access phpPgAdmin from the web browser with URL:
http://192.168.1.101/phpPgAdmin/
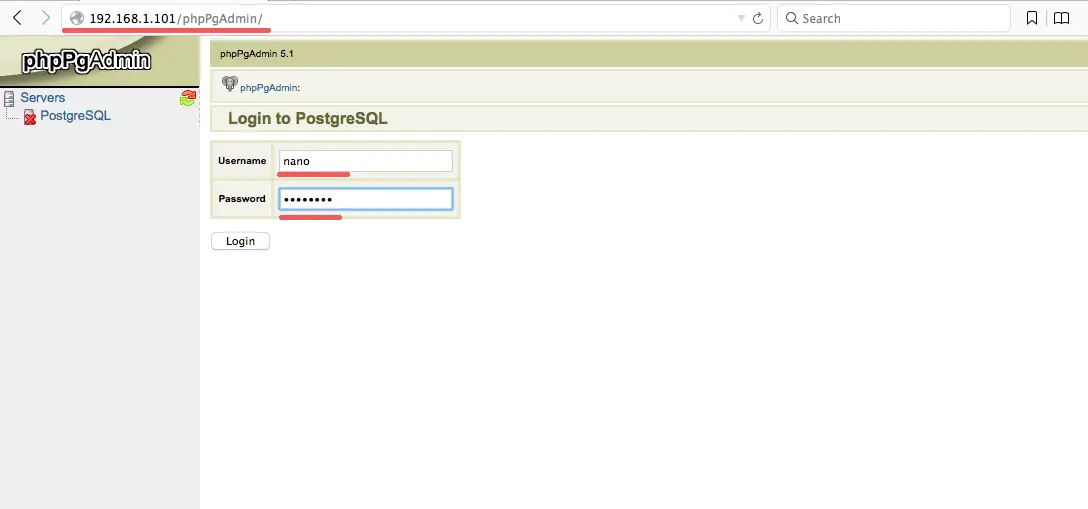
Login with user nano and password 'aqwe123@'.
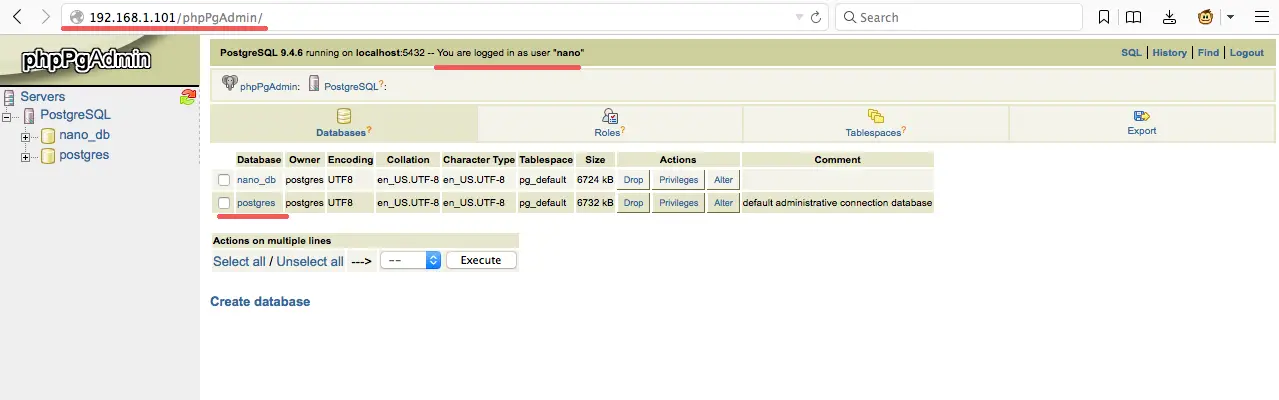
if you log in with user 'postgres' and the correct password, it's disallowed.


