How to Install Mattermost with PostgreSQL and Nginx on Ubuntu 16.04
Mattermost is an open source messaging system written in the programming languages Golang and React. It's a slack alternative, we can build our own messaging service like slack or hipchat with it. Mattermost brings your team communication to a single place and makes it accessible anywhere. You can access it from your desktop, Android device, and iPhone.
In this tutorial, I will guide you to create your own Mattermost server that uses PostgreSQL as the database system and Nginx as the reverse proxy for Mattermost. I will use ubuntu 16.04 as the operating system.
Prerequisite
- Ubuntu 16.04 - 64bit
- Root Privileges
Step 1 - Install and Configure the PostgreSQL Database
Mattermost supports MySQL and PostgreSQL databases. We will use PostgreSQL as the main database for this tutorial.Connect to your server and update the repository.
Connect to your server by SSH or login on the terminal and update the Ubuntu repository.
ssh [email protected]
sudo apt-get update
As the root user, install PostgreSQL with this apt command.
sudo apt-get install postgresql postgresql-contrib
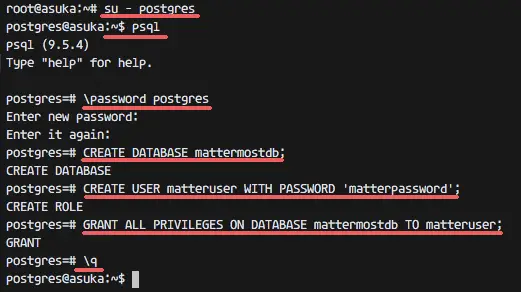
When the installation finished, login to the postgres user and type in the command 'psql' to login to the postgresql shell.
su - postgres
psql
Change the postgres user password with the command below:
\password postgres
Enter new password:
Next, we have to configure a new database and user for the Mattermost installation. I will create a new database named 'mattermostdb' and user 'matteruser' with password 'matterpassword'. Please chose a secure password for your installation.
Create the new database and user with PostgreSQL query below:
CREATE DATABASE mattermostdb;
CREATE USER matteruser WITH PASSWORD 'matterpassword';
Grant 'matteruser' privileges to the database 'mattermostdb' and exit.
GRANT ALL PRIVILEGES ON DATABASE mattermostdb TO matteruser;
\q
Step 2 - Install and Configure Mattermost
We will install and configure Mattermost as normal Linux user, not the root user. We will run Mattermost as user 'matter', so we need to create a new Linux user named 'matter' on the server.
Create new 'matter' user and password.
useradd -m -s /bin/bash matter
passwd matter
'matter' user created, now login to the user and download the latest Mattermost version with wget.
su - matter
wget https://releases.mattermost.com/3.4.0/mattermost-3.4.0-linux-amd64.tar.gz
Extract the Mattermost file and you will see new directory 'mattermost', enter that directory with the cd command.
tar -xzvf mattermost-3.4.0-linux-amd64.tar.gz
cd mattermost/
Next, create a new 'data' directory for storing the user files, then edit the mattermost config file 'config/config.json' with vim.
mkdir data/
vim config/config.json
We will run mattermost behind a Nginx reverse proxy, so it's better to configure Mattermost to listen on the local IP address. In the 'ServiceSettings' block, add the localhost IP address to the configuration on line 4.
"ListenAddress": "127.0.0.1:8065",
Now go to the 'SqlSettings' on line 48. Change the 'DriverName' and 'DataSource' configuration to use the PostgreSQL database with the configuration below:
"DriverName": "postgres",
"DataSource": "postgres://matteruser:[email protected]:5432/mattermostdb?sslmode=disable&connect_timeout=10",
Note:
matteruser = postgresql user.
matterpassword = the password.
mattermostdb = the database.
Save and exit.
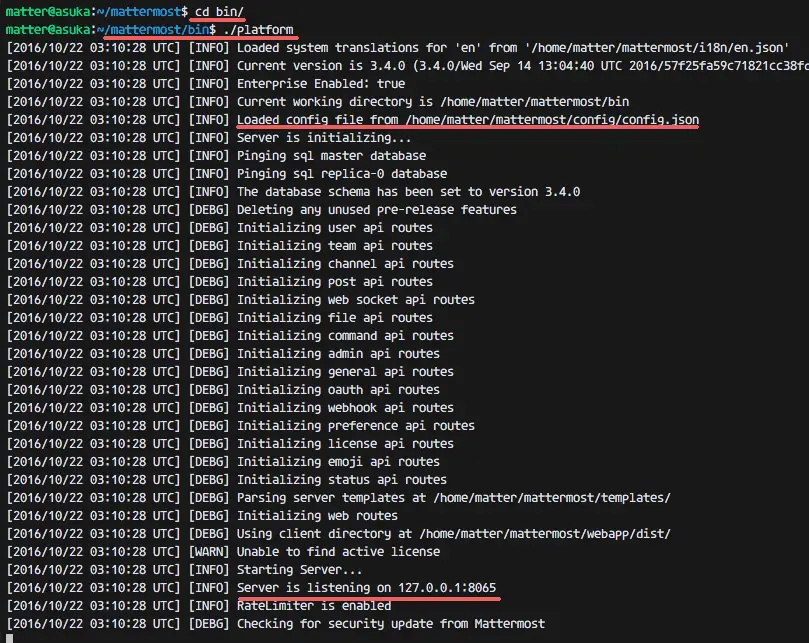
When this is done, go to the bin directory and run the mattermost.
cd bin/
./platform
You will see that mattermost is running on localhost IP with port 8065 now.
Press Ctrl + c to exit.
Step 3 - Configure Mattermost Systemd Service
Go to the systemd system directory and create a new mattermost service file.
cd /etc/systemd/system/
vim mattermost.service
Paste configuration below:
[Unit]
Description=Mattermost is an open source, self-hosted Slack-alternative
After=syslog.target network.target

[Service]
Type=simple
User=matter
Group=matter
ExecStart=/home/matter/mattermost/bin/platform
PrivateTmp=yes
WorkingDirectory=/home/matter/mattermost
Restart=always
RestartSec=30
LimitNOFILE=49152

[Install]
WantedBy=multi-user.target
Save and exit.
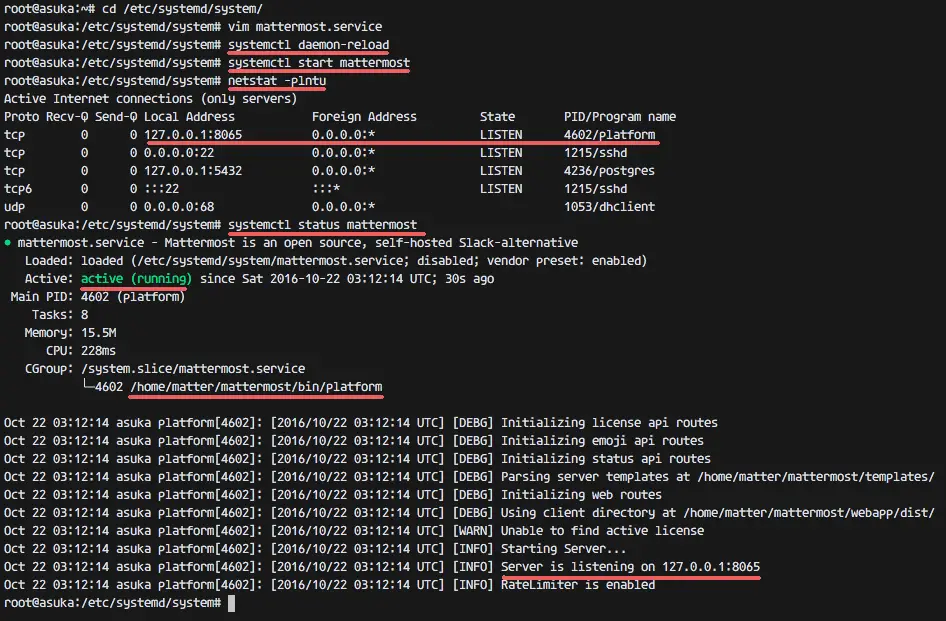
Reload the systemd daemon and start the Mattermost service that we created above.
systemctl daemon-reload
systemctl start mattermost
Make sure there is no error. Check that the Mattermost service is running.
netstat -plntu
systemctl status mattermost
Step 4 - Install and Configure Nginx
In this step, we will install Nginx and configure Nginx as reverse proxy for Mattermost. We will map the mattermost port 8056 to the HTTP and HTTPS port.
Install Nginx from Ubuntu repository with this apt command.
sudo apt-get install nginx
Now go to the Nginx config directory and create the SSL subdirectory.
cd /etc/nginx/
mkdir ssl/; cd ssl/
Generate a new self-signed SSL certificate file with OpenSSL and change the permissions of the private key.
openssl req -new -x509 -days 365 -nodes -out /etc/nginx/ssl/mattermost.crt -keyout /etc/nginx/ssl/mattermost.key
chmod 400 mattermost.key
Create a new virtual host file for Mattermost in the 'sites-available' directory.
cd /etc/nginx/sites-available/
vim mattermost
Paste virtual host configuration below:
server {
   listen         80;
   server_name    mattermost.mydomain.com;
   return         301 https://$server_name$request_uri;
}

server {
   listen 443 ssl;
   server_name mattermost.mydomain.com;

   ssl on;
   ssl_certificate /etc/nginx/ssl/mattermost.crt;
   ssl_certificate_key /etc/nginx/ssl/mattermost.key;
   ssl_session_timeout 5m;
   ssl_protocols TLSv1 TLSv1.1 TLSv1.2;
   ssl_ciphers 'EECDH+AESGCM:EDH+AESGCM:AES256+EECDH:AES256+EDH';
   ssl_prefer_server_ciphers on;
   ssl_session_cache shared:SSL:10m;

   location / {
      gzip off;
      proxy_set_header X-Forwarded-Ssl on;
      client_max_body_size 50M;
      proxy_set_header Upgrade $http_upgrade;
      proxy_set_header Connection "upgrade";
      proxy_set_header Host $http_host;
      proxy_set_header X-Real-IP $remote_addr;
      proxy_set_header X-Forwarded-For $proxy_add_x_forwarded_for;
      proxy_set_header X-Forwarded-Proto $scheme;
      proxy_set_header X-Frame-Options SAMEORIGIN;
      proxy_pass http://127.0.0.1:8065;
   }
}
Change the domain name to your own domain, save and exit.
Activate the virtual host by creating a symlink to the mattermost file in the 'sites-enabled' directory.
ln -s /etc/nginx/sites-available/mattermost /etc/nginx/sites-enabled/
Test the Nginx configuration and make sure there is no error, and restart nginx.
nginx -t
systemctl restart nginx
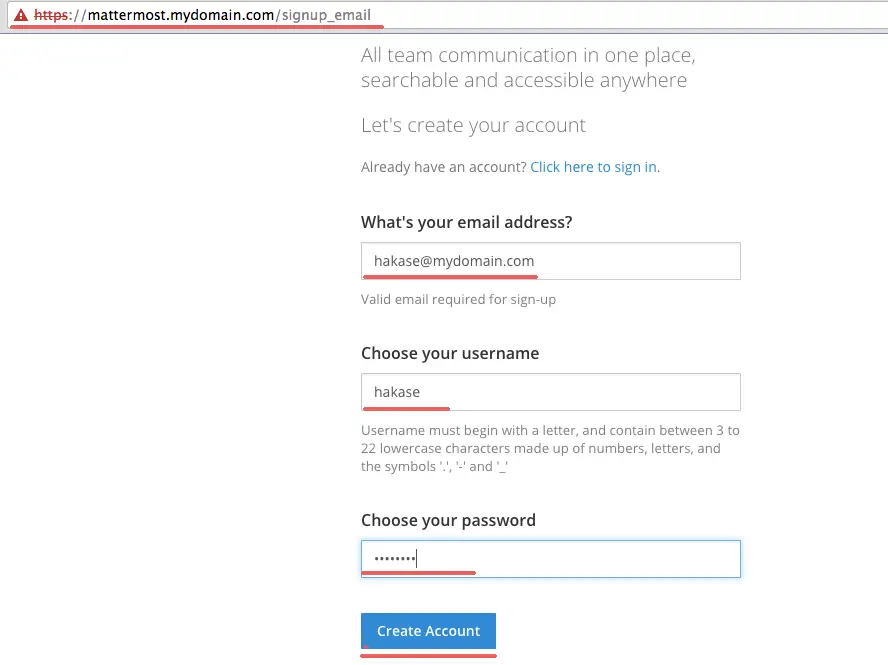
Step 5 - Testing
Open your web browser and visit the mattermost domain name, in my case: mattermost.mydomain.com.
You will be redirected to the HTTPS connection automatically.
Create a new account first, click on 'Create Account'.
Then you can see the link for creating new teams or to access the admin/system console.
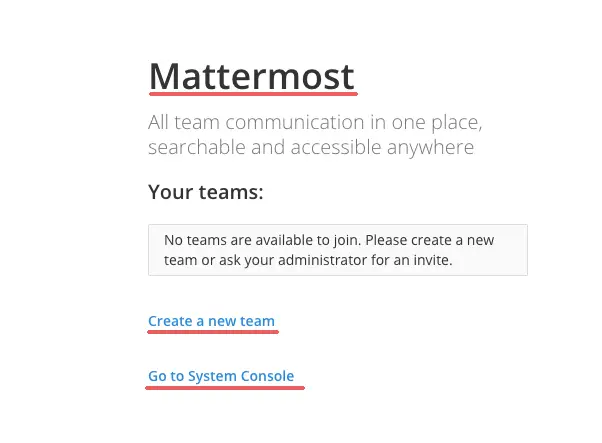
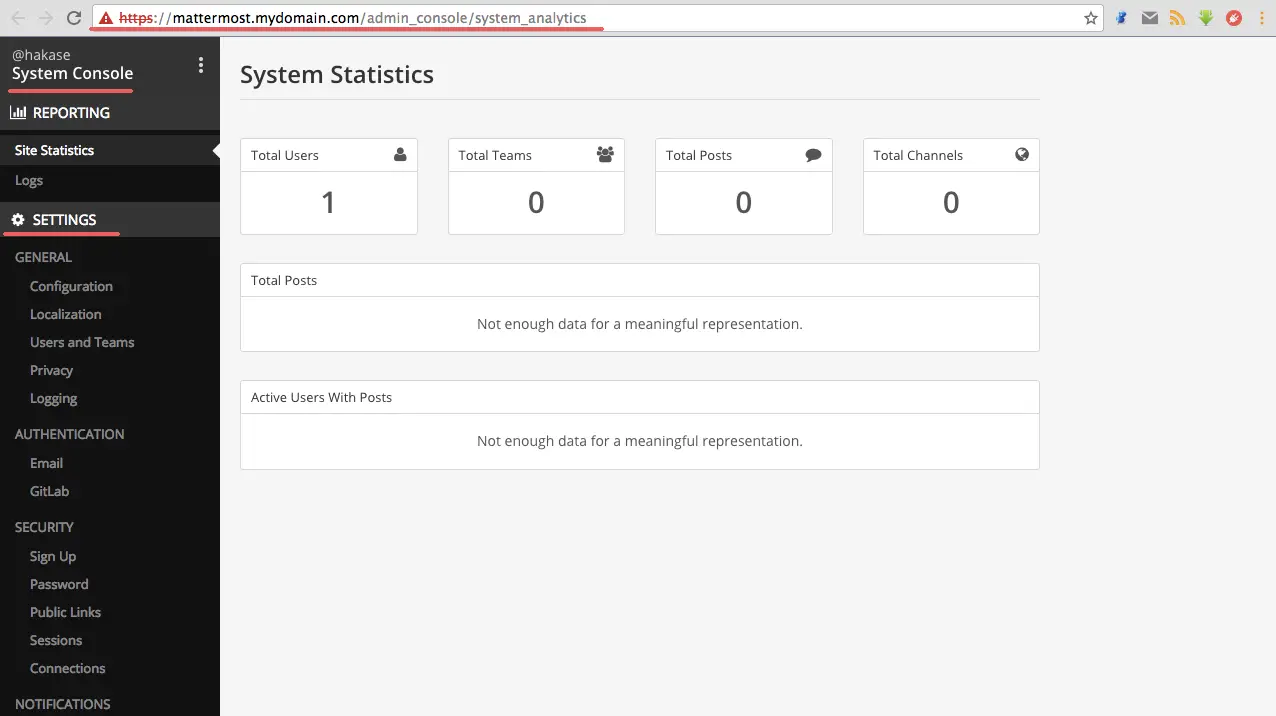
Click on 'Go to System Console' and you will see the system console dashboard below:
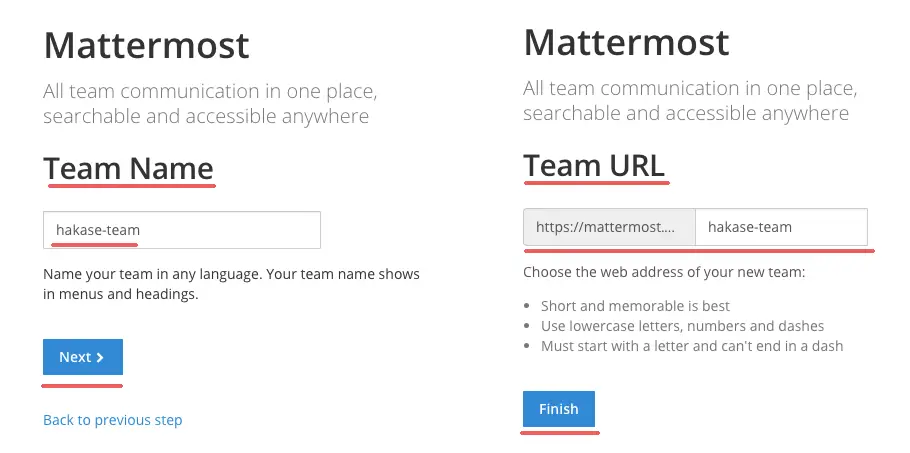
Click on 'Create New Team', type in your team name and click 'Next'. Then configure the team URL and click on the 'Finish' button.
Finaly you see Team Dashboard.
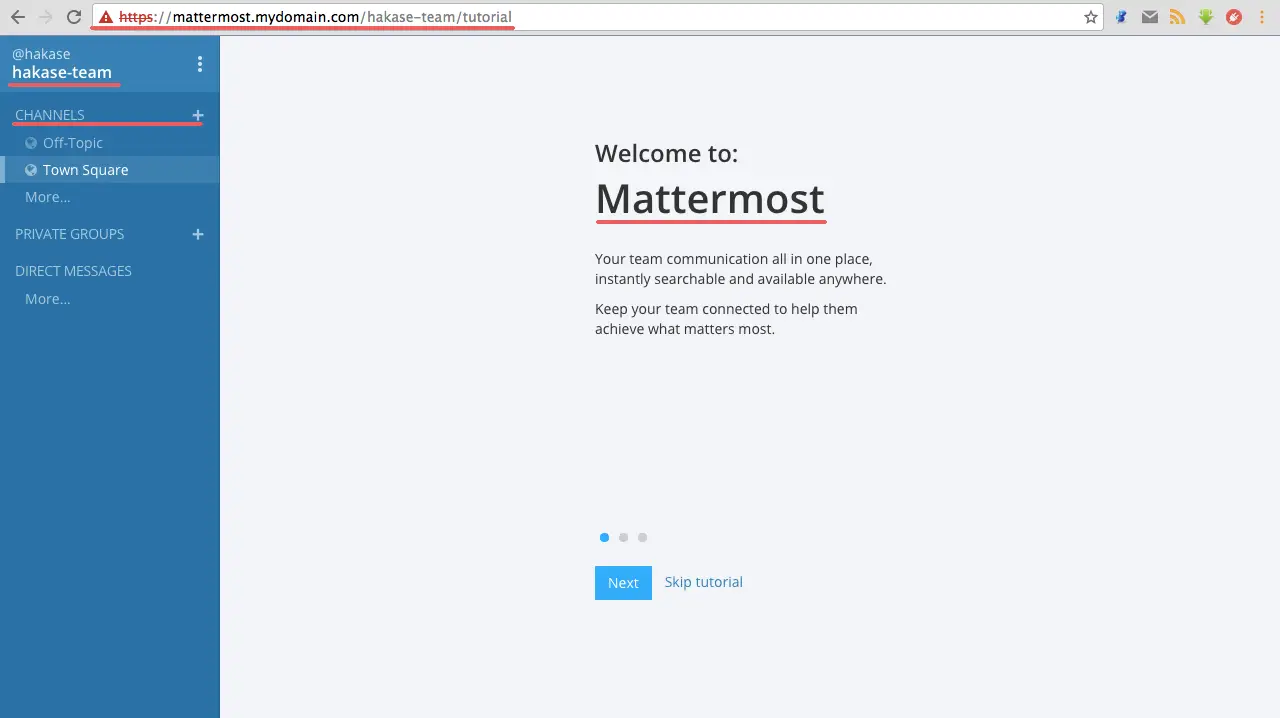
Mattermost Team Chat.
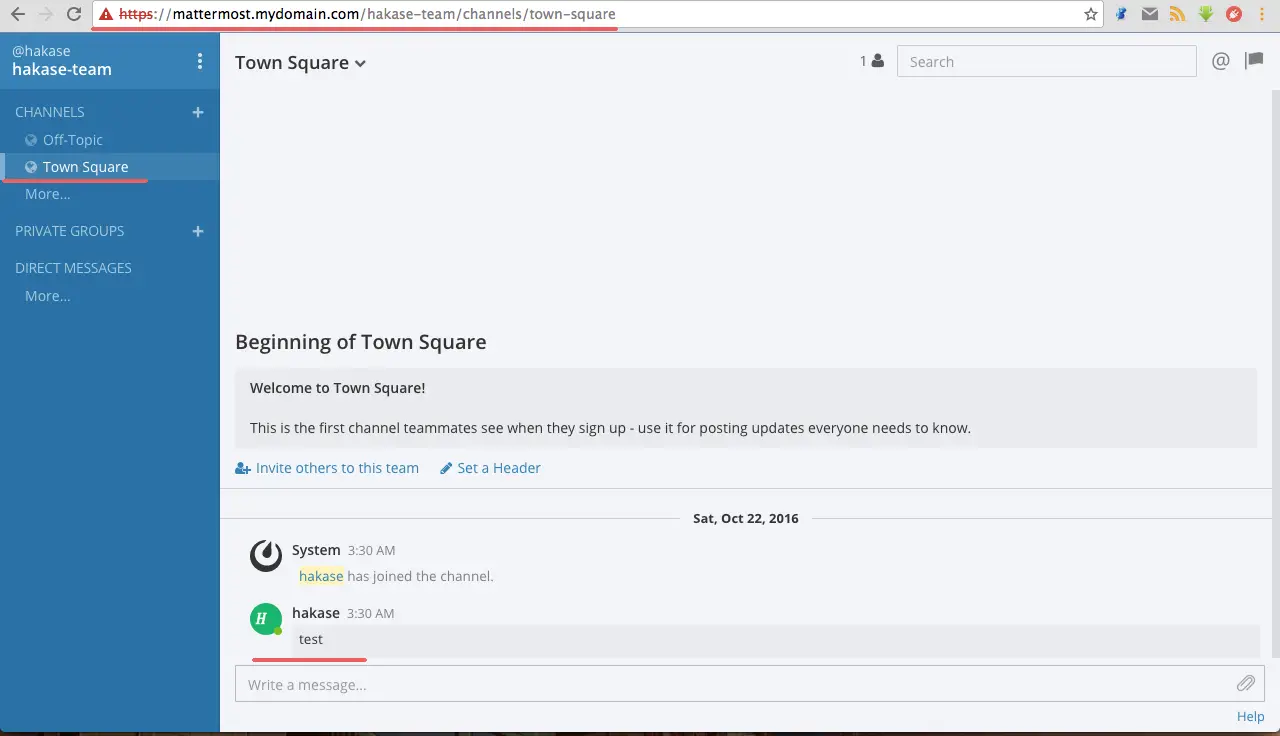
Mattermost with PostgreSQL and Nginx web server on Ubuntu 16.04 has been successfully installed.

