How to Install Linux Malware Detect (LMD) and ClamAV on CentOS 7
Linux Malware Detect (LMD) is malware detector and scanner for Linux, designed for shared hosting environments. LMD is released under GNU GPLV2 license, it can be installed on cPanel WHM and Linux environments with together other detection tools such as ClamAV.
Clam AntiVirus (ClamAV) is an open source antivirus solution to detect trojans, malware, viruses and other malicious software. ClamAV supports multiple platforms including Linux, Windows, and MacOS.
In this tutorial, I will show you how to install Linux Malware Detect (LMD) with Clam AntiVirus (ClamAV). I will use CentOS 7 as the operating system.
Prerequisite
- CentOS 7
- Root privileges
Step 1 - Install Epel repository and Mailx
Install the Epel (Extra Packages for Enterprise Linux) repository and the mailx command with yum. We need mailx installed on the system so that LMD can send the scan reports to your email address.
yum -y install epel-release
Install mailx so we can use the mail command on CentOS 7:
yum -y install mailx
Step 2 - Install Linux Malware Detect (LMD)
Linux Malware Detect is not available in CentOS or Epel repository, we need to install it manually from source.
Download LMD and extract it:
cd /tmp
wget http://www.rfxn.com/downloads/maldetect-current.tar.gz
tar -xzvf maldetect-current.tar.gz
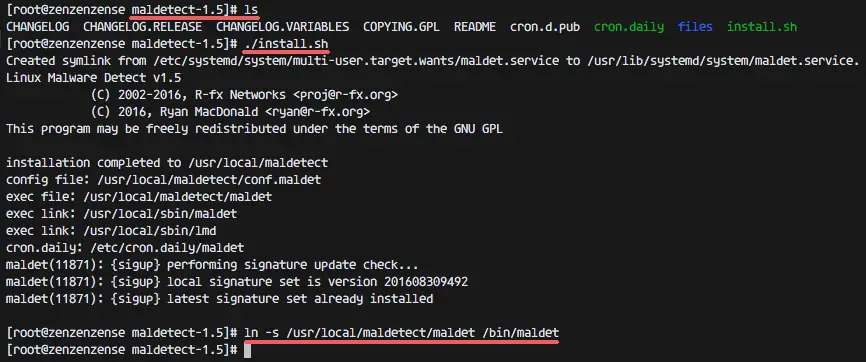
Go to the maldetect directory and run the installer script 'install.sh' as root:
cd maldetect-1.5
./install.sh
Next, make a symlink to the maldet command in the /bin/ directory:
ln -s /usr/local/maldetect/maldet /bin/maldet
hash -r
Step 3 - Configure Linux Malware Detect (LMD)
LMD has benn installed into the '/usr/local/maldet/' directory. Go to that directory and edit the configuration file 'conf.maldet' with vim:
cd /usr/local/maldetect/
vim conf.maldet
Enable email alert by changing the value to '1' on line 16.
email_alert="1"
Type in your email address on line 21.
email_addr="[email protected]"
We will use the ClamAV clamscan binary as default scan engine because it provides a high-performance scan on large file sets. Change value to '1' on line 114.
scan_clamscan="1"
Next, enable quarantining to move malware to the quarantine automatically during the scan process. Change value to '1' on line 180.
quarantine_hits="1"
Change value to 1 on line 185 to enable clean based malware injections.
quarantine_clean="1"
Save and exit.
Step 4 - Install ClamAV
In this step, we will install Clam AntiVirus or ClamAV to get the best scanning results of LMD. ClamAV is available in the Epel repository (that we've installed in the first step).
Install ClamAV and ClamAV devel with yum:
yum -y install clamav clamav-devel
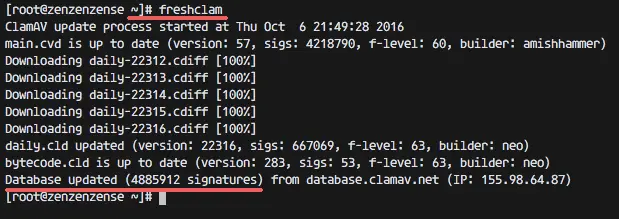
After ClamAV has been installed, update the ClamAV virus databases with the freshclam command:
freshclam
Step 5 - Testing LMD and ClamAV
We will test an LMD manual scan with the maldet command. We will use the maldet command to scan the web directory '/var/www/html/'.
Go to the web root directory and download some sample malware (eicar) with wget:
cd /var/www/html
wget http://www.eicar.org/download/eicar.com.txt
wget http://www.eicar.org/download/eicar_com.zip
wget http://www.eicar.org/download/eicarcom2.zip
Next, scan the web root directory with the maldet command below:
maldet -a /var/www/html
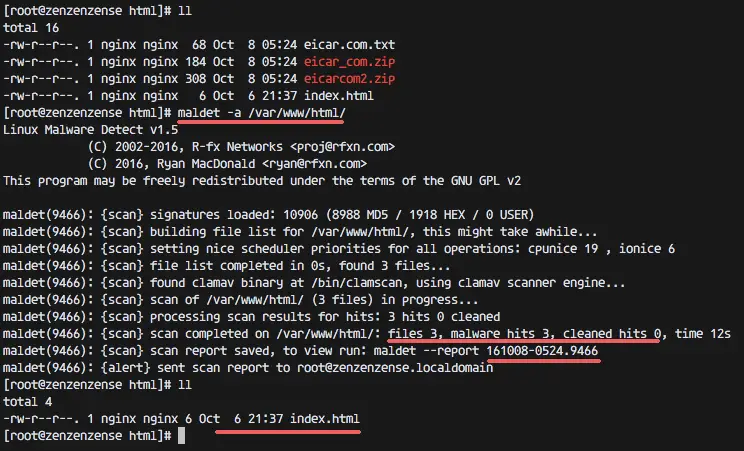
You can see that LMD is using the ClamAV scanner engine to perform the scan, and there are 'malware hits 3' and the malware files were automatically moved to the quarantine directory.
Check the scan report with the command below:
maldet --report 161008-0524.9466
SCANID = 161008-0524.9466 is found in the Maldet output.

Now check the email report from LMD:
tail -f /var/mail/root
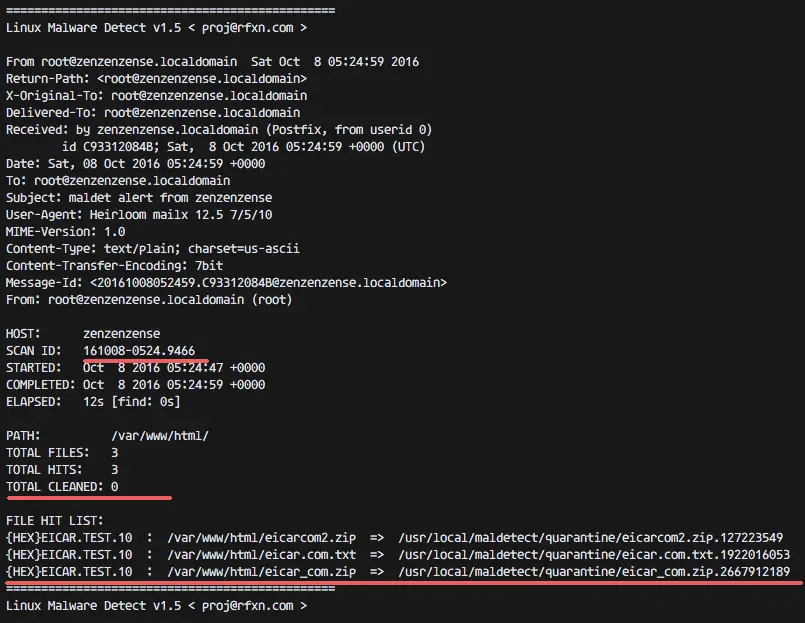
As you can see, the scan report has been sent to the destination email address.
Step 6 - Other LMD Commands
Perform a scan for specific file extention only:
maldet -a /var/www/html/*.php
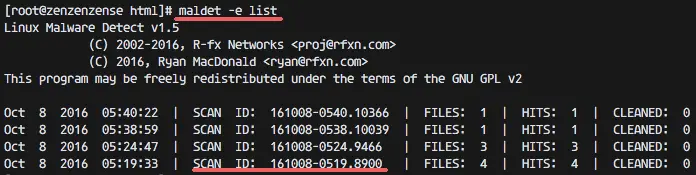
Get a list of all reports:
maldet -e list
Scan files that have been created/modified in the last X days.
maldet -r /var/www/html/ 5
5 = the last days.
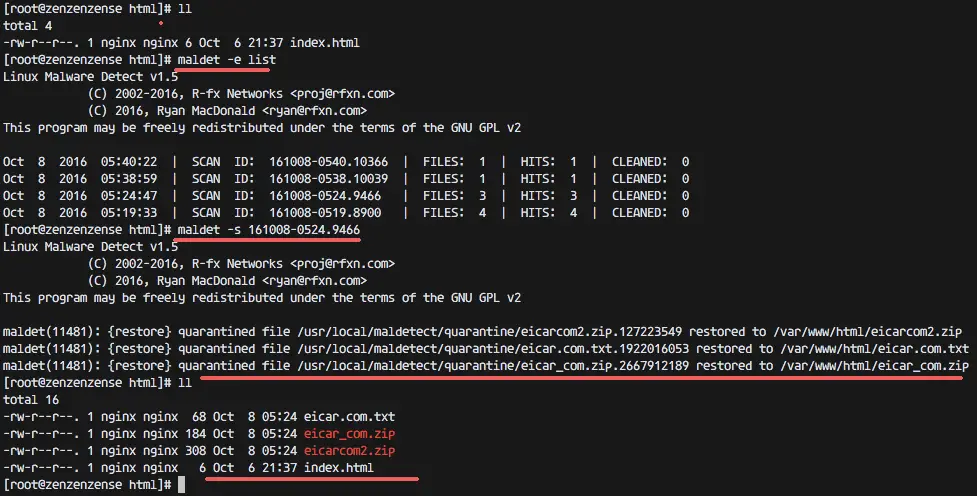
Restore files from the quarantine directory.
maldet -s SCANID
Enable monitoring of a directory.
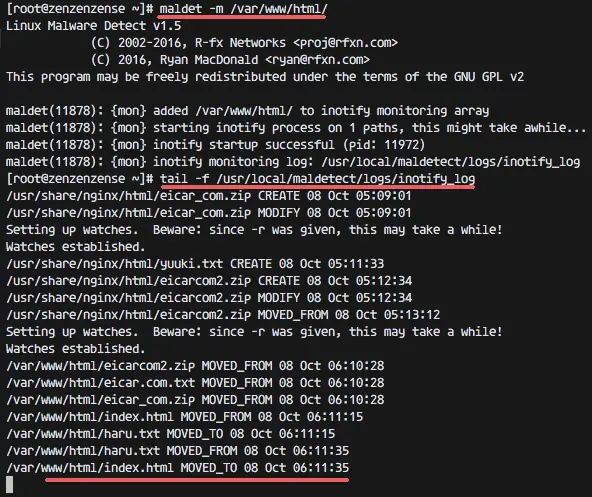
maldet -m /var/www/html/
Check the monitor log file:
tail -f /usr/local/maldetect/logs/inotify_log