How to Install Django with PostgreSQL and Nginx on Ubuntu 16.04
On this page
- Step 1 - Install Django, Virtualenv, and Gunicorn
- Step 2 - Install and Configure PostgreSQL
- Step 3 - Start New Django Project
- Step 4 - Configure the Django Project with Gunicorn
- Step 5 - Install and Configure Supervisor
- Step 6 - Install and Configure Nginx for the Django Project
- Step 7 - Testing Django
- Links
Django is a free open-source web framework based on Python. It's a high-level python web framework with an MVT (Model-View-Template) architecture pattern. Django is maintained by the Django Software Foundation (DSF). The Django web framework is fast, it helps developers to built applications rapidly (RAD).
In this tutorial, I will show you how to install the Django web framework and configure it to use a PostgreSQL database for development. We will run Nginx as a reverse proxy for Django web framework for speed and security reasons. Django will run under the python WSGI HTTP server 'Gunicorn', we will manage and control 'Gunicorn' with 'Supervisor' as the process control system.
Prerequisite
- Ubuntu 16.04
- Root Privileges
Step 1 - Install Django, Virtualenv, and Gunicorn
I will use python3 as the default Python version for the system. We will install python3 and pip3 on Ubuntu 16.04. Pip3 is a package management system to install and manage software packages written in python.
Connect to your server as root user on the terminal or by SSH (like I do it here) and update the Ubuntu repository:
ssh [email protected]
sudo apt-get update
Install python3 and pip3 with this apt command:
sudo apt-get install python3-pip python3-dev
Create a new symlink for the pip3 command to be able to use it as "pip" instead of "pip3" and upgrade it:
ln -s /usr/bin/pip3 /usr/bin/pip
pip install --upgrade pip
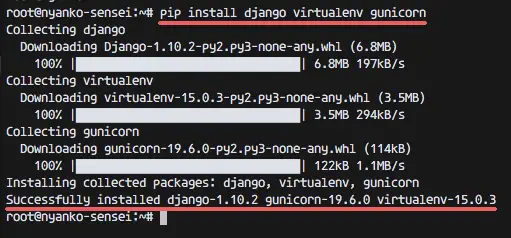
Next, install required python packages with the pip command. I will install Django, Virtualenv, and Gunicorn here:
pip install django virtualenv gunicorn
Step 2 - Install and Configure PostgreSQL
We will use PostgreSQL as the database for our Django project. Install PostgreSQL with this apt command.
sudo apt-get install postgresql postgresql-contrib libpq-dev
When the installation is finished, install the new python package named 'psycopg2' with pip. It's the python-postgreSQL database adapter.
pip install psycopg2
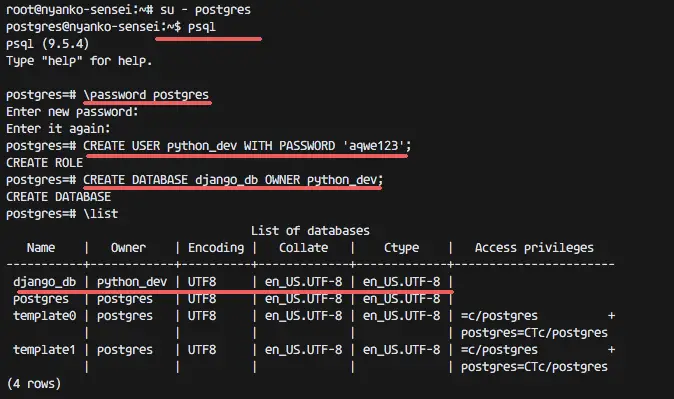
Now access the postgres user and open the PostgreSQL shell with psql command:
su - postgres
psql
Set a new password for the postgres user with the command below:
\password postgres
Enter new password:
Next, create a new database and a new user/role for the django project in PostgreSQL. I will create new databases named 'django_db' with user/role 'python_dev'. Type command below on the PostgreSQL shell.
CREATE USER python_dev WITH PASSWORD 'aqwe123';
CREATE DATABASE django_db OWNER python_dev;
See the database list and role:
\list
Step 3 - Start New Django Project
Start the first Django project with the name 'hello_django'. We are not going to use root privileges for the project, I will use a normal Linux user 'natsume' for the project. Feel free to use a different username that describes your project.
Create a New User
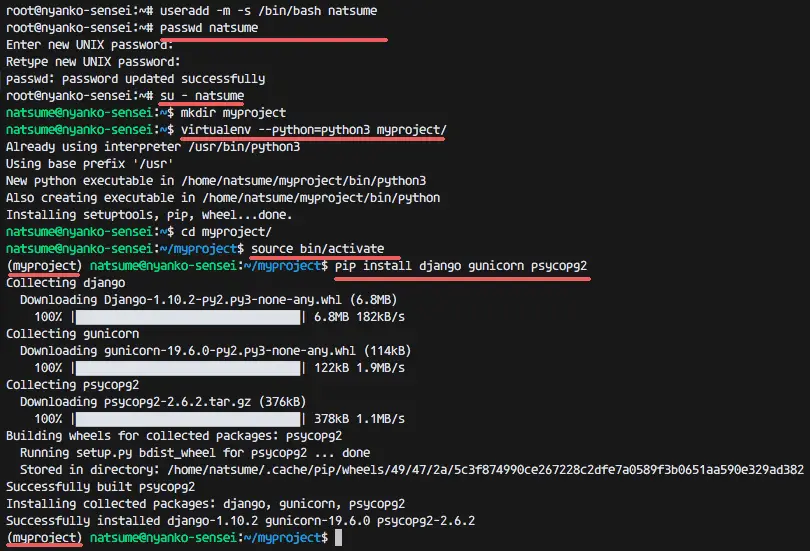
Create new Linux user with the command below:
useradd -m -s /bin/bash natsume
passwd natsume
-m = Automatically create the home directory.
-s = Define the default shell for the user.
Create New Virtualenv and Install Django
Login to the natsume user:
su - natsume
Create a new virtual environment in the directory 'myproject' for our Django project with python3 as the default python version.
mkdir myproject
virtualenv --python=python3 myproject/
Go to the 'myproject' directory and activate the virtualenv.
cd myproject/
source bin/activate
Next, install Django, gunicorn, and psycopg2 with pip command in that environment.
pip install django gunicorn psycopg2
Start New Project with PostgreSQL
Start the Django project 'hello_django' with the django-admin command below:
django-admin startproject hello_django
It will create a new directory 'hello_django', go to that directory and edit the configuration file 'setting.py' with vim.
cd hello_django/
vim hello_django/settings.py
Change the database settings on line 76 with configuration below:
        'ENGINE': 'django.db.backends.postgresql_psycopg2',
        'NAME': 'django_db',
        'USER': 'python_dev',
        'PASSWORD': 'aqwe123',
        'HOST': 'localhost',
        'PORT': '',
At the end of the file, configure the static url by adding the STATIC_ROOT configuration line below:
STATIC_ROOT = os.path.join(BASE_DIR, 'static/')
Save and exit.
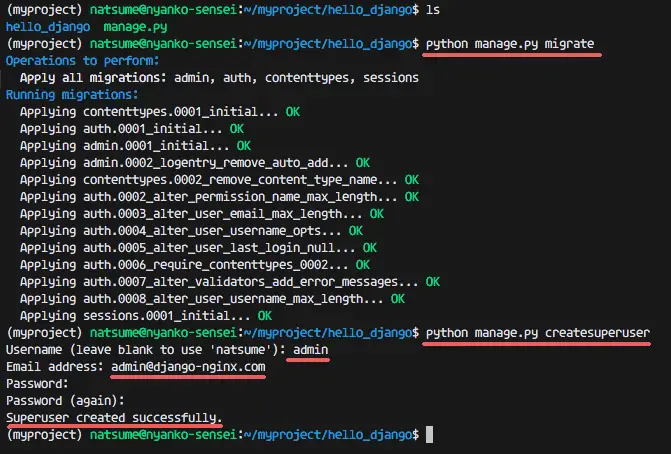
Next, migrate the database to our postgreSQL database and create a new admin user. Then collect all static files to the static directory which is automatically created when we execute the command.
python manage.py migrate
python manage.py createsuperuser
python manage.py collectstatic
Make sure there is no error and do a test-run of the django project server with the runserver command.
python manage.py runserver 0.0.0.0:8080
Open your web browser and visit the server IP address on port 8080, in my case http://192.168.1.115:8080. You will see the Django default page.
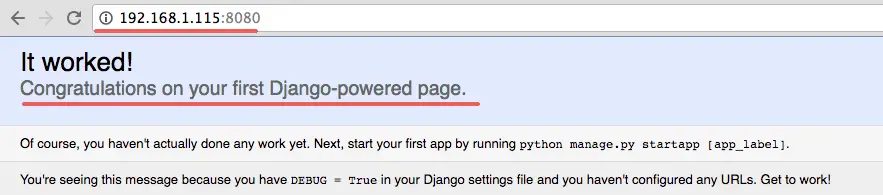
Press Ctrl + c to exit.
Step 4 - Configure the Django Project with Gunicorn
Gunicorn or Green Unicorn is a python WSGI HTTP server forked from the Ruby Unicorn project. It supports various web frameworks and is easy to configure.
Go to the 'myproject' directory and activate the virtual environment for the the natsume user home directory.
cd ~/myproject/
source bin/activate
Create a new file 'gunicorn_start' inside bin directory with vim:
vim bin/gunicorn_start
Paste configuration below:
#!/bin/bash

# Project Name
NAME="hello_django"

# Django Project Directory
DJANGODIR=/home/natsume/myproject/hello_django

# Run gunicorn on the socket file
SOCKFILE=/home/natsume/myproject/hello_django/run/gunicorn.sock

# Gunicorn running as user and group
USER=natsume
GROUP=natsume

# Workers
NUM_WORKERS=3

#Module Setting
#replace hello_django with your project name
DJANGO_SETTINGS_MODULE=hello_django.settings
DJANGO_WSGI_MODULE=hello_django.wsgi

echo "Starting $NAME as `whoami`"

# Activate the virtual environment
cd $DJANGODIR
source ../bin/activate
export DJANGO_SETTINGS_MODULE=$DJANGO_SETTINGS_MODULE
export PYTHONPATH=$DJANGODIR:$PYTHONPATH

# Create the run directory if it doesn't exist
RUNDIR=$(dirname $SOCKFILE)
test -d $RUNDIR || mkdir -p $RUNDIR

# Start your Django Unicorn
# Programs meant to be run under supervisor should not daemonize themselves (do not use --daemon)
exec ../bin/gunicorn ${DJANGO_WSGI_MODULE}:application \
--name $NAME \
--workers $NUM_WORKERS \
--user=$USER --group=$GROUP \
--bind=unix:$SOCKFILE \
--log-level=debug \
--log-file=-
Save and exit.
Make the file executable with the chmod command.
chmod u+x bin/gunicorn_start
Step 5 - Install and Configure Supervisor
Supervisor is a process control system for Linux operating systems. It allows you to configure, monitor and control a number of processes on Linux. Supervisor is based on python, we can install it from the python repository pypi with the pip command or install it from the ubuntu repository with apt.
I will install supervisor with this apt command:
sudo apt-get install supervisor
Supervisor has a default configuration file in the '/ect/supervisor/' directory. Go to that directory and create a new configuration for our Django project so we can control it with supervisor.
cd /etc/supervisor/conf.d/
vim hello-django.conf
Paste the Supervisor configuration below:
[program:hello_django]
command = sh /home/natsume/myproject/bin/gunicorn_start
user = natsume
stdout_logfile = /home/natsume/myproject/logs/gunicorn_supervisor.log
redirect_stderr = true
environment=LANG=en_US.UTF-8,LC_ALL=en_US.UTF-8
Save and exit.
Next, login to the natsume user and create some directories that are needed for the gunicorn socket file and the supervisor log file.
su - natsume

# Directory for gunicorn sock file
mkdir -p myproject/hello_django/run/

# Directory and file for supervisor log files
mkdir -p myproject/logs/
touch myproject/logs/gunicorn_supervisor.log
Back to the root user with "exit" and start Supervisor:
exit
systemctl start supervisor
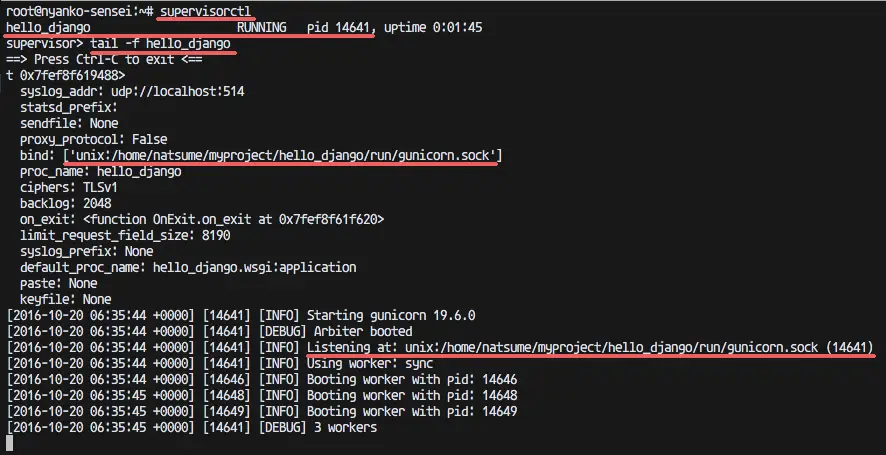
Check the status and log of the process:
supervisorctl
tail -f hello_django
Step 6 - Install and Configure Nginx for the Django Project
In this step, we will install Nginx and configure it as a reverse proxy for our Django project.
Install Nginx from the Ubuntu repository:
sudo apt-get install nginx
Go to the Nginx virtual host configuration directory and create a hello_django virtual host file:
cd /etc/nginx/sites-available/
vim hello_django
Paste configuration below:
# Django running with Gunicorn Sock file
upstream hello_django_project {
    server unix:/home/natsume/myproject/hello_django/run/gunicorn.sock fail_timeout=0;
}

server {

    listen   80;
    server_name www.django-nginx.com;

    client_max_body_size 4G;

    access_log /home/natsume/myproject/logs/nginx-access.log;
    error_log /home/natsume/myproject/logs/nginx-error.log;

    location /static/ {
        alias   /home/natsume/myproject/hello_django/static/;
    }

    location /media/ {
        alias   /home/natsume/myproject/hello_django/media/;
    }

    location / {
        proxy_set_header X-Forwarded-For $proxy_add_x_forwarded_for;
        proxy_set_header Host $http_host;
        proxy_redirect off;

    # Try to serve static files from nginx, no point in making an
    # *application* server like Unicorn/Rainbows! serve static files.
    if (!-f $request_filename) {
        proxy_pass http://hello_django_project;
        break;
        }


# Error pages
    error_page 500 502 503 504 /500.html;
    location = /500.html {
        root /home/natsume/myproject/hello_django/static/;
        }
    }
}
Save and exit.
Activate the virtual host and test the Nginx configuration.
ln -s /etc/nginx/sites-available/hello_django /etc/nginx/sites-enabled/
nginx -t
Make sure there is no error, then restart Nginx:
systemctl restart nginx
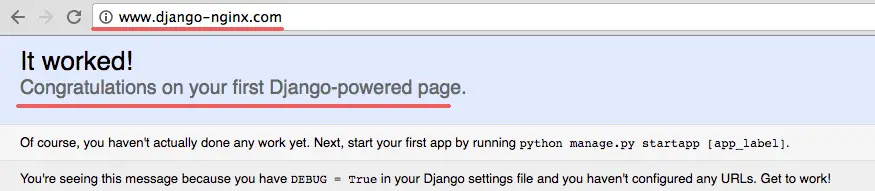
Step 7 - Testing Django
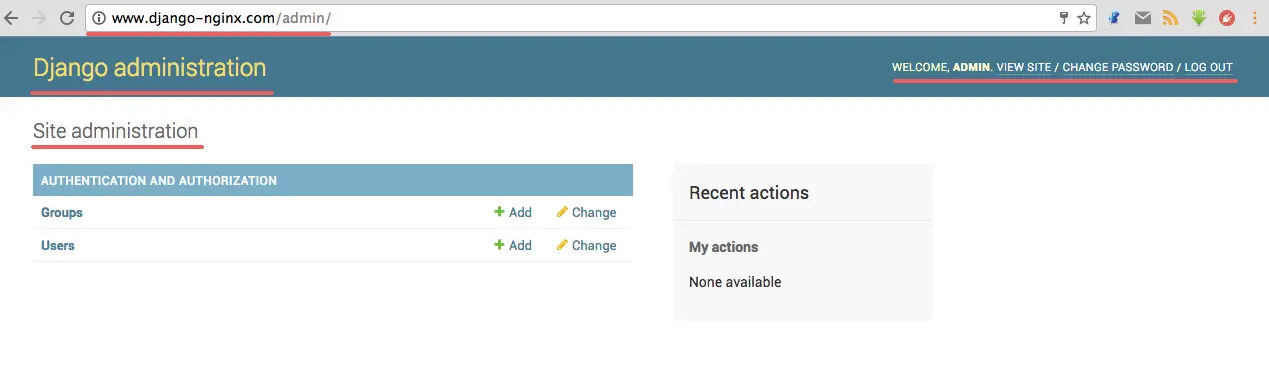
In step 5, we've created a virtual host for our Django project with the domain name 'www.django-nginx.com'. Open your browser and visit the domain name that you have chosen for your project.
www.django-nginx.com/admin/
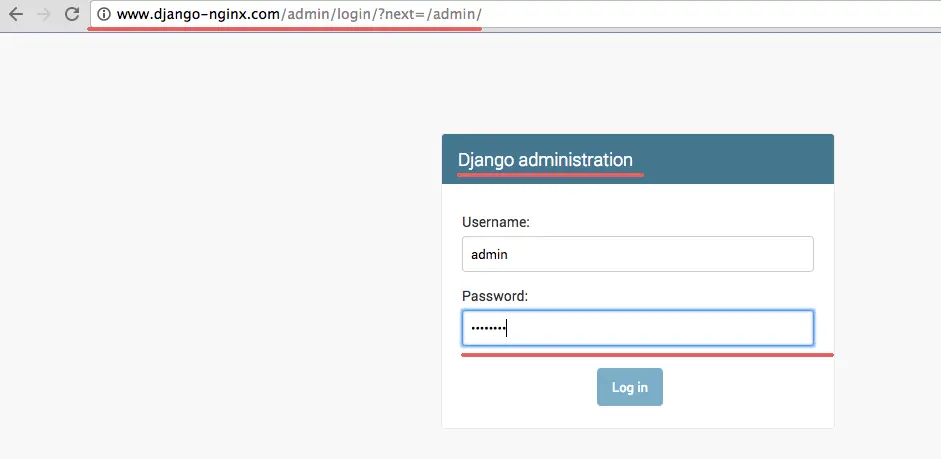
And you will be redirected to the Django admin dashboard.
Checking that all the services that we've setup are running with command below:
netstat -pl
You will see the pid, port and sock file used by all services.
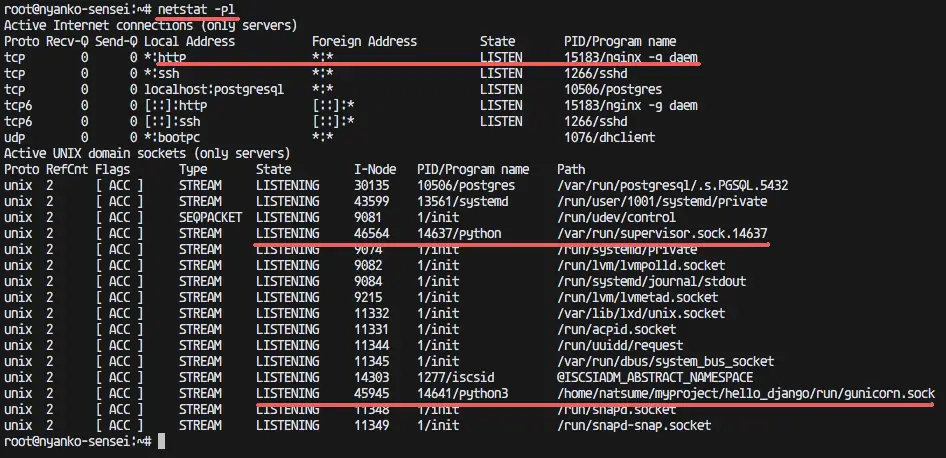
The Django installation and configuration with PostgreSQL and Nginx on Ubuntu 16.04 has been successful.

