How to Install Redmine 3 with Nginx on CentOS 7
Redmine is an open source web application for project management and issue tracker. Redmine is based on the Ruby on Rails Framework, it has cross-platform and cross-database support and ships with translations for 42 languages. The software allows you to track multiple projects, it integrates news, document and file management and a support wiki per-project. User accounts can be authenticated against an LDAP directory and third party software can be connected trough a REST API.
In this tutorial, we will install Redmine 3.2 with Nginx as the web server, MySQL as the database server on a CentOS 7 (64 bit) operating system.
Prerequisite
- CentOS 7 - 64 bit.
- Root privileges.
Step 1 - Install the Redmine dependencies
Redmine has a lot of dependencies that we will install first. Login to your CentOS 7 server as root user:
ssh [email protected]
Install all dependencies that are required by Redmine and the packages needed for ruby and rvm with the yum command below:
yum install zlib-devel curl-devel openssl-devel httpd-devel apr-devel apr-util-devel mysql-devel ftp wget ImageMagick-devel gcc-c++ patch readline readline-devel zlib libyaml-devel libffi-devel make bzip2 autoconf automake libtool bison iconv-devel subversion
The installation will ask for a MySQL password. Type in your new MySQL root password when requested.
Step 2 - Install Ruby and RVM
In this step, we will install rvm (latest version) and ruby 2.2. Redmine 3.2 supports ruby version 2.2. RVM (Ruby Version Manager) is a command line tool that allows you to install, manage and work with multiple ruby environments on the same server.
gpg2 --keyserver hkp://keys.gnupg.net --recv-keys 409B6B1796C275462A1703113804BB82D39DC0E3
curl -L https://get.rvm.io | bash -s stable --ruby=2.2.5
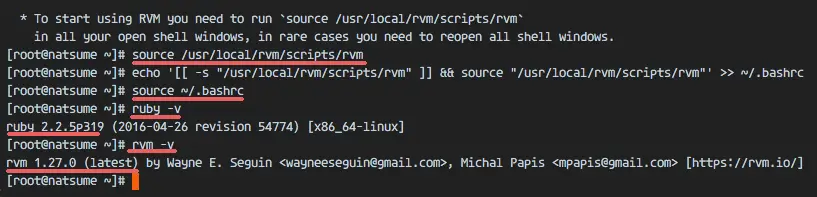
When the installation finished, we have to reload RVM and add it to the .bashrc file for automatic reloading:
source /usr/local/rvm/scripts/rvm
echo '[[ -s "/usr/local/rvm/scripts/rvm" ]] && source "/usr/local/rvm/scripts/rvm"' >> ~/.bashrc
Reload the .bashrc file and check the Ruby and RVM version.
source ~/.bashrc
ruby -v
rvm -v
Step 3 - Configure the Database for Redmine
In this step, we will install the mysql-server package from the official MySQL repository.
Add the Oracle MySQL repository and check the repository list.
rpm -Uvh https://dev.mysql.com/get/mysql57-community-release-el7-9.noarch.rpm
yum repolist
to ensure that the MySQL server repositry has been added successfully.
Install the MySQL server with this yum command.
yum install mysql-server
When the installation finished, start the mysqld service and configure the MySQL root password.
systemctl start mysqld
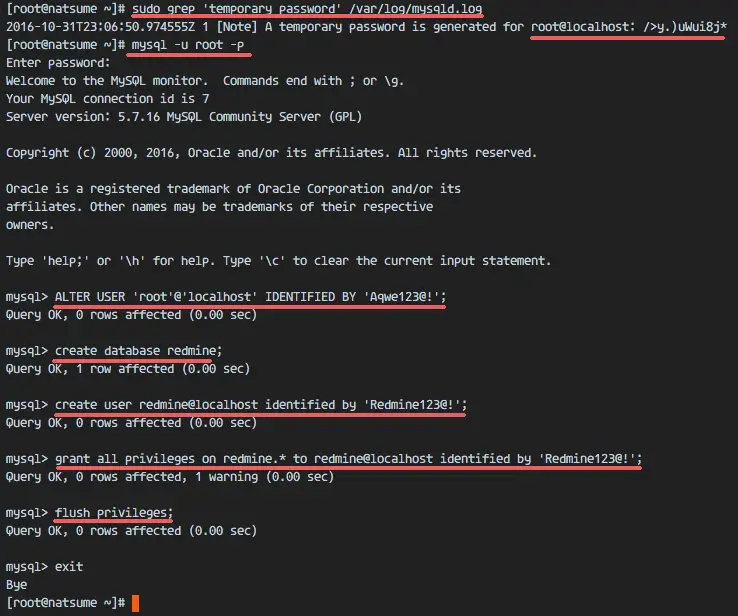
Mysql server has been started. Now get the temporay root password for the mysql server with the grep command below:
grep 'temporary password' /var/log/mysqld.log
You will see a result similar to this:
2016-10-31T23:06:50.974555Z 1 [Note] A temporary password is generated for root@localhost: />y.)uWui8j*
So we know the root password for the MySQL server is: />y.)uWui8j*
Now we will set a new root password for mysql server. Log in to the mysql shell with user root and the generated password:
mysql -u root -p
GENERATED PASSWORD: />y.)uWui8j*
Set a new root user password with the mysql query below:
ALTER USER 'root'@'localhost' IDENTIFIED BY 'Aqwe123@!';
Next, create a new database called "redmine" and create a new user 'redmine' with password 'redmine' (use a secure password on your server here!). Then grant all privilages for the user to the 'redmine' database.
create database redmine;
create user redmine@localhost identified by 'Redmine123@!';
grant all privileges on redmine.* to redmine@localhost identified by 'Redmine123@!';
flush privileges;
exit
Database and user have been created.
Step 4 - Install Phusion Passenger and Nginx
Phusion Passenger is web application server that can be used together with apache and nginx. It supports multiple languages: Ruby, Python and Nodejs. It is easy to us, fast, can handle more traffic and provides security enhancements.
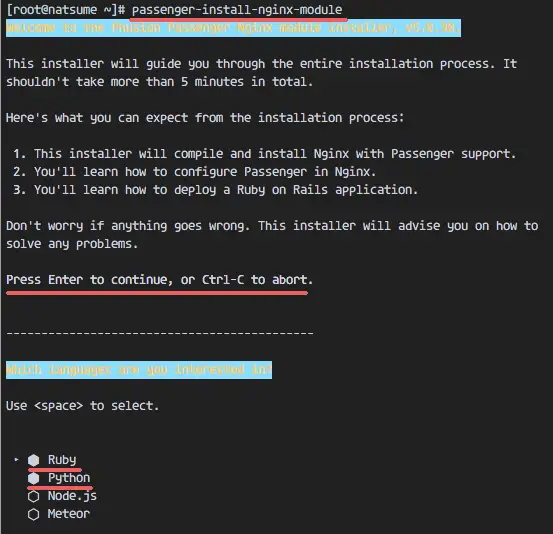
In this chapter, we will install the Phusion Passenger and integrate it with our nginx web server. Install passenger with the gem command below, then run the command passenger-nginx-module.
gem install passenger --no-ri --no-rdoc
passenger-install-nginx-module
The command will ask you which programming language shall be used, select Ruby and Python.
You will be asked about the nginx installation; select "Yes: download, compile and install Nginx for me. (recommended)".
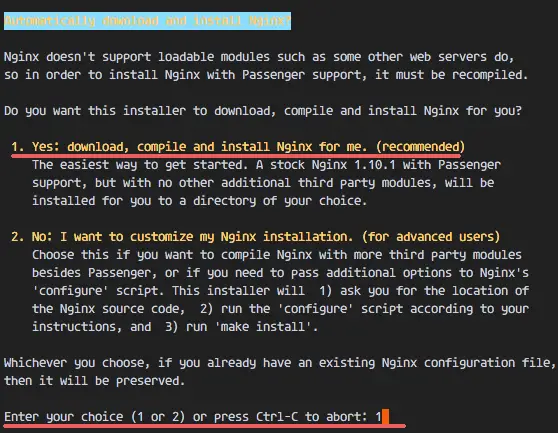
You will be asked for the nginx installation directory, use the default '/opt/nginx/', just press "Enter".
Step 5 - Configure Nginx
When the nginx installation is done, go to the installation directory and edit the nginx.conf file with an editor.
cd /opt/nginx/
cd conf/
vim nginx.conf
Paste the configuration below at line 24:
include vhost/*.conf;
Save the file and exit the editor.
Create a new 'vhost' directory for the virtual host configuration.
mkdir -p /opt/nginx/conf/vhost
Go to the vhost directory and create the redmine virtualhost configuration with vim:
cd /opt/nginx/conf/vhost/
vim redmine.conf
Paste the virtual host configuration below:
    server {
        listen       80;
        server_name  www.redmine.me;

        root /var/www/redmine/public;
        passenger_enabled on;
        client_max_body_size      10m; # Max attachemnt size

        # redirect server error pages to the static page /50x.html
        #
        error_page   500 502 503 504  /50x.html;
        location = /50x.html {
            root   html;
        }
    }
Save the file.
Ubuntu 16.04 uses systemd as init system. Next we configure nginx for systemd. Go to the systemd directory and create new service file named 'nginx.service'.
cd /lib/systemd/system/
vim nginx.service
Paste nginx script for systemd below :
[Unit]
Description=The NGINX HTTP and reverse proxy server
After=syslog.target network.target remote-fs.target nss-lookup.target

[Service]
Type=forking
PIDFile=/opt/nginx/logs/nginx.pid
ExecStartPre=/opt/nginx/sbin/nginx -t
ExecStart=/opt/nginx/sbin/nginx
ExecReload=/bin/kill -s HUP $MAINPID
ExecStop=/bin/kill -s QUIT $MAINPID
PrivateTmp=true

[Install]
WantedBy=multi-user.target
Save and exit.
Reload the systemd service and try to start nginx with systemctl command:
systemctl daemon-reload
systemctl start nginx
If you want to check nginx, check the open port 80:
netstat -plntu | grep nginx
The result should be like this:
tcp 0 0 0.0.0.0:80 0.0.0.0:* LISTEN 4871/nginx
Step 6 - Install Redmine
Make a new directory for the Redmine installation. I will use the '/var/www/' directory here.
mkdir -p /var/www/
Go to '/var/www/' directory and download Redmine with the svn command:
cd /var/www/
svn co https://svn.redmine.org/redmine/branches/3.2-stable redmine
Go to the Redmine directory and copy the configuration file and database configuration file:
cd redmine
cp config/configuration.yml.example config/configuration.yml
cp config/database.yml.example config/database.yml
Edit the database.yml file with vim:
vim config/database.yml
In the production section line, fill in the database name user and password:
production:
  adapter: mysql2
  database: redmine
  host: localhost
  username: redmine
  password: "Redmine123@!"
  encoding: utf8
Save the file.
In the redmine directory, create some new directories and change the owner to user and group nobody:
mkdir -p tmp tmp/pdf public/plugin_assets
sudo chown -R nobody:nobody files log tmp public/plugin_assets
sudo chmod -R 775 files log tmp public/plugin_assets
Install the bundler and gem dependencies for redmine:
gem install bundler
bundle install --without development test
Generate the secret token, then generate the database:
bundle exec rake generate_secret_token
RAILS_ENV=production bundle exec rake db:migrate
RAILS_ENV=production bundle exec rake redmine:load_default_data
Restart nginx and visit the redmine domain name with a web browser:
systemctl restart nginx
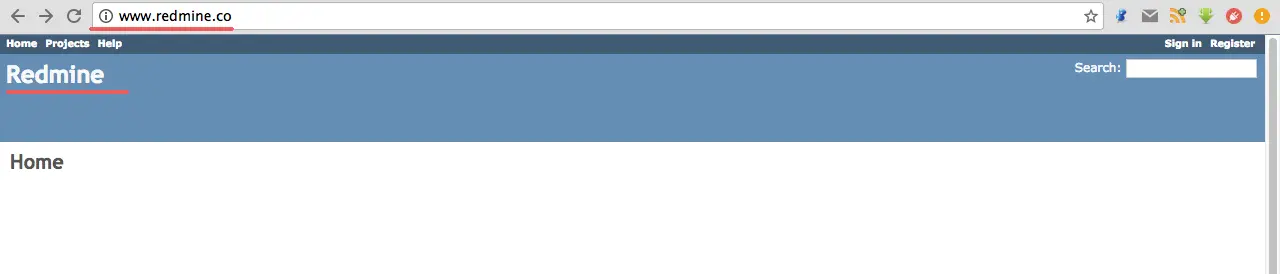
Visit redmine installation, mine is: www.redmine.co
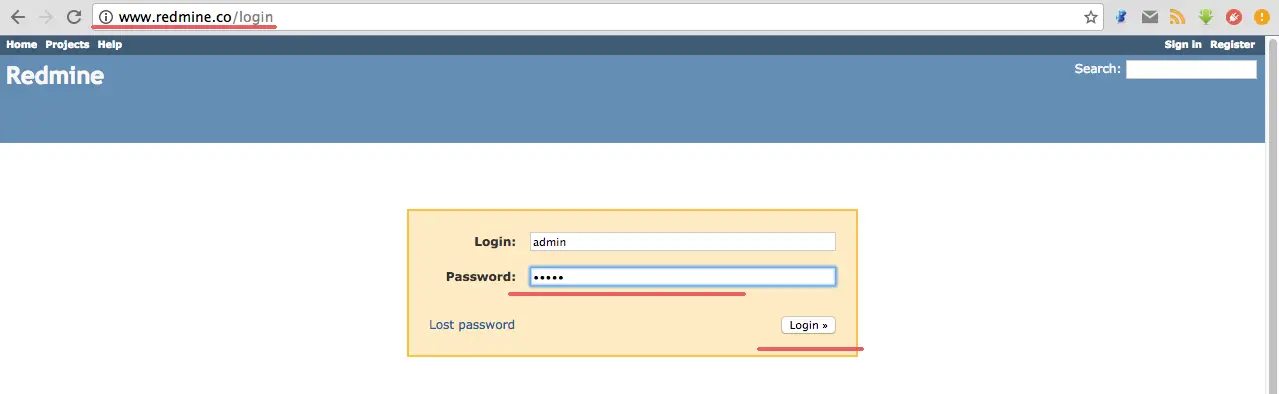
Login to the admin page: www.redmine.co/login
The default user and password is 'admin'.
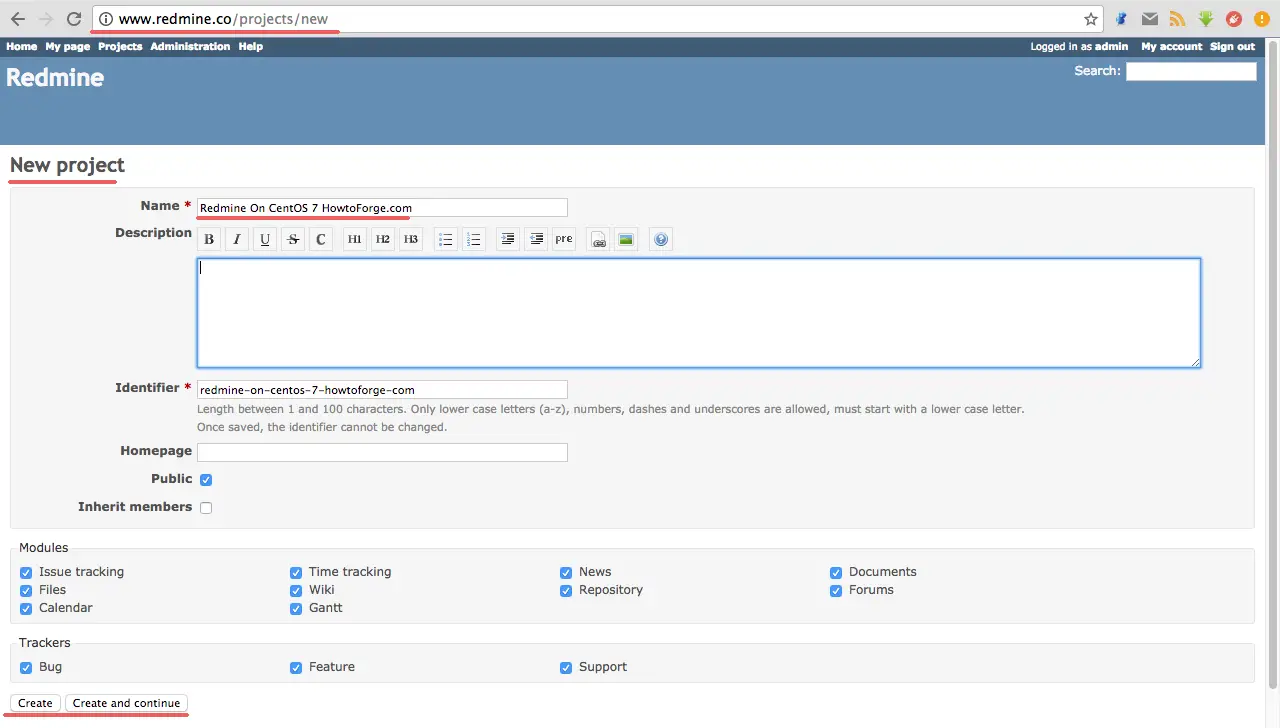
Create a new sample project.
Sample Project Page.
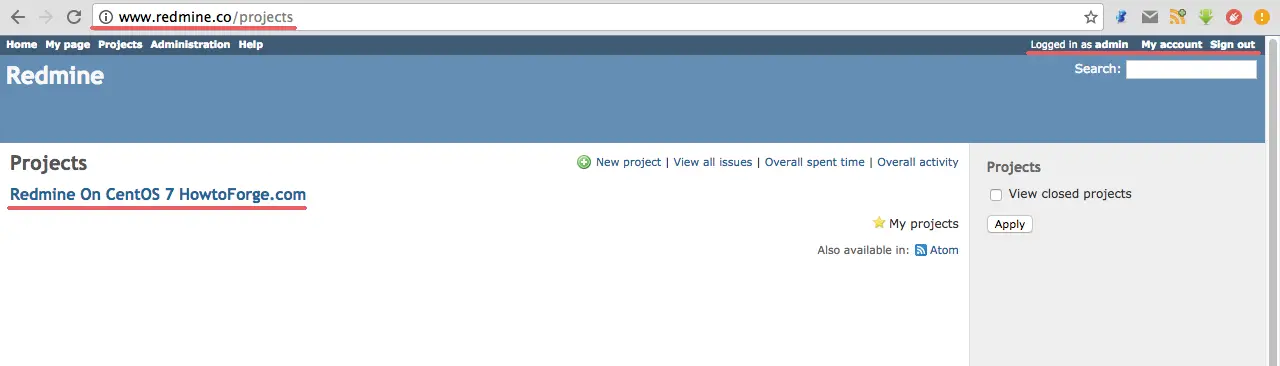
Installation of Redmine with Nginx and MySQL on CentOS 7 has been successful.
Conclusion
Redmine is a web-based application for project management and issue tracking. Redmine is cross-platform, so we can run it on Windows, Linux or Mac OS. Redmine has support for many databases like MySQL, PostgreSQL, Microsoft SQL Server and SQLite. Redmine is easy to install and configure, we can use Apache or Nginx as the web server. Redmine is very powerful and has many features like multi-language support, file management, wiki and a REST API. Redmine is one of the best free solutions if you want to build your own project management with issue tracking.

