How to install a Ceph Storage Cluster on Ubuntu 16.04
Ceph is an open source storage platform, it provides high performance, reliability, and scalability. It's a free distributed storage system that provides an interface for object, block, and file-level storage and can operate without a single point of failure.
In this tutorial, I will guide you to install and build a Ceph cluster on Ubuntu 16.04 server. A Ceph cluster consists of these components:
- Ceph OSDs (ceph-osd) - Handles the data storage, data replication, and recovery. A Ceph cluster needs at least two Ceph OSD servers. We will use three Ubuntu 16.04 servers in this setup.
- Ceph Monitor (ceph-mon) - Monitors the cluster state and runs the OSD map and CRUSH map. We will use one server here.
- Ceph Meta Data Server (ceph-mds) - this is needed if you want to use Ceph as a File System.
Prerequisites
- 6 server nodes with Ubuntu 16.04 server installed
- Root privileges on all nodes
I will use the following hostname / IP setup:
hostname IP address
ceph-admin 10.0.15.10
mon1 10.0.15.11
osd1 10.0.15.21
osd2 10.0.15.22
osd3 10.0.15.23
client 10.0.15.15
Step 1 - Configure All Nodes
In this step, we will configure all 6 nodes to prepare them for the installation of the Ceph Cluster software. So you have to follow and run the commands below on all nodes. And make sure that ssh-server is installed on all nodes.
Create the Ceph User
Create a new user named 'cephuser' on all nodes.
useradd -m -s /bin/bash cephuser
passwd cephuser
After creating the new user, we need to configure cephuser for passwordless sudo privileges. This means that 'cephuser' can run and get sudo privileges without having to enter a password first.
Run the commands below to achieve that.
echo "cephuser ALL = (root) NOPASSWD:ALL" | sudo tee /etc/sudoers.d/cephuser
chmod 0440 /etc/sudoers.d/cephuser
sed -i s'/Defaults requiretty/#Defaults requiretty'/g /etc/sudoers
Install and Configure NTP
Install NTP to synchronize date and time on all nodes. Run the ntpdate command to set the date and time via NTP. We will use the US pool NTP servers. Then start and enable NTP server to run at boot time.
sudo apt-get install -y ntp ntpdate ntp-doc
ntpdate 0.us.pool.ntp.org
hwclock --systohc
systemctl enable ntp
systemctl start ntp
Install Open-vm-tools
If you are running all nodes inside VMware, you need to install this virtualization utility.
sudo apt-get install -y open-vm-tools
Install Python and parted
In this tutorial, we need python packages for building the ceph-cluster. Install python and python-pip.
sudo apt-get install -y python python-pip parted
Configure the Hosts File
Edit the hosts file on all nodes with vim editor.
vim /etc/hosts
Paste the configuration below:
10.0.15.10        ceph-admin
10.0.15.11        mon1
10.0.15.21        ceph-osd1
10.0.15.22        ceph-osd2
10.0.15.23        ceph-osd3
10.0.15.15        ceph-client
Save the hosts file and exit the vim editor.
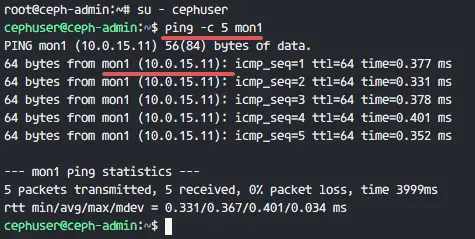
Now you can try to ping between the server hostnames to test the network connectivity.
ping -c 5 mon1
Step 2 - Configure the SSH Server
In this step, we will configure the ceph-admin node. The admin node is used for configuring the monitor node and osd nodes. Login to the ceph-admin node and access the 'cephuser'.
ssh root@ceph-admin
su - cephuser
The admin node is used for installing and configuring all cluster node, so the user on the ceph-admin node must have privileges to connect to all nodes without a password. We need to configure password-less SSH access for 'cephuser' on the 'ceph-admin' node.
Generate the ssh keys for 'cephuser'.
ssh-keygen
Leave passphrase is blank/empty.
Next, create a configuration file for the ssh config.
vim ~/.ssh/config
Paste the configuration below:
Host ceph-admin
        Hostname ceph-admin
        User cephuser

Host mon1
        Hostname mon1
        User cephuser

Host ceph-osd1
        Hostname ceph-osd1
        User cephuser

Host ceph-osd2
        Hostname ceph-osd2
        User cephuser

Host ceph-osd3
        Hostname ceph-osd3
        User cephuser

Host ceph-client
        Hostname ceph-client
        User cephuser
Save the file and exit vim.
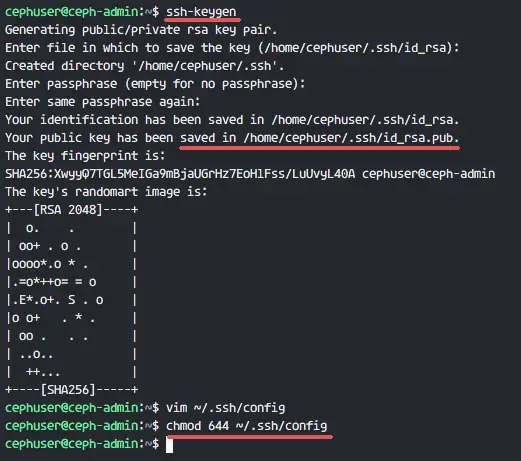
Change the permission of the config file to 644.
chmod 644 ~/.ssh/config
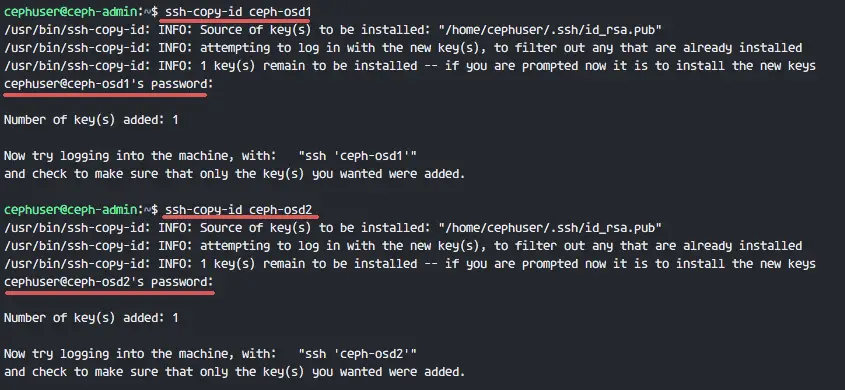
Now add the key to all nodes with the ssh-copy-id command.
ssh-keyscan ceph-osd1 ceph-osd2 ceph-osd3 ceph-client mon1 >> ~/.ssh/known_hosts
ssh-copy-id ceph-osd1
ssh-copy-id ceph-osd2
ssh-copy-id ceph-osd3
ssh-copy-id mon1
Type in your cephuser password when requested.
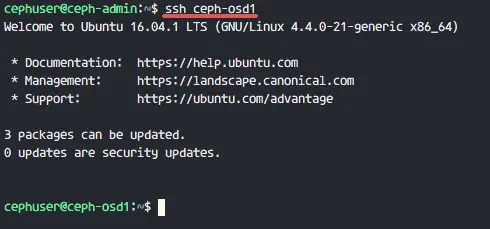
Now try to access the osd1 server from the ceph-admin node to test if the password-less login works.
ssh ceph-osd1
Step 3 - Configure the Ubuntu Firewall
For security reasons, we need to turn on the firewall on the servers. Preferably we use Ufw (Uncomplicated Firewall), the default Ubuntu firewall, to protect the system. In this step, we will enable ufw on all nodes, then open the ports needed by ceph-admin, ceph-mon and ceph-osd.
Login to the ceph-admin node and install the ufw packages.
ssh root@ceph-admin
sudo apt-get install -y ufw
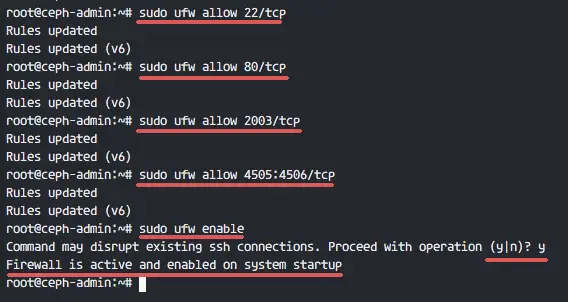
Open port 80, 2003 and 4505-4506, then reload firewalld.
sudo ufw allow 22/tcp
sudo ufw allow 80/tcp
sudo ufw allow 2003/tcp
sudo ufw allow 4505:4506/tcp
Start and enable ufw to start at boot time.
sudo ufw enable
From the ceph-admin node, login to the monitor node 'mon1' and install ufw.
ssh mon1
sudo apt-get install -y ufw
Open the ports for the ceph monitor node and start ufw.
sudo ufw allow 22/tcp
sudo ufw allow 6789/tcp
sudo ufw enable
Finally, open these ports on each osd node: ceph-osd1, ceph-osd2 and ceph-osd3 - port 6800-7300.
Login to each of the ceph-osd nodes from the ceph-admin, and install ufw.
ssh ceph-osd1
sudo apt-get install -y ufw
Open the ports on the osd nodes and reload firewalld.
sudo ufw allow 22/tcp
sudo ufw allow 6800:7300/tcp
sudo ufw enable
The ufw firewall configuration is finished.
Step 4 - Configure the Ceph OSD Nodes
In this tutorial, we have 3 OSD nodes, each of these nodes has two hard disk partitions.
- /dev/sda for root partition
- /dev/sdb is empty partition - 20GB
We will use /dev/sdb for the ceph disk. From the ceph-admin node, login to all OSD nodes and format the /dev/sdb partition with XFS file system.
ssh ceph-osd1
ssh ceph-osd2
ssh ceph-osd3
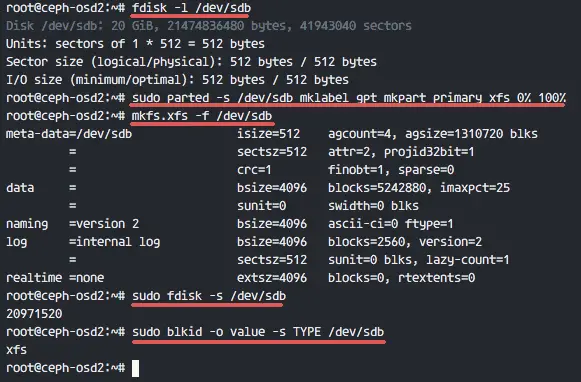
Check the partition scheme with the fdisk command.
sudo fdisk -l /dev/sdb
Format the /dev/sdb partition with an XFS filesystem and with a GPT partition table by using the parted command.
sudo parted -s /dev/sdb mklabel gpt mkpart primary xfs 0% 100%
Next, format the partition in XFS format with the mkfs command.
sudo mkfs.xfs -f /dev/sdb
Now check the partition, and you will see a XFS /dev/sdb partition.
sudo fdisk -s /dev/sdb
sudo blkid -o value -s TYPE /dev/sdb
Step 5 - Build the Ceph Cluster
In this step, we will install Ceph on all nodes from the ceph-admin. To get started, login to the ceph-admin node.
ssh root@ceph-admin
su - cephuser
Install ceph-deploy on ceph-admin node
In the first step we've already installed python and python-pip on to the system. Now we need to install the Ceph deployment tool 'ceph-deploy' from the pypi python repository.
Install ceph-deploy on the ceph-admin node with the pip command.
sudo pip install ceph-deploy
Note: Make sure all nodes are updated.
After the ceph-deploy tool has been installed, create a new directory for the Ceph cluster configuration.
Create a new Cluster
Create a new cluster directory.
mkdir cluster
cd cluster/
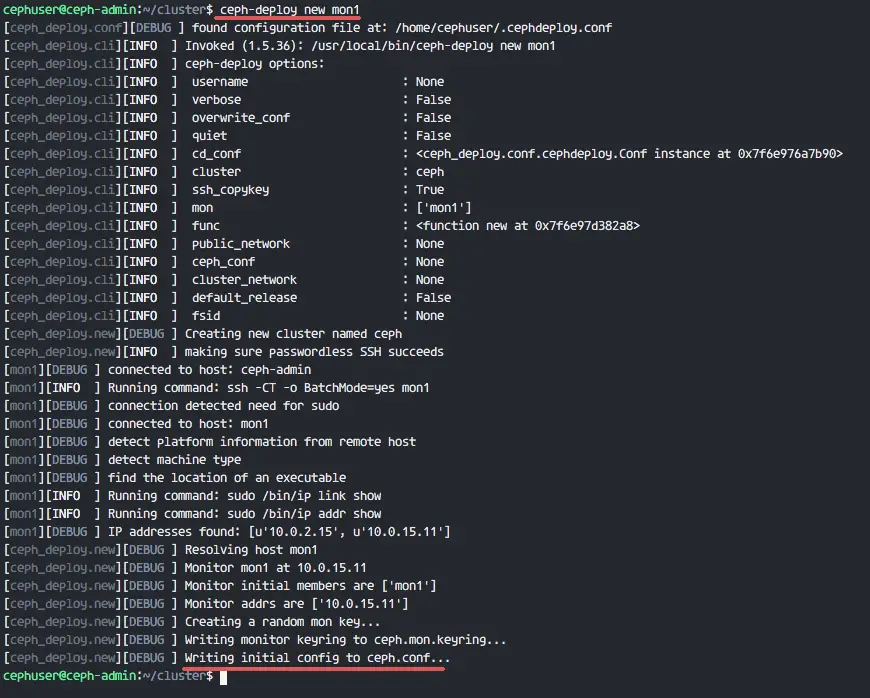
Next, create a new cluster with the 'ceph-deploy' command by defining the monitor node 'mon1'.
ceph-deploy new mon1
The command will generate the Ceph cluster configuration file 'ceph.conf' in cluster directory.
Edit the ceph.conf file with vim.
vim ceph.conf
Under the [global] block, paste the configuration below.
# Your network address
public network = 10.0.15.0/24
osd pool default size = 2
Save the file and exit the editor.
Install Ceph on All Nodes
Now install Ceph on all nodes from the ceph-admin node with a single command.
ceph-deploy install ceph-admin ceph-osd1 ceph-osd2 ceph-osd3 mon1
The command will automatically install Ceph on all nodes: mon1, osd1-3 and ceph-admin - The installation will take some time.
Now deploy the monitor node on the mon1 node.
ceph-deploy mon create-initial
The command will create a monitor key, check the key with this ceph command.
ceph-deploy gatherkeys mon1

Adding OSDS to the Cluster
After Ceph has been installed on all nodes, now we can add the OSD daemons to the cluster. OSD Daemons will create the data and journal partition on the disk /dev/sdb.
Check the available disk /dev/sdb on all osd nodes.
ceph-deploy disk list ceph-osd1 ceph-osd2 ceph-osd3

You will see /dev/sdb with the XFS format that we created before.
Next, delete the partition tables on all nodes with the zap option.
ceph-deploy disk zap ceph-osd1:/dev/sdb ceph-osd2:/dev/sdb ceph-osd3:/dev/sdb
The command will delete all data on /dev/sdb on the Ceph OSD nodes.
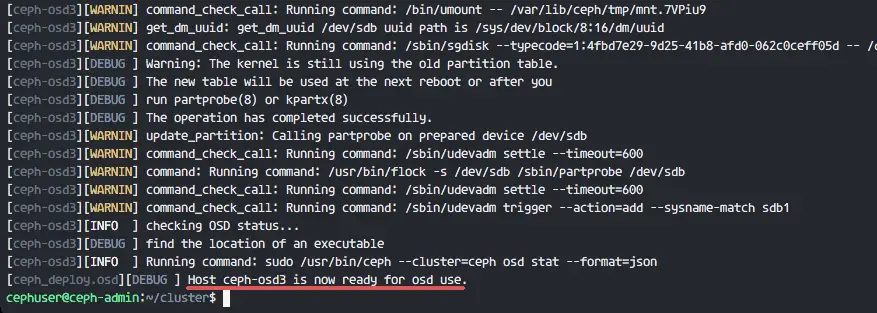
Now prepare all OSD nodes and ensure that there are no errors in the results.
ceph-deploy osd prepare ceph-osd1:/dev/sdb ceph-osd2:/dev/sdb ceph-osd3:/dev/sdb
When you see the ceph-osd1-3 is ready for OSD use in the result, then the command was successful.
Activate the OSD'S with the command below:
ceph-deploy osd activate ceph-osd1:/dev/sdb ceph-osd2:/dev/sdb ceph-osd3:/dev/sdb
Now you can check the sdb disk on OSDS nodes again.
ceph-deploy disk list ceph-osd1 ceph-osd2 ceph-osd3

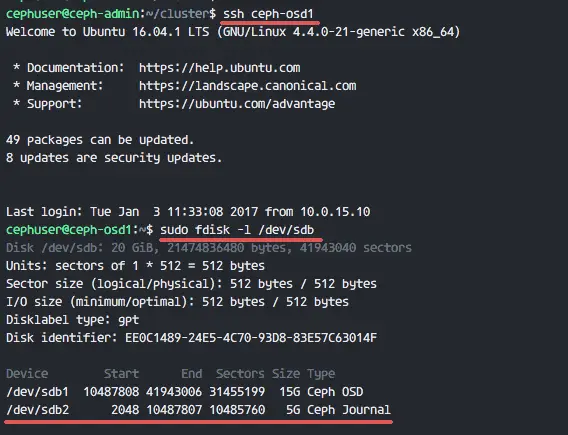
The result is that /dev/sdb has two partitions now:
- /dev/sdb1 - Ceph Data
- /dev/sdb2 - Ceph Journal
Or you check it directly on the OSD node.
ssh ceph-osd1
sudo fdisk -l /dev/sdb
Next, deploy the management-key to all associated nodes.
ceph-deploy admin ceph-admin mon1 ceph-osd1 ceph-osd2 ceph-osd3
Change the permission of the key file by running the command below on all nodes.
sudo chmod 644 /etc/ceph/ceph.client.admin.keyring
The Ceph Cluster on Ubuntu 16.04 has been created.
Step 6 - Testing Ceph
In step 4, we've installed and created a new Ceph cluster, and added OSDS nodes to the cluster. Now we should test the cluster to make sure that it works as intended.
From the ceph-admin node, log in to the Ceph monitor server 'mon1'.
ssh mon1
Run the command below to check the cluster health.
sudo ceph health
Now check the cluster status.
sudo ceph -s
You can see results below:
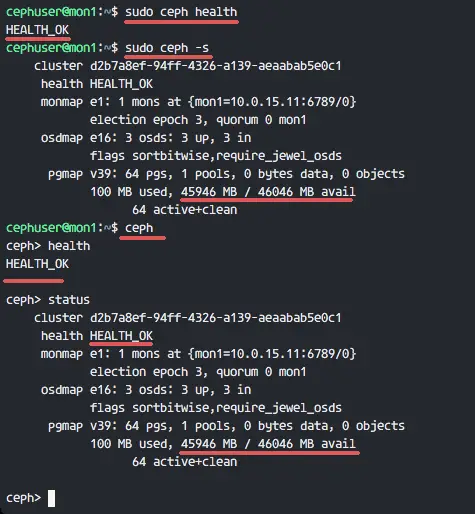
Make sure the Ceph health is OK and there is a monitor node 'mon1' with IP address '10.0.15.11'. There are 3 OSD servers and all are up and running, and there should be an available disk space of 45GB - 3x15GB Ceph Data OSD partition.
We build a new Ceph Cluster on Ubuntu 16.04 successfully.

