How to install OTRS (OpenSource Trouble Ticket System) on Ubuntu 16.04
On this page
- Step 1 - Install Apache and PostgreSQL
- Step 2 - Install Perl Modules
- Step 3 - Create New User for OTRS
- Step 4 - Create and Configure the Database
- Step 5 - Download and Configure OTRS
- Step 6 - Import the Sample Database
- Step 7 - Start OTRS
- Step 8 - Configure OTRS Cronjob
- Step 9 - Testing OTRS
- Step 10 - Troubleshooting
- Reference
OTRS or Open-source Ticket Request System is an open source ticketing software used for Customer Service, Help Desk, and IT Service Management. The software is written in Perl and javascript. It is a ticketing solution for companies and organizations that have to manage tickets, complaints, support request or other kinds of reports. OTRS supports several database systems including MySQL, PostgreSQL, Oracle and SQL Server it is a multiplatform software that can be installed on Windows and Linux.
In this tutorial, I will show you how to install and configure OTRS on Ubuntu 16.04. I will use PostgreSQL as the database for OTRS, and Apache web server as the web server.
Prerequisites
- Ubuntu 16.04.
- Min 2GB of Memory.
- Root privileges.
Step 1 - Install Apache and PostgreSQL
In this first step, we will install the Apache web server and PostgreSQL. We will use the latest versions from the ubuntu repository.
Login to your Ubuntu server with SSH:
ssh [email protected]
Update Ubuntu repository.
sudo apt-get update
Install Apache2 and a PostgreSQL with the apt:
sudo apt-get install -y apache2 libapache2-mod-perl2 postgresql
Then make sure that Apache and PostgreSQL are running by checking the server port.
netstat -plntu
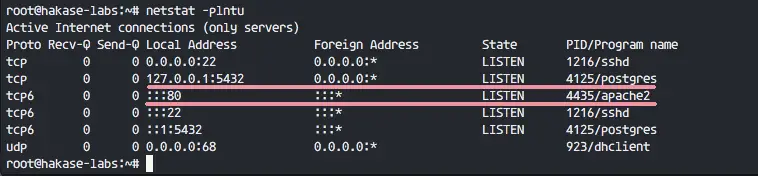
You will see port 80 is used by apache, and port 5432 used by postgresql database.
Step 2 - Install Perl Modules
OTRS is based on Perl, so we need to install some Perl modules that are required by OTRS.
Install perl modules for OTRS with this apt command:
sudo apt-get install -y libapache2-mod-perl2 libdbd-pg-perl libnet-dns-perl libnet-ldap-perl libio-socket-ssl-perl libpdf-api2-perl libsoap-lite-perl libgd-text-perl libgd-graph-perl libapache-dbi-perl libarchive-zip-perl libcrypt-eksblowfish-perl libcrypt-ssleay-perl libencode-hanextra-perl libjson-xs-perl libmail-imapclient-perl libtemplate-perl libtemplate-perl libtext-csv-xs-perl libxml-libxml-perl libxml-libxslt-perl libpdf-api2-simple-perl libyaml-libyaml-perl
When the installation is finished, we need to activate the Perl module for apache, then restart the apache service.
a2enmod perl
systemctl restart apache2
Next, check the apache module is loaded with the command below:
apachectl -M | sort
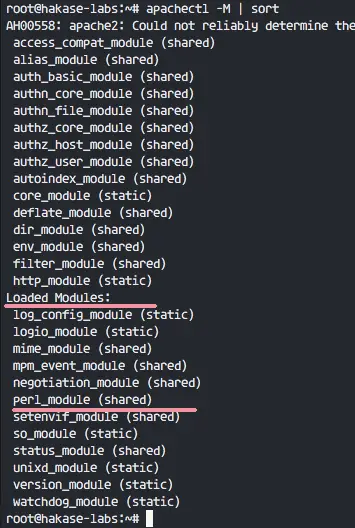
And you will see perl_module under 'Loaded Modules' section.
Step 3 - Create New User for OTRS
OTRS is a web based application and running under the apache web server. For best security, we need to run it under a normal user, not the root user.
Create a new user named 'otrs' with the useradd command below:
useradd -r -d /opt/otrs -c 'OTRS User' otrs
-r: make the user as a system account.
-d /opt/otrs: define home directory for new user on '/opt/otrs'.
-c: comment.
Next, add the otrs user to 'www-data' group, because apache is running under 'www-data' user and group.
usermod -a -G www-data otrs
Check that the otrs user is available in the '/etc/passwd' file.
grep -rin otrs /etc/passwd
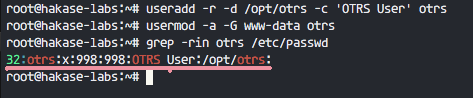
New user for OTRS is created.
Step 4 - Create and Configure the Database
In this section, we will create a new PostgreSQL database for the OTRS system and make some small changes in PostgreSQL database configuration.
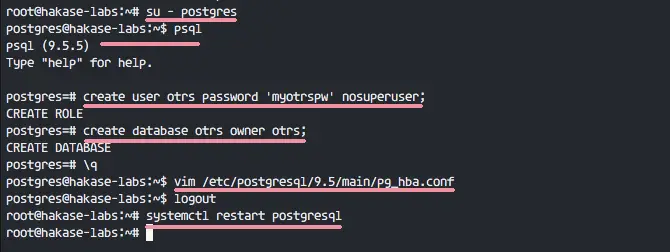
Login to the postgres user and access the PostgreSQL shell.
su - postgres
psql
Create a new role named 'otrs' with the password 'myotrspw' and the nosuperuser option.
create user otrs password 'myotrspw' nosuperuser;
Then create a new database named 'otrs' under the 'otrs' user privileges:
create database otrs owner otrs;
\q
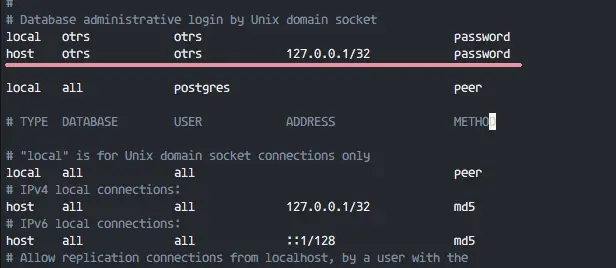
Next, edit the PostgreSQL configuration file for otrs role authentication.
vim /etc/postgresql/9.5/main/pg_hba.conf
Paste the cConfiguration below after line 84:
local   otrs            otrs                                    password
host    otrs            otrs            127.0.0.1/32            password
Save the file and exit vim.
Back to the root privileges with "exit" and restart PostgreSQL:
exit
systemctl restart postgresql
PostgreSQL is ready for the OTRS installation.
Step 5 - Download and Configure OTRS
In this tutorial, we will use the latest OTRS version that is available on the OTRS web site.
Go to the '/opt' directory and download OTRS 5.0 with the wget command:
cd /opt/
wget http://ftp.otrs.org/pub/otrs/otrs-5.0.16.tar.gz
Extract the otrs file, rename the directory and change owner of all otrs files and directories the 'otrs' user.
tar -xzvf otrs-5.0.16.tar.gz
mv otrs-5.0.16 otrs
chown -R otrs:otrs otrs
Next, we need to check the system and make sure it's ready for OTRS installation.
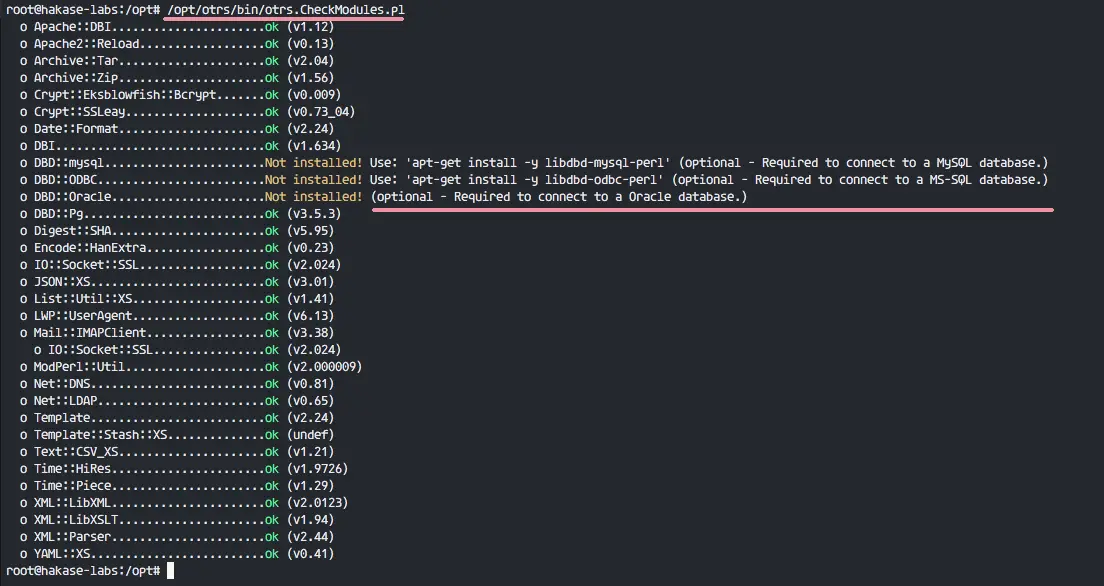
Check system packages for OTRS installation with the otrs script command below:
/opt/otrs/bin/otrs.CheckModules.pl
Make sure all results are ok, it means is our server ready for OTRS.
OTRS is downloaded, and our server is ready for the OTRS installation.
Next, go to the otrs directory and copy the configuration file.
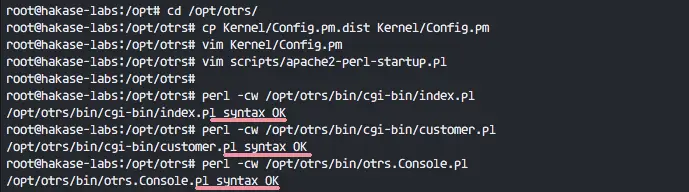
cd /opt/otrs/
cp Kernel/Config.pm.dist Kernel/Config.pm
Edit 'Config.pm' file with vim:
vim Kernel/Config.pm
Change the database password line 42:
$Self->{DatabasePw} = 'myotrspw';
Comment the MySQL database support line 45:
# $Self->{DatabaseDSN} = "DBI:mysql:database=$Self->{Database};host=$Self->{DatabaseHost};";
Uncomment PostgreSQL database support line 49:
$Self->{DatabaseDSN} = "DBI:Pg:dbname=$Self->{Database};";
Save the file and exit vim.
Then edit apache startup file to enable PostgreSQL support.
vim scripts/apache2-perl-startup.pl
Uncomment line 60 and 61:
# enable this if you use postgresql
use DBD::Pg ();
use Kernel::System::DB::postgresql;
Save the file and exit the editor.
Finally, check for any missing dependency and modules.
perl -cw /opt/otrs/bin/cgi-bin/index.pl
perl -cw /opt/otrs/bin/cgi-bin/customer.pl
perl -cw /opt/otrs/bin/otrs.Console.pl
You should see that the result is 'OK' asshown in the screenshot below:
Step 6 - Import the Sample Database
In this tutorial, we will use the sample database, it's available in the script directory. So we just need to import all sample databases and the schemes to the existing database created in step 4.
Login to the postgres user and go to the otrs directory.
su - postgres
cd /opt/otrs/
Insert database and table scheme with psql command as otrs user.
psql -U otrs -W -f scripts/database/otrs-schema.postgresql.sql otrs
psql -U otrs -W -f scripts/database/otrs-initial_insert.postgresql.sql otrs
psql -U otrs -W -f scripts/database/otrs-schema-post.postgresql.sql otrs
Type the database password 'myotrspw' when requested.

Step 7 - Start OTRS
Database and OTRS are configured, now we can start OTRS.
Set the permission of otrs file and directory to the www-data user and group.
/opt/otrs/bin/otrs.SetPermissions.pl --otrs-user=www-data --web-group=www-data
Then enable the otrs apache configuration by creating a new symbolic link of the file to the apache virtual host directory.
ln -s /opt/otrs/scripts/apache2-httpd.include.conf /etc/apache2/sites-available/otrs.conf
Enable otrs virtual host and restart apache.
a2ensite otrs
systemctl restart apache2
Make sure apache has no error.

Step 8 - Configure OTRS Cronjob
OTRS is installed and now running under apache web server, but we still need to configure the OTRS Cronjob.
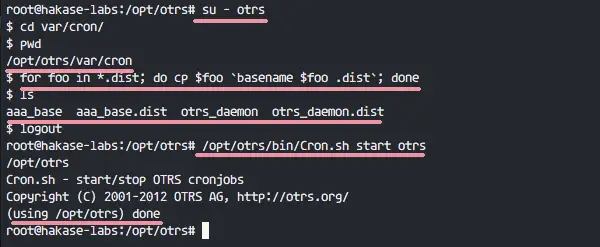
Login to the 'otrs' user, then go to the 'var/cron' directory as the otrs user.
su - otrs
cd var/cron/
pwd
Copy all cronjob .dist scripts with the command below:
for foo in *.dist; do cp $foo `basename $foo .dist`; done
Back to the root privilege with exit and then start the cron script as otrs user.
exit
/opt/otrs/bin/Cron.sh start otrs
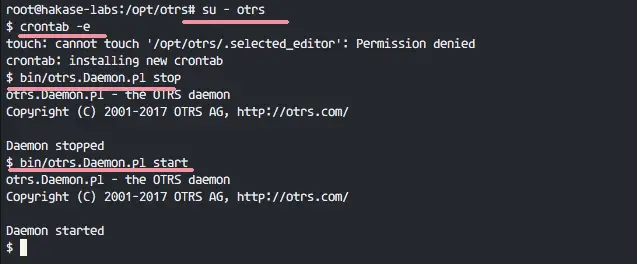
Next, manually create a new cronjob for PostMaster which fetches the emails. I'll configure it tp fetch emails every 2 minutes.
su - otrs
crontab -e
Paste the configuration below:
*/2 * * * * $HOME/bin/otrs.PostMasterMailbox.pl >> /dev/null
Save and exit.
Now stop otrs daemon and start it again.
bin/otrs.Daemon.pl stop
bin/otrs.Daemon.pl start
The OTRS installation and configuration is finished.
Step 9 - Testing OTRS
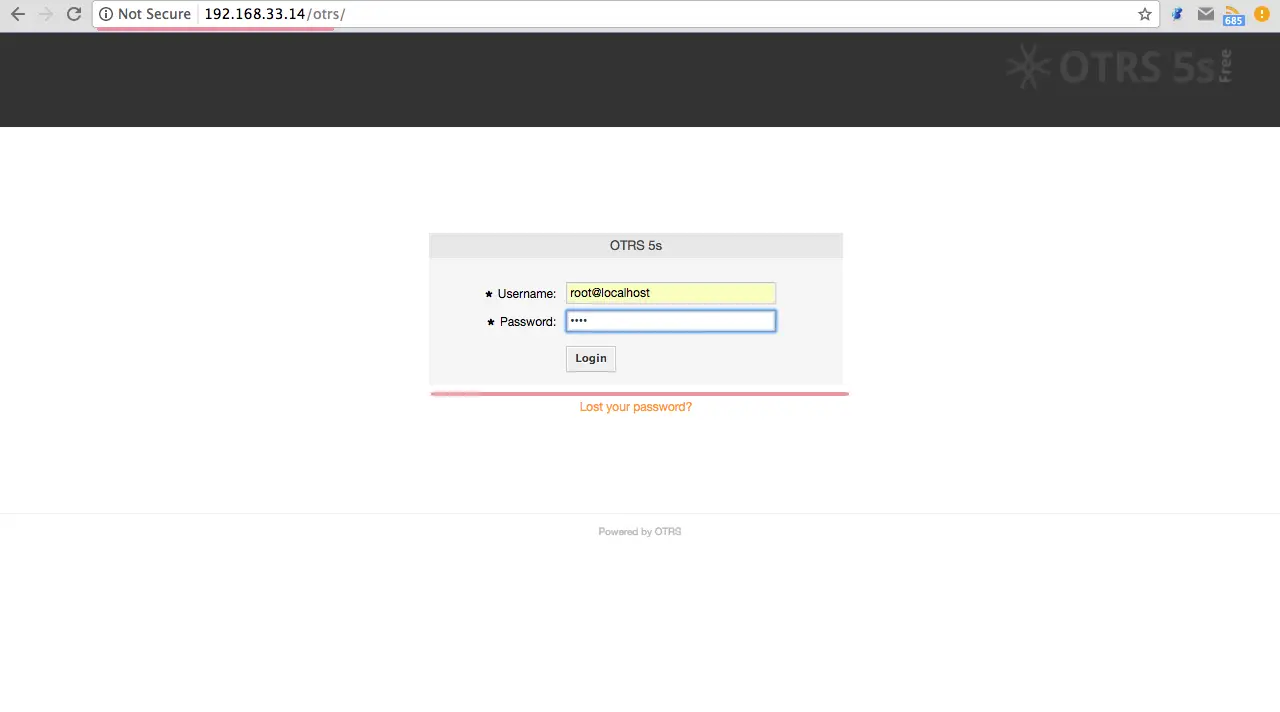
Open your web browser and type in your server IP address:
Login with default user 'root@localhost' and password 'root'.
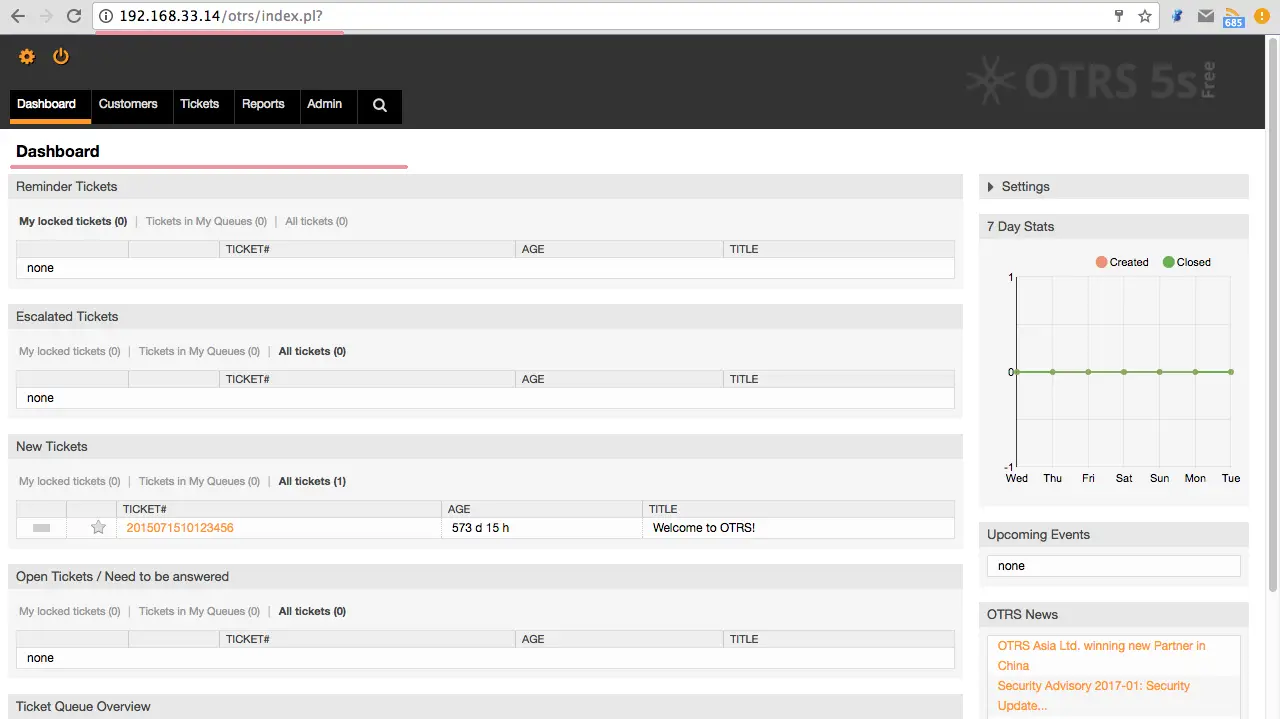
You will see a warning about using default root account. Click on that warning message to create new admin root user.
Below the admin page after login with different admin root user, and there is no error message again.
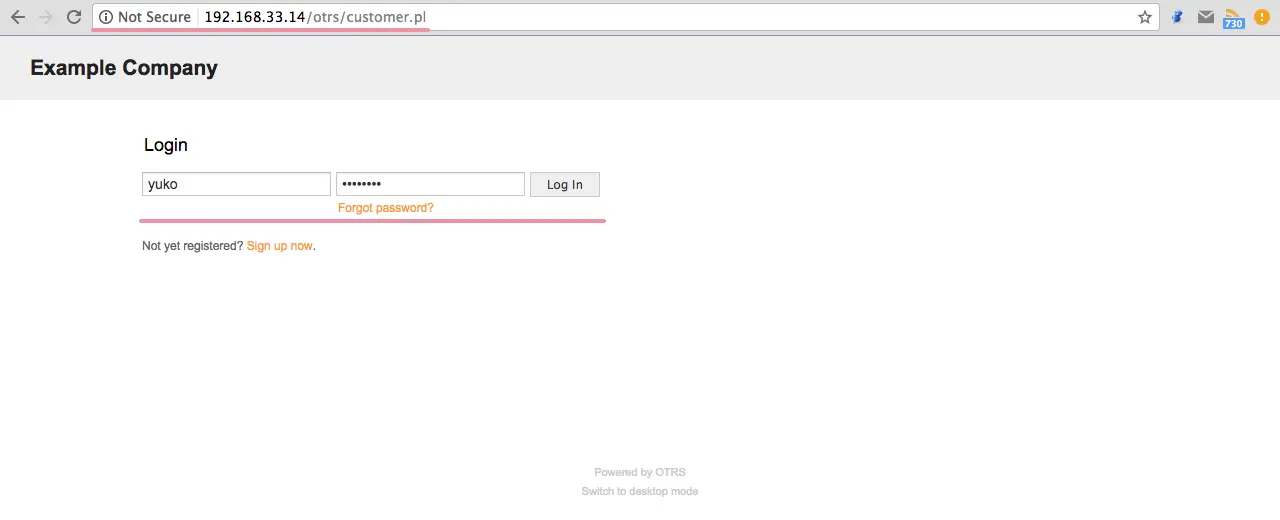
If you want to log in as Customer, you can use 'customer.pl'.
http://192.168.33.14/otrs/customer.pl
You will see the customer login page. Type in a customer username and password.
Below is the customer page for creating a new ticket.

Step 10 - Troubleshooting
If you still have an error like 'OTRS Daemon is not running', you can enable debugging in the OTRS daemon like this.
su - otrs
cd /opt/otrs/
Stop OTRS daemon:
bin/otrs.Daemon.pl stop
And start OTRS daemon with --debug option.
bin/otrs.Daemon.pl start --debug

