How to perform pattern search in files using Grep
In our first article on the grep command, we covered quite a few features the tool offers, including how you can use it to search only for words, search for two words, count lines containing matched word, and more. Aside from these, the tool provides some more easy-to-understand and useful features. In this article, we will discuss a handful of those.
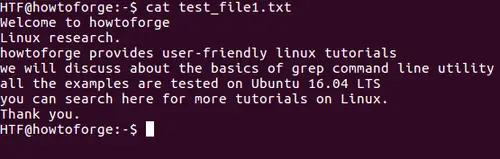
Please note that all the examples mentioned in this tutorial have been tested on Ubuntu 14.04LTS. Also, we will be using the following file (test_file1.txt) for all our grep related examples in this tutorial:
Case insensitive search with Grep
By default, grep is case sensitive, meaning, for example, it will treat 'ABC' and 'abc' separately. However, if you want your search to be case insensitive, you can use the -i command line option.
grep -i [string-to-be-searched] [filename]
For example:
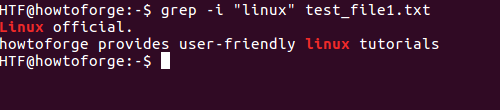
grep -i "linux" test_file1.txt
Note: Not only pattern (for example, 'linux' in above example), the grep man page says that the -i option also makes sure that case sensitivity for input files is also ignored. Here's the excerpt:
 -i, --ignore-case
 Ignore case distinctions in both the PATTERN and the input files. (-i is specified by POSIX.)
However, we could not reproduce input files-related behavior at our end.
Display certain non-matched lines with line containing matched string in Grep
Using the tool, you can also display a specified number of lines after, before, or around the line containing the matched string.
Use the -A command line option to print 'N' lines after the matched line.
$ grep -A N [string-to-be-searched] [filename]
For example:
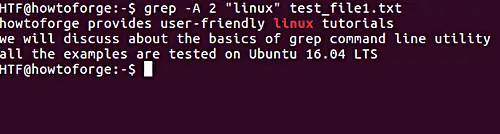
$ grep -A 2 "linux" test_file1.txt
Here is the output of above command
Similarly, the -B command line option is used to display lines before the matched line.
$ grep -B N [string-to-be-searched] [filename]
For example:
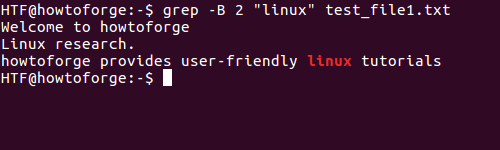
$ grep -B 2 "linux" test_file1.txt
Here is the output:
Lastly, to print lines around the matched line, use the -C command line option.
$ grep -C N [string-to-be-searched] [filename]
For example:
$ grep -C 2 "linux" test_file1.txt
Here is the output captured:

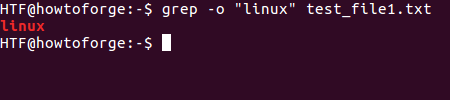
Only print matched strings in Grep
You are also allowed to only print the matched string on the standard output (instead of complete lines that get displayed by default). This feature can be accessed using the -o command line option.
$ grep -o [string-to-be-searched] [filename]
For example, if the requirement is to search a string "linux" in a file (but complete lines should not be printed), then we will use the following command.
$ grep -o "linux" [file-name]
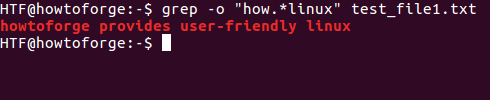
We can also use wildcard characters such as * and .* to grep more than one string. For example, If we want to grep a group of words starting from "how" and ending at "linux", then we can use the following command.
$ grep -o “how.*linux” [file-name]
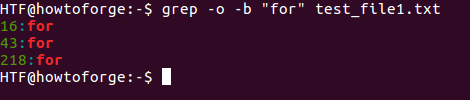
Display position in Grep
The grep command also allows you to display the byte-offset of the line in which the matched string occurs. This feature can be accessed using the -b command line option. But for the better usage of this option, you can use it with the -o command line option, which will display the exact position of the matched string.
$ grep -o -b [string-to-be-searched] [filename]
For example:
$ grep -o -b "for" test_file1.txt
Here is the output:
Conclusion
You might not require all these options every day, but you should at-least know about them as you never know when they might come handy. Grep becomes even more powerful when used with regular expression, but we'll leave that topic for some other day.

