How to install Moodle on ISPConfig
Moodle is a learning platform designed to provide educators, administrators, and learners with a single robust, secure and integrated system to create personalized learning environments.
It is used in many environments, starting from education, e-learnign to certification tests.
I'll personally use it every day to teach my students in an operating systems course and both teachers and students, love it.
In this tutorial, we will learn how to install it as a website inside ISPConfig, also with SSL certificate from let's Encrypt.
The tutorial is based on Debian 8, but it should work fine also with Ubuntu and other ISPConfig supported Distros.
So what are the prerequisite before start
- ISPConfig installed (this guide should be ok https://www.howtoforge.com/tutorial/perfect-server-debian-8-4-jessie-apache-bind-dovecot-ispconfig-3-1/ )
- DNS correctly configured to point your site (for our test we use course.servisys.it as reference of the example), this is necessary for the correct configuration of Let's Encrypt
1. Setup the DNS
In our example, we said, we'll use the domain course.servisys.it, so when we go to open our Moodle site we'll use https://course.servisys.it, so to configure the DNS. Go to the DNS tab in ISPConfig and edit you DNS to look something like the image below:

Attention to select an A record type. This is a very important step, because the A record is used by let's encrypt to generate the SSL certificate.
If you manage you DNS at an external provider, you will have to create the same record type there.
2. Create the website
Now go on Website tab in ISPConfig and create a new website, called like the previously DNS setup, editing the following options:
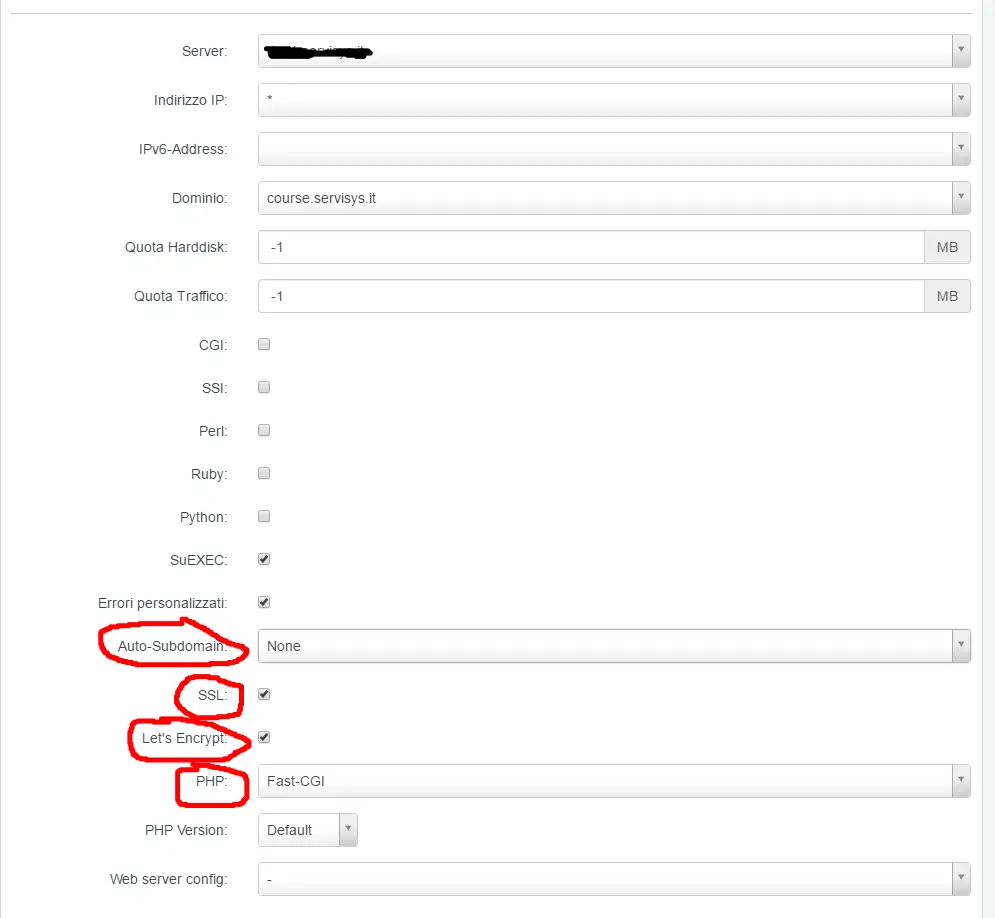
Auto-subdomain: in my case I've switched from www. to none because my domain is course.servisys.it. If you set it to www, the let's encrypt automation will try to generate a certificate for www.course.servisys.it and will fail. So pay attention to this option.
SSL: Enable for SSL.
Let's Encrypt: yes we wanna generate a certificate with this.
PHP: Fastcgi is working fine for me.
Now click save and wait, that certificate will be issued correctly.
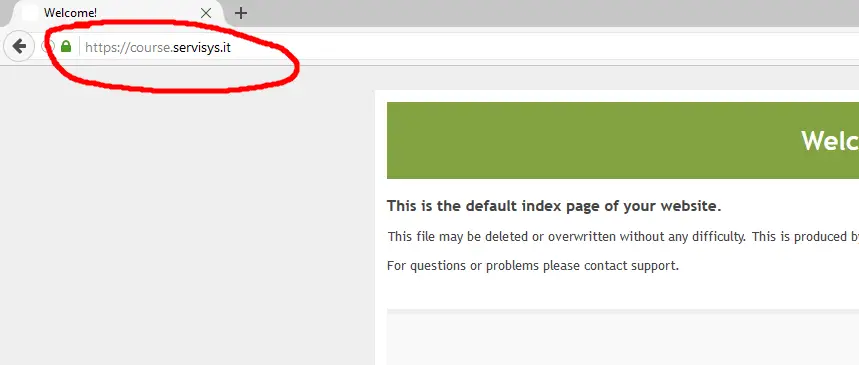
Wait some minutes and try to open you website, in my case https://course.servisys.it, if all it's ok you'll see the green bar!
3. Database creation
Let's create a Database User and Database to use with moodle.
Go to the sites tab, then to Database users > new user.
Select the client associated with it, choose a name and a password, something like this:
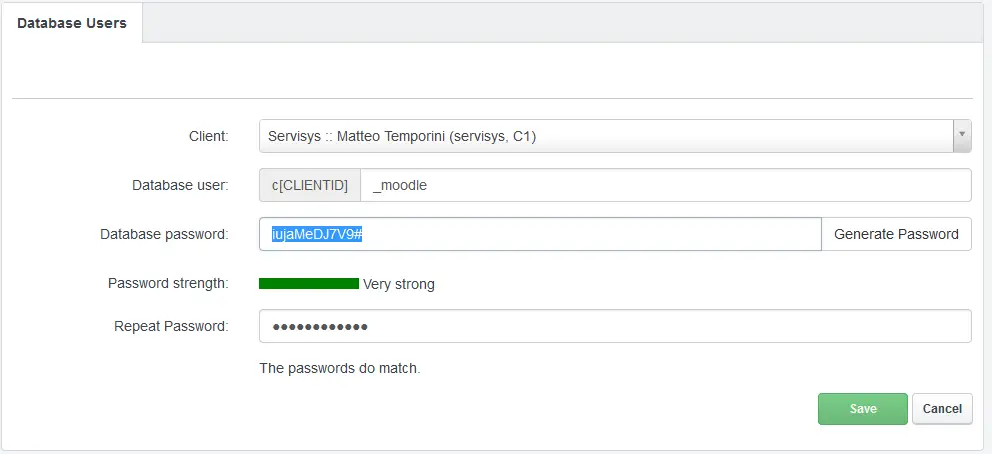
Take note of:
- Database user
- Password
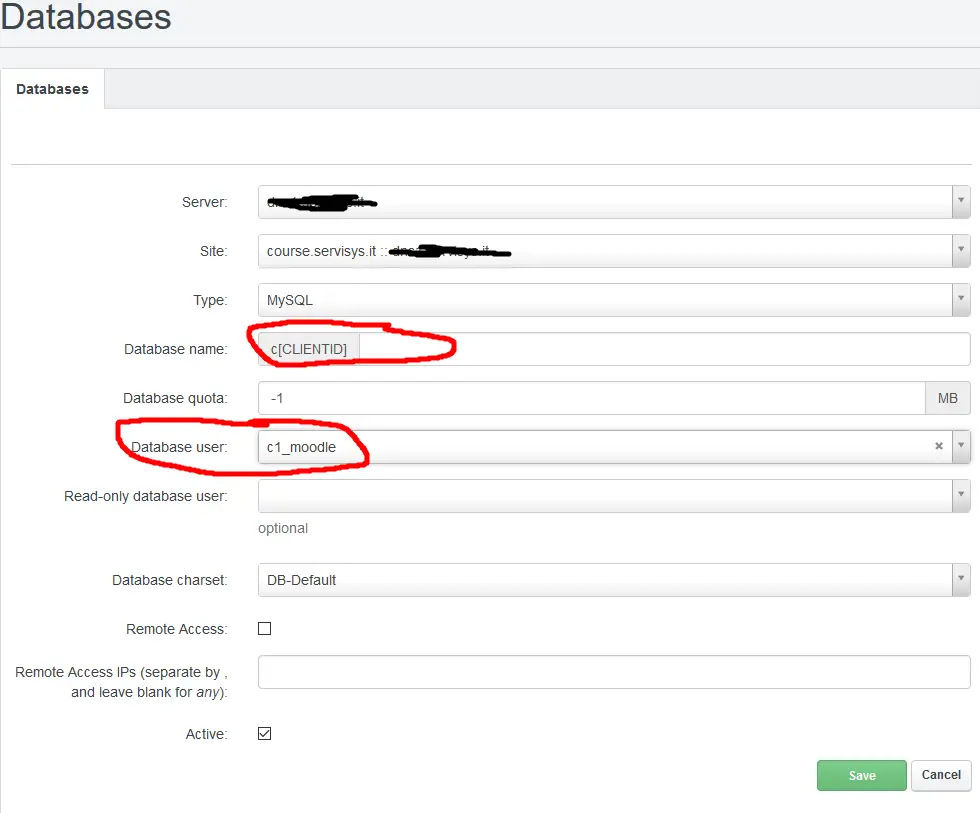
Go back on tab Sites, and now choose Databases, then Add New Database, select your site (courses.serverisy.it), choose a Database name and select the previously created user, and click save. Something like the screenshot below:
4. Modify MySql configuration
The default mysql configuration, need some little modification to work with Moodle. You have to edit the file:
nano /etc/mysql/my.cnf
and at the beginning, add the red line
[client]
port = 3306
socket = /var/run/mysqld/mysqld.sock
default-character-set = utf8mb4
always in the same file, go a bit down, before [mysqldump] statmente begins, and again add the redlines
#Moodle - Matteo
innodb_file_format = Barracuda
innodb_file_per_table = 1
innodb_large_prefix

character-set-client-handshake = FALSE
character-set-server = utf8mb4
collation-server = utf8mb4_unicode_ci

[mysqldump]
quick
quote-names
max_allowed_packet = 16M
These modifications are needed because they are prerequisites to install Moodle, or during setup it won't let you go on on installation.
After that, restart MySql with:
/etc/init.d/mysql restart
5. Preparing install of Moodle
We are now ready to prepare the installation of Moodle, we'll do that from command line because is faster than FTP :)
Go on this page and select the installation wich suits your needs, in a production environment i'll suggest you to use the stable version. At the time we are writing, it is the 3.2.2.
So from command line go on the web directory of your site, in my case, these are the commands:
cd /var/www/course.servisys.it/web
rm index.html
wget https://download.moodle.org/download.php/direct/stable32/moodle-3.2.2.tgz
tar -zxvf moodle-3.2.2.tgz
cp -pr moodle/* ./
cp -pr moodle/.* ./
when you use the cd command, obviouslly change it to the name of your site.
We have removed the default index.html page, as we want that the first page serverd will be index.php.
After that, we need to fix the ownership of files, to fit our users and group, to know wich is correct for you simple launch an
ls -al
you should see lot of files, and some of the contina user web* client*, in my case:
drwxr-xr-x 18 1005 1005 4096 mar 11 22:16 report
drwxr-xr-x 24 1005 1005 4096 mar 11 22:16 repository
-rwxr-xr-- 1 web42 client1 14 apr 13 17:25 robots.txt
drwxr-xr-x 2 1005 1005 4096 mar 11 22:16 rss
drwxr-xr-x 7 1005 1005 4096 mar 11 22:16 search
drwxr-xr-x 2 web42 client1 4096 apr 13 17:25 stats
drwxr-xr-x 5 1005 1005 4096 mar 11 22:16 tag
-rw-r--r-- 1 1005 1005 615 mar 11 22:16 tags.txt
drwxr-xr-x 6 1005 1005 4096 mar 11 22:16 theme
as you can see, my user is web42 and my group is client1, so now fix the permission with:
chown -R web42:client1 *
chown -R web42:client1 .*
and fix back persmission of dirs
chown root:root stats/ error/
then we go to create a moodledata directory not publically accessible, to do so, simpli create it in the private directory.
mkdir ../private/moodledata
chown -R web42:client1 ../private/moodledata
6. Moodle Web Installation
Here we go! Now we can start the last step of the installation, open your browser, you should get a page similar to this when you open the URL of the website:
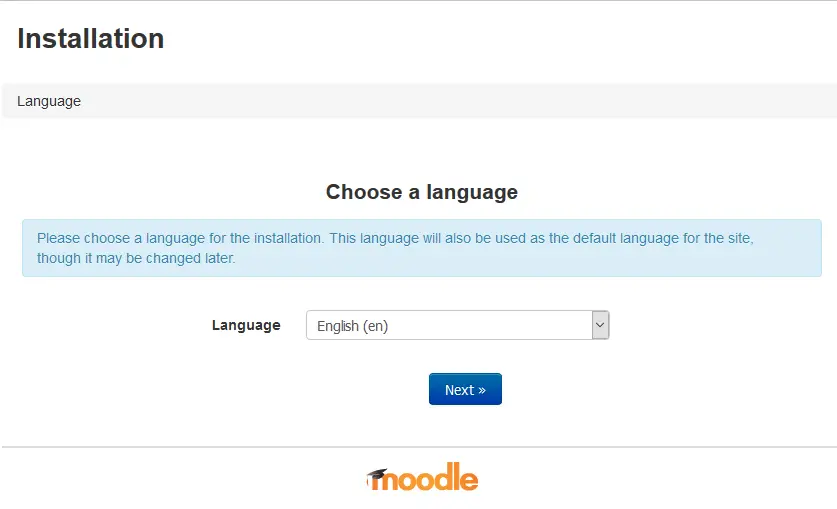
Select language and click next.
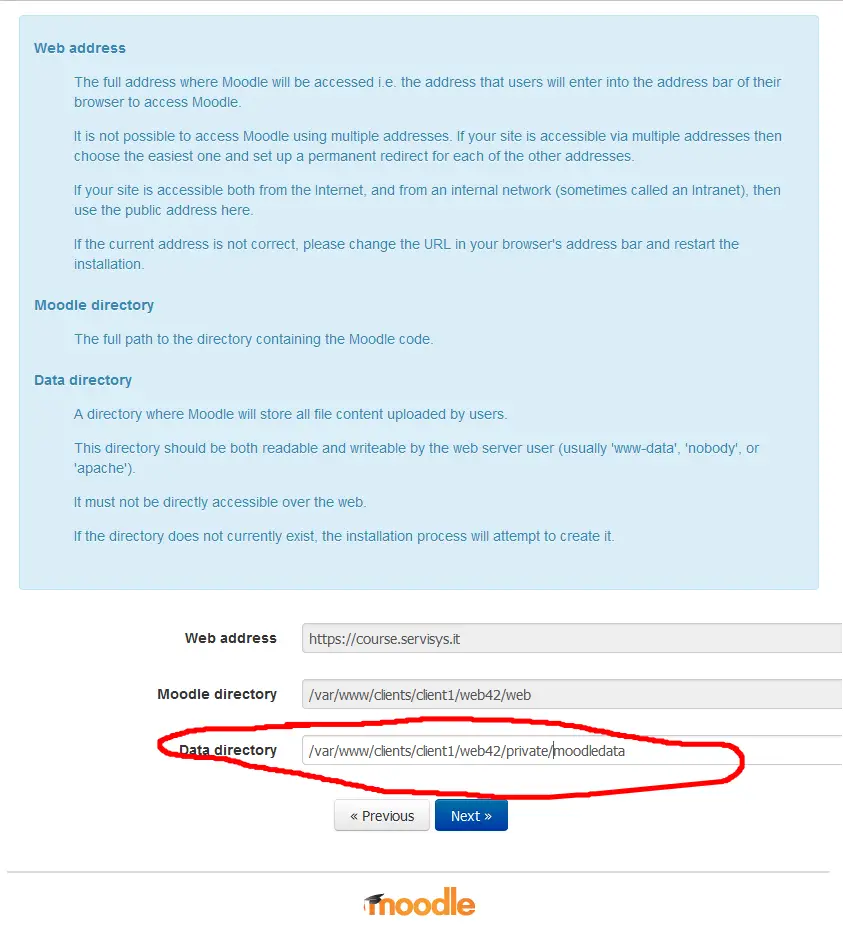
The default data directory for Moodle will show up as /var/www/clients/client1/web42/moodledata but our directory is in the private folder, so alter the path so that it uses the moodle folder in the private folder instead: /var/www/clients/client1/web42/private/moodledata
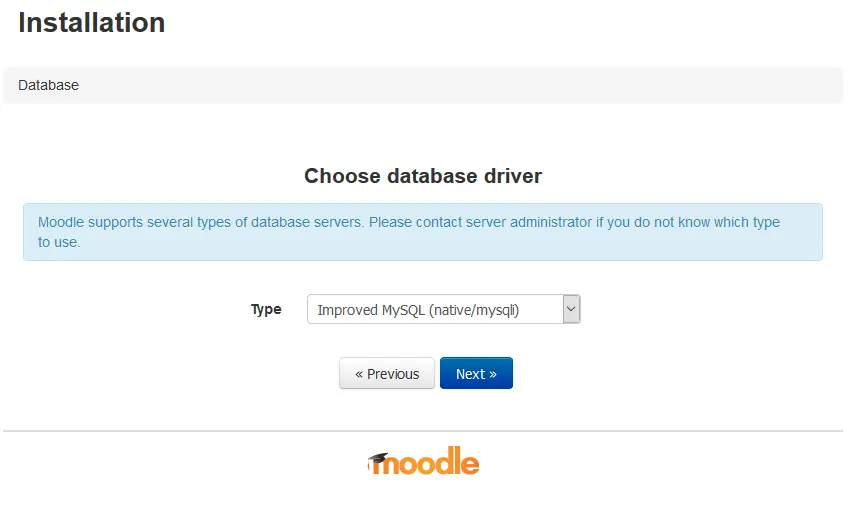
Then select Database Type, in my case MySql.
Then complete with MySql Data.
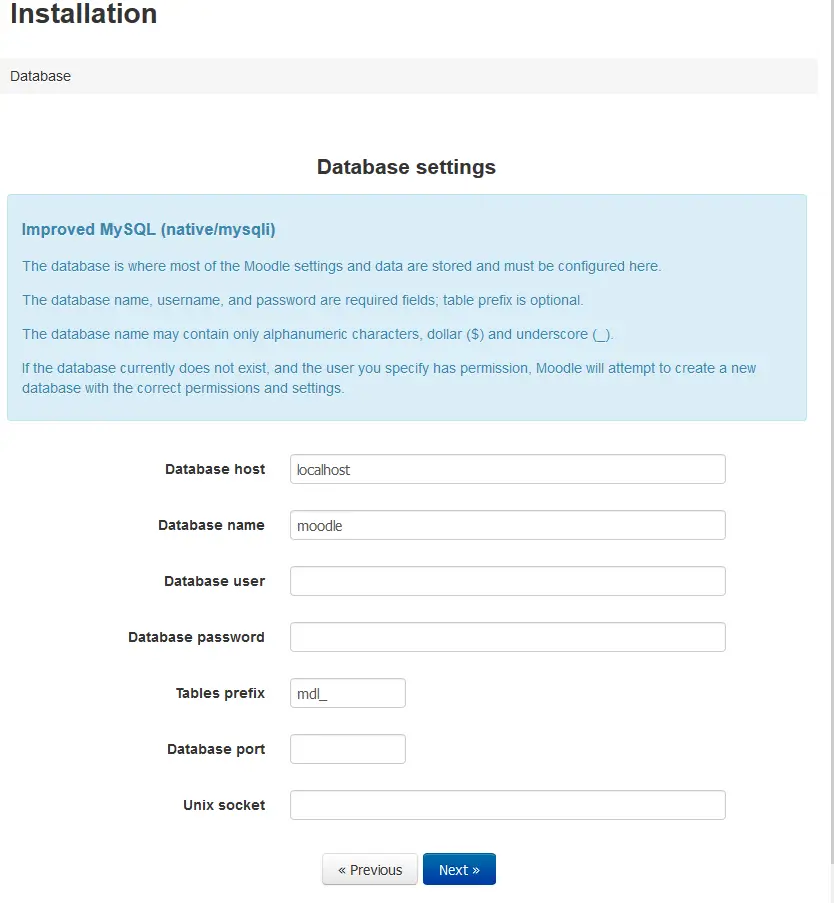
Database host: localhost
Database name: c1_moodle
Database user: c1_moodle
Database password: the one you choose during Datbase User creation
Table prefix: mdl_
Database port:
Unix socket:
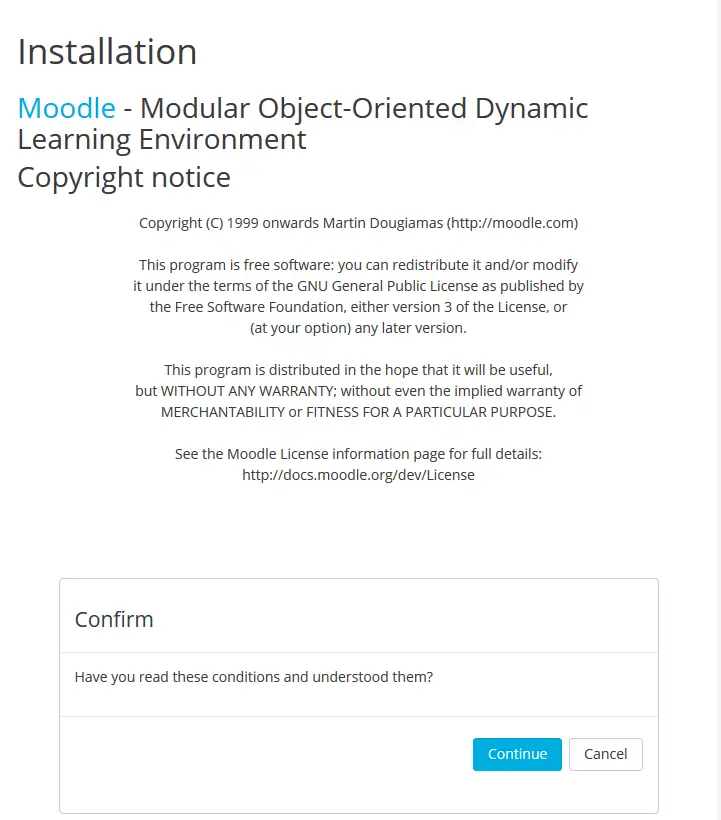
Now click and wait, after some seconds you should see the conditions, that you should accept.
After that, Moodile will perform some system checks to test that everything is working fine.
All should be green right now!!!
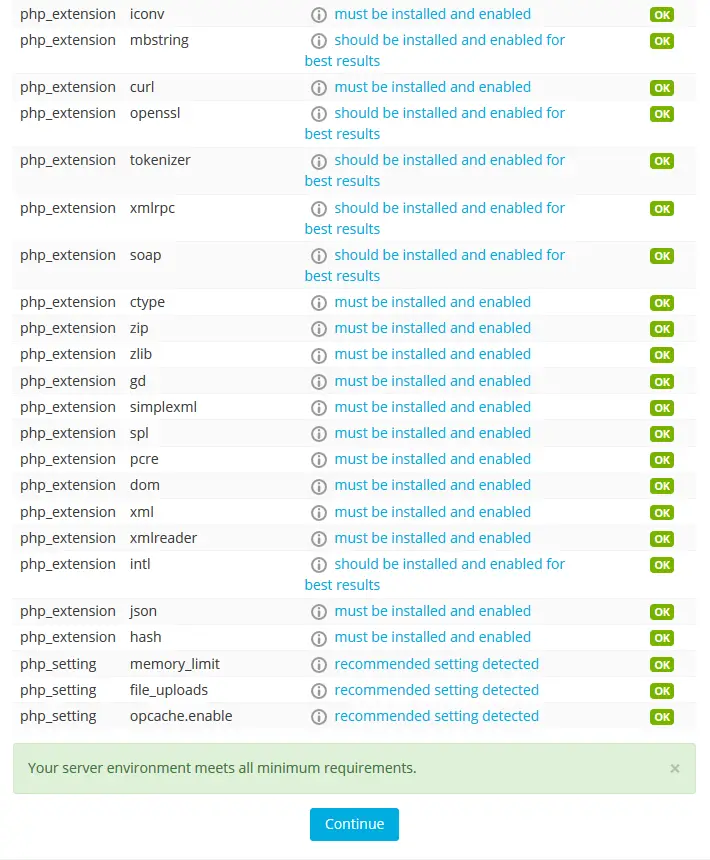
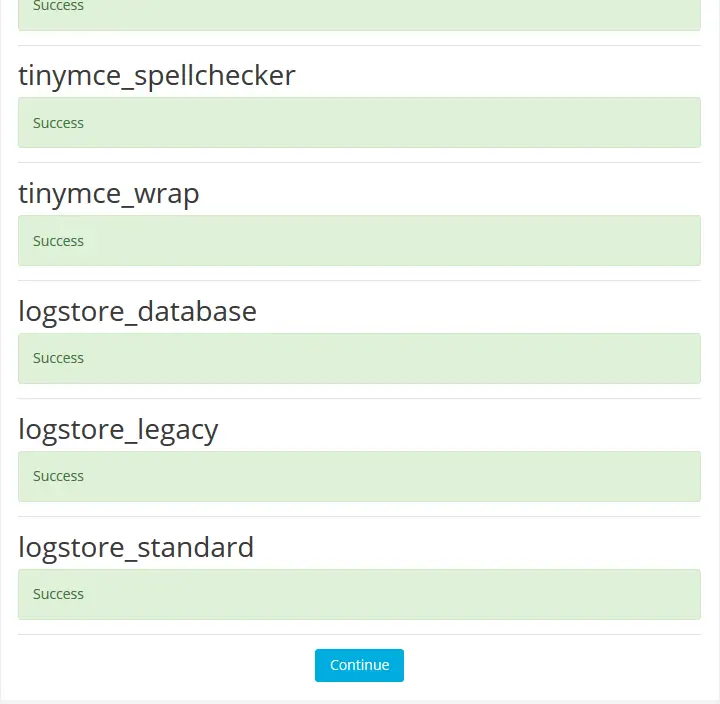
Click Continue and other checks will come up....
Click continue fill the data of admin user (Name, First, user password..).
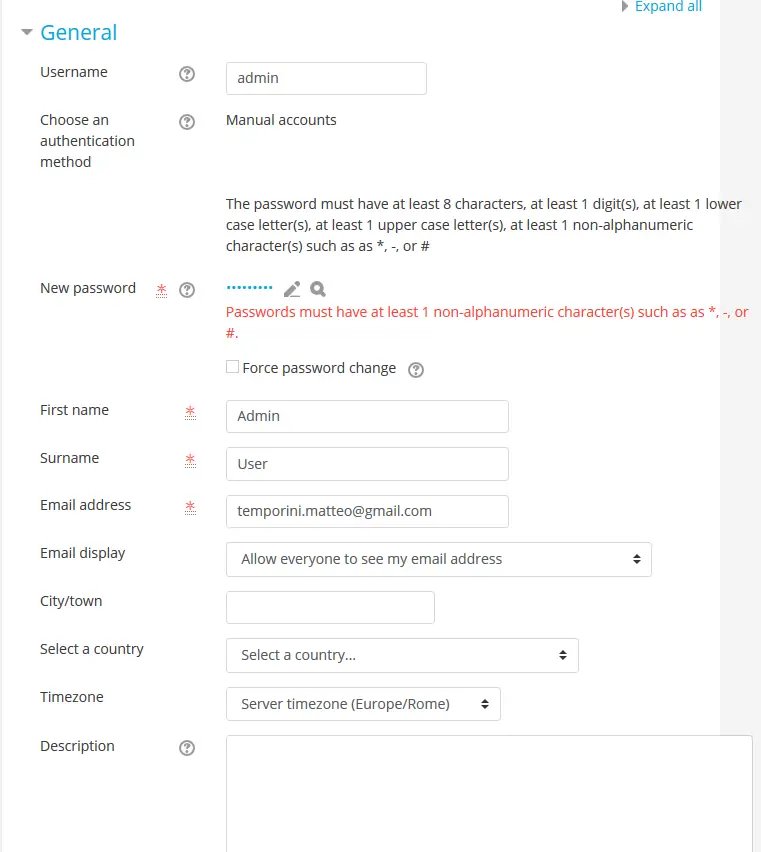
You should fill in the data of your new learning and testing platform :)
Enjoy your courses!

