Download Files with Wget on the Linux Shell - Explanation and Examples
On this page
- About wget
- How does the wget command work?
- 1. How to download a file using wget
- 2. How to resume your downloads using wget
- 3. How to download a file with a different filename
- 4. How to redirect your wget output to a log file
- 5. How to make wget download files in background
- 6. How to limit downloading speed while using wget
- 7. How to change wget read timeout
- 8. How to change number of retries
- 9. How to make wget display debug information
- 10. How to modify wget's download progress meter
- Conclusion
Are you a Linux newbie? Are you looking for a command-line tool that can help you download files from the Web? If your answer to both these questions is yes, then you've come to the right place, as in this tutorial, we will discuss the basic usage of the WGET command-line utility.
Please note that all the examples and instructions mentioned in this article have been tested on Ubuntu 18.04 LTS, Debian 10 and CentOS 8.
About wget
Wget is basically a command line tool that allows for non-interactive download of files from the Internet. By non-interactive, it means that the utility can work in the background, while the user is not logged on. Supported protocols include HTTP, HTTPS, and FTP.
Wget also allows retrieval through HTTP proxies, and "can follow links in HTML, XHTML, and CSS pages, to create local versions of remote web sites, fully recreating the directory structure of the original site."
How does the wget command work?
The following sections explain the basic usage of the Wget tool, as well as some of its features.
1. How to download a file using wget
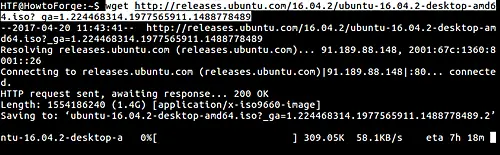
The file the tool downloads gets saved in user's current working directory. Here's how you can use Wget to download a file:
wget [URL]
Here is an example screenshot:
2. How to resume your downloads using wget
In case your ongoing download gets interrupted due to bad internet connection or any other reason, you can have it resumed by running the same command again but with the -c command line option:
wget -c [URL]
Here is an example screenshot (see the second command):
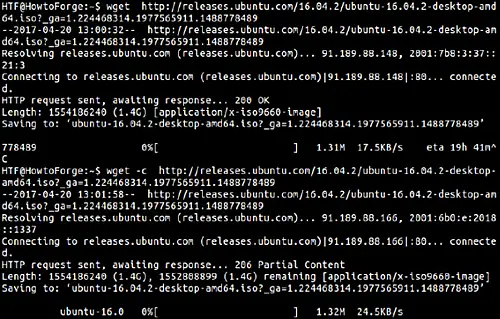
So you can see that when the wget command was run for the second time with -c option, the download started from the same point where it was halted. Note that this option also works when you want to finish up a download started by a program other than wget.
3. How to download a file with a different filename
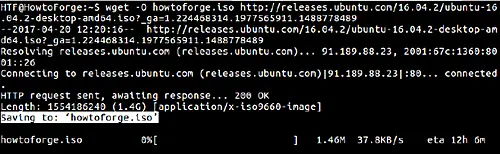
By default, wget saves the file with the same name it carries on the Web. But if you want, you can also save the downloaded file with a different filename. This feature can be accessed using the -O (upper-case) command line option.
$ wget -O [file-name] [URL]
Here is an example screenshot:
4. How to redirect your wget output to a log file
If you want, you can also redirect the messages/information wget produces on stdout to a log file. This can be done using the -o (lower-case) command line option.
$ wget -o [log-filename] [URL]
Here is an example snapshot:

As you can see in the above screenshot, no output or messages are displayed on the standard output. This is because all the messages are being redirected to a log file named ‘abc.log’.
You can see the log file using cat command.
$ cat abc.log
Here is what the log file contained in our case:

5. How to make wget download files in background
Using the tool, you can download files in background. The downloaded file will be saved with name ‘wget-log.’ This feature can be accessed using the -b command line option.
$ wget -b [URL]
Here is an example:

Note that you can change the file name by using the -o (lower-case) option we've explained earlier.
6. How to limit downloading speed while using wget
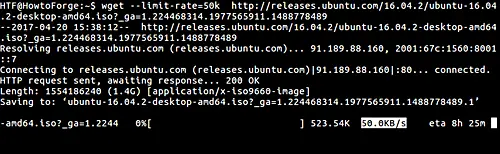
While using wget, you can also limit the downloading speed. This can be done using the -limit-rate option, which requires a value signifying the amount in terms of bytes per second. The amount could be in bytes, kilobytes with the 'k' suffix, or megabytes with the 'm' suffix.
$ wget –limit-rate=[amount] [URL]
Here is an example that limits the wget download speed to 50k:
7. How to change wget read timeout
Read timeout is the amount of time (in seconds) for which wget checks for data (in case no data is being received) before restarting the download. By default read timeout is 900 seconds but you can change this by using the –read-timeout option.
$ wget –read-timeout=[time in seconds] [URL]
Here is an example:

8. How to change number of retries
Whenever your download is interrupted due to bad internet connection or any other error, the tool tries to resume the download by itself. By default, the utility tries 20 times and then stops. But if you want to increase or decrease the number of tries, you can do it by using the -t command line option.
$ wget -t [no.-of-retries-you want] [URL]
Here is an example:
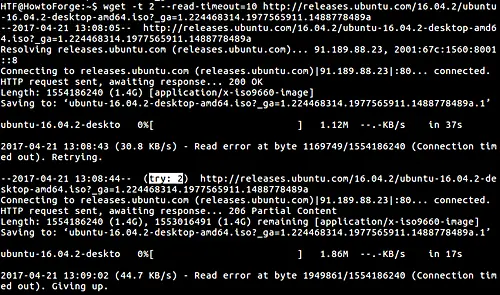
As you can see in the above screenshot, wget gave up after two tries.
NOTE: This feature comes with the exception of fatal errors like "connection refused" or "not found" (404), which are not retried.
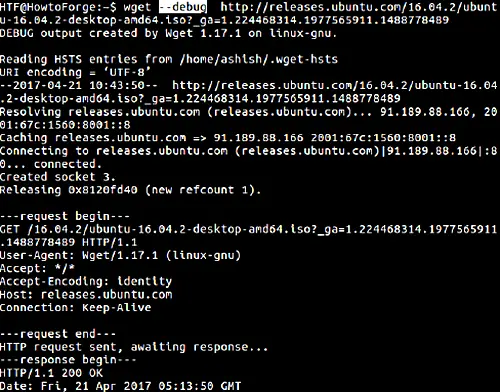
9. How to make wget display debug information
If you want, you can also make the wget command display additional information related to the download process. This information is useful for debugging purposes if the tool isn't working properly. The feature can be accessed using the --debug or -d command line option.
$ wget –debug [URL]
Here is an example:
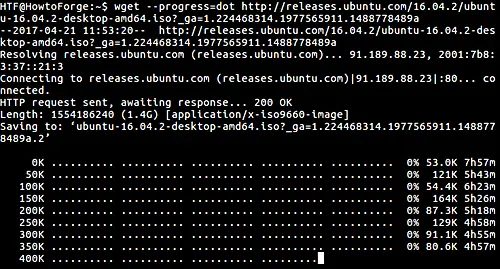
10. How to modify wget's download progress meter
If you want, you can also modify the download progress indicator wget displays in output. There are two types of progress indicators: bar (which is default) and dot. However, if the output is not being displayed on terminal (TTY) then dot indicator is used as default.
The --progress option lets you choose the type of indicator incase you want to override the default behavior. For example:
$ wget --progress=dot [URL]
Here is an example screenshot:
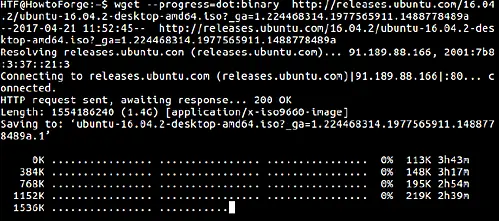
Moving on, depending on the size of the file you are downloading, you can also adjust the way download progress meter is displayed.
$ wget -–progress=[type]:[parameter]
'type' can be bar or dot whereas 'parameter' can be default, binary, mega or giga.
For example, if you want to set your ‘type’ as dot and ‘parameter’ as binary, then you can use the following command:
$ wget -–progress=dot:binary [URL]
Here is an example:
Note that the parameter you opt for ( binary, mega or giga) usually depends on the size of the file being downloaded. Here's what the man page says about these styles:
With the "default" style each dot represents 1K, there are ten dots in a cluster and 50 dots in a
line. The "binary" style has a more "computer"-like orientation---8K dots, 16-dots clusters and 48 dots per line (which makes for 384K lines). The "mega" style is suitable for downloading large files---each dot represents 64K retrieved, there are eight dots in a cluster, and 48 dots on each line (so each line contains 3M). If "mega" is not enough then you can use the "giga" style---each dot represents 1M retrieved, there are eight dots in a cluster, and 32 dots on each line (so each line contains 32M).
Conclusion
We've just scratched the surface here as wget offers plenty of more command line options. However, the ones we've discussed here should be enough to get you started. Do try these, and in case of any doubt or query, refer to the command's man page.

