How to Enable SSL and Remote Connections for MySQL on CentOS 7
MySQL is an open source relational database system that works on many Operating Systems including Windows, Linux, MacOS and FreeBSD. It is probably the most popular OpenSource RDBMS and a central component of the LAMP and LEMP Stacks. There are many applications that depend on MySQL like Wordpress, Joomla, TYPO3, phpBB and many more.
In this tutorial, I will show you step by step to configure MySQL securely for remote connections. When you need to access MySQL remotely, it's either required to use a VPN as MySQL does not encrypt the transferred data or you can configure MySQL to use SSL, as I will show you in this tutorial. In this configuration, only users with the correct SSL certificate files are allowed to connect to the MySQL server, and the traffic is encrypted. We will install the latest version of MySQL, and then configure SSL for the remote connection. For the base system, I will use a CentOS 7 server.
What we will do:
- Install MySQL.
- Configure the MySQL Root Password.
- Generate New Self-signed SSL Certificate Files.
- Enable SSL for MySQL.
- Enable Remote Connection.
- Testing.
Prerequisite
- CentOS 7 server
- Root privileges
Step 1 - Install MySQL
In this tutorial, we will use MySQL 5.7, the latest version at this time. It's installed from the MySQL repository, so we have to add a new CentOS repository to the system first.
Add the new repository for MySQL with yum command below.
yum localinstall https://dev.mysql.com/get/mysql57-community-release-el7-9.noarch.rpm
You will be asked for installing a new package, type 'y' and press 'Enter' to confirm.
Now you can the install MySQL latest version 5.7 to the server like this:
yum -y install mysql-community-server
When the installation has been completed, start the MySQL service and enable it to run automatically at the boot time with the systemctl command.
systemctl start mysqld
systemctl enable mysqld
Make sure MySQL is running by checking the port used by MySQL (3306). Check it with the netstat command below.
netstat -plntu
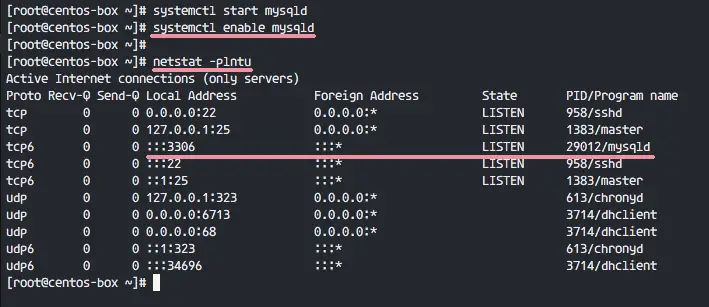
MySQL has been installed on CentOS 7 from the MySQL repository.
Step 2 - Configure the MySQL Root Password
By default, MySQL 5.7 generates a default root password for you when starting the service the first time. The password is stored in the MySQL log file '/var/log/mysqld.log'.
To see the default MySQL root password, you can use the grep command below.
grep 'temporary' /var/log/mysqld.log
You will see a result similar to the one below, my default password is 'wxtX8Te&Uh1K'.
A temporary password is generated for root@localhost: wxtX8Te&Uh1K
Connect to the MySQL shell with the default password and the replace the password with your own password.
mysql -u root -p
TYPE IN DEFAULT PASSWORD
Now replace the default password with your own password. In this tutorial, I will use 'Hakase-labs123@' as the new MySQL root password. Run MySQL queries below.
ALTER USER 'root'@'localhost' IDENTIFIED BY 'Hakase-labs123@';
flush privileges;
exit;

Now you can connect again with the new password 'Hakase-labs123@'.
mysql -u root -p
TYPE NEW PASSWORD 'Hakase-labs123@'
Step 3 - Generate New Self-Signed Certificate Files
By default, MySQL 5.7 has its own SSL certificate files in the '/var/lib/mysql' directory. But in this tutorial, I will show you how to generate your own SSL Certificate files with OpenSSL, and then configure them with MySQL.
In this step, we will generate new self-signed certificate files. We need 3 certificates, CA Certificate, Server Certificate and Key, Client Certificate and Key. We will create them with OpenSSL.
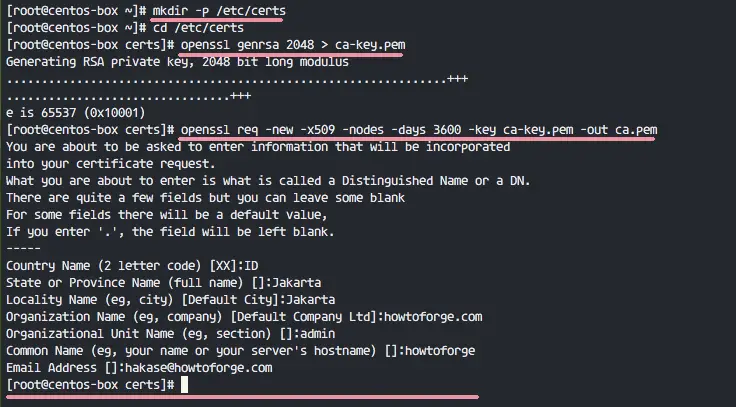
Create a new directory for the SSL certificate files '/etc/certs/' and go to that directory.
mkdir -p /etc/certs
cd /etc/certs
Generate new CA certificate ca.pem file.
openssl genrsa 2048 > ca-key.pem
openssl req -new -x509 -nodes -days 3600 -key ca-key.pem -out ca.pem
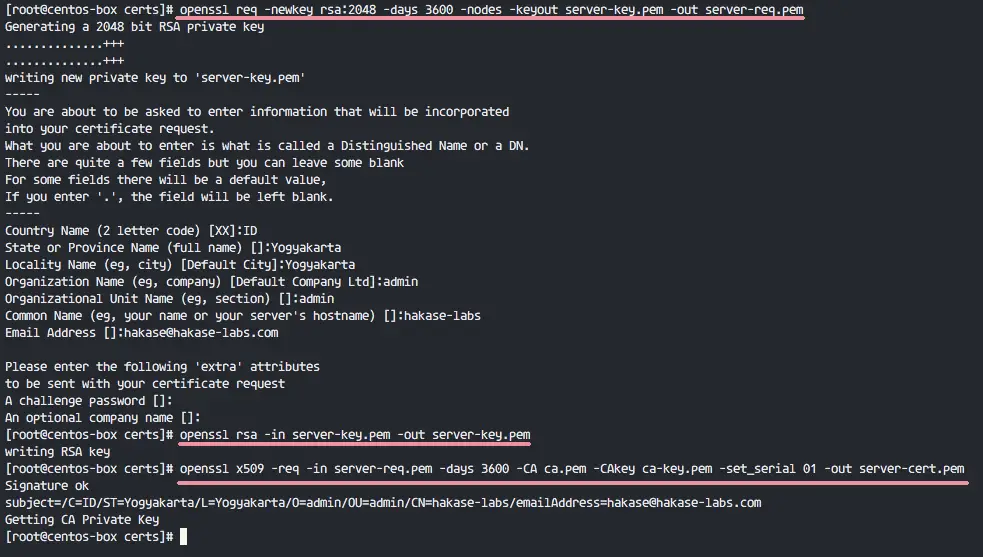
Next, we have to create the server-side certificates. Create new server certificate server-cert.pem and server-key.pem files. Generate new certificate files, remove the passphrase and sign them with the CA certificate.
openssl req -newkey rsa:2048 -days 3600 -nodes -keyout server-key.pem -out server-req.pem
openssl rsa -in server-key.pem -out server-key.pem
openssl x509 -req -in server-req.pem -days 3600 -CA ca.pem -CAkey ca-key.pem -set_serial 01 -out server-cert.pem
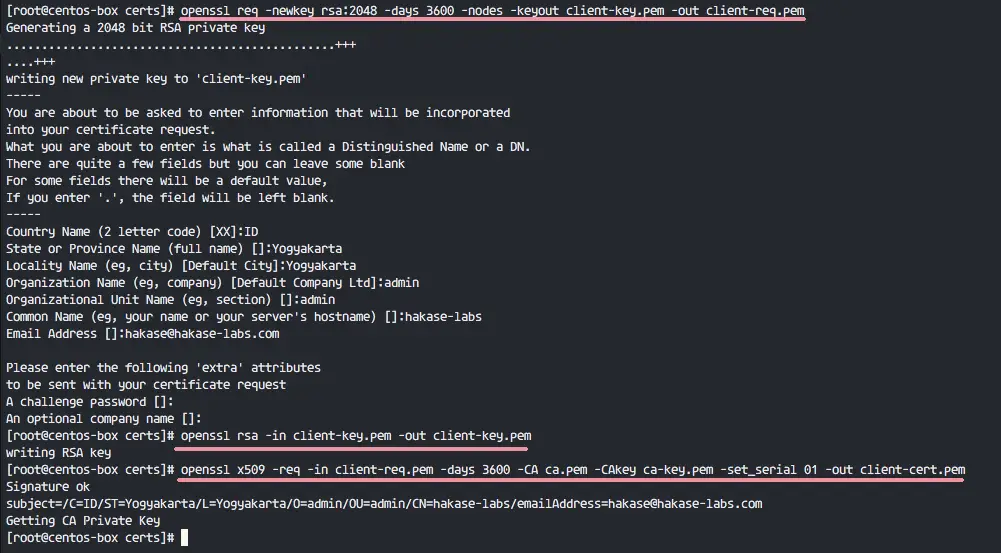
Now generate certificate files for the client. The MySQL server will only accept remote connection from the client who has these certificate files. Generate new client certificate files, remove the passphrase and sign them using the CA certificate.
openssl req -newkey rsa:2048 -days 3600 -nodes -keyout client-key.pem -out client-req.pem
openssl rsa -in client-key.pem -out client-key.pem
openssl x509 -req -in client-req.pem -days 3600 -CA ca.pem -CAkey ca-key.pem -set_serial 01 -out client-cert.pem
Note:
The CA certificate info must be different from the client and server info.
All certificates that we require for this setup have been generated. Now we can to verify certificate files with the command below.
openssl verify -CAfile ca.pem server-cert.pem client-cert.pem
Make sure there is no error, the results as below.
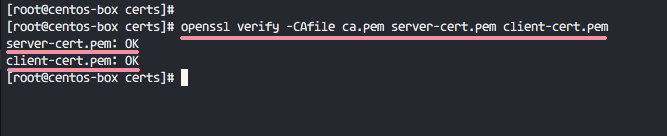
All Certificate files have been verified. Change the owner of the certs directory to the 'mysql' user and change permissions of all key files.
chown -R mysql:mysql /etc/certs/
chmod 600 client-key.pem server-key.pem ca-key.pem
Step 4 - Enable SSL for MySQL
In this step, we will enable SSL for MySQL. Before we start to configure and enable SSL on MySQL, we need to backup the default certificate files to the new backup directory.
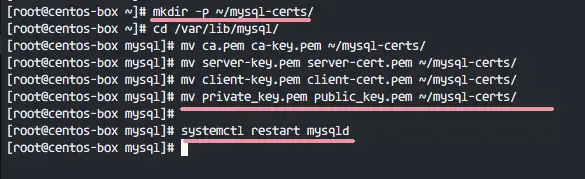
Create new backup directory 'mysql-certs' for all certificates.
mkdir -p ~/mysql-certs/
Go to the '/var/lib/mysql' directory and move all default certificates to the backup directory.
cd /var/lib/mysql/
mv ca.pem ca-key.pem ~/mysql-certs/
mv server-key.pem server-cert.pem ~/mysql-certs/
mv client-key.pem client-cert.pem ~/mysql-certs/
mv private_key.pem public_key.pem ~/mysql-certs/
Now restart the MySQL service.
systemctl restart mysqld
Next, check SSL from the MySQL shell. Login to mysql with the new password:
mysql -u root -p
TYPE NEW PASSWORD 'Hakase-labs123@'
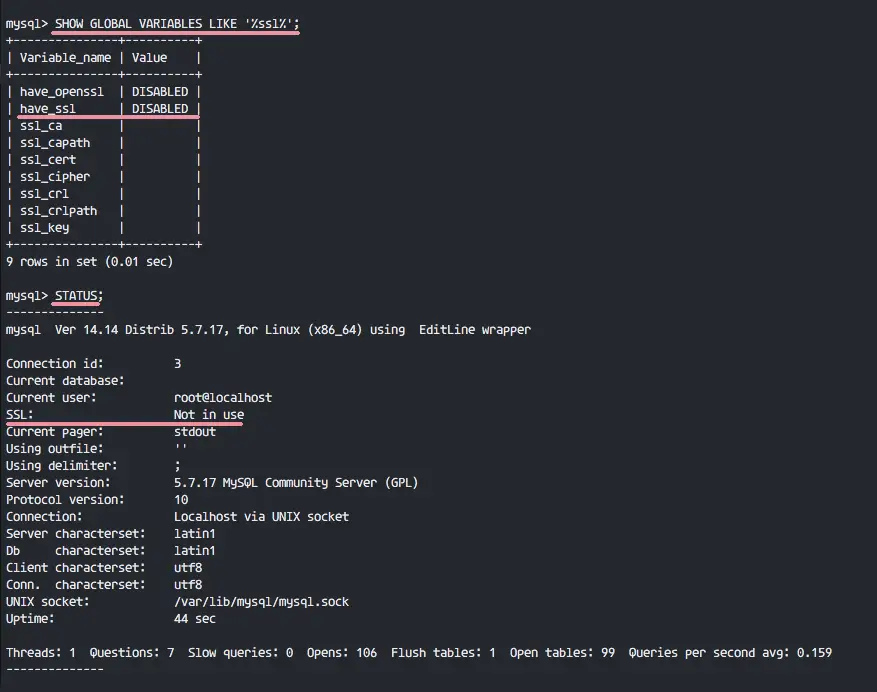
Run the query below so we can see the SSL status for MySQL.
SHOW GLOBAL VARIABLES LIKE '%ssl%';
STATUS;
You will see SSL status is 'DISABLED', and the root user has been connected without SSL.
Next, we will enable the SSL connection for MySQL. We have to edit the MySQL configuration file 'my.cnf' file with vim.
vim /etc/my.cnf
In the '[mysqld]' section, paste the configuration below.
# Type your own certificates directory
ssl-ca=/etc/certs/ca.pem
ssl-cert=/etc/certs/server-cert.pem
ssl-key=/etc/certs/server-key.pem
Save the file and exit vim, the restart MySQL service.
systemctl restart mysqld
Now login to the MySQL again and check the SSL.
mysql -u root -p
TYPE NEW PASSWORD 'Hakase-labs123@'
Run query below to make sure SSL section value is 'YES'.
SHOW VARIABLES LIKE '%ssl%';
STATUS;
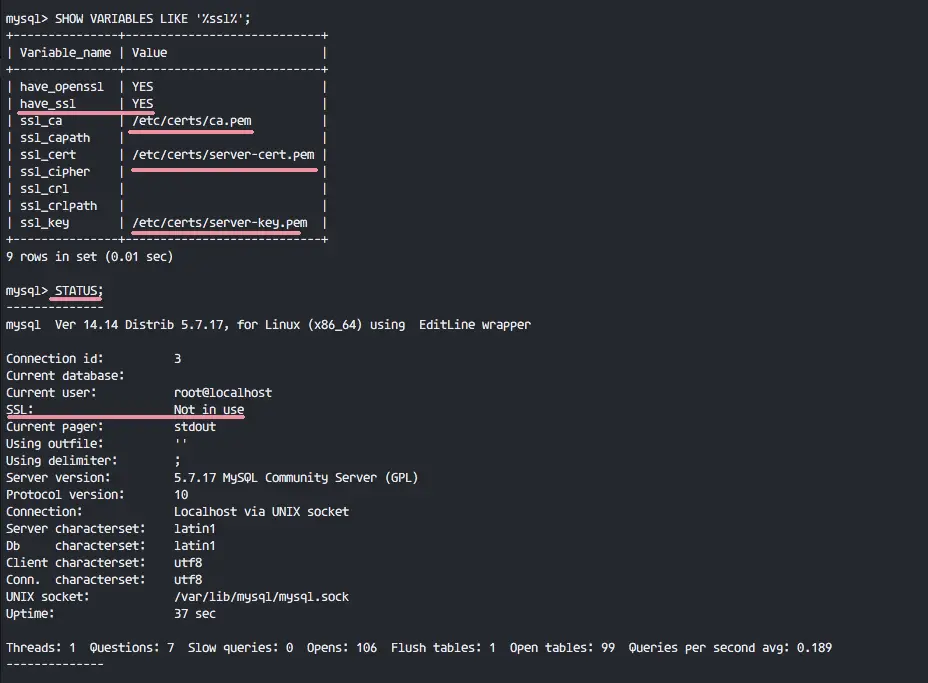
You will see that SSL for MySQL is enabled, but the root user still not connected using the SSL connection.
To force all local user connection with SSL, edit the mysql configuration file 'my.cnf' again.
vim /etc/my.cnf
Paste configuration below to the end of the line.
[client]
ssl-ca=/etc/certs/ca.pem
ssl-cert=/etc/certs/client-cert.pem
ssl-key=/etc/certs/client-key.pem
Save and exit, then restart MySQL.
systemctl restart mysqld
Connect to the MySQL again and check the connection and SSL enabled.
mysql -u root -p
TYPE NEW PASSWORD 'Hakase-labs123@'


SHOW VARIABLES LIKE '%ssl%';
STATUS;
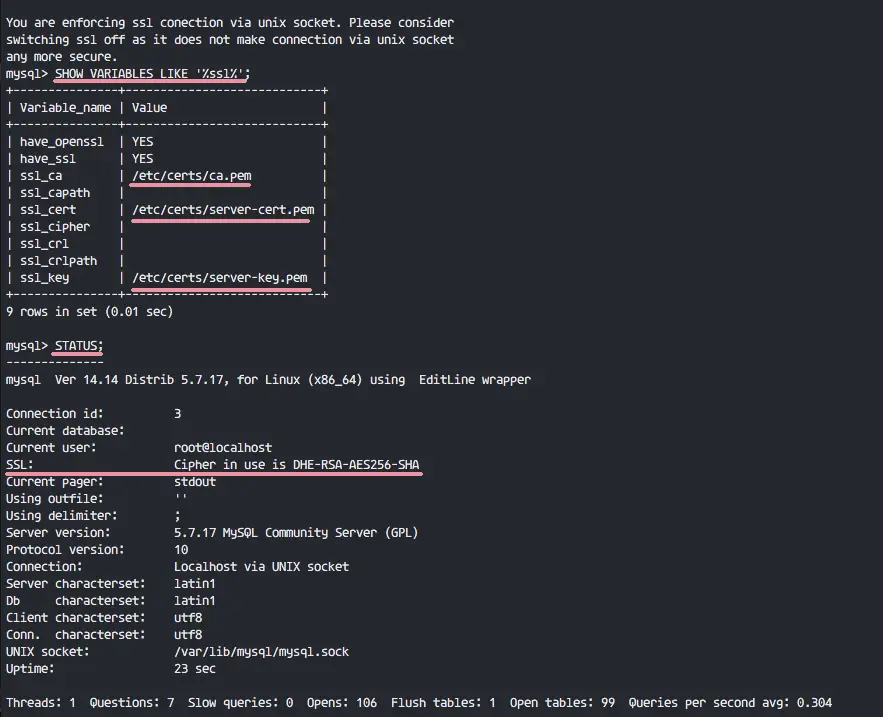
SSL has been enabled and the local connection uses SSL as well.
Step 5 - Enable Remote Connections
In the steps above, we've already enabled SSL for the MySQL server, and local connections are forced to use SSL. In this step, we will enable remote connections for MySQL, but we allow only clients have certificate files signed by our CA to connect to the MySQL server.
Edit MySQL configuration file with vim.
vim /etc/my.cnf
Paste this configuration below at the end of the '[mysqld]' section.
bind-address = *
require_secure_transport = ON
Save the file and exit the editor, the restart MySQL.
systemctl restart mysqld
Next, create a new user for the remote connection. I will create a new user named 'hakase' with password 'Hakase-labs123@' and grant all privileges to the 'hakase' user. 'hakase' user will only be able to connect with the Certificate key.
mysql -u root -p
TYPE NEW PASSWORD 'Hakase-labs123@'

create user 'hakase'@'%' identified by 'Hakase-labs123@' REQUIRE X509;
grant all privileges on *.* to 'hakase'@'%' identified by 'Hakase-labs123@' REQUIRE X509;
flush privileges;
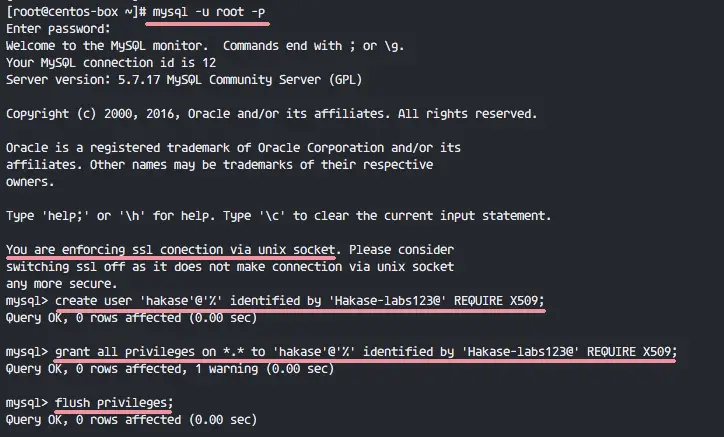
New user for remote connection has been created.
Note:
You might see '1 warning' in the mysql query result. It's just warning about using ALTER USER query instead of a GRANT because 'GRANT' query will be deprecated in the next release.
Step 6 - Testing
In the final section of this tutorial, we will test the if the new user named 'hakase' is able to connect to the MySQL server remotely with certificate files. Three certificates for the client must be downloaded.
- CA certificate - ca.pem
- Client certificate - client-cert.pem
- Client key - client-key.pem
I've logged into another Linux system and installed the mysql-client packages there. Then I've downloaded all client certificate files with SCP. Now I will connect to the MySQL server with the certificate files.
mysql -h 10.0.15.11 -u hakase \
--ssl-ca=ca.pem \
--ssl-cert=client-cert.pem \
--ssl-key=client-key.pem -p
10.0.15.11 = IP address of MySQL Server.

You can see the connection status with this query below.
STATUS;

User hakase with IP address 10.0.15.10 Connected to the MySQL server with IP address 10.0.15.11, the connection via TCP/IP on port 3306 and using SSL.
When you try to connect without Certificate files, you will see the error as below.

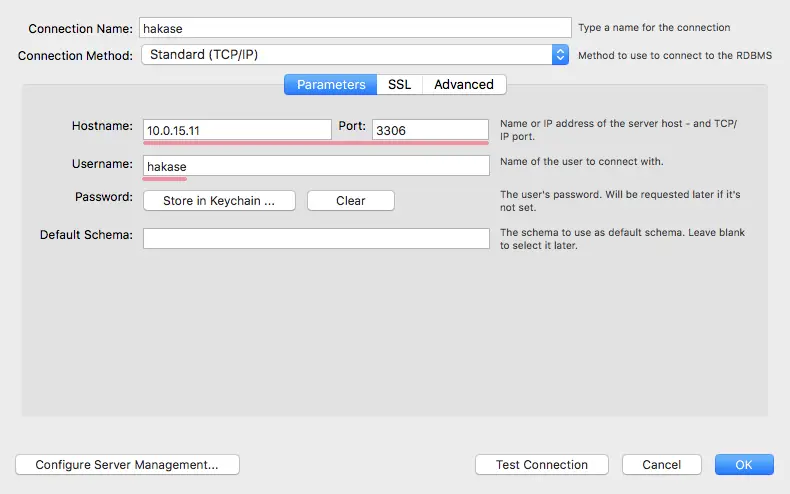
Next, I will test with the MySQLWorkbench GUI from my host.
Below is my configuration - Setting Parameter.
SSL Configuration - Setting SSL.
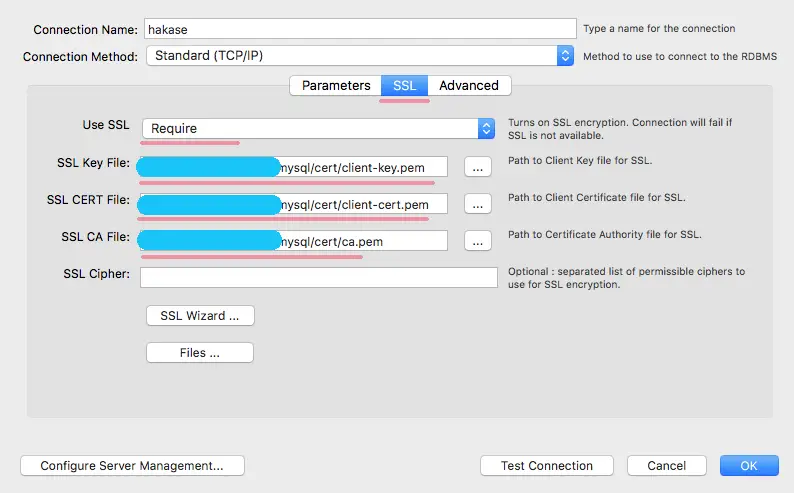
And below the results of the connection with SSL Client Certificate files.
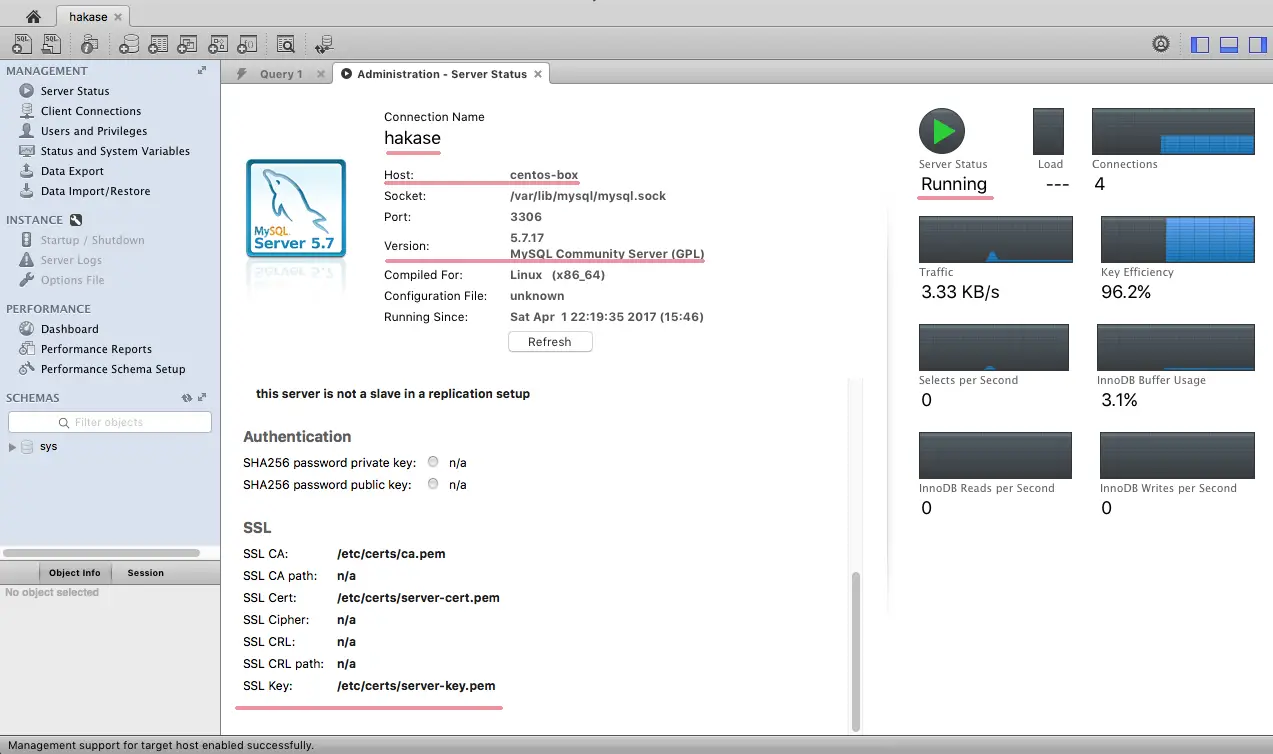
A new user successfully connected remotely to the MySQL database server with an SSL connection. When a user tries to connect without the Certificate files, the result will be 'denied'. Installation and Configuration of MySQL with SSL connection has been successfully.

