How to Install Oracle Database 12c on CentOS 7
Oracle Database is an object-relational database management system (RDBMS) developed by Oracle Corporation. The Oracle Database is available under a Proprietary and OTN Standard License. The supported operating systems are Redhat Enterprise Linux (x86-64), SUSE and Oracle Linux, Microsoft Windows x86-64 and IBM Linux.
In this tutorial, I will show you step-by-step how to install Oracle 12c on a CentOS 7 x86-64 machine. This includes the preparation and configuration of the CentOS 7 machine for the Oracle 12c installation, the Oracle 12c installation and testing the database with the Oracle Database command line utility 'sqlplus' and the web-based Oracle Enterprise Manager.
Prerequisites
- CentOS 7 64-bit.
- At least 1 GB RAM Memory.
- Root Privileges.
Step 1 - Install required Packages
As the first step, we have to install a lot of packages required by Oracle database, like GCC, Binutils, Glibc etc. We will install them from the Centos repository with the yum command.
Install packages required by Oracle database with yum.
yum install -y binutils.x86_64 compat-libcap1.x86_64 gcc.x86_64 gcc-c++.x86_64 glibc.i686 glibc.x86_64 \
glibc-devel.i686 glibc-devel.x86_64 ksh compat-libstdc++-33 libaio.i686 libaio.x86_64 libaio-devel.i686 libaio-devel.x86_64 \
libgcc.i686 libgcc.x86_64 libstdc++.i686 libstdc++.x86_64 libstdc++-devel.i686 libstdc++-devel.x86_64 libXi.i686 libXi.x86_64 \
libXtst.i686 libXtst.x86_64 make.x86_64 sysstat.x86_64
Step 2 - Configure User and System
Oracle Database will run under a normal Linux user and not with root privileges. In this step, we will create a new user and group for Oracle.
Create new groups named 'oinstall' and 'dba', then create a new user 'oracle' and add it to the 'oinstall' group.
groupadd oinstall
groupadd dba
useradd -g oinstall -G dba oracle
passwd oracle
TYPE THE PASSWORD
New user and group are created, now we need to configure our system for the Oracle installation. There are some kernel parameters that we must configure for the Oracle installation.
Edit 'sysctl.conf' file with vim.
vim /etc/sysctl.conf
Paste configuration below.
fs.aio-max-nr = 1048576
fs.file-max = 6815744
kernel.shmall = 2097152
kernel.shmmax = 2147483648
kernel.shmmni = 4096
kernel.sem = 250 32000 100 128
net.ipv4.ip_local_port_range = 9000 65500
net.core.rmem_default = 262144
net.core.rmem_max = 4194304
net.core.wmem_default = 262144
net.core.wmem_max = 1048586
Save the file and exit the editor.
Now run the commands below to display all kernel parameter and apply the new values.
sysctl -p
sysctl -a
Next, we need to configure some limits for the oracle user. Specify the max number process and max number of open files descriptors.
Edit 'limits.conf' file with vim.
vim /etc/security/limits.conf
Paste the configuration below.
oracle soft nproc 2047
oracle hard nproc 16384
oracle soft nofile 1024
oracle hard nofile 65536
Save the file and exit vim.
New user and system configuration is finished.
Step 3 - Configure Desktop
The Oracle installation requires GUI access, so the fastest way for this is by installing a X Window System on the server, and then access the GUI app with ssh -X option.
Install X Window System with yum command below.
yum groupinstall -y "X Window System"
When the installation is done, open a new terminal and connect to the server as oracle user with the ssh command option below. Try to run the GUI application and you will get the application screen.
ssh -X [email protected]
Step 4 - Download Oracle Database
If you do not have an Oracle account yet, register one and then log in to download 12c for Linux.
Below are my oracle files.
cd ~/oracle/
ll

Install zip and unzip to extract the archives.
yum -y install zip unzip
Extract the Oracle files to a new directory named 'stage'.
unzip linuxamd64_12102_database_se2_1of2.zip -d /stage/
unzip linuxamd64_12102_database_se2_2of2.zip -d /stage/
Change owner and group of the '/stage/' directory to the oracle user and oinstall group.
chown -R oracle:oinstall /stage/
Next, create new directories for the Oracle installation files and Oracle database files.
Directory 'u01' is for the Oracle installation files and 'u02' for the Oracle database files.
mkdir -p /u01 /u02
Change owner and group of the new directories and set permissions to '755'.
chown -R oracle:oinstall /u01 /u02
chmod -R 775 /u01 /u02
chmod g+s /u01 /u02
Oracle is downloaded and the new directories for the installation are ready.
Step 5 - Install Oracle Database 12c
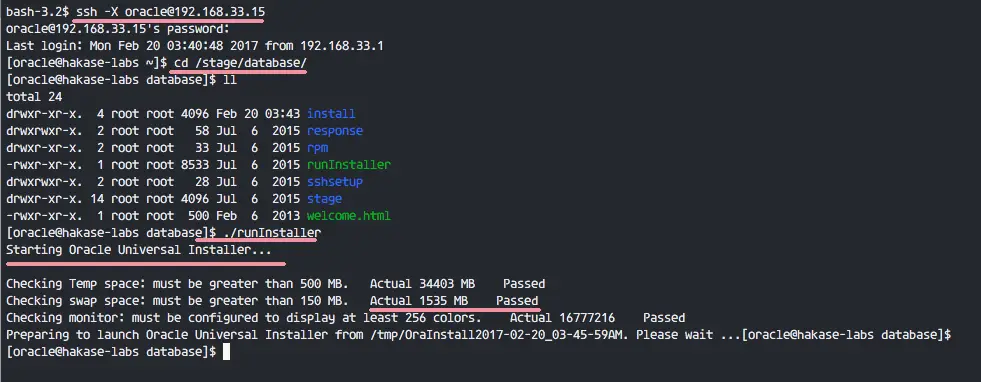
Open a new terminal and connect to the CentOS 7 server with the ssh command below.
ssh -X [email protected]
Go to the stage database directory and run the installer file.
cd /stage/database/
./runInstaller
The script will check the server, make sure all tests are passed.
And you will see the GUI installation screen below, there click 'Next'.

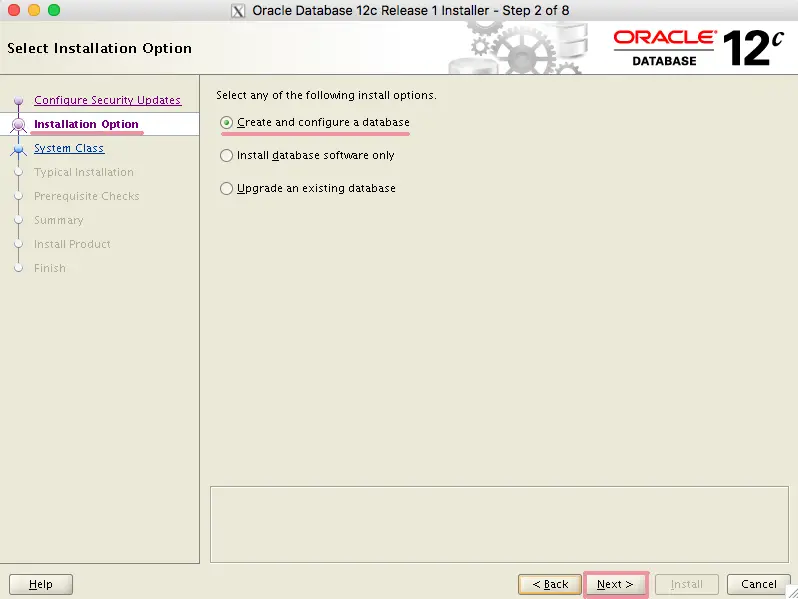
At 'Installation Options', choose 'Create and configure a database' and click 'Next'.
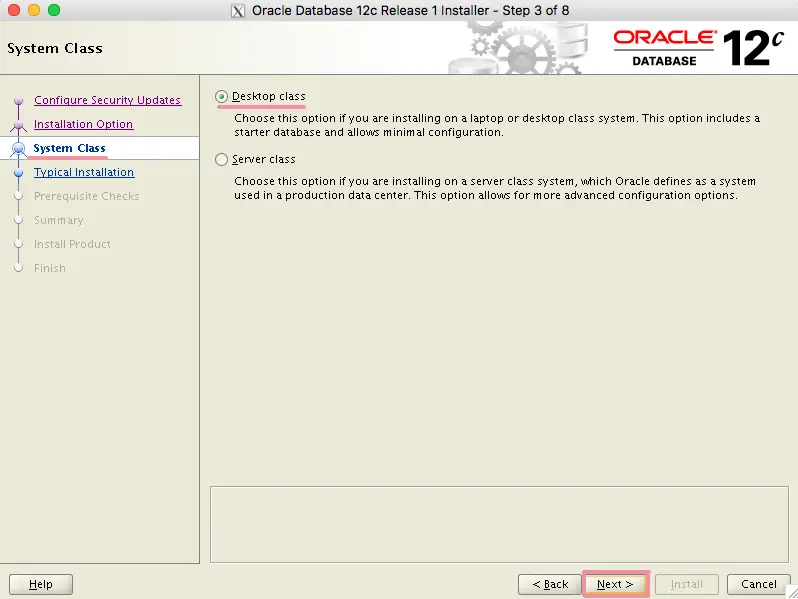
Under the 'System Class' section, choose 'Desktop Class' and click 'Next' again.
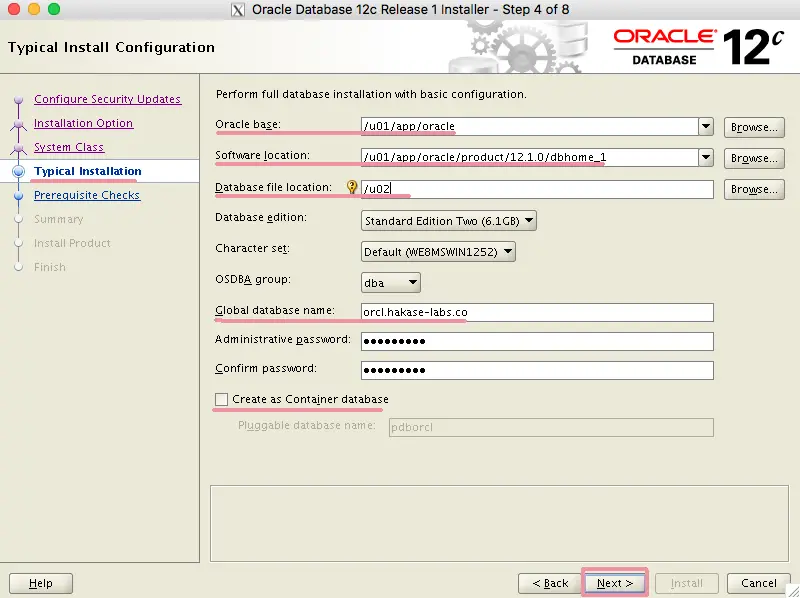
'Typical Installation' info.
- Oracle base: '/u01/app/oracle'
- Software location: /u01/app/oracle/product/12.1.0/dbhome_1
- Database file location: /u02
- Database edition: Default
- Character set: Default
- OSDBA group: dba
- Global database name: Type your own name
- Administrative password: Type your own password
- Confirm password: Type again
- Uncheck the 'Create as Container database'
Click Next.
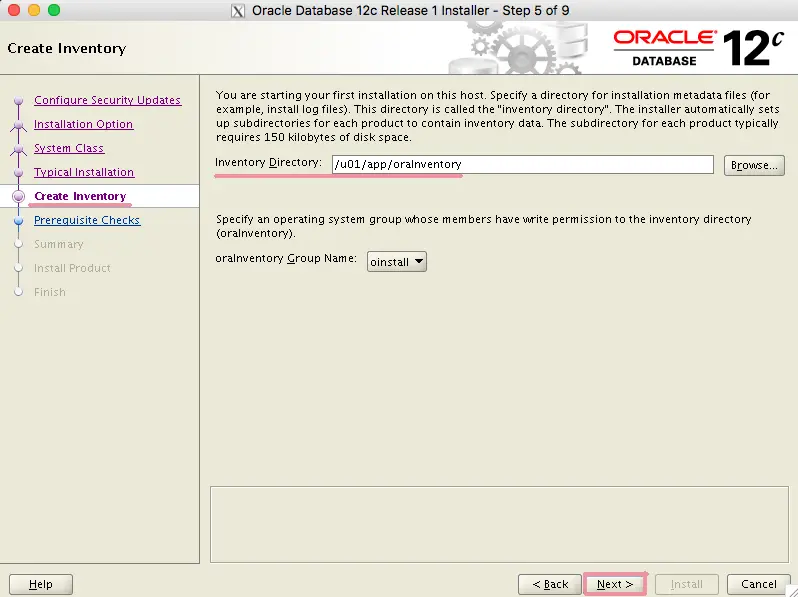
At 'Create Inventory', enter the path below:
Inventory Directory: /u01/app/oraInventory
oraInventory Group Name: use 'oinstall' group.
Click 'Next'.
Make sure all checks completed without an error, then you will see a summary of the Oracle configuration.
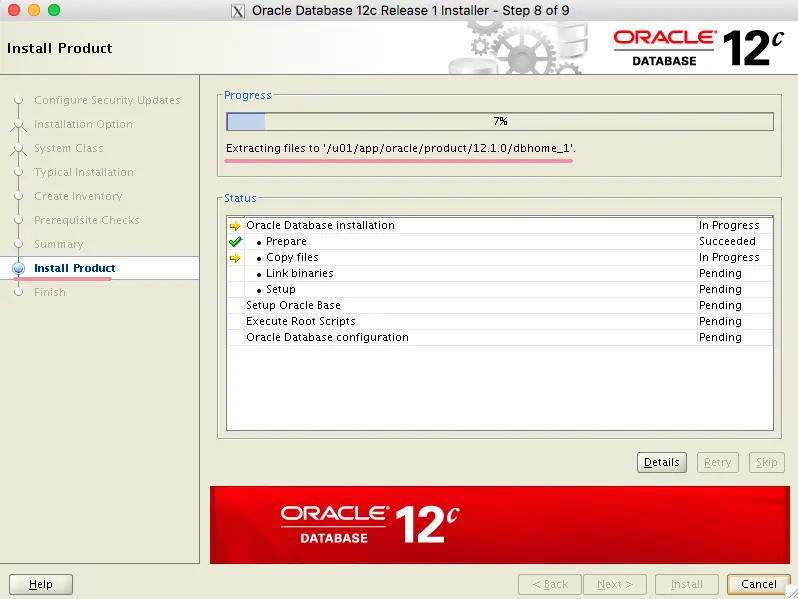
Click 'Install'.

Installation process.
During installation process, you will be asked to execute some scripts as root.
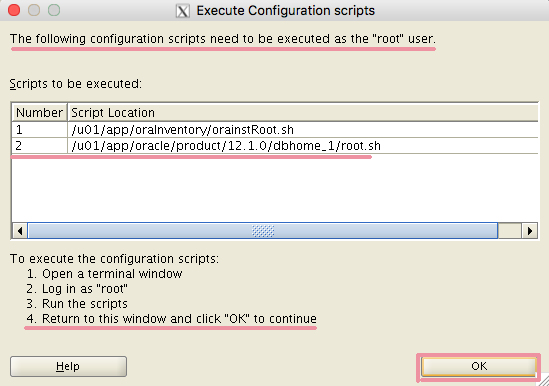
Open a new terminal and execute the files.
ssh [email protected]
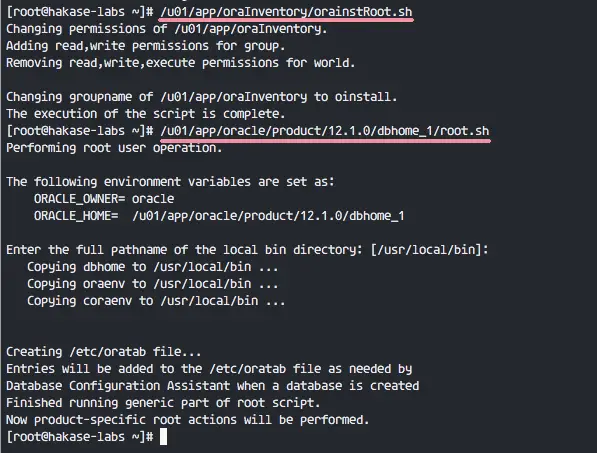
/u01/app/oraInventory/orainstRoot.sh
/u01/app/oracle/product/12.1.0/dbhome_1/root.sh
You will get the results below.
Next, you will be shown a new pop-up from the database configuration assistant, please wait, it takes a time.
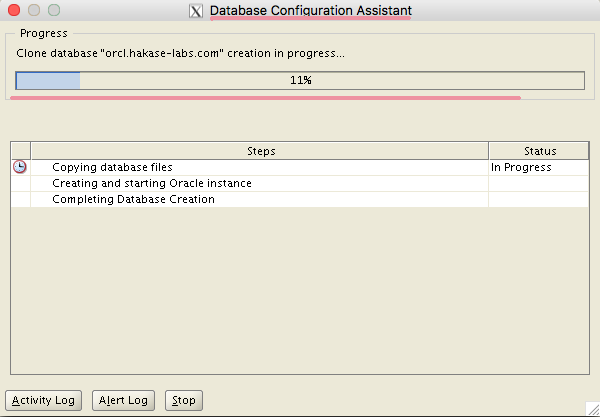
When the 'Database Configuration Assistant' is finished, you will see the info below:
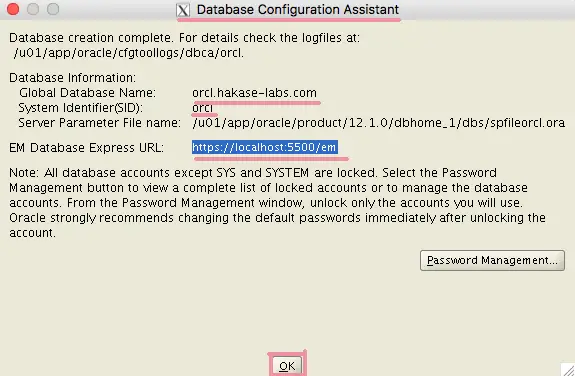
Click 'Ok' and the Oracle database installation is done.
Click 'Close'.

Step 6 - Testing
The Oracle installation is finished and ready for testing. I will try to access Oracle from the command line first.
Log in to the server and access the oracle user.
ssh [email protected]
TYPE YOUR PASSWORD
Login to the oracle user.
su - oracle
Execute the commands below to set the oracle environment.
export ORACLE_SID=orcl
export ORACLE_HOME=/u01/app/oracle/product/12.1.0/dbhome_1/
export PATH=$PATH:$ORACLE_HOME/bin
Access the oracle database utility 'sqlplus', log in as 'sysdba' privileges.
sqlplus / as sysdba
Oracle comes with some default users. Run the query below if you want to change the default user named 'sys'.
alter user sys identified by yourpassword;
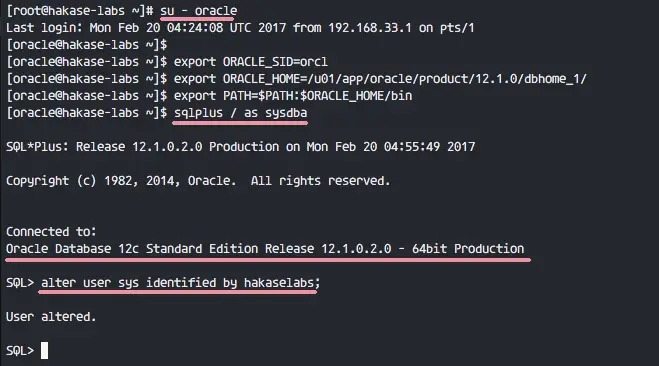
Sqlplus is working fine.
Next, try to access the web-based 'Oracle Enterprise Manager'. Open your web browser and type the https URL below on port 5500. Use the IP of your server!
https://192.168.33.55:5500/em/
Login with user 'system', and the password you have setup as 'Administrative Password' in step 5. Or you can use the 'sys' user and your password.
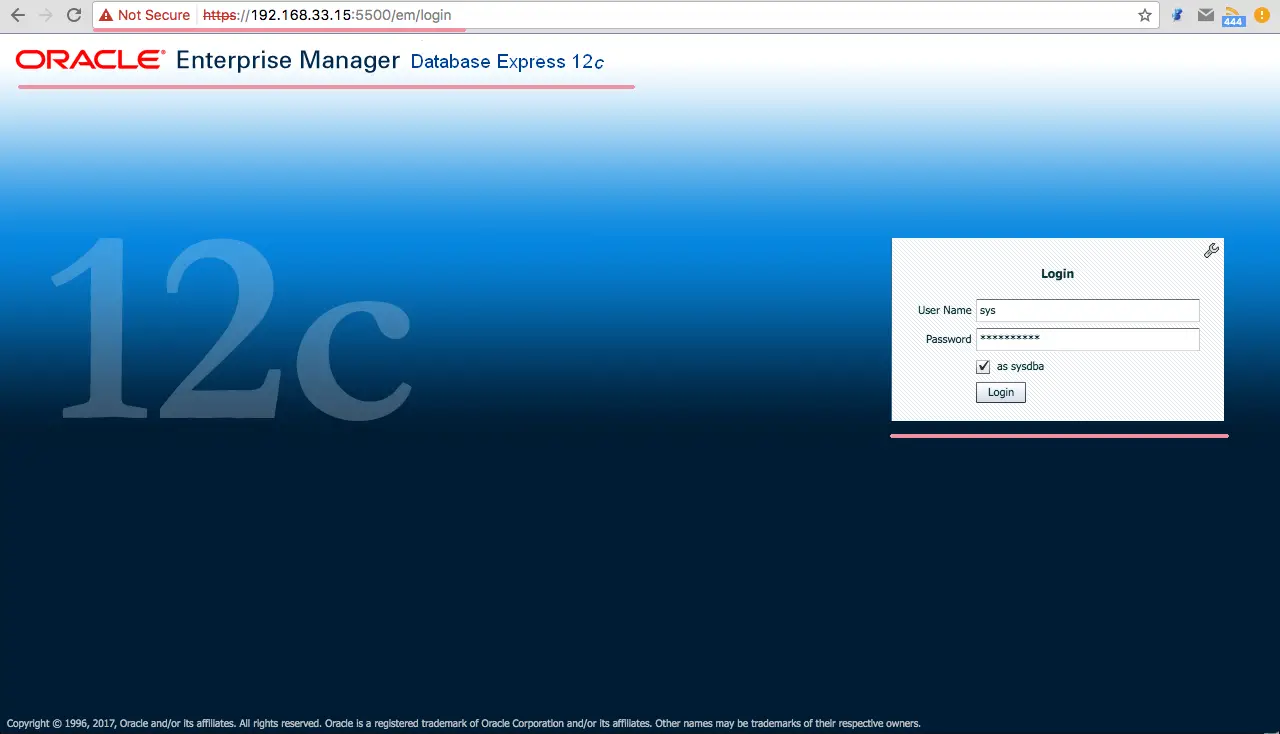
After login, you will see the 'Oracle Enterprise Manager' dashboard below.
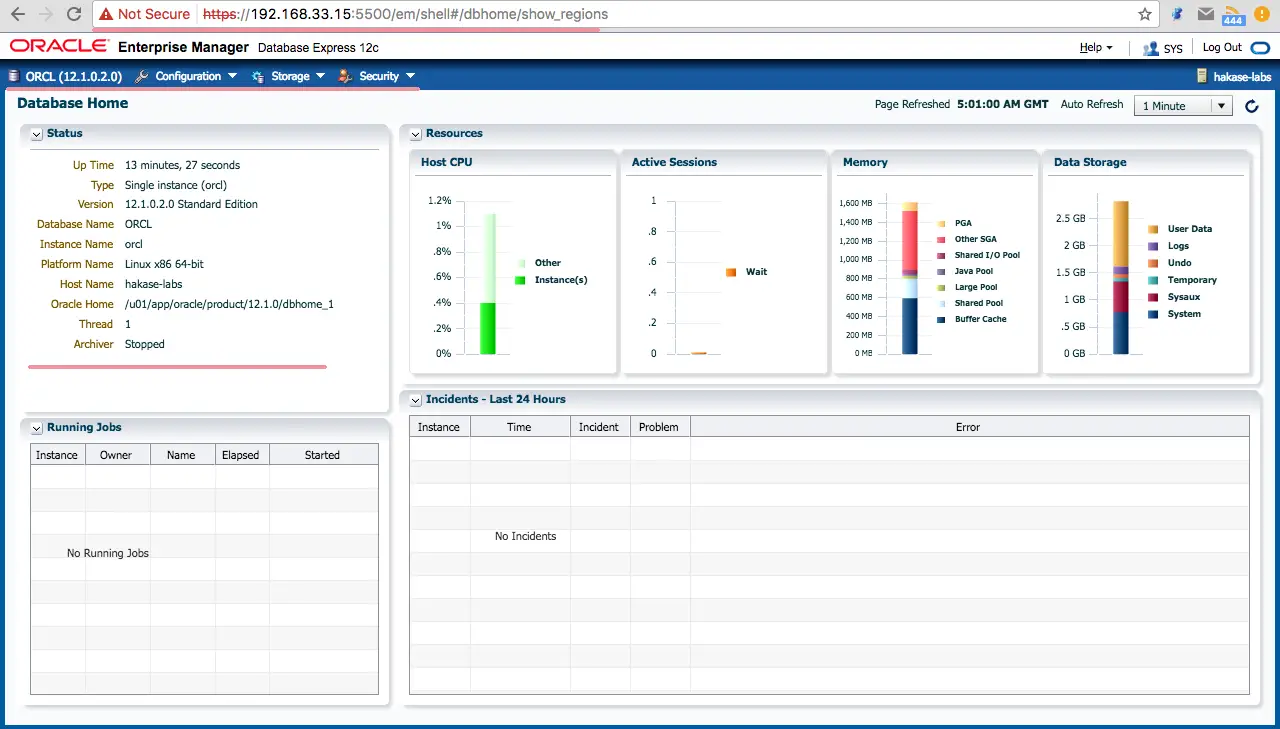
The Oracle Database 12c installation and configuration is done.
Oracle database utility and Oracle Enterprise manager are working.

