Deploy WordPress on top of FAMP in FreeBSD 11.1
This guide will show how to install and configure the most popular open source CMS used on the internet, WordPress, on top of FAMP in FreeBSD 11.x latest release. FAMP is an acronym which describes the following software bundle: FreeBSD 11.1 Unix-like operating system, Apache HTTP server, one of the most popular open-source web server on the internet, MariaDB RDBMS (relational database management system), which is a fork of MySQL database engine, and PHP programming server-side language.
REQUIREMENTS:
- FreeBSD 11.x installation performed from scratch or no previous FAMP software installed in the system.
- The network interface card configured with a static IP address.
- SSH server installed and configured for remote access or direct access to server’s command line console.
- Preferably a registered domain name (not absolutely necessary in this tutorial because we’ll use the static IP address of the server to visit the website).
- An sudo account on the server configured with root privileges or direct access to root account.
Step 1 - Install MariaDB
Before installing FAMP bundle in your FreeBSD server, login with an account with root privileges and make sure your system is fully up-to-date by issuing the below commands.
freebsd-update fetch
freebsd-update install
pkg update
pkg upgrade
In order to facilitate the administration of the server from command line make sure you also install the following packages:
pkg install bash bash_completion nano
Nano is a popular Linux command line editor. In FreeBSD, ee is the default file editor. Vi editor is also installed, by default, in FreeBSD.
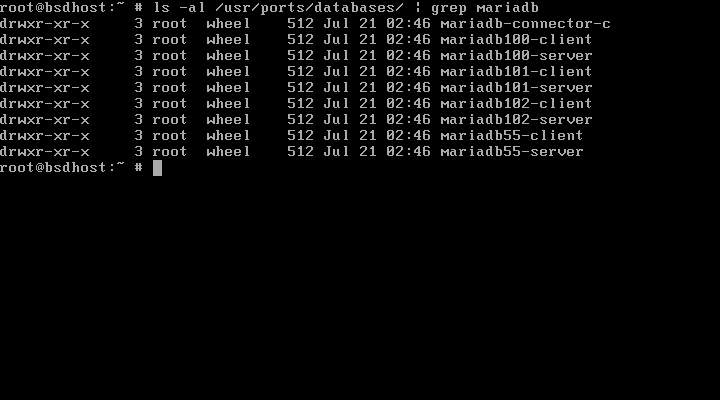
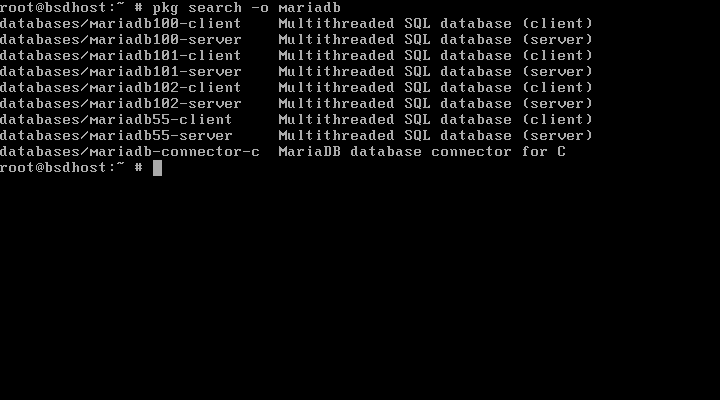
To deploy a Wordpress website on a server, it’s absolutely imperious to connect to a relational database. One of the most used RDBMS in conjunction with Wordpress is MySQL/MariaDB. So, the first component to install in our FAMP stack would be MySQL database server. In order to search for available MariaDB database versions and components, which will be used in this setup in favor of MySQL database, issue one of the following commands in your machine console.
ls -al /usr/ports/databases/ | grep mariadb
pkg search -o mariadb
Then, install the latest version of MariaDB database server in FreeBSD, by running the following command:
pkg install mariadb102-client mariadb102-server
In the next step, make sure to enable MariaDB daemon in FreeBSD and start the database service by running the below commands.
sysrc mysql_enable=”YES”
service mysql-server start
Next, start to secure MaraDB database by executing mysql_secure_installation script. Use the following installation example in order to secure MariaDB database. Also, assure that you choose a strong password for MySQL root user.
/usr/local/bin/mysql_secure_installation
NOTE: RUNNING ALL PARTS OF THIS SCRIPT IS RECOMMENDED FOR ALL MariaDB
SERVERS IN PRODUCTION USE! PLEASE READ EACH STEP CAREFULLY!
In order to log into MariaDB to secure it, we'll need the current
password for the root user. If you've just installed MariaDB, and
you haven't set the root password yet, the password will be blank,
so you should just press enter here.
Enter current password for root (enter for none):
OK, successfully used password, moving on...
Setting the root password ensures that nobody can log into the MariaDB
root user without the proper authorisation.
Set root password? [Y/n] y
New password:
Re-enter new password:
Password updated successfully!
Reloading privilege tables..
... Success!
By default, a MariaDB installation has an anonymous user, allowing anyone
to log into MariaDB without having to have a user account created for
them. This is intended only for testing, and to make the installation
go a bit smoother. You should remove them before moving into a
production environment.
Remove anonymous users? [Y/n] y
... Success!
Normally, root should only be allowed to connect from 'localhost'. This
ensures that someone cannot guess at the root password from the network.
Disallow root login remotely? [Y/n] y
... Success!
By default, MariaDB comes with a database named 'test' that anyone can
access. This is also intended only for testing, and should be removed
before moving into a production environment.
Remove test database and access to it? [Y/n] y
- Dropping test database...
... Success!
- Removing privileges on test database...
... Success!
Reloading the privilege tables will ensure that all changes made so far
will take effect immediately.
Reload privilege tables now? [Y/n] y
... Success!
Cleaning up...
All done! If you've completed all of the above steps, your MariaDB
installation should now be secure.
Thanks for using MariaDB!
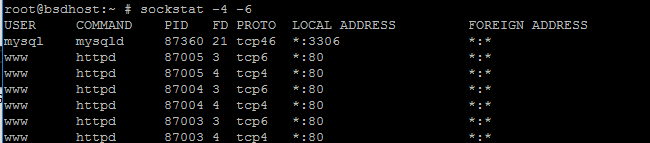
MariaDB service is configured, by default, to bind and listen for network connections on 0.0.0.0:3306/TCP network socket. By running sockstat command with the -4 -6 flags you will notice MariaDB socket state as illustrated in the below screenshot.
sockstat -4 -6
This behavior of MySQL server is prone to security issues, so we’ll completely disable remote access to MariaDB by binding the daemon to the loopback interface only, by issuing the below command. You will need to restart the daemon to reflect changes.
sysrc mysql_args="--bind-address=127.0.0.1".
service mysql-server restart
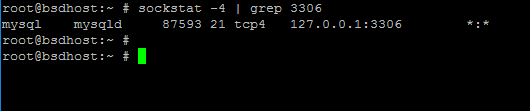
However, issue sockstat command again to determine the new status of MariaDB network socket. By now, MariaDB should listen for connections only from loopback interface, as shown in the below screenshot.
sockstat -4
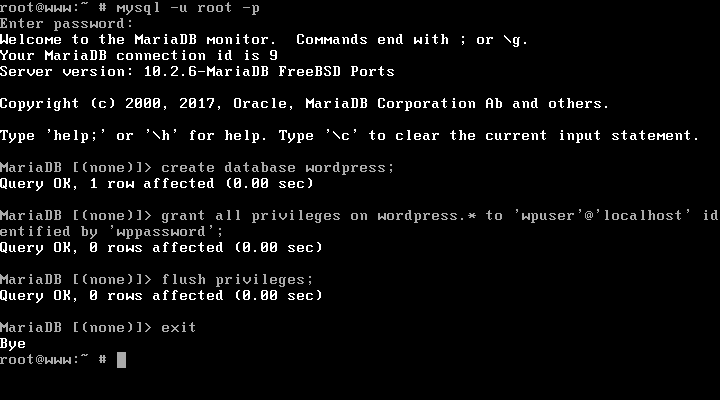
Finally, after securing MySQL database daemon, create MariaDB database for Wordpress installation. Log in to MariaDB from server console and issue the following commands to create the database and the user which will be used to administer Wordpress database. Enter MySQL root password in prompt and make sure you replace the database name, database user and password accordingly.
mysql –u root –p
create database wordpress;
grant all privileges on wordpress.* to 'wpuser'@'localhost' identified by 'wppassword';
flush privileges;
exit
Step 2 – Install Apache Web Server
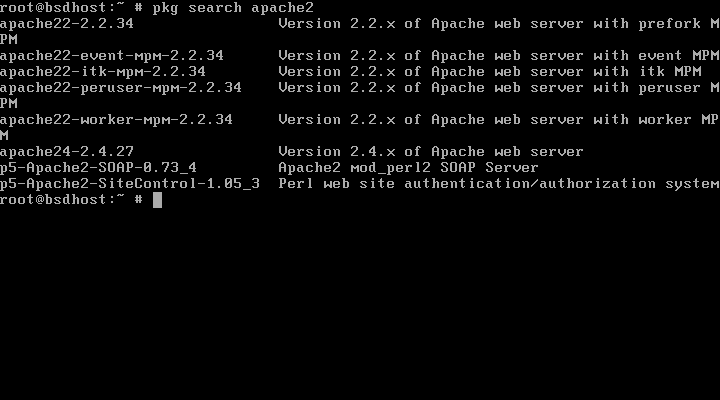
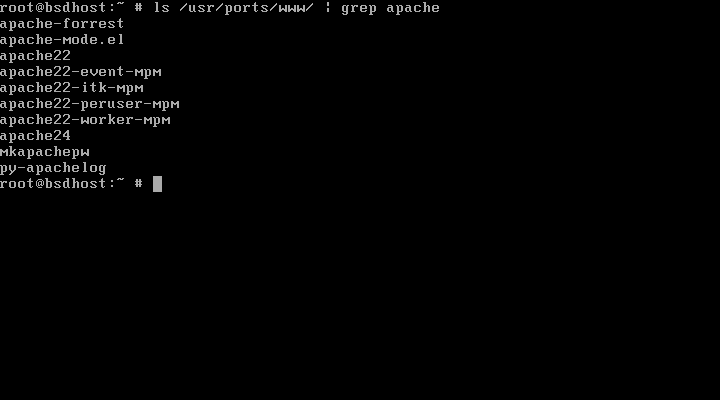
The next service you need to install in order to complete FAMP stack is Apache HTTP server. FreeBSD PORTS repositories comes with two pre-compiled versions of Apache web server. In order to list all Apache runtime versions, issue one of the following command in terminal.
pkg search apache2
ls /usr/ports/www/ | grep apache
For this custom setup with Wordpress, we’ll install the 2.4 version of the Apache HTTP server by issuing the following command.
pkg install apache24
After Apache web server package with all dependencies has been installed on the system, make sure you enable and start the daemon with the following commands.
sysrc apache24_enable=”yes”
service apache24 start
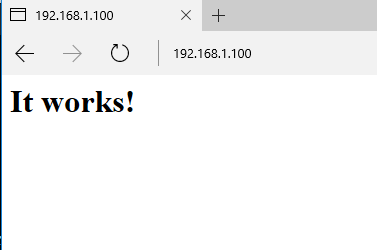
To test Apache configuration, open a browser and visit the default web page via HTTP protocol by entering the IP address of your server or the system FQDN in the URL filed, as illustrated in the below image. A message saying "It works!" should be displayed in your browser.
http://server_IP or_FQDN
Apache HTTP server DocumentRoot directory is located in /usr/local/www/apache24/data/ path in FreeBSD 11.x. We’ll copy Wordpress installation files in that location later. Also, make sure you remove the default index.html file by issuing the following command.
rm /usr/local/www/apache24/data/index.html
Step 3 – Install PHP
Similar to the Apache web server, FreeBSD 11.x PORTS ship with multiple pre-compiled binary versions of PHP language: PHP 5.6, PHP 7.0 and PHP 7.1 release. To display all PHP versions issue one of the following commands.
ls /usr/ports/lang/ | grep php
pkg search –o php

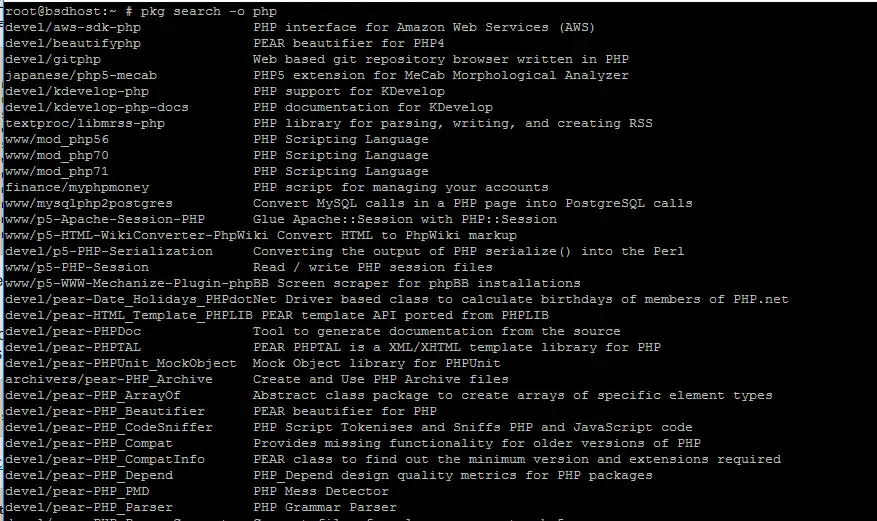
In this custom tutorial we’ll use PHP 7.1 version for Wordpress installation. Issue the below command to install PHP with all required modules in order for Wordress to function properly.
pkg install php71 php71-mysqli mod_php71 php71-mbstring php71-mcrypt php71-zlib php71-curl php71-gd php71-json
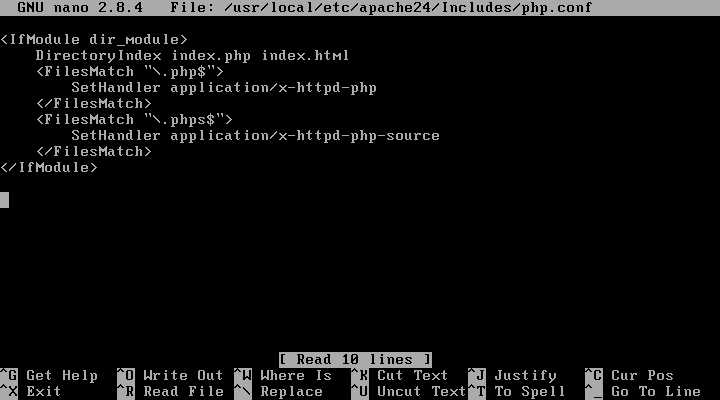
On the next step, using your favorite text editor create a new php.conf configuration file for Apache web server in /usr/local/etc/apache24/Includes/ directory and add the below content.
nano /usr/local/etc/apache24/Includes/php.conf
php.conf file excerpt:
<IfModule dir_module>
    DirectoryIndex index.php index.html
    <FilesMatch "\.php$">
        SetHandler application/x-httpd-php
    </FilesMatch>
    <FilesMatch "\.phps$">
        SetHandler application/x-httpd-php-source
    </FilesMatch>
</IfModule>
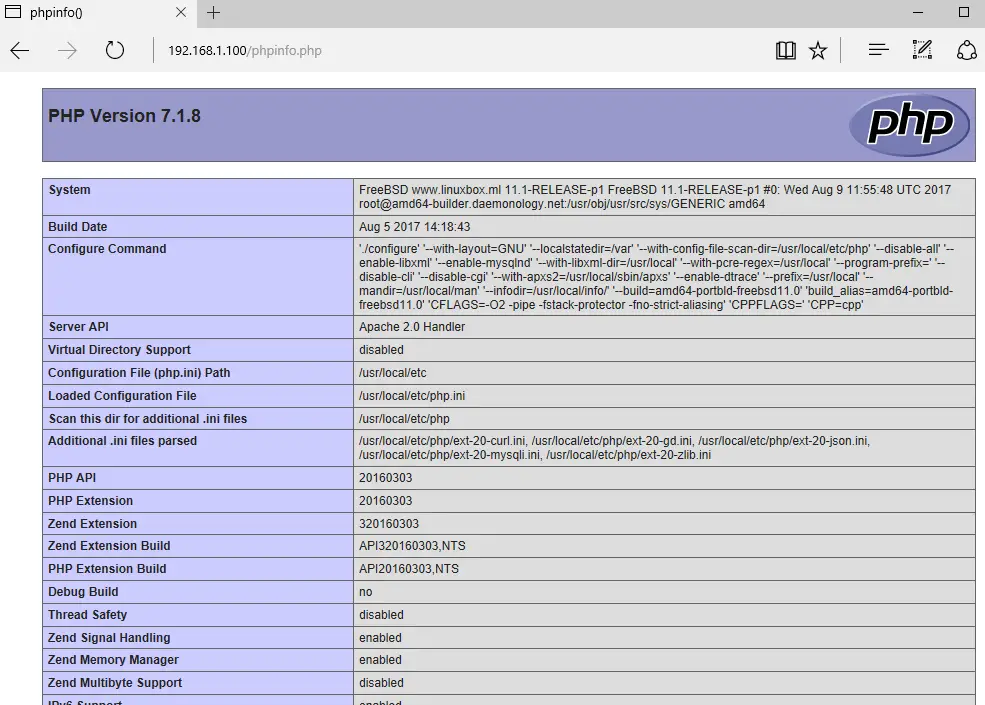
After you finish editing the file, make sure you create a new phpinfo.php file in Apache default webroot path by running the below command in order to test if Apache PHP gateway is working as expected.
echo '<?php phpinfo(); ?>' | tee /usr/local/www/apache24/data/phpinfo.php
Finally, restart Apache service in order to apply the changes and navigate to the below URL to display PHP server-side configuration as illustrated in the following screenshot.
service apache24 restart
http://server_IP-or-FQDN/phpinfo.php
Also, you might want to create the PHP ini configuration file for Apache and change the timezone statement to reflect your server’s geographical location. The list of supported PHP timezones can be found at the following link: http://php.net/manual/en/timezones.php
Copy the php.ini-production file in order to create the default setup file for PHP. Then, edit php.ini file in order to chage PHP timezone configuration.
cp /usr/local/etc/php.ini-production /usr/local/etc/php.ini
nano /usr/local/etc/php.ini
php.ini file excerpt:
date.timezone = Continent/City
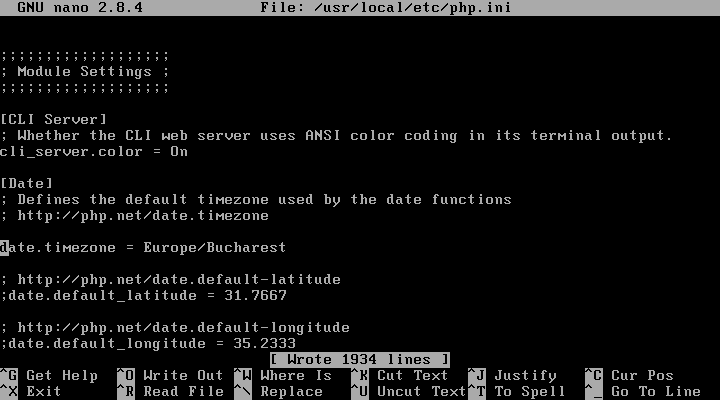
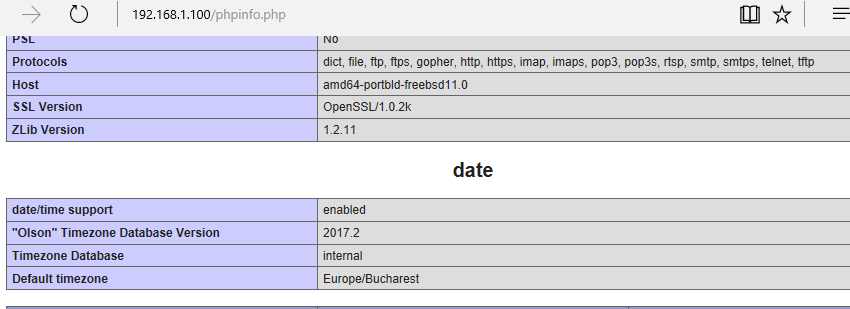
To apply the new PHP setting, you need to restart Apache service. Then, visit phpinfo.php web page again and scroll to date setting in order to see if the change has been successfully applied, as illustrated in the below screenshot.
service apache24 restart
Step 4 – Install WordPress
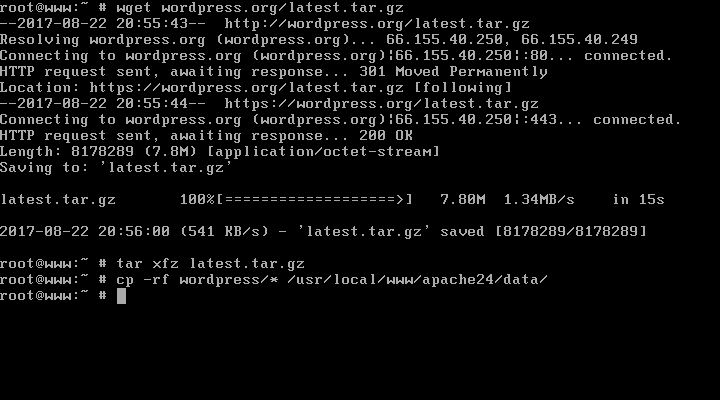
In order to install Wordpress on top of FAMP in FreeBSD, first download the latest version of the installation archive tarball in your system using the wget utility. Extract the downloaded archive and copy all Wordpress installation files to Apache webroot path by issuing the following commands.
wget https://wordpress.org/latest.tar.gz
tar xfz latest.tar.gz
cp –rf wordpress/* /usr/local/www/apache24/data/
Next, adjust the proper permissions to your server webroot path for Apache runtime group account, in order to grant the web server write permissions to Wordpress installation directory.
chown -R root:www /usr/local/www/apache24/data/
chmod -R 775 /usr/local/www/apache24/data/
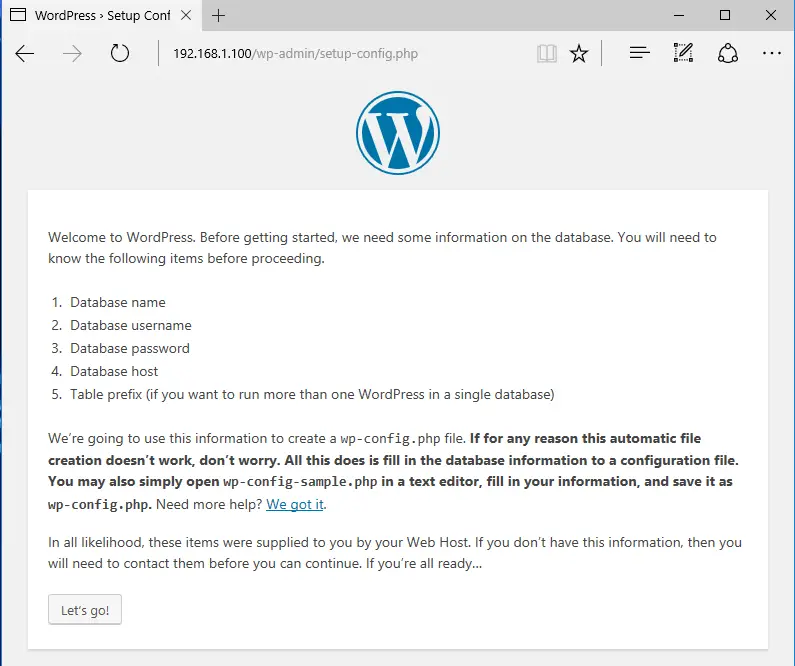
Now, your web server is prepared for Wordpress installation process. Open a browser and navigate to your server IP address or FQDN and the first install screen should appear. Hit on Let’s go! button to start the installation.
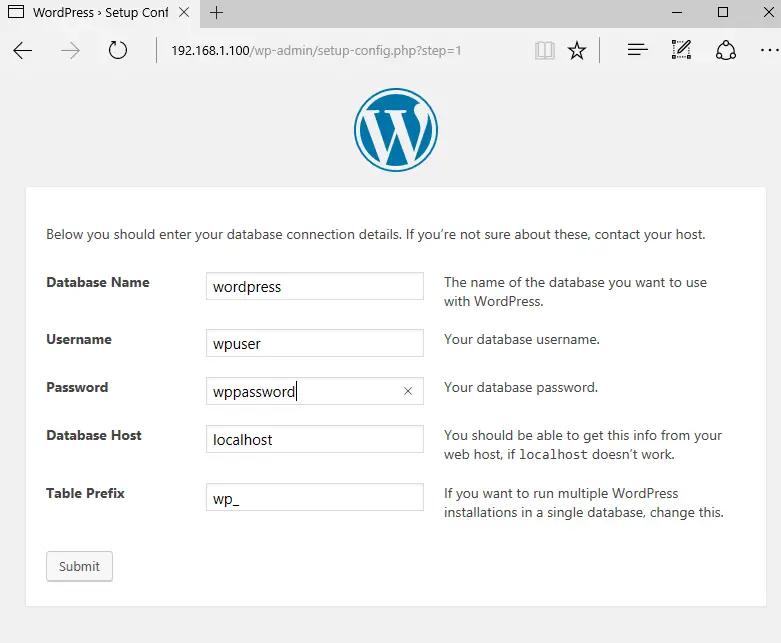
On the next screen enter MariaDB database name, the Wordpress database username and password and the database host. Because MariaDB and Apache web server are installed on the same node, use localhost for database host. Leave the Table Prefix default value and press on Submit button to continue.
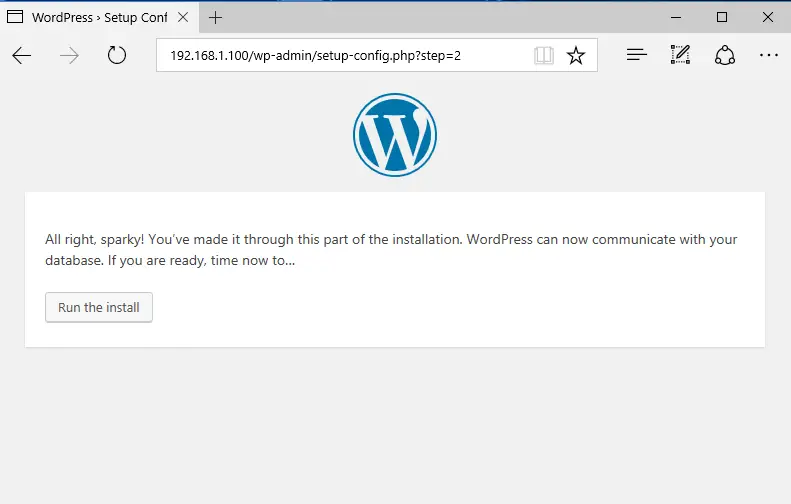
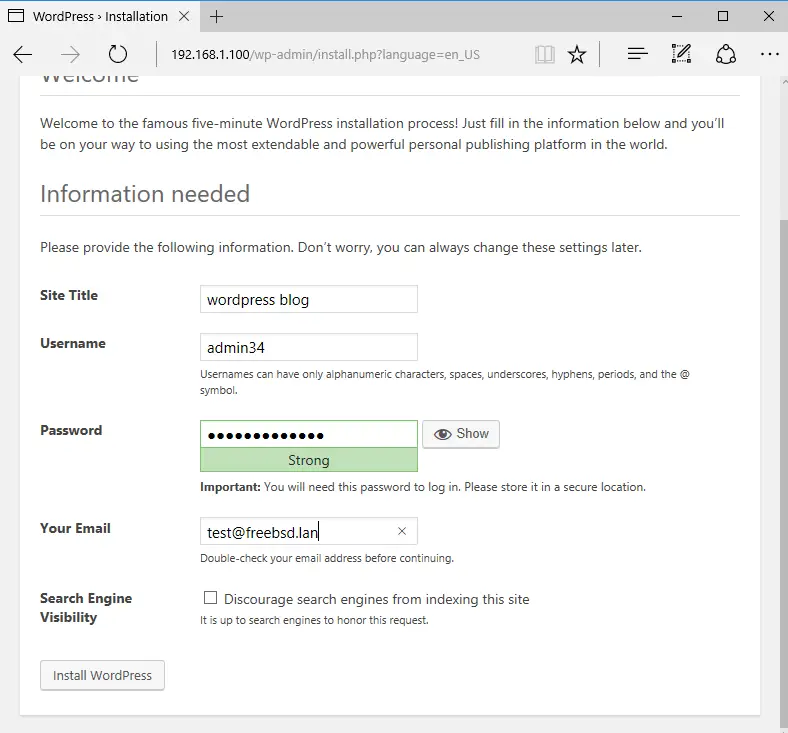
After the database configuration file is created, hit on Run the install button and, on the next screen, add a title for your website, a username to administer the website and an email address. Make sure you choose a strong password for the username. Also, you should avoid using simple usernames as admin, administrator, root etc, due to security implications. When you’ve finished, hit the Install Wordpress button to complete the installation.
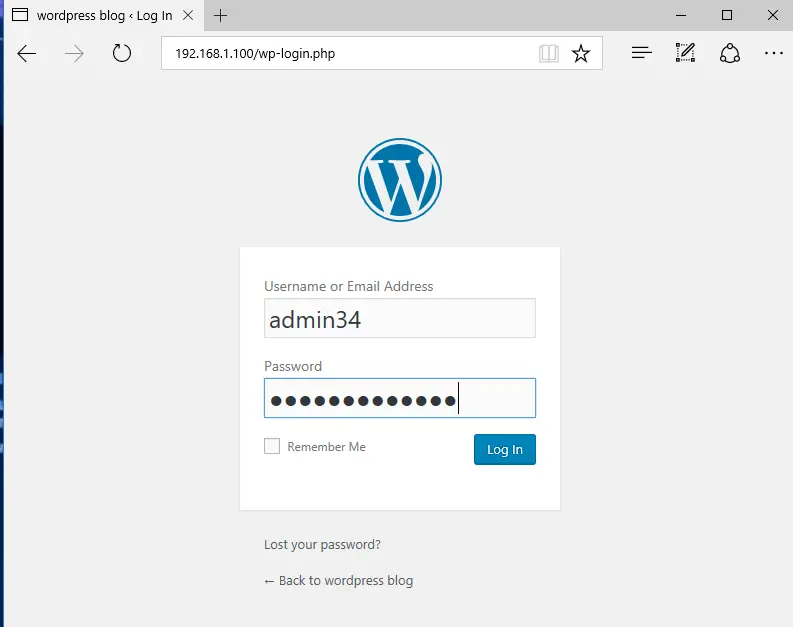
After Wordpress has been successfully installed, log in to admin dashboard panel with the credentials created in the previous step and start managing your website.

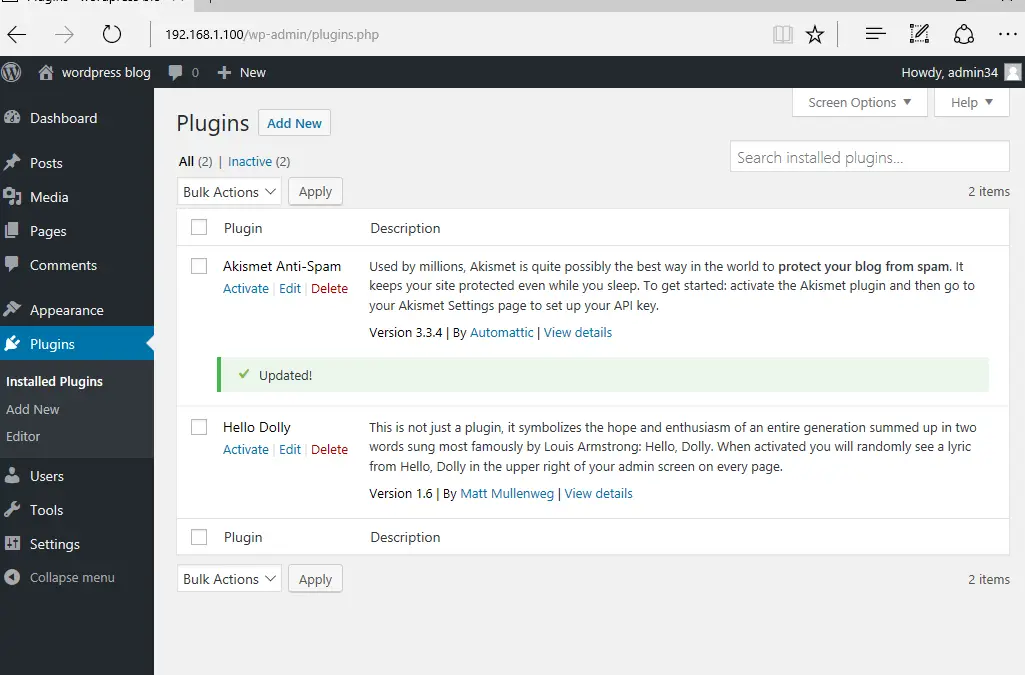
In order to update or install plugins or themes or upload pictures or modify other aspects of Wordpress which requires downloading files from internet, append the following line to Wordpress wp-config.php file by issuing the following command with root privileges.
echo "define('FS_METHOD', 'direct');" | tee –a /usr/local/www/apache24/data/wp-config.php
This line assures that Wordpress can download and install online files or updates without running FTP server on the host. However, this method might not be the best choice in case Wordpress is installed on a shared hosting plan. In the below screenshot an update for a plugin has been successfully applied using the FS_METHOD without asking for a ftp account.
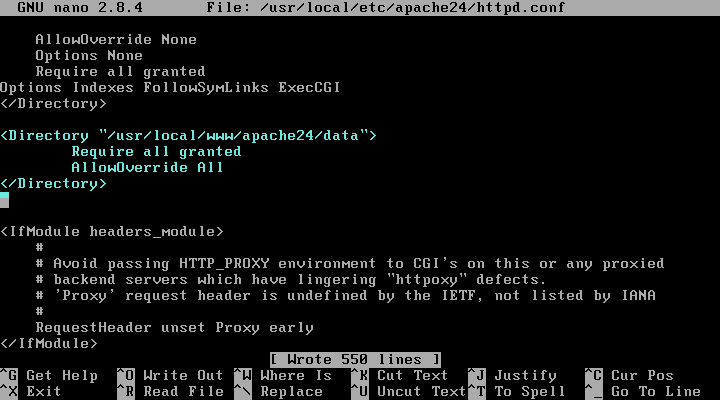
Finally, in order to be able to change Wordpress permanent internal link structure, you need to enable rewrite for Apache HTTP server. To enable the rewrite module, first open Apache main configuration file and add the following block of code before <IfModule headers_module> statement as illustrated in the below screenshot.
nano /usr/local/etc/apache24/httpd.conf
httpd.conf file excerpt:
<Directory "/usr/local/www/apache24/data">
                Require all granted
                AllowOverride All
</Directory>
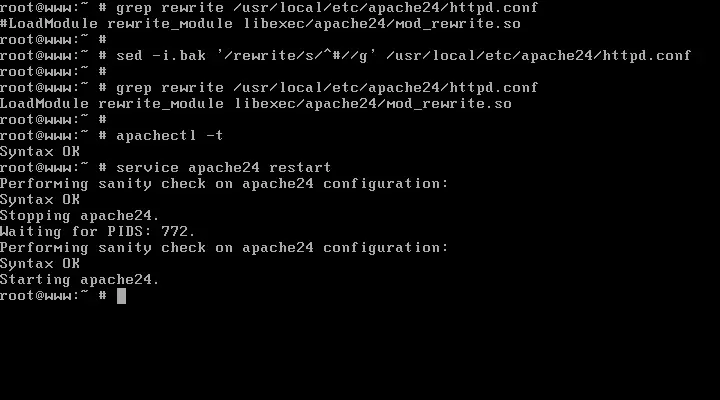
Then, close the file and uncomment rewrite LoadModule line by issuing the below command which removes the preceding hashtag sign. Use grep filter to display the rewrite LoadModule line. Finally, check Apache configuration file for potential syntax errors and restart the service to apply changes.
grep rewrite /usr/local/etc/apache24/httpd.conf
sed -i.bak '/rewrite/s/^#//g' /usr/local/etc/apache24/httpd.conf
grep rewrite /usr/local/etc/apache24/httpd.conf
apachectl -t
service apache24 restart
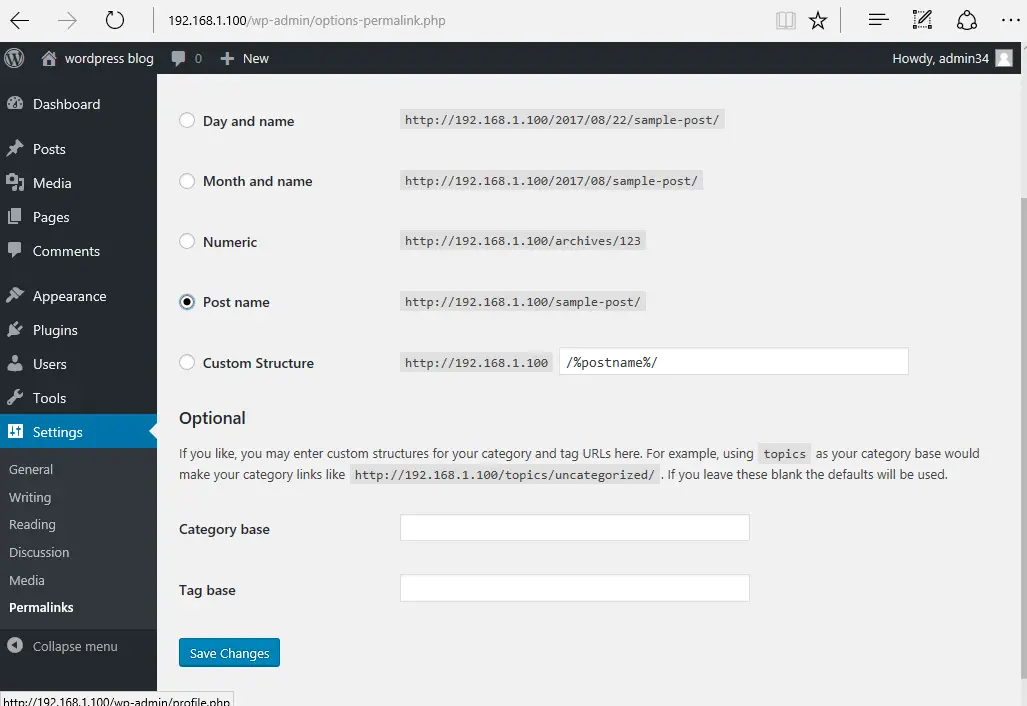
Now, you can change Wordpress permanent link structure by navigating to Dashboard ->Settings -> Permalinks. Choose your favorite permalink option for URL structure from screen options and hit on Save Changes button to apply changes. A great option for SEO is the Post name permalink.
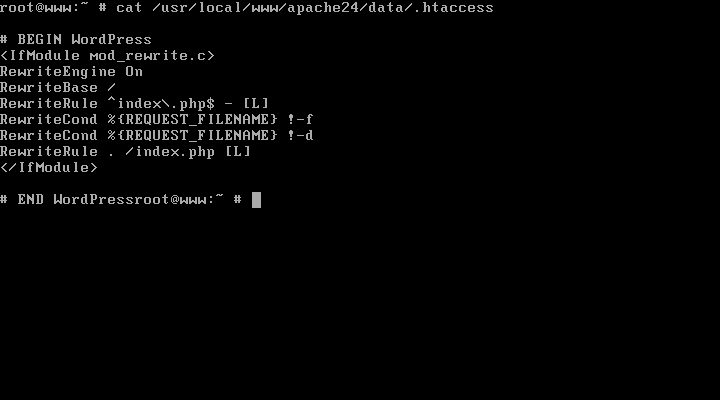
In case the permalink option don’t apply, open and investigate the content of .htaccess file from your server webroot path. The below content should be automatically inserted in this file. If not, update the below content manually to .htaccess file or check file permissions. Apache runtime user or group account should be granted with write permissions to this file.
<IfModule mod_rewrite.c>
RewriteEngine On
RewriteBase /
RewriteRule ^index\.php$ - [L]
RewriteCond %{REQUEST_FILENAME} !-f
RewriteCond %{REQUEST_FILENAME} !-d
RewriteRule . /index.php [L]
</IfModule>
That’s all! You’ve successfully deployed a Wordpress website on top of Apache web server, MariaDB database and PHP programming language in FreeBSD 11.

