How to Install Turtl Server Evernote Alternative on CentOS 7
On this page
- Prerequisites
- What we will do
- Step 1 - Install Development Tools
- Step 2 - Install Libuv on CentOS 7
- Step 3 - Install and Configure RethinkDB
- Step 4 - Install Common Lisp
- Step 5 - Install Quicklisp
- Step 6 - Download and Install Turtl Server
- Step 7 - Running Turtl Server as a Service
- Step 8 - Install and Configure Apache/httpd as a Reverse Proxy for Turtl
- Step 9 - Testing
- Reference
Turtl is a secure and encrypted Evernote alternative. It's an open source application that allows you to take notes, bookmark websites, store documents, share passwords with your coworkers, and more. Turtl allows you to take control of all your data in a private place. The source code of turtl client and turtl server application is available on github - you can deploy it manually on your server.
In this tutorial, we will show you step-by-step how to install and configure Turtl server on CentOS 7. Turtl server is written in Common Lisp, so we need to install Common Lisp and QuickLisp on the system. This tutorial will cover some topics including installation of Libuv on CentOS 7 system and installation of RethinkDB for the turtl data store.
Prerequisites
- CentOS 7
- Root privileges
What we will do
- Install Development Tools
- Install Libuv on CentOS 7
- Install and Configure RethinkDB
- Install Common Lisp
- Install Quicklisp
- Download and Install Turtl Server
- Running Turtl Server as a Service
- Install and Configure Apache as a Reverse Proxy for Turtl
- Testing
Step 1 - Install Development Tools
For this guide, we need the 'Development Tools' packages installed on the CentOS system.
Install 'Development Tools' using the yum command below.
sudo yum group install "Development Tools"
Wait for all 'Development Tools' packages installation.
Step 2 - Install Libuv on CentOS 7
Libuv is a multi-platform support library focused on asynchronous I/O. This library is needed by the Turtl Server, and we will install this library manually.
Before installing manually 'Libuv' to the system, let's install openssl and openssl-devel.
yum -y install openssl openssl-devel
Now go to the '/usr/local/src' directory and download the libuv.targz file using wget.
cd /usr/local/src
wget http://dist.libuv.org/dist/v1.9.1/libuv-v1.9.1.tar.gz
Extract libuv.tar.gz and remove the master.
tar -xf libuv-v1.9.1.tar.gz
rm -f libuv-v1.9.1.tar.gz
Go to the 'libuv' directory.
cd libuv-v1.9.1/
Install Libuv using the development tools by running all commands below.
sh autogen.sh
./configure
make
make install
When it's complete, run the following command.
sudo ldconfig
The Libuv library has been installed on the CentOS 7 system.

Step 3 - Install and Configure RethinkDB
RethinkDB is an open source and distributed document-oriented database, and the Turtl Server is using RethinkDB as a data store.
In this step, we will install RethinkDB from its own repository.
Add RethinkDB repository for CentOS 7 to the system.
sudo wget http://download.rethinkdb.com/centos/7/`uname -m`/rethinkdb.repo \
          -O /etc/yum.repos.d/rethinkdb.repo
RethinkDB repository has been added, now install it using the yum command in the following way.
sudo yum -y install rethinkdb
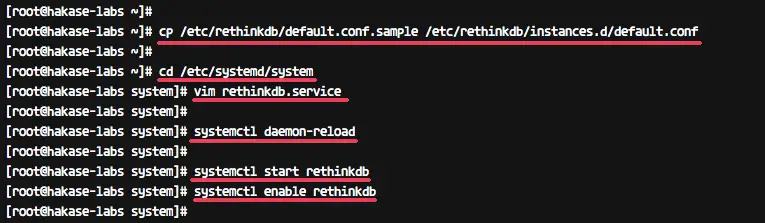
After the installation is complete, copy the default configuration to the '/etc/rethinkdb/instances.d' directory.
cp /etc/rethinkdb/default.conf.sample /etc/rethinkdb/instances.d/default.conf
And create new service file for RethinkDB using the vim editor.
cd /etc/systemd/system
vim rethinkdb.service
Paste the following configuration there.
# Automatically generated by systemd-sysv-generator

 [Unit]
 Documentation=man:systemd-sysv-generator(8)
 SourcePath=/etc/init.d/rethinkdb
 Description=LSB: This starts a set of rethinkdb server instances.
 Before=multi-user.target
 Before=multi-user.target
 Before=multi-user.target
 Before=graphical.target
 Before=shutdown.target
 After=remote-fs.target
 Conflicts=shutdown.target

 [Service]
 Type=forking
 Restart=no
 TimeoutSec=5min
 IgnoreSIGPIPE=no
 KillMode=process
 GuessMainPID=no
 RemainAfterExit=yes
 ExecStart=/etc/init.d/rethinkdb start
 ExecStop=/etc/init.d/rethinkdb stop
Now reload the systemd system and start the RethinkDB service.
systemctl daemon-reload
systemctl start rethinkdb
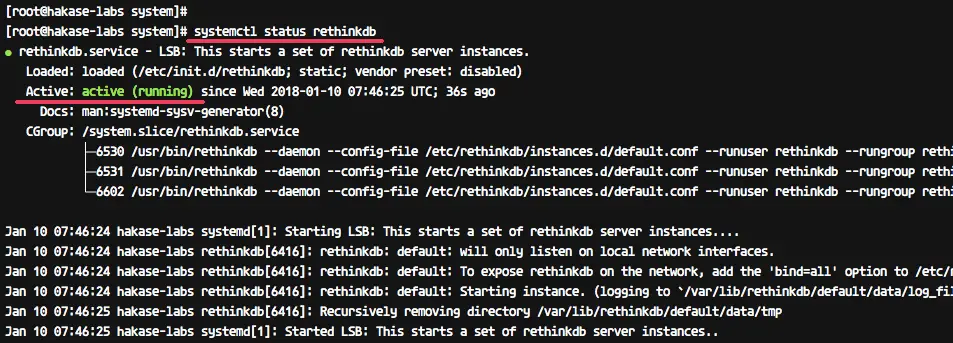
RethinkDB is now installed and running on the CentOS 7 system.
Check it using the following command.
systemctl status rethinkdb
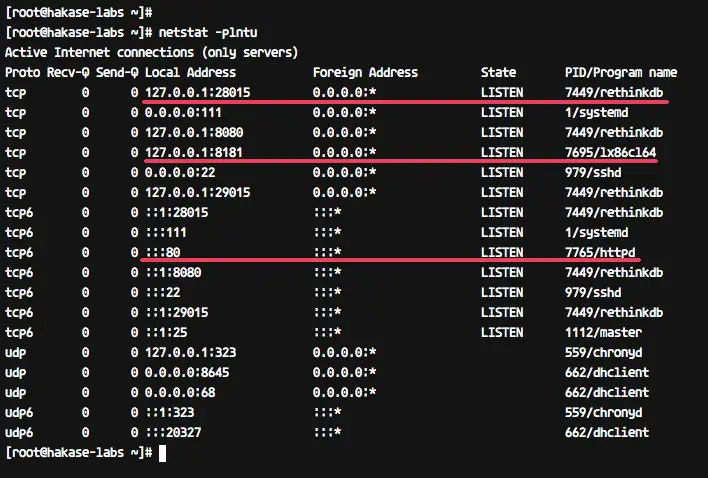
netstat -plntu
And you should get the result as below.
Step 4 - Install Common Lisp
Common Lisp (CL) is a dialect of the Lisp programming language. It's a member from the Lisp family. In this step, we will install manually the 'Clozure Common Lisp' to the CentOS system.
Go to the '/usr/local/src' directory and download the 'Clozure Common Lisp' for Linux 86/64-bit using wget command.
cd /usr/local/src
wget https://github.com/Clozure/ccl/releases/download/v1.11.5/ccl-1.11.5-linuxx86.tar.gz
Extract the 'Clozure Common Lisp' compressed file and remove the master file.
tar -xf ccl-1.11.5-linuxx86.tar.gz
rm -f ccl-1.11.5-linuxx86.tar.gz
And you will get the 'ccl' directory. Go to the 'ccl' directory and copy the 'ccl64' bin file to '/usr/bin' directory.
cd /usr/local/src/ccl
sudo cp scripts/ccl64 /usr/bin/
Now verify the 'Clozure Common Lisp' installation by running the 'ccl64' command.
ccl64
And make sure you get the result as below.
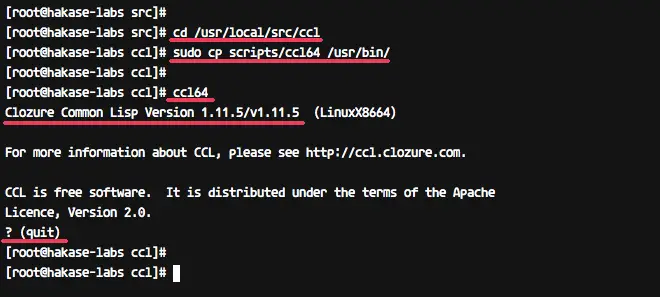
The 'Clozure Common lisp' is now installed. And if you want to exit from the 'ccl' shell, type the quit command.
(quit)
Step 5 - Install Quicklisp
Quicklisp is a library manager for the Common Lisp. We need the 'Quicklisp' installed on the system because turtl loads all of its dependencies through the Quicklisp system.
Before installing Quicklisp, please add a new user for turtl installation.
useradd -m -s /bin/bash turtl
passwd turtl
Now login as the 'turtl' user.
su - turtl
Download the 'quicklisp.lisp' and 'asdf.lisp' files using the wget/curl command.
wget https://common-lisp.net/project/asdf/asdf.lisp
curl -O https://beta.quicklisp.org/quicklisp.lisp
Now load 'quicklisp.lisp' using the 'ccl64' command as below.
ccl64 --load quicklisp.lisp
And you will get the 'ccl' shell command line. Install Quicklisp using the command below.
(quicklisp-quickstart:install)
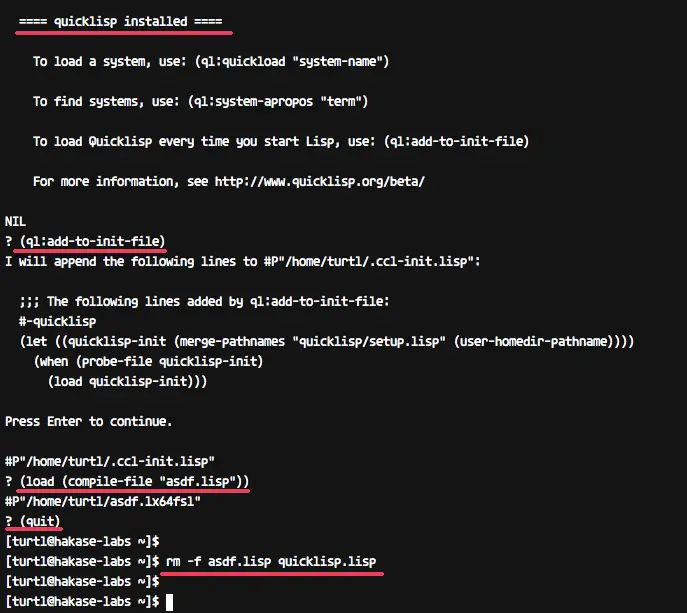
The command will download all dependencies for Quicklisp. And after it's complete, add the Quicklisp 'init' file and load 'asdf.lisp'.
(ql:add-to-init-file)
(load (compile-file "asdf.lisp"))
When it's complete, exit from the 'ccl' shell.
(quit)
And remove 'quicklisp.lisp' and 'asdf.lisp' files.
rm -f asdf.lisp quicklisp.lisp
Quiclisp has been installed.
Step 6 - Download and Install Turtl Server
In this step, we will install Turtl under the 'turtl' user that we've created on the top.
Login as the 'turtl' user and clone the turtl source code using git.
su - turtl
git clone https://github.com/turtl/api.git
Go to the 'api' directory and create new file 'launch.lisp' using vim.
cd /home/turtl/api
vim launch.lisp
Paste the following configuration there.
(pushnew "./" asdf:*central-registry* :test #'equal)
 (load "start")
Save and exit.
Next, we need to install some dependencies for turtl. Go to the quicklisp directory and clone all dependencies.
cd ~/quicklisp/local-projects
Download all dependencies by running all commands below.
git clone git://github.com/orthecreedence/cl-hash-util
git clone git://github.com/orthecreedence/vom
git clone git://github.com/orthecreedence/cl-async
git clone git://github.com/orthecreedence/cffi
git clone git://github.com/orthecreedence/wookie
git clone git://github.com/orthecreedence/cl-rethinkdb
git clone git://github.com/orthecreedence/cl-libuv
git clone git://github.com/orthecreedence/drakma-async
git clone https://github.com/Inaimathi/cl-cwd.git
And edit the ccl init file.
vim /home/turtl/.ccl-init.lisp
Go to the end of the line, paste the following configuration there.
(cwd "/home/turtl/api")
 (load "/home/turtl/api/launch")
Save and exit.
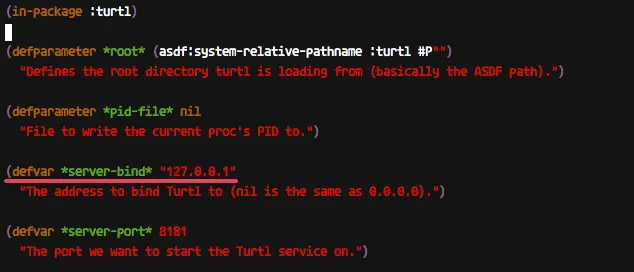
Now copy the default turtl configuration 'config.lisp' and edit it using vim.
cp /home/turtl/api/config/config.default.lisp /home/turtl/api/config/config.lisp
vim /home/turtl/api/config/config.lisp
On the 'server-bind' line, add the localhost IP address as below.
defvar *server-bind* "127.0.0.1"
Save and exit.
After all of the configuration is complete, start the turtl server using the 'ccl64' command.
ccl64
The command will install Turtl server API, and when it's complete you will get the result as below.

Press 'Ctrl + c' and type '(quit)' to exit.
Step 7 - Running Turtl Server as a Service
The Turtl server API has been installed under the 'turtl' user. And for this tutorial, we will run turtl as a service.
Go to the '/lib/systemd/system' directory and create a new 'turtl.service' file using vim.
cd /lib/systemd/system/
vim turtl.service
Paste the following turtl service configuration there.
 [Unit]
 Description=turtl_service
 After=network.target mysql.service postgresql.service

 [Service]
 User=turtl
 ExecStart=/usr/bin/ccl64
 Restart=always

 [Install]
 WantedBy=multi-user.target
Save and exit.
Now reload systemd and start the turtl service using the systemctl command.
systemctl daemon-reload
systemctl start turtl
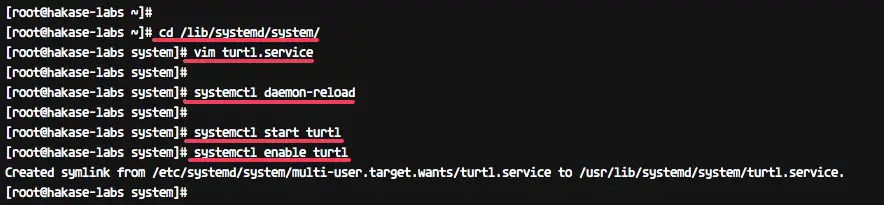
Add the turtl service to the boot time and check the turtl service status.
systemctl enable turtl
systemctl status turtl
You should get the result as below.
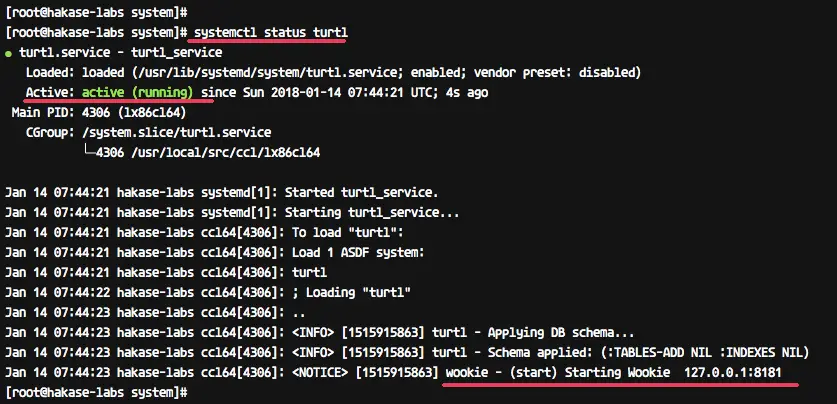
The turtl service is now running as a service on CentOS 7 system.
Step 8 - Install and Configure Apache/httpd as a Reverse Proxy for Turtl
In this tutorial, we will run the Turtl server under the Apache/httpd reverse proxy server. The Turtl server is now running under the local IP '127.0.0.1' with port '8181', and now we will install the Apache2 web server and configure it as a reverse proxy for the Turtl server.
Install apache2 with all dependencies using the yum command below.
yum -y install httpd mod_proxy_html
After the installation is complete, add new virtual host file for Turtl.
Go to the '/etc/httpd/conf.d' directory and create a new virtual host file 'turtl.conf'.
cd /etc/httpd/conf.d/
vim turtl.conf
Paste the following virtual host configuration there.
<VirtualHost *:80>

 ServerName turtl.hakase-labs.co
 ServerAdmin [email protected]

 ProxyPreserveHost On
 ProxyRequests off
 RewriteEngine On

 <Proxy http://localhost:8181>
 Order deny,allow
 Allow from all
 </Proxy>

 ProxyPass / http://127.0.0.1:8181/ Keepalive=On timeout=1600
 ProxyPassReverse / http://127.0.0.1:8181/

 LogLevel info

 CustomLog /var/log/httpd/turtl.log combined

 </VirtualHost>
Save and exit.
Now check the Apache configuration and make sure there is no error.
apachectl configtest
Now, restart the httpd service and enable it to launch everytime at system boot.
systemctl restart httpd
systemctl enable httpd
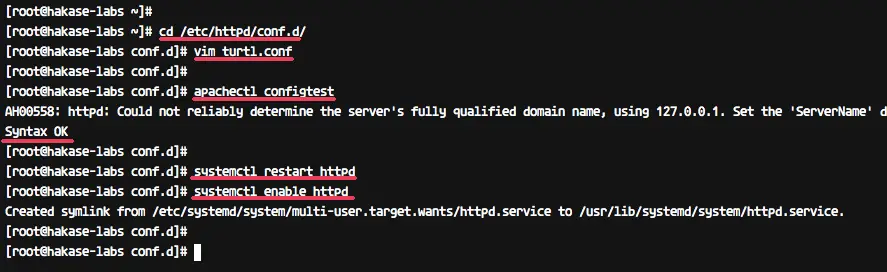
The Apache2/httpd web server has been installed on the CentOS 7 system, and it acts as a reverse proxy for Turtl application on port 8181.
Check it using the netstat command below.
netstat -plntu
Step 9 - Testing
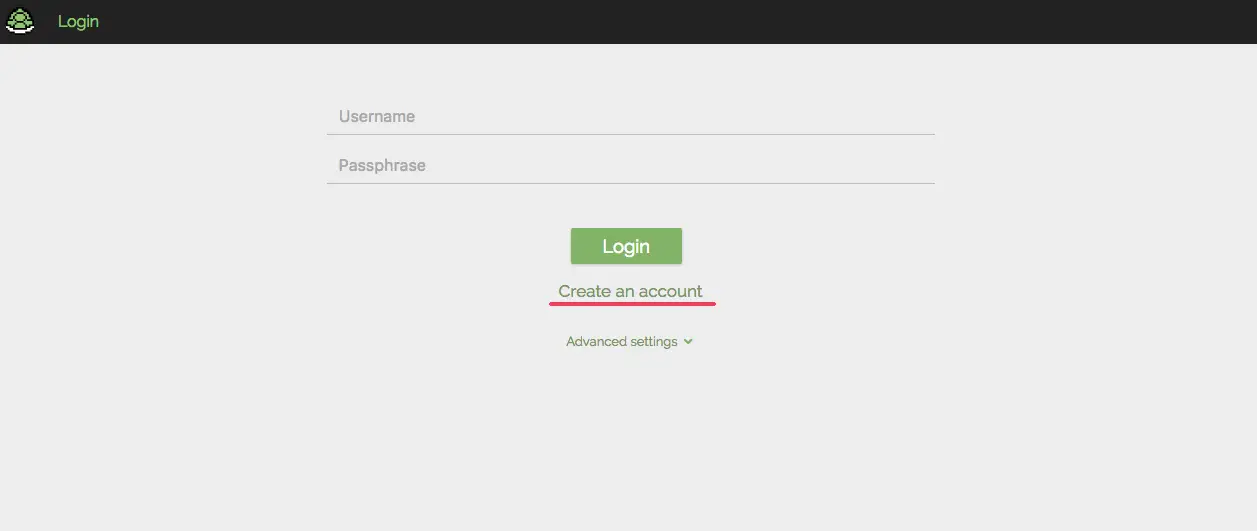
Download the turtl client application and open it.
Click on the 'Create an Account' link.
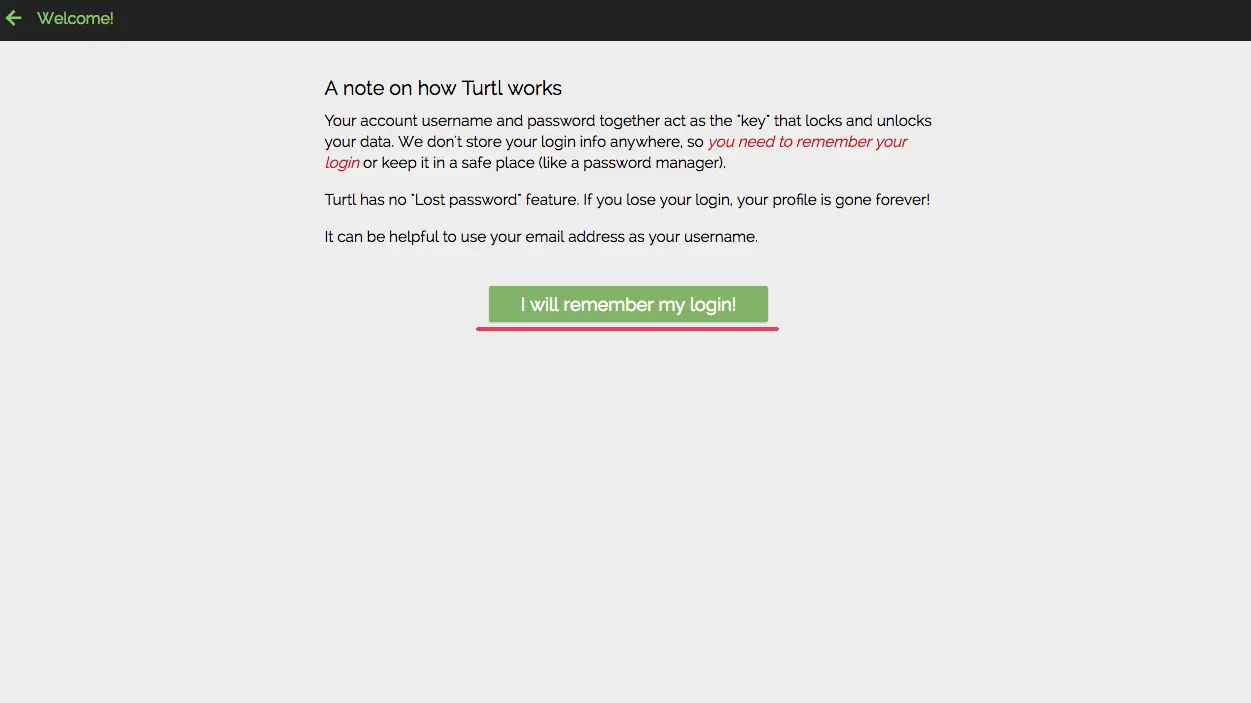
Now click the 'I will remember my login' button.
Type your email address with password and your Turtl server domain name.
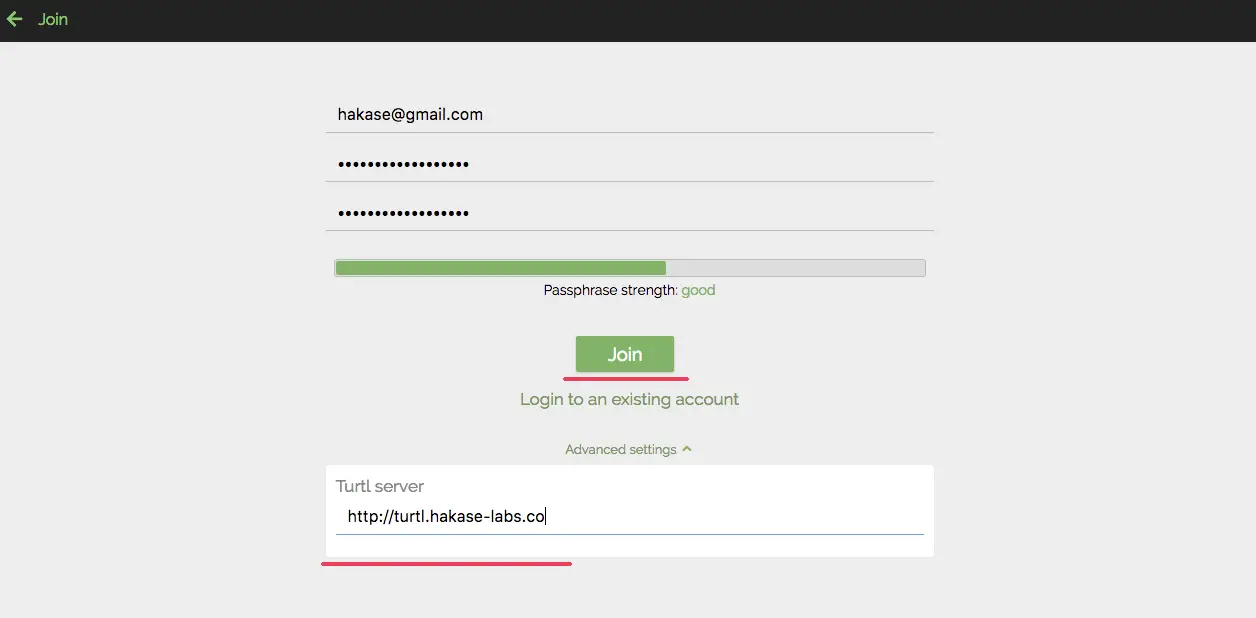
And click the 'Join' button.
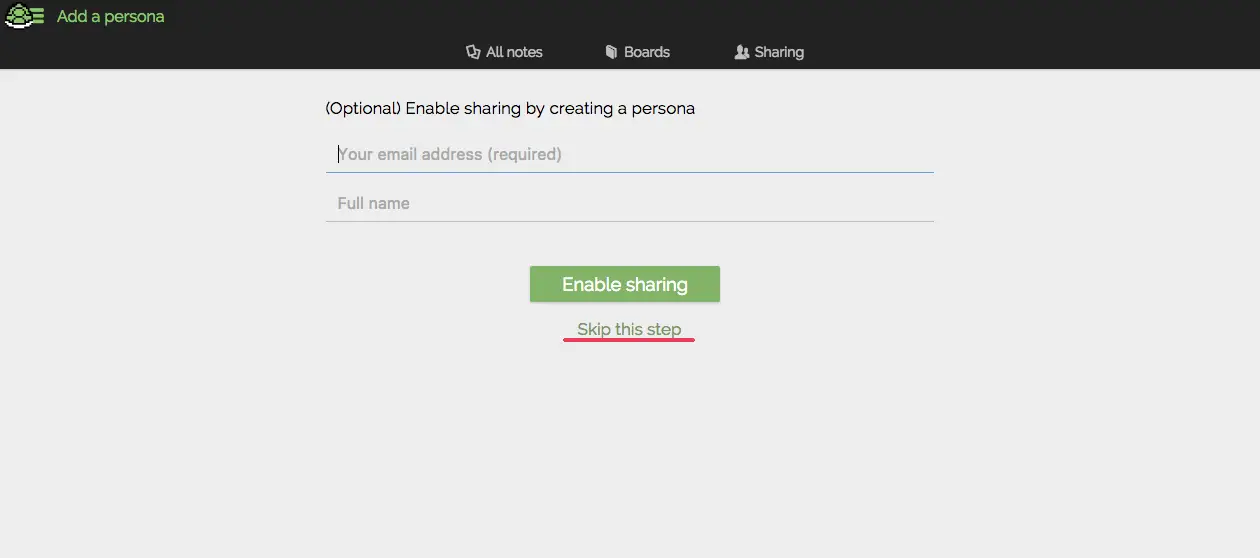
Now you will get a new window - click the 'skip this step' button.
And you will get the blank turtl dashboard. Here, you can add new note, password, files, bookmark etc.
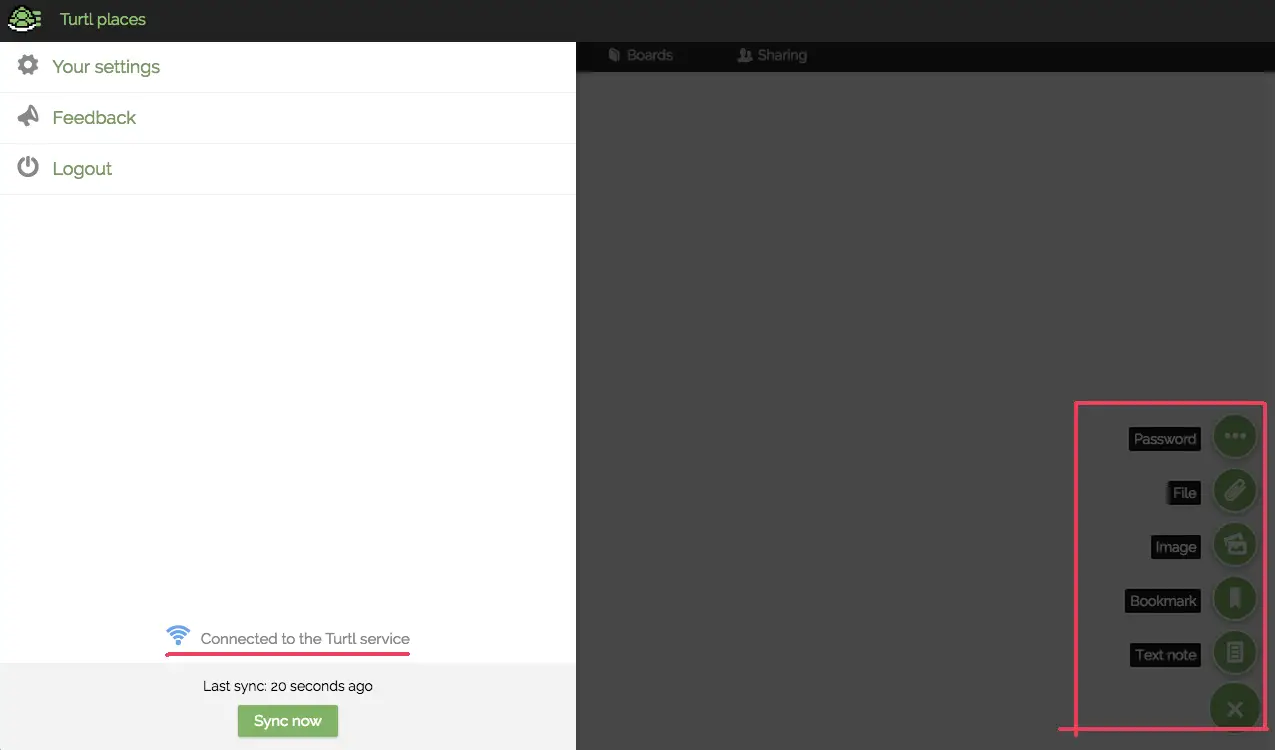
The Turtl server installation on CentOS 7 system has been completed successfully.

