How to Install DokuWiki on Debian 12
This tutorial exists for these OS versions
- Debian 12 (Bookworm)
- Debian 11 (Bullseye)
- Debian 9 (Stretch)
On this page
DokuWiki is a simple, versatile open-source wiki software that doesn't require a database. It's known for its ease of maintenance, readability, and user management, making it ideal for creating and managing documentation in corporate or collaborative environments. Powered with PHP, its versatile wiki software and built-in Access Controls (ACL) support major authentication drivers. DokuWiki provides an easy administration, it is easy to install, maintain, and backup from one host to another.
In this guide, we'll walk you through the installation of DokuWiki on the Debian 12 server. You will install DokuWiki with LAMP Stack (Apache2, MariaDB, and PHP), UFW, and SSl/TLS certificates via Letsencyrpt.
Prerequisites
Ensure you have the following to proceed with this guide:
- A Debian 12 server.
- A non-root user with administrator privileges.
- A domain name pointed to the server IP address.
Installing Dependencies
By default, the DokuWiki package is available on the Debian repository. But, to ensure that you have the latest version of DokuWiki installed, you will be installing DokuWiki manually to your Debian server.
In this section, you will install dependencies for DokuWiki, including the LAMP STack packages (Apache2, MariaDB, and PHP), UFW, and Certbot.
Before you start, update your Debian repository using the command below.
sudo apt update
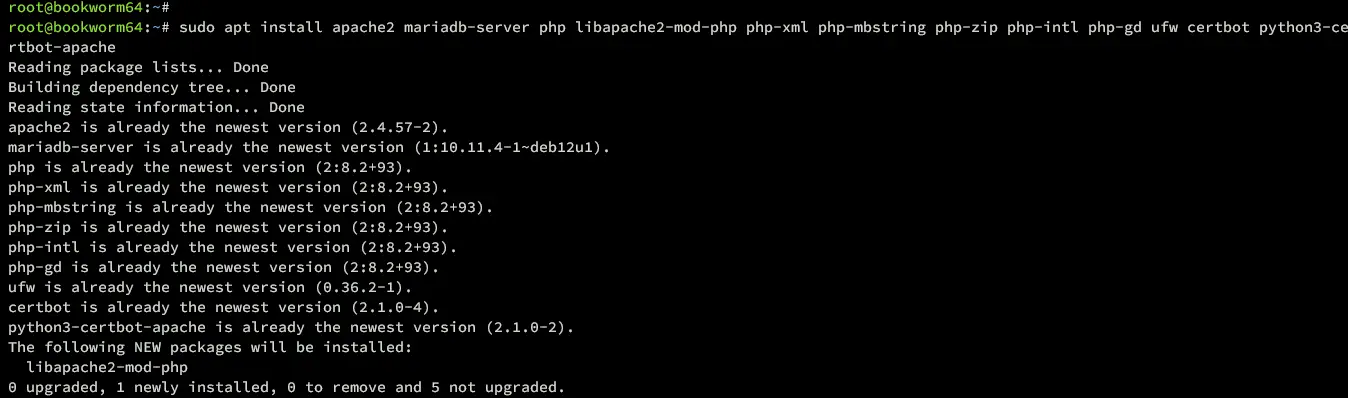
Install the LAMP Stack, UFW, and Certbot packages using the following apt install command. Type Y and press ENTER when prompted.
sudo apt install apache2 mariadb-server php libapache2-mod-php php-xml php-mbstring php-zip php-intl php-gd ufw certbot python3-certbot-apache
Once the installation is finished, verify both Apache and MariaDB service status to ensure that the service is running.
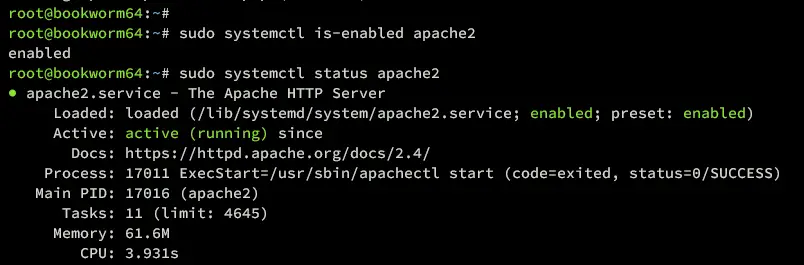
Execute the following command to check the apache2 service.
sudo systemctl is-enabled apache2
sudo systemctl status apache2
When apache2 is running, you should get an output 'active (running)'. And the output 'enabled' confirms apache2 will start at system boot.
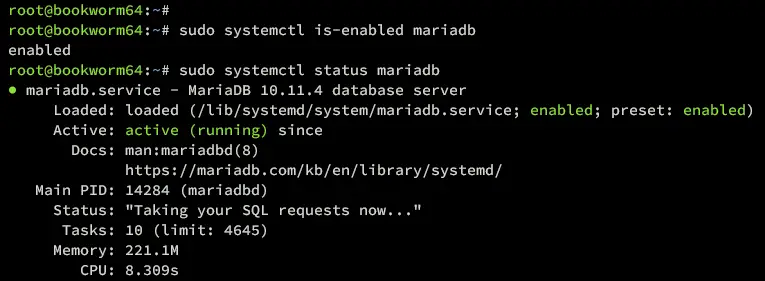
Now execute the following command to verify the mariadb service.
sudo systemctl is-enabled mariadb
sudo systemctl status mariadb
Ensure that the mariadb service is 'enabled' and 'active (running)' on your Debian machine.
Configuring UFW
In this guide, you will secure your Debian server with UFW (Uncomplicated Firewall). In that case, you must open the SSH port for your remote access, and ports for HTTP and HTTPS protocols to run the DokuWiki installation.
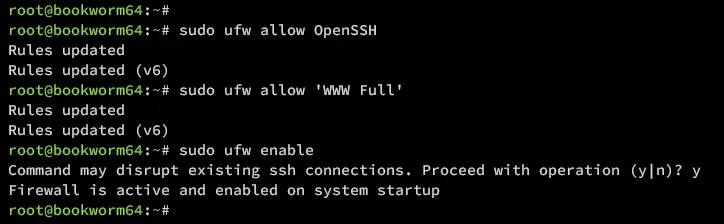
Run the following command to add the OpenSSH and 'WWW Full' profiles to UFW.
The OpenSSH profile will open default SSh port 22, while the 'WWW Full' profile opens both HTTP and HTTPS ports.
sudo ufw allow OpenSSH
sudo ufw allow 'WWW Full'
Now, run the following command to start and enable UFW on your Debian machine.
sudo ufw enable
Input y when asked to confirm, and you should get an output such as 'Firewall is active and enabled on system startup'. The UFW will be run automatically on system boot.
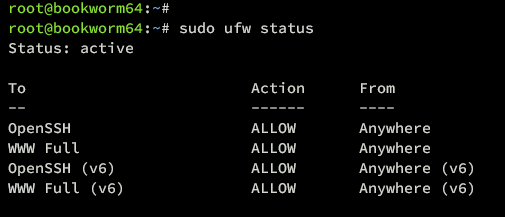
Lastly, run the following command to verify the UFW status. Ensure both OpenSSH and 'WWW Full' profiles are listed on your UFW-enabled rules.
sudo ufw status
Configuring php.ini
In the following section, you will configure PHP by modifying the default php.ini file and adjusting some of the configurations for the DokuWiki installation.
Run the following nano editor command to open the PHP configuration file '/etc/php/8.2/apache2/php.ini'.
sudo nano /etc/php/8.2/apache2/php.ini
Change the default configuration with the following. be sure to adjust the memory_limit parameter with your current server RAM.
memory_limit=256M
upload_max_filesize=32M
post_max_size=32M
max_execution_time=60
Save and close the file when finished.
Now, run the systemctl command below to restart the apache2 service and take the effects of your changes.
sudo systemctl restart apache2
Configuring MariaDB Server
Now that you've configured PHP, the next step is to configure your MariaDB server installation, then create a new database and user that will use DokuWiki.
Start the MariaDB configuration process by executing the mariadb-secure-installation command below.
sudo mariadb-secure-installation
Input Y when asked to apply the new configuration to MariaDB, or you can also type n for No to reject it. Below are some of the MariaDB configurations you will be prompted:
- The default MariaDB installation comes without a password, press ENTER when prompted for the password.
- Now input Y to set up the MariaDB root password. Then, type the new password for MariaDB and repeat the password.
- Input Y to remove the anonymous user from your MariaDB installation.
- Input Y again when prompted to disable the remote login for the MariaDB root user.
- Input Y to remove the default database test from your MariaDB.
- Lastly, input Y to reload table privileges and apply new changes.
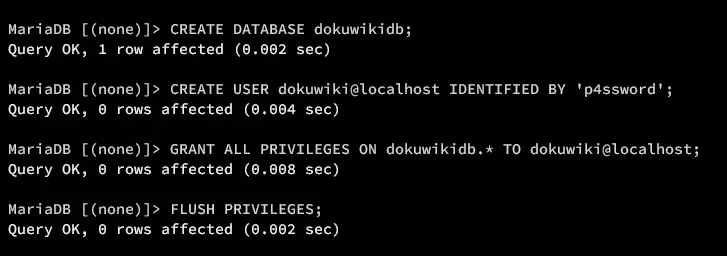
After the MariaDB configuration is finished, you need to create a new database and user that will be used by DokuWiki.
Log in to the MariaDB server by executing the mariadb command below. Input your MariaDB root password when prompted.
sudo mariadb -u root -p
Now run the following queries to create a new database dokuwikidb, user dokuwiki, with the password 'p4ssword'. Be sure to change the password with your new password.
CREATE DATABASE dokuwikidb;
CREATE USER dokuwiki@localhost IDENTIFIED BY 'p4ssword';
GRANT ALL PRIVILEGES ON dokuwikidb.* TO dokuwiki@localhost;
FLUSH PRIVILEGES;
Next, verify the user dokuwiki to ensure the privileges to the database dokuwikidb.
SHOW GRANTS FOR dokuwiki@localhost;
In the following output, you've configured user dokuwiki with full privileges for the database dokuwikidb.
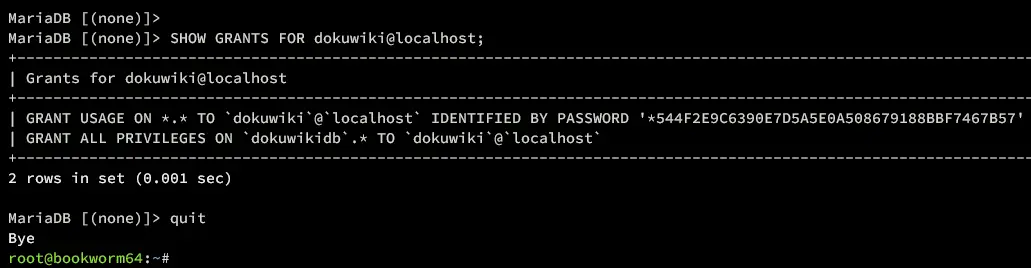
Lastly, type quit to exit from the MariaDB server and move on to the next step.
Downloading DokuWiki Source Code
In this section, you will download the DokuWiki source code and set up the installation directory with proper permission.
Move on to the /var/www/ directory and download the latest stable version of DokuWiki using the wget command below.
cd /var/www/
wget https://download.dokuwiki.org/src/dokuwiki/dokuwiki-stable.tgz
Now extract the file dokuwiki-stable.tgz and rename the extracted directory to dokuwiki. This means that your DokuWiki installation directory will be available at /var/www/dokuwiki.
tar xzvf dokuwiki-stable.tgz
sudo mv dokuwiki-*a dokuwiki
Lastly, run the command below to change the ownership of the /var/www/dokuwiki directory to the user www-data and user www-data. This way, your Apache2 web server will be able to read DokuWiki source code.
sudo chown -R www-data:www-data /var/www/dokuwiki
Configuring Apache2 Virtual Host
After downloading DokuWiki, you will now create a new Apache2 virtual host file to run DokuWiki. Be sure that you've your domain name is ready before you start. In this example, we'll be using the domain wiki.hwdomain.io.
Now, run the nano editor command below to create a new Apache2 virtual host configuration /etc/apache2/sites-available/dokuwiki.conf.
sudo nano /etc/apache2/sites-available/dokuwiki.conf
Insert the following configuration and be sure to change the domain name wiki.hwdomain.io with your domain.
<VirtualHost *:80>
    ServerName    wiki.hwdomain.io
    DocumentRoot  /var/www/dokuwiki

    <Directory ~ "/var/www/dokuwiki/(bin/|conf/|data/|inc/)">
        <IfModule mod_authz_core.c>
            AllowOverride All
            Require all denied
        </IfModule>
        <IfModule !mod_authz_core.c>
            Order allow,deny
            Deny from all
        </IfModule>
    </Directory>

    ErrorLog   /var/log/apache2/wiki.hwdomain.io_error.log
    CustomLog  /var/log/apache2/wiki.hwdomain.io_access.log combined
</VirtualHost>
When finished, save and close the file.
Next, run the following command to enable the dokuwiki.conf virtual host and verify your Apache syntax to ensure no error.
sudo a2ensite dokuwiki.conf
sudo apachectl configtest
If you have proper syntax and have no error, you will see an output 'Syntax OK'.

Lastly, run the command below to restart the Apache2 server and apply your modification.
sudo systemctl restart apache2
Securing DokuWiki with SSL/TLS Certificates
At this point, your DokuWiki is running and accessible. But to ensure that your installation is secure, you will set up SSl/TLS certificates via Letsencrypt.
Execute the certbot command below to generate SSL/TLS certificates for your DokuWiki domain name. Be sure to change the email address and domain name with your information.
sudo certbot --apache --agree-tos --redirect --hsts --staple-ocsp --email [email protected] -d wiki.hwdomain.io
Once the process is finished, your DokuWiki installation should be automatically configured with HTTPS. And your SSL/TLS certificates should be available at /etc/letsencrypt/live/yourdomain.com directory.
Installing DokuWiki via Web Installer
Open your web browser and visit your domain name for DokuWiki installation, such as https:/wiki.hwdomain.io/install.php. You should see the DokuWiki web installer.
Select the option Enable ACL, input your admin user, email, and password for DokuWiki, and then click Save.
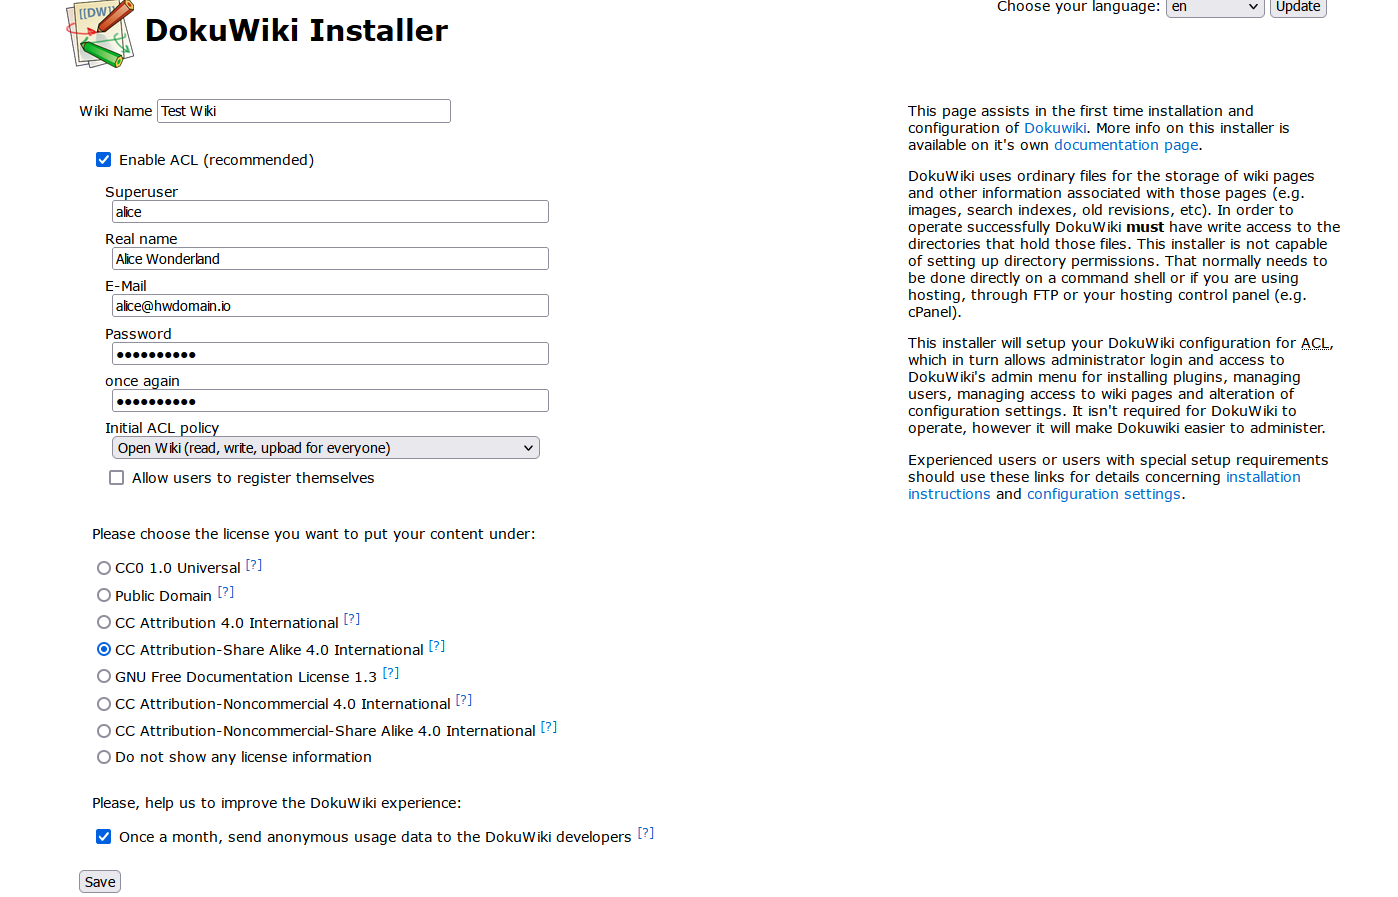
Once the installation is successful, you should get an output 'The configuration was finished successfully..'.
Pictu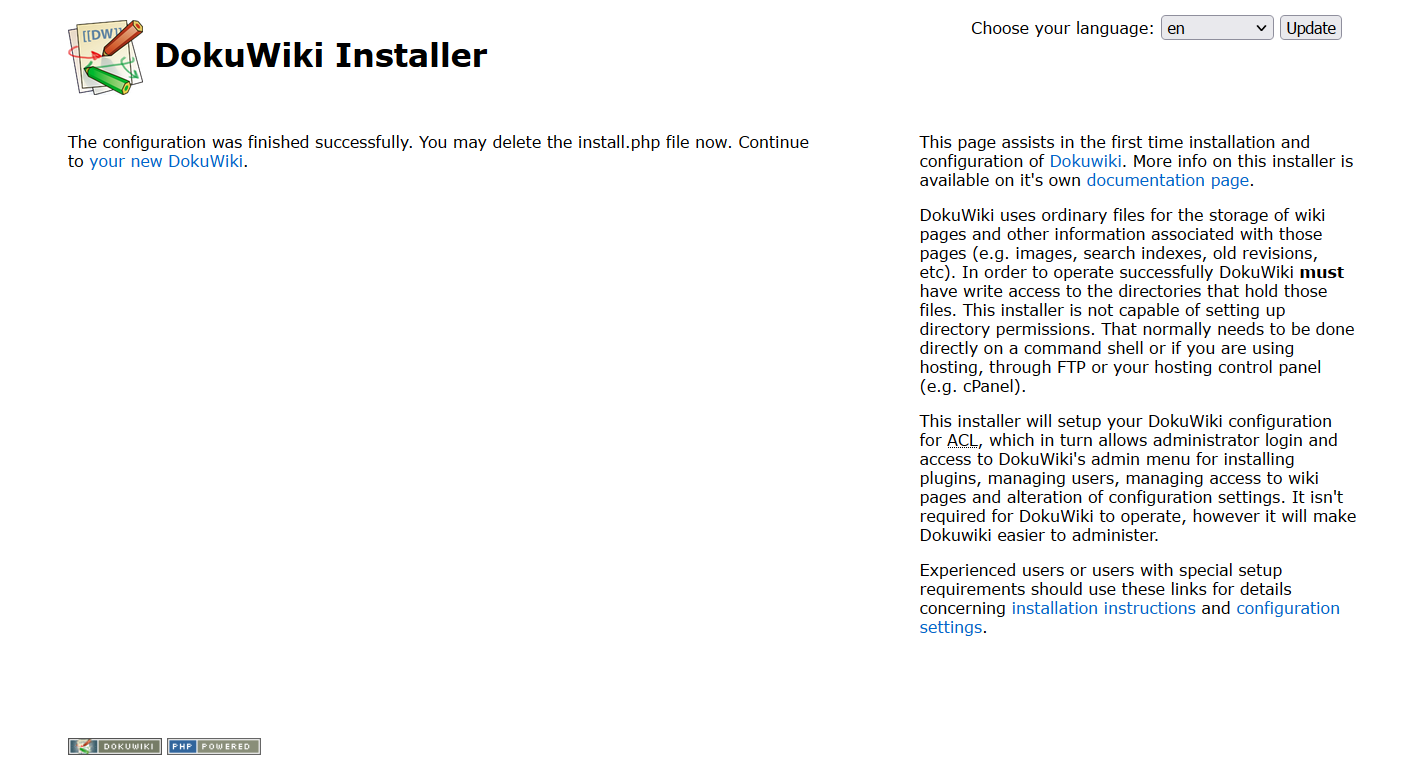 re
re
Now move back to your terminal and delete the install.php script using the command below.
sudo rm /var/www/dokuwiki/install.php
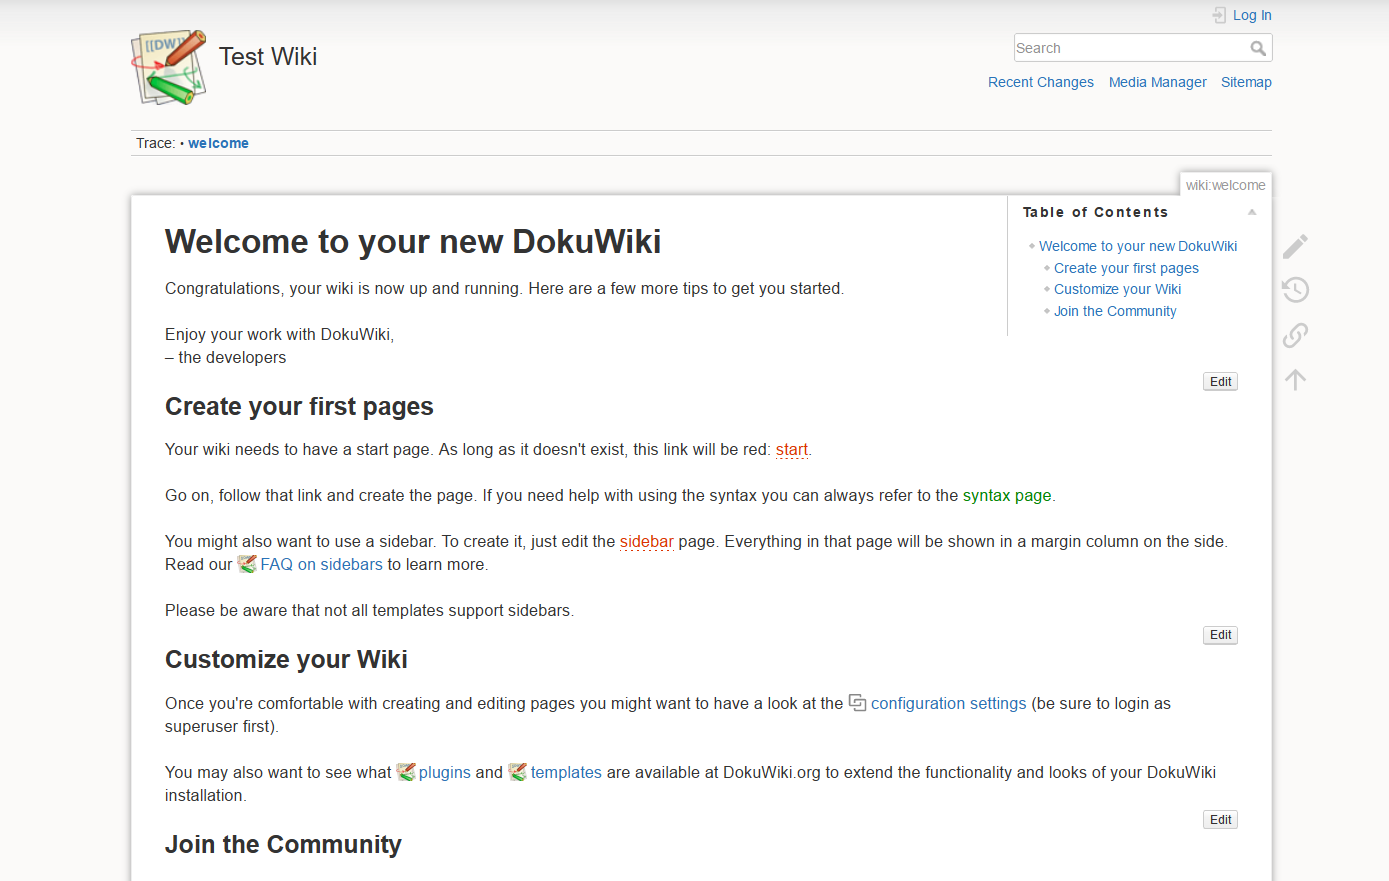
Next, click the link 'your new DokuWiki' to continue. And you should get the DokuWiki homepage like the following.
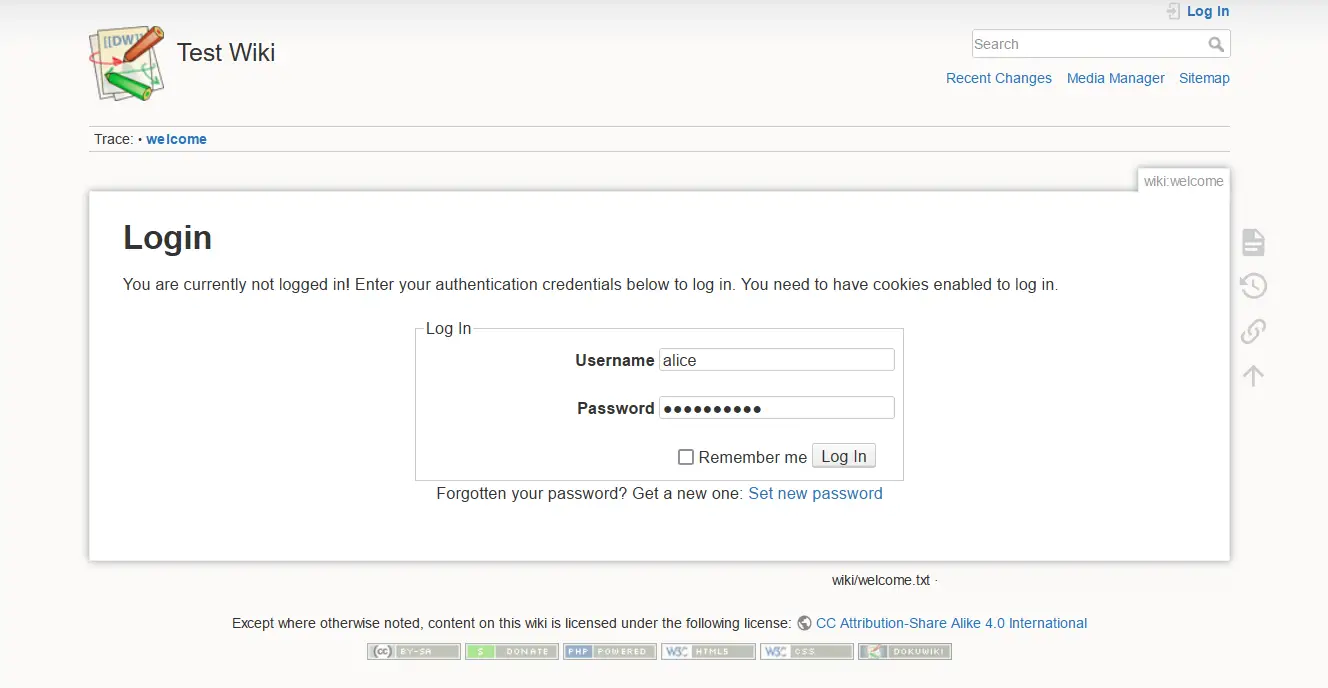
Now click on the Login button and you should get the DokuWiki login page like the following.
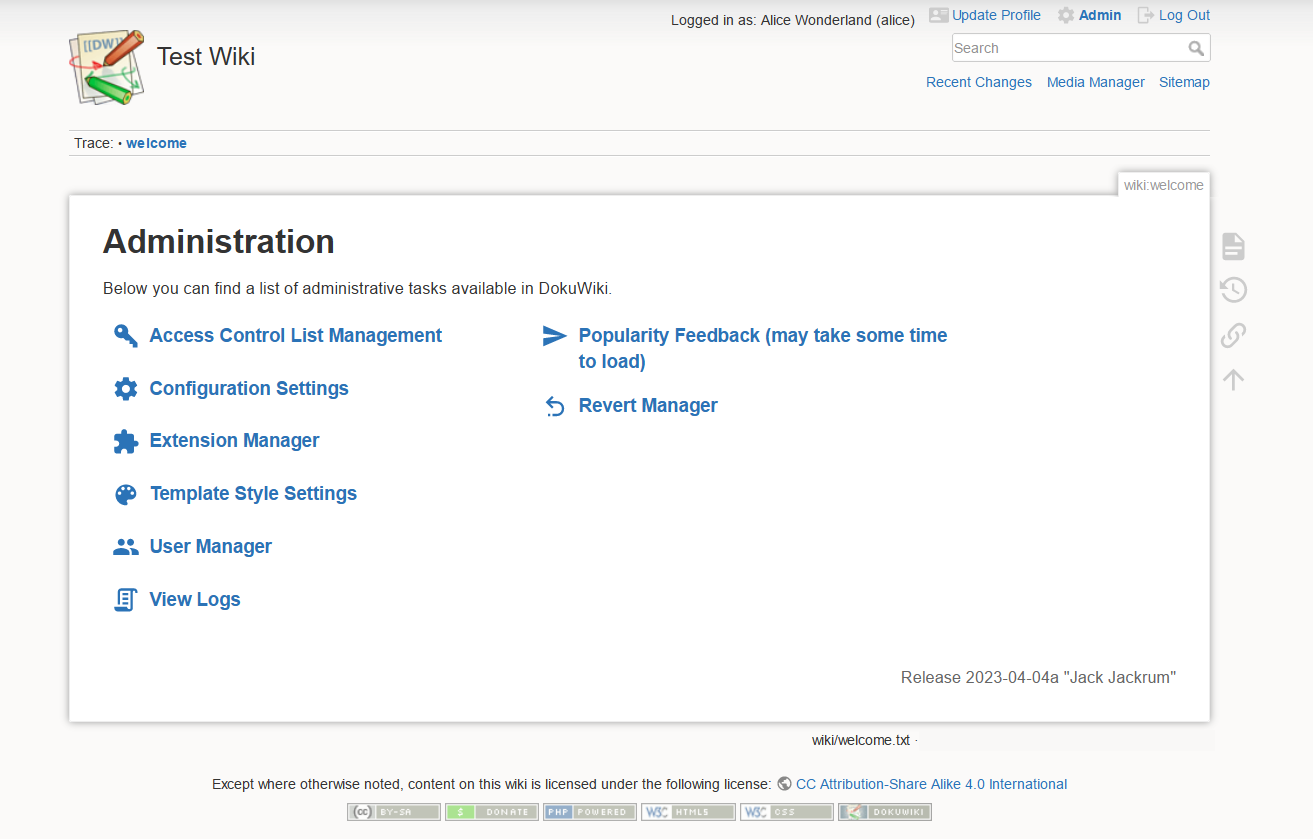
Input your admin user and password, then click Log in. When successful, you should presented with the DokuWiki dashboard.
Conclusion
Congratulations! You've now completed the installation of DokuWiki on the Debian 12 server. You've installed DokuWiki with the LAMP Stack (Apache2, MariaDB, and PHP). You've also secured your DokuWiki installation with UFW (Uncomplicated Firewall) and SSL/TLS certificates from Letsencrypt.

