How to Install Apache Maven on CentOS 8
Apache Maven is a software project management tool based on the POM (Project, Object, Model) concept. Maven is a build automation tool used primarily for Java-based projects, but can also be used to build and manage projects written in C#, Ruby, Scala, and other languages. It not only describes how software builds but also its dependencies.
In this tutorial, we will show you step-by-step how to install and configure Apache Maven on a CentOS 8 system.
Prerequisites
- CentOS 8
Root privileges
What we will do:
- Install Java OpenJDK on CentOS 8
- Download Apache Maven Binary File
- Configure Apache Maven Environment
- Testing
Step 1 - Install Java OpenJDK on CentOS 8
Firstly, we're going to install the Java OpenJDK on CentOS 8 from the AppStream repository. There many OpenJDK versions provided by the AppStream repository, and we're going to use the Java OpenJDK LTS version 11.
You use the following command to get all available OpenJDK version on the AppStream.
dnf search openjdk
dnf info java-11-openjdk
Now install the Java OpenJDK 11 using the dnf command below.
sudo dnf install java-11-openjdk
Once the installation is complete, check the Java version.
java -version
And you will get the result as below.
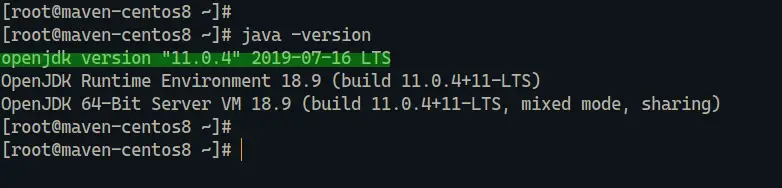
As a result, the Java OpenJDK 11 has been installed on CentOS 8 Server.
Step 2 - Download Apache Maven Binary File
In this tutorial, we're going to install the latest stable version Apache Maven 3.6.2 by downloading its binary file.
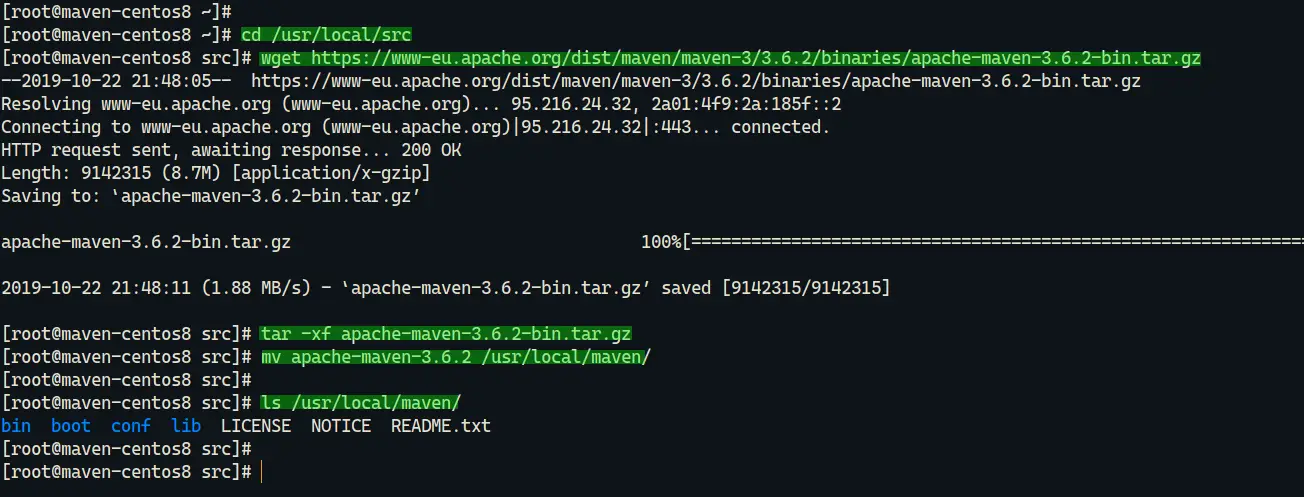
Go to the '/usr/local/src' directory and download the Apache Maven binary file using the wget command.
cd /usr/local/src
wget https://www-eu.apache.org/dist/maven/maven-3/3.6.2/binaries/apache-maven-3.6.2-bin.tar.gz
Extract the compressed file and move the Apache maven directory to '/usr/local' as a 'maven' directory.
tar -xf apache-maven-3.6.2-bin.tar.gz
mv apache-maven-3.6.2 /usr/local/maven/
Now the Apache Maven has been installed on the '/usr/local/maven' directory.
Step 3 - Configure Apache Maven Environment
In this step, we're going to set up the environment variable for Apache Maven. We're going to configure the Apache Maven environment variable directory through the '/etc/profile.d' directory, and it will make the Apache Maven can be used by all users on the system.
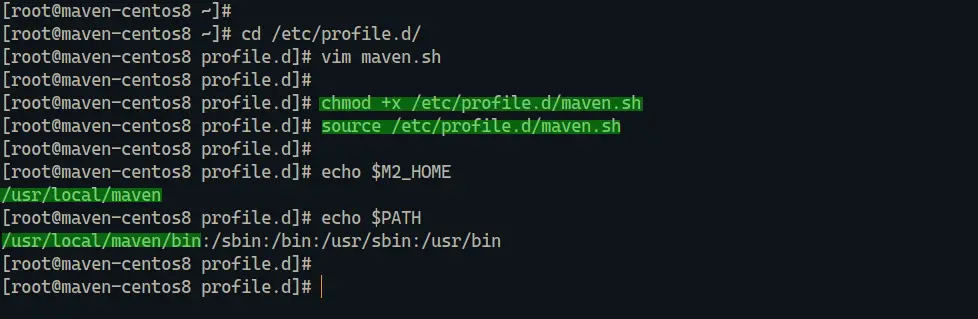
Go to the '/etc/profile.d' directory and create the 'maven.sh' script using vim editor.
cd /etc/profile.d/
vim maven.sh
Paste the following script.
# Apache Maven Environment Variables
# MAVEN_HOME for Maven 1 - M2_HOME for Maven 2
export M2_HOME=/usr/local/maven
export PATH=${M2_HOME}/bin:${PATH}
Save and close.
After that, make the 'maven.sh' script executable and load it to the system using the source command.
chmod +x /etc/profile.d/maven.sh
source /etc/profile.d/maven.sh
Now the configuration of Apache Maven environment variable has been completed. And as a result, the Apache Maven command is available for all users on the system.
Step 4 - Testing
To verify our Apache Maven installation, you can run the maven command below.
mvn --version
And you should get a result similar to the following:
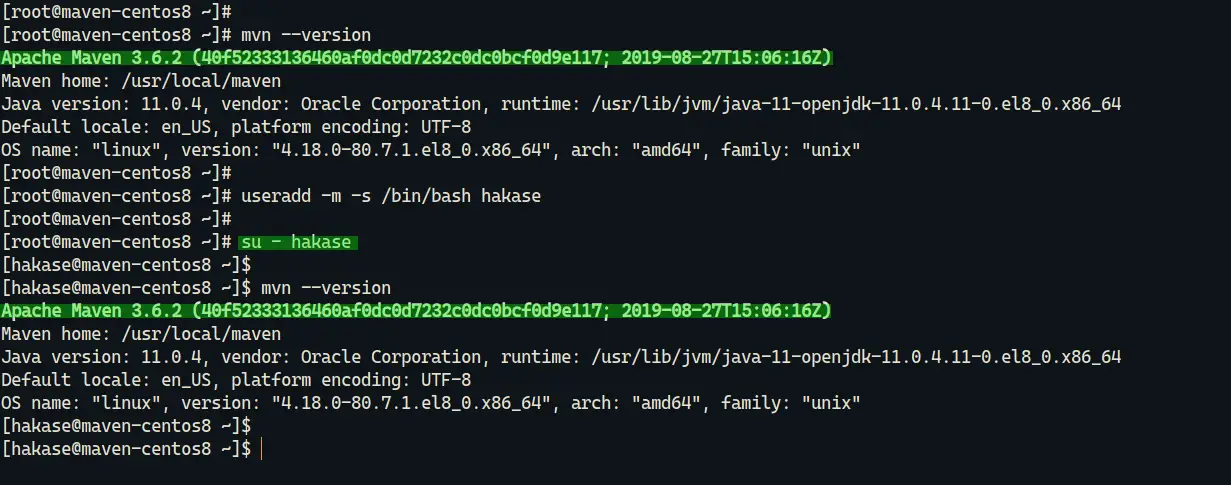
As a result, The Apache Maven 3.6 installation has been completed. It's running under Linux CentOS 8 64bit, with Java OpenJDK 11 installed, and the Maven Home directory is '/usr/local/maven'.

