How to install XMB forum on Ubuntu 16.04 LTS
XMB forum also known as eXtreme Message Board is a free and open source forum software written in PHP and uses MySQL database backend. XMB is a simple, lightweight, easy to use, Powerful and highly customizable. You can do everything with XMB forum and also share any modifications or themes.
In this tutorial, we will learn how to install XMB forum on Ubuntu 16.04.
Requirements
- A server running Ubuntu 16.04.
- A non-root user with sudo privileges.
Update the System
Before starting, it is recommended to update your package with the latest version. You can do this with the following command:
sudo apt-get update -y
sudo apt-get upgrade -y
Once your system is up-to-date, restart the system to apply the changes.
Install LAMP Server
XMB forum runs on Apache web server, written in PHP and uses MySQL as a database backend, so you will need to install LAMP server to your system.
You can install it by running the following command:
sudo apt-get install apache2 libapache2-mod-php7.0 php7.0 pkp7.0-cli php7.0-gd php7.0-mcrypt php7.0-xml wget nano unzip mariadb-server -y
Once all the packages are installed, start Apache and MariaDB server and enable them to start on boot using the following command:
sudo systemctl start apache2
sudo systemctl enable apache2
sudo systemctl start mysql
sudo systemctl enable mysql
Download XMB
Next, you will need to download the latest version of the XMB from their official website. You can do this with the following command:
wget https://www.xmbforum2.com/download/XMB-1.9.11.15.zip
Next, extract the downloaded file using the following command:
unzip XMB-1.9.11.15.zip
Next, copy extracted directory to the apache root directory:
cp -r XMB-1.9.11.15 /var/www/html/xmb
Next, give proper permission to the XMB directory:
sudo chown -R www-data:www-data /var/www/html/xmb
sudo chmod -R 777 /var/www/html/xmb
Configure Database
By default, MariaDb is not secured, you can secured it by running the mysql_secure_installation script:
sudo mysql_secure_installation
This script will set a root password, remove anonymous users, disallow remote root login, and remove the test database and access to secure MariaDB as shown below:
Set root password? [Y/n] y
Remove anonymous users? [Y/n] y
Disallow root login remotely? [Y/n] y
Remove test database and access to it? [Y/n] y
Reload privilege tables now? [Y/n] y
Once the MariaDB is secured, log in to MariaDB shell with the following command:
mysql -u root -p
Enter your root password, then create a database and user for XMB with the following command:
MariaDB [(none)]> SET GLOBAL sql_mode='';
MariaDB [(none)]> CREATE DATABASE xmbdb;
MariaDB [(none)]> CREATE USER xmb;
MariaDB [(none)]> GRANT ALL PRIVILEGES ON xmbdb.* TO 'xmb'@'localhost' IDENTIFIED BY 'password' WITH GRANT OPTION;
Next, flush the privileges:
MariaDB [(none)]> FLUSH PRIVILEGES;
Finally, exit from the MariaDB shell:
MariaDB [(none)]>exit
Configure Apache for XMB
Next, you will need to create an Apache virtual host directive for XMB. You can do this by creating xmb.conf file:
sudo nano /etc/apache2/sites-enable/xmb.conf
Add the following lines:
<VirtualHost *:80>
 ServerAdmin [email protected]
 DocumentRoot /var/www/html/xmb
 ServerName example.com
 <Directory /var/www/html/xmb/>
Options Indexes FollowSymLinks MultiViews
AllowOverride All
Order allow,deny
allow from all
 </Directory>
 ErrorLog /var/log/apache2/xmb-error_log
 CustomLog /var/log/apache2/xmb-access_log common
</VirtualHost>
Save and close the file, when you are finished. Then enable XMB virtual host with the following command:
sudo a2ensite xmb
Finally, restart Apache web server to apply all the changes:
sudo systemctl restart apache2
Access XMB Forum Installer
Now, open your web browser and type the URL http://example.com/files/install/, you should see the following page:
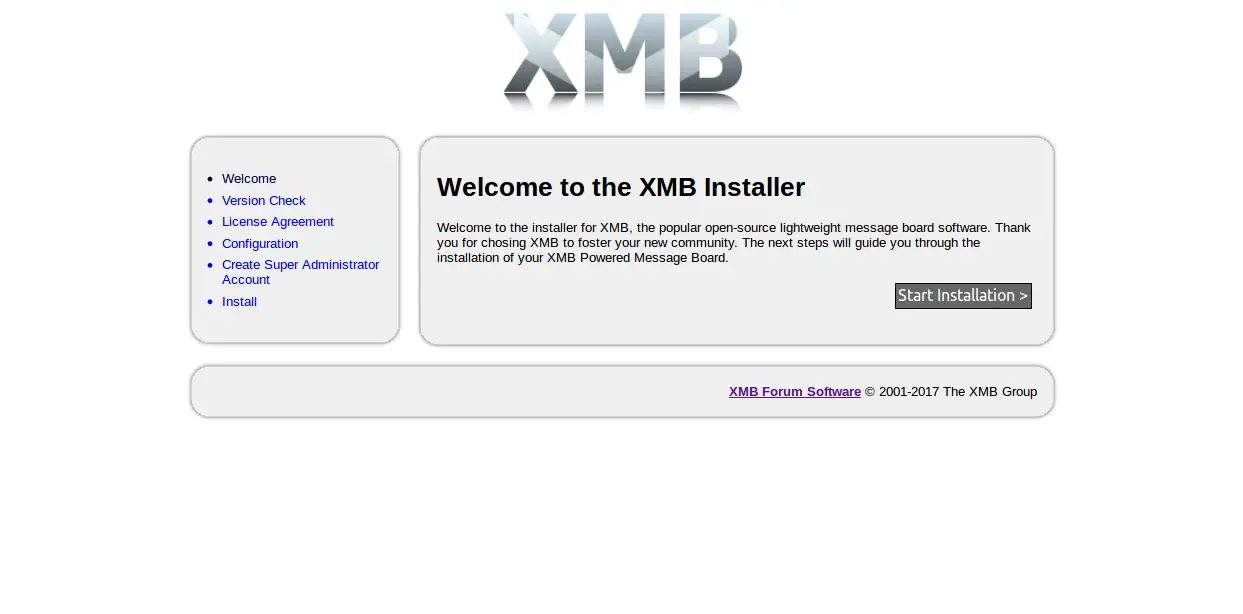
Now, click on the Start Installation button to start the installation, you should see the following page:
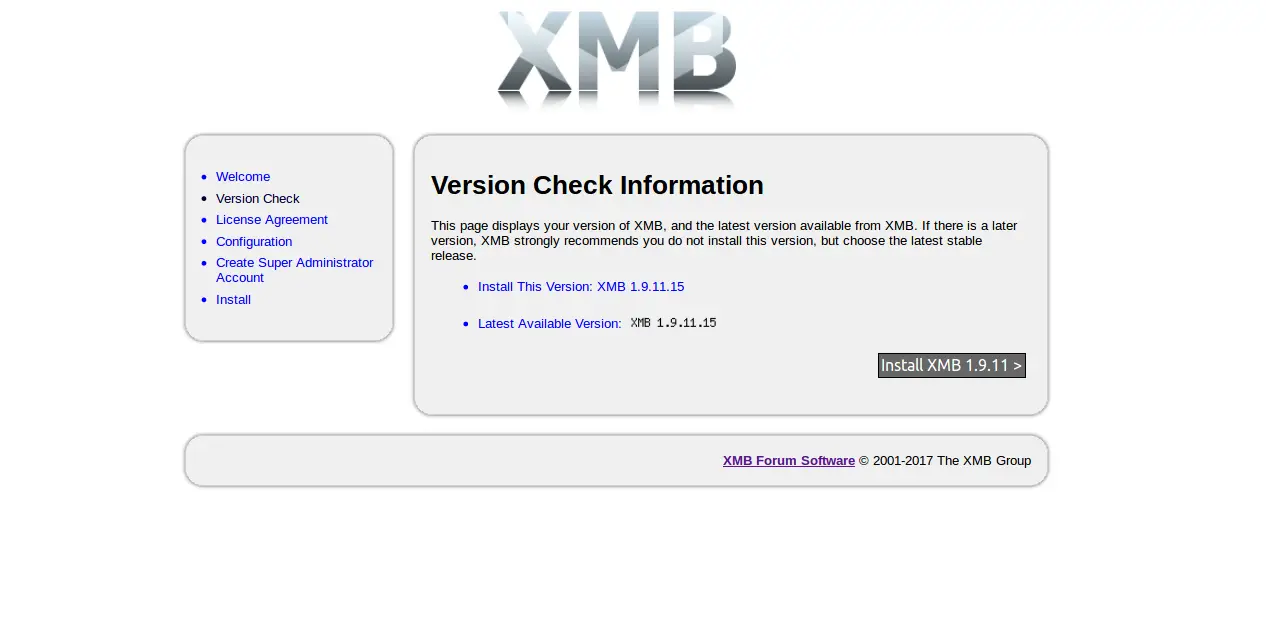
Here, choose the latest XMB version and click on the Install XMB button, you should see the following page:
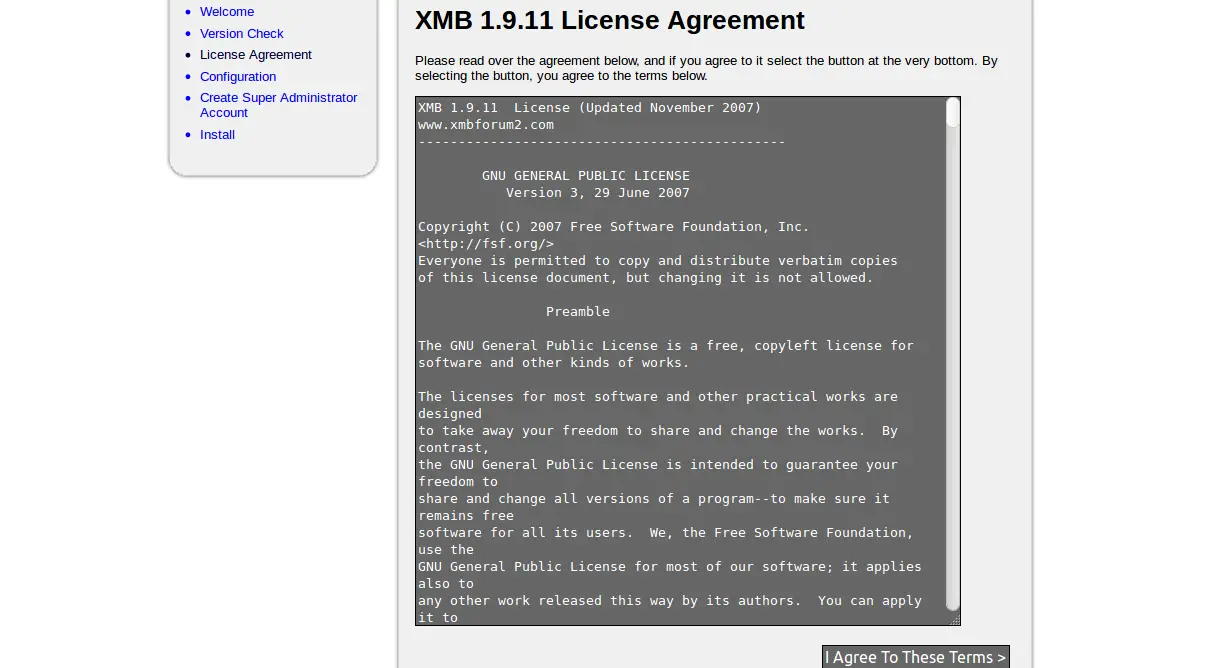
Here, accept the License agreement and click on the I Agree to These Terms button, you should see the following page:
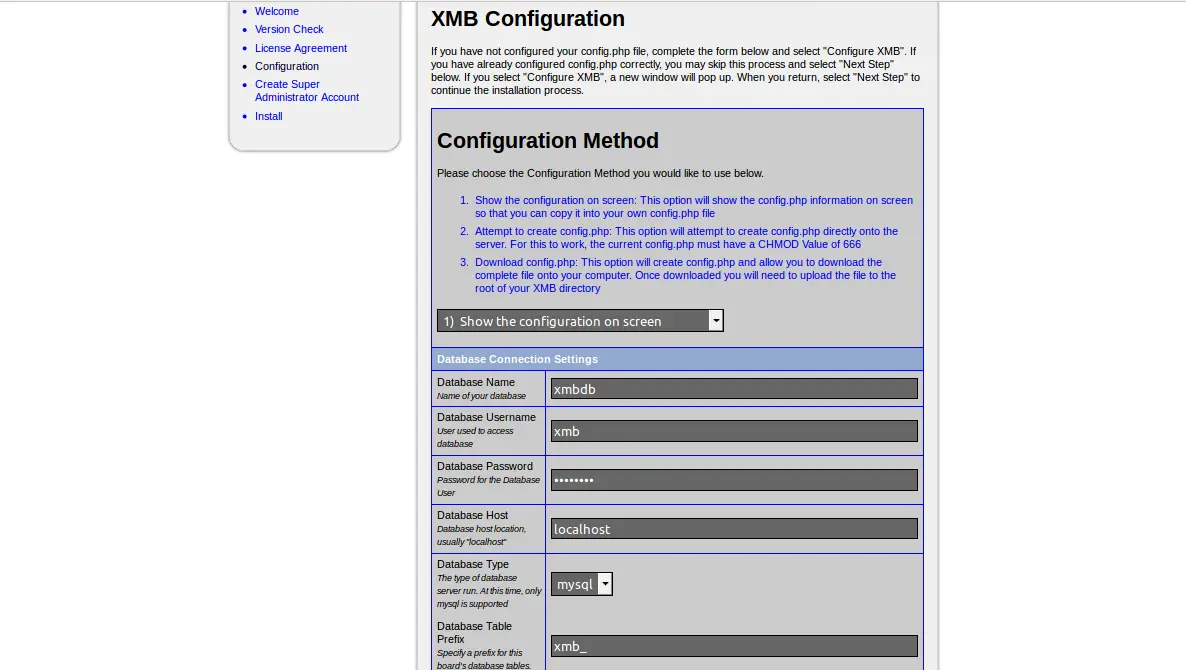
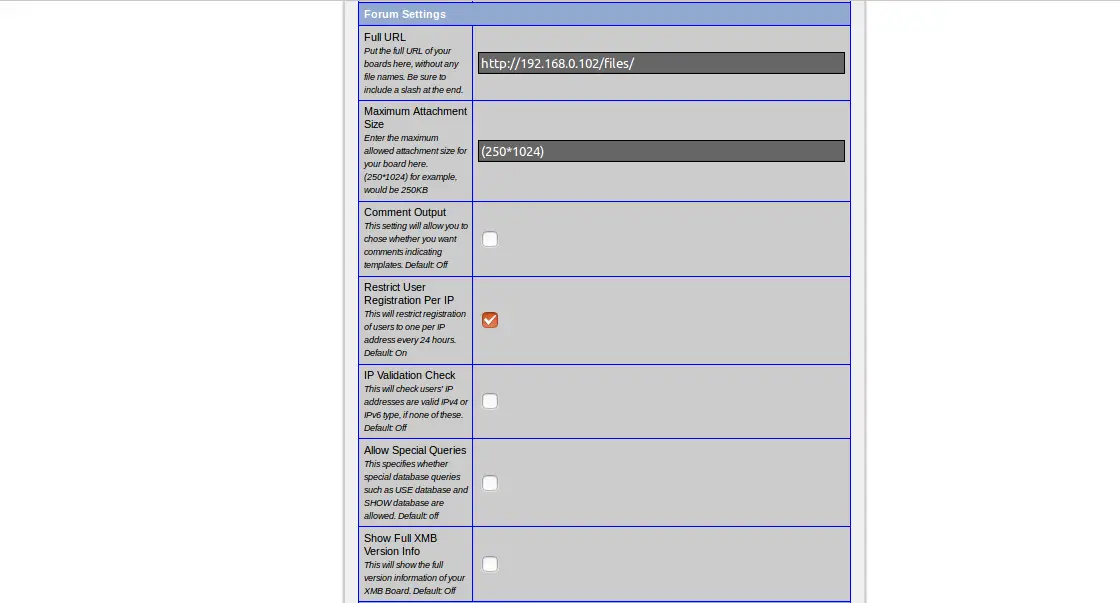
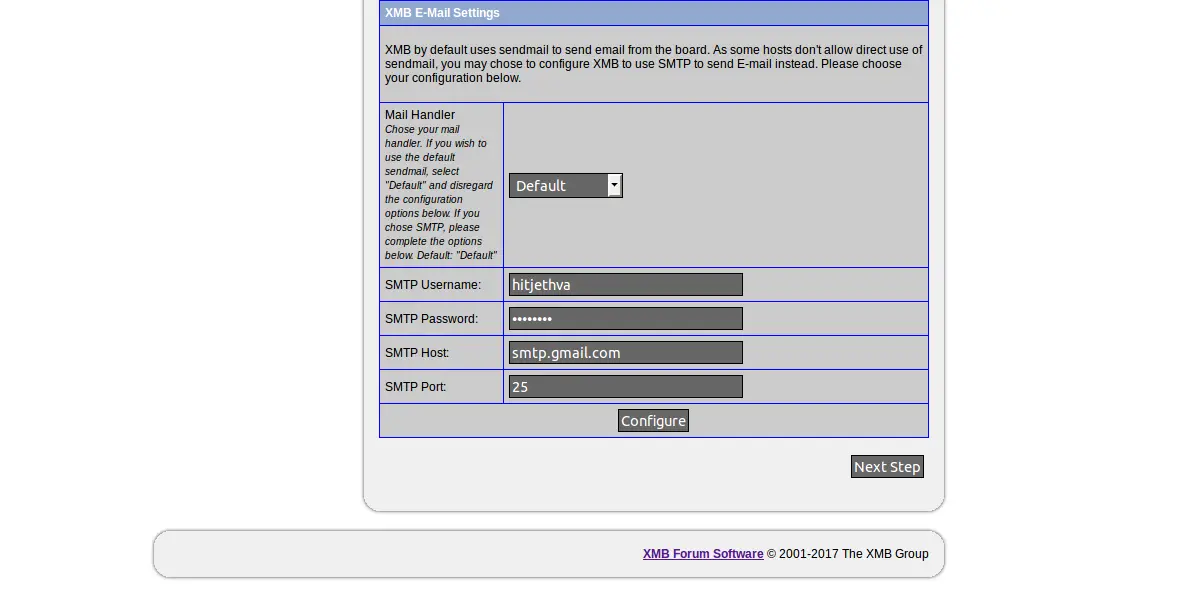
Here, provide all the required information like, Database name, Database username, Database type, SMTP username and password, then click on the Configure button, you should see the PHP code to your screen, copy this code to config.php file and upload this file to the /var/www/html/xmb/files/ directory. Then click on the Next button, you should see the following page:
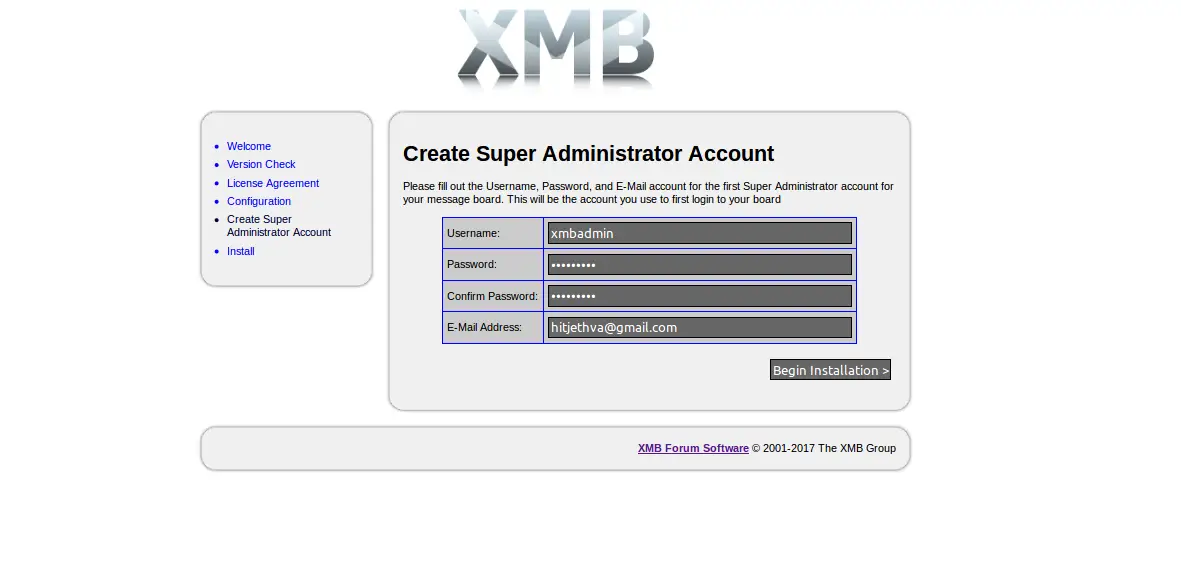
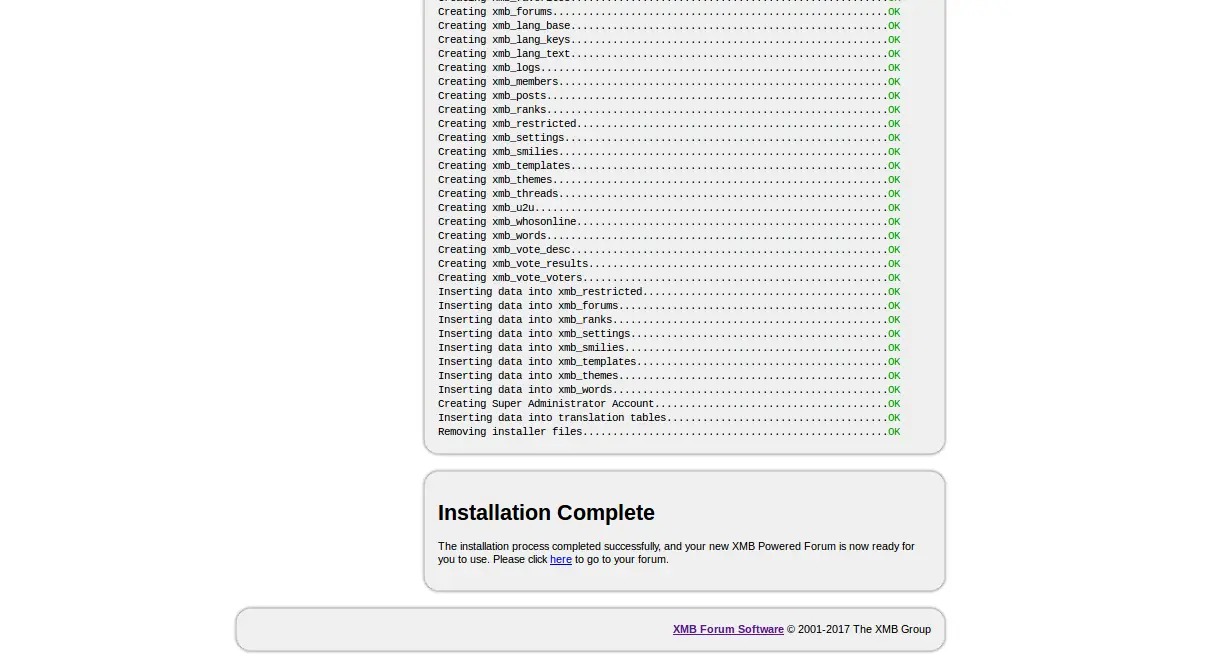
Here, provide Admin username and password, then click on the Begin Installation button, Once the installation is completed, you should see the following page:
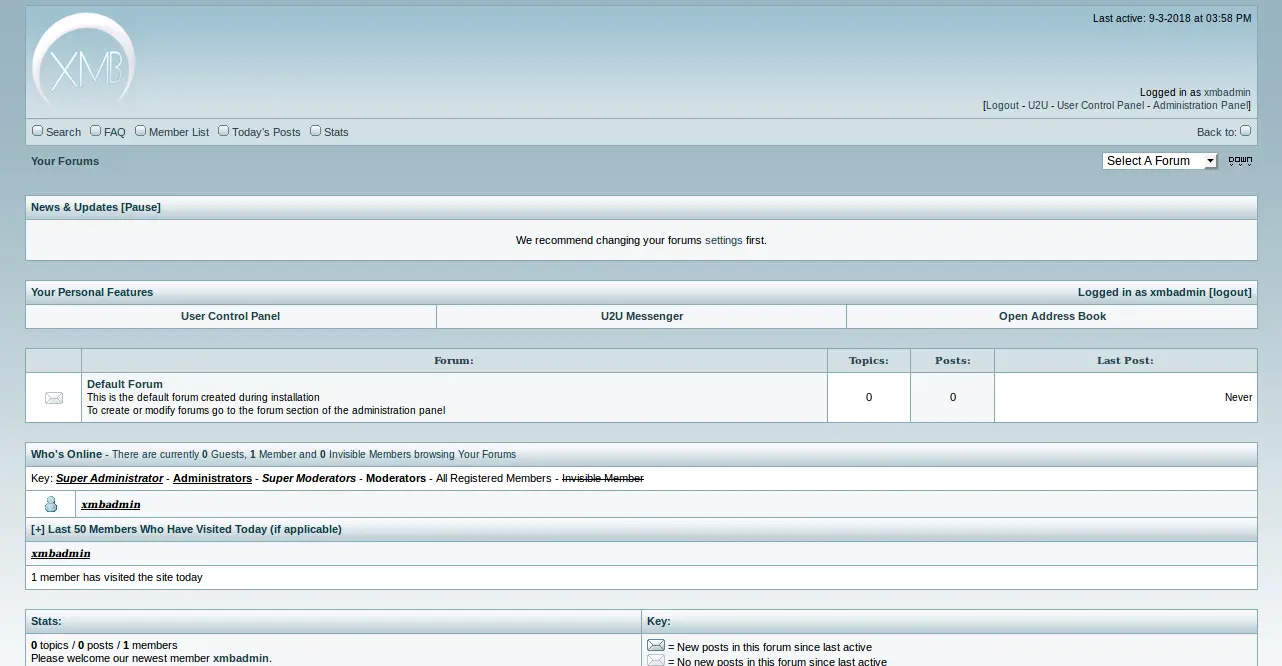
Now, click on Please click here to go to your forum button, you should see the following page:

Now, click on Login button, you should see the XMB forum login page as below:
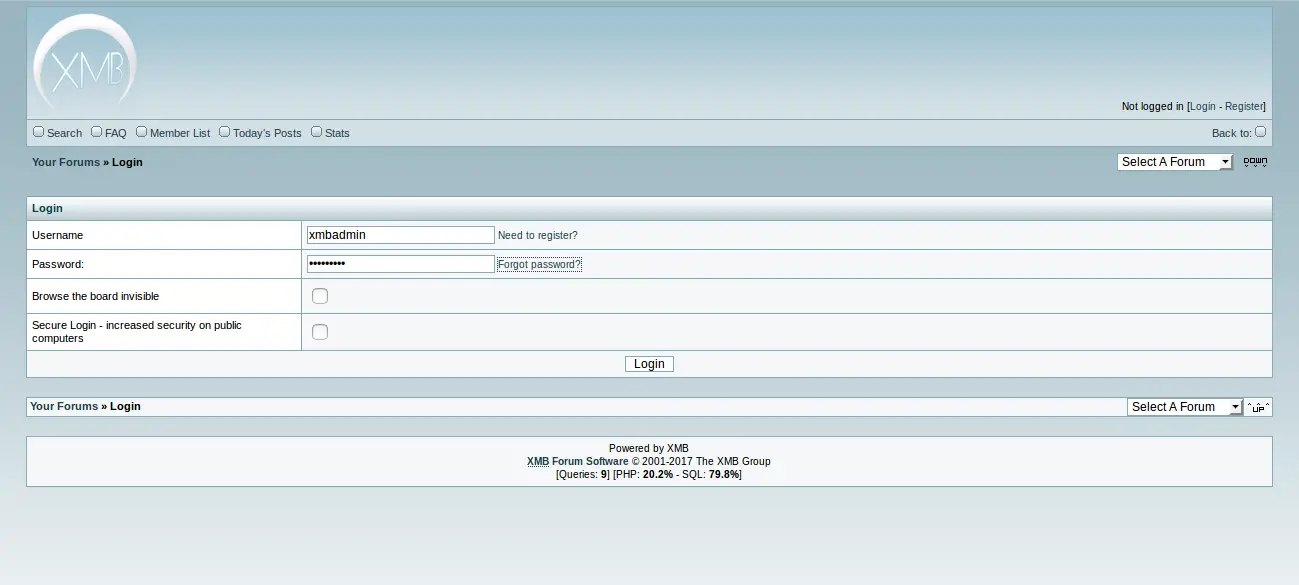
Now, enter your XMB admin credential and click on the Login button, you should see the XMB forum dashboard in the following page: