How to Install Log.io Realtime Log Monitoring Tool on Ubuntu 16.04 LTS
Log.io is a simple but effective log management tool built on top of Node.js and Socket.io that monitors the system and provides real-time information on the system logs in a web browser. Log.io consists of two services, log.io server and harvester. Harvester watches the log files listed in harvester configuration file and send them to log.io server. Then log.io server broadcast all the messages coming from harvester to client browser.
In this tutorial, we will learn how to install Log.io on Ubuntu 16.04 server.
Requirements
- A server running Ubuntu 16.04 with Apache installed.
- A root password is setup on your server.
Install Node.js and NPM
Node.js is a Javascript server-side programming platform that allows you to create network applications with backend functionality. NPM is a javascript package manager that allows user to manage dependencies for application. By default, Node.js and NPM are available in Ubuntu 16.04 repository. You can easily install it with the following command:
apt-get install nodejs npm -y
Once Node.js and NPM are installed, you can proceed to the next step.
Install and Configure Log.io
Before starting, you will need to fix SSL certificate error when running Npm. You can do this by running the following command:
npm config set strict-ssl false
Next, install Log.io application by running the following command:
npm install -g log.io --user "root"
Once the installation is completed, a new .log.io directory is created under /root. Next, change the directory to the .log.io with the following command:
cd .log.io
ls
You should see the three configuration files:
harvester.conf
log_server.conf
web_server.conf
First, edit harvester.conf file. By default, harvester is set to monitor only apache log. You can configure it as per your need:
nano harvester.conf
Change the file as shown below:
exports.config = {
  nodeName: "Webserver",
  logStreams: {
    apache: [
      "/var/log/apache2/access.log",
      "/var/log/apache2/error.log"
    ]

  },
  server: {
    host: '0.0.0.0',
    port: 28777
  }
}
Save and close the file when you are finished, then edit log_server.conf file. You can specify listening IP address in this file.
nano log_server.conf
Change the file as shown below
exports.config = {
  host: '0.0.0.0',
  port: 28777
}
Save and close the file when you are finished, then edit web_server.conf file. You can specify the port number and increase the security by putting HTTP authentication, securing the web interface with SSL using this file.
nano web_server.conf
Change the file as shown below:
exports.config = {
  host: '0.0.0.0',
  port: 28778,

  /*
  // Enable HTTP Basic Authentication
  auth: {
    user: "admin",
    pass: "1234"
  },
  */

  /*
  // Enable HTTPS/SSL
  ssl: {
    key: '/path/to/privatekey.pem',
    cert: '/path/to/certificate.pem'
  },
  */

  /*
  // Restrict access to websocket (socket.io)
  // Uses socket.io 'origins' syntax
  restrictSocket: '*:*',
  */

  /*
  // Restrict access to http server (express)
  restrictHTTP: [
    "192.168.29.39",
    "10.0.*"
  ]
  ]
  */

}
Save and close the file, when you are finished. Then start Log.io service by running the following command:
log.io-server &
log.io-harvester &
Access Log.io Web Interface
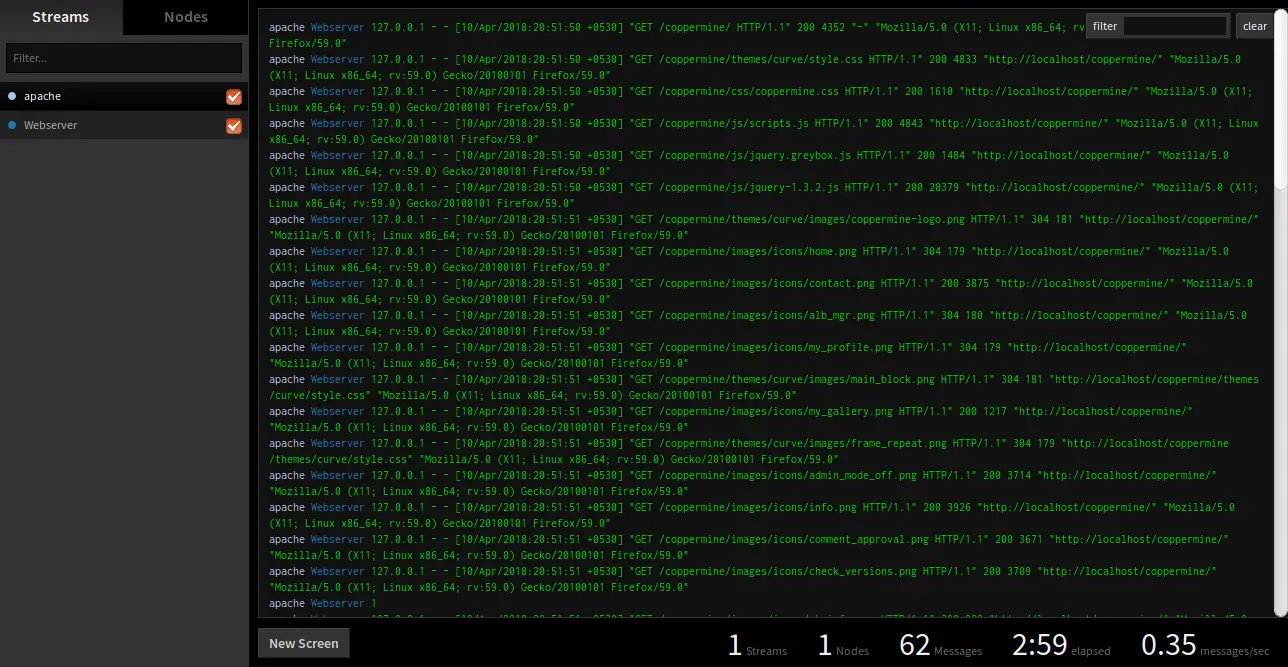
Log.io server is now running and listening on port 28778. It's time to access Log.io web interface.
Open your web browser and type the URL http://your-ip-address:28778, you will be redirected to the Log.io dashboard as shown below: